
Your Ninja blender sits dead on the counter just as you’re ready to make your morning smoothie—the charging light blinks erratically, and you’re left wondering exactly how long for Ninja blender to charge before you can get back to blending. This frustrating scenario happens to countless Ninja owners who don’t understand their specific model’s charging requirements, leading to unnecessary troubleshooting and wasted morning routines.
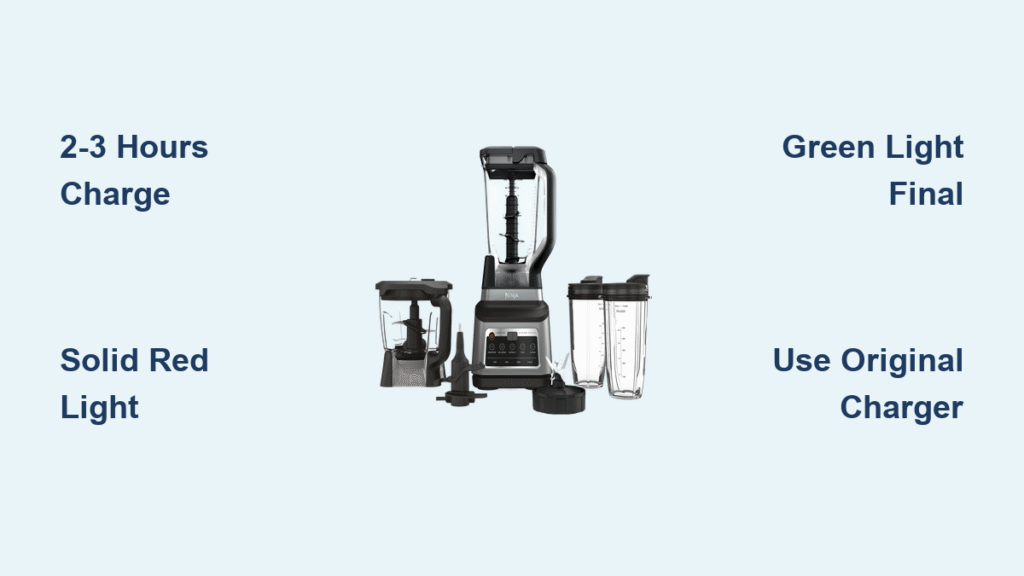
Most Ninja cordless blenders require between 2-3 hours for a complete charge from empty, but this timeframe varies significantly depending on your exact model, battery condition, and charging environment. Understanding these variables prevents you from prematurely assuming your blender is broken when it simply needs more time to reach full capacity. This guide eliminates the guesswork by providing model-specific charging timelines, indicator light interpretations, and professional tips to optimize your charging process.
Ninja Blender Charging Times by Model

Ninja Blast Portable Blender Full Charge Duration
The Ninja Blast portable blender needs precisely 2 hours for a complete charge when starting from completely depleted. This compact model features a 4000mAh battery that delivers up to 15 individual blends per full charge cycle. When properly connected to its charger, the LED ring surrounding the power button glows red during charging and transitions to a solid white light when fully charged.
Don’t be tempted to unplug your Ninja Blast after 90 minutes thinking it’s “almost done”—the final 20% of charging takes disproportionately longer due to battery saturation protocols. Waiting the full 2 hours ensures maximum blend capacity. If you consistently get fewer than 10 blends after a full charge cycle, your battery may be degrading and require replacement.
Ninja Foodi Power Blender Extended Charging Process
Larger Ninja Foodi Power Blender models with rechargeable bases require 2.5-3 hours to reach full capacity. These premium units contain more substantial 4500-5000mAh batteries designed to support 18-20 continuous blends. Unlike simpler models, Foodi blenders feature digital displays that show charging progress in precise 25% increments, eliminating guesswork.
When charging your Foodi model, watch for the percentage indicator climbing steadily during the first 80% of charging, then slowing considerably as it approaches full capacity. This slowdown is normal battery management protocol—not a malfunction. If your display shows 100% but the blender performs weakly, leave it charging for an additional 20 minutes to complete the saturation phase.
Ninja FreshVac Blender Rapid Charging Advantage
Ninja FreshVac cordless units boast the fastest charging technology at 1.5-2 hours for a complete cycle, thanks to their optimized lithium-ion battery chemistry. Despite this quicker charging capability, they maintain a solid 12-15 blend capacity per charge—perfect for meal prep enthusiasts. The FreshVac model features a unique triple-light indicator system that provides more granular charging status than other Ninja blenders.
When charging your FreshVac blender, expect all three indicator lights to illuminate red initially, then transition to green one by one as charging progresses. The final light turning green signifies 100% charge, but for optimal performance, allow 10 additional minutes after the last light changes. This brief extension ensures the battery reaches its maximum voltage potential.
Reading Ninja Blender Charging Indicator Lights Correctly
Solid Red Light Charging Status Interpretation
A solid red indicator means your Ninja blender is actively charging and functioning properly. This light appears immediately upon connecting the charging cable and remains steady until the battery reaches approximately 80% capacity. Many users mistakenly unplug their blender during this phase, thinking something’s wrong when the light doesn’t change color.
Don’t interrupt this critical charging stage—unplugging prematurely leaves your battery in a partially charged state that gradually degrades overall battery health. The solid red light actually indicates healthy charging progress, not a problem. If this light disappears completely within 5 minutes of plugging in, check your cable connection or try a different power adapter.
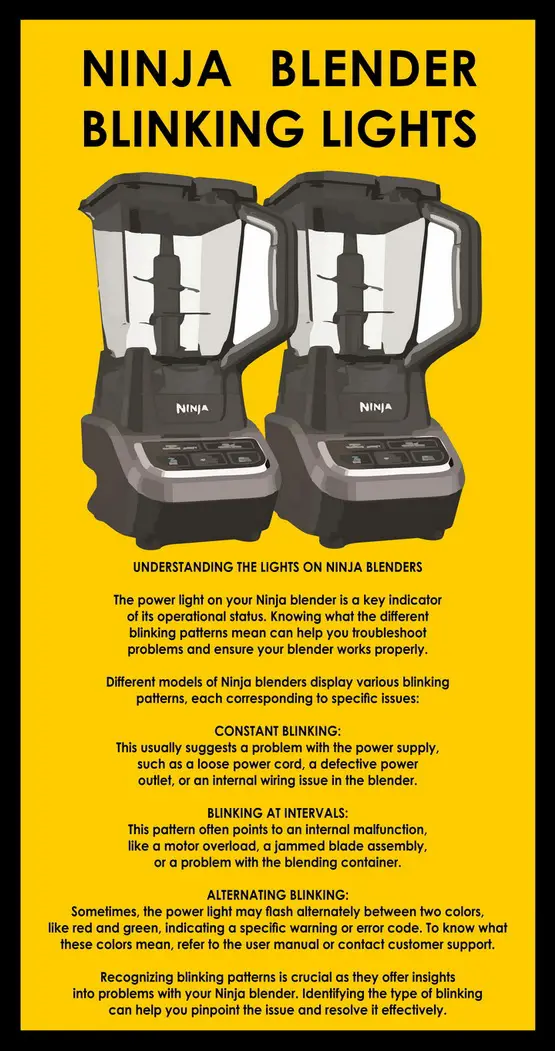
Blinking Light Patterns Decoded for Troubleshooting
Rapid blinking (2-3 times per second) signals your Ninja blender battery is critically low—below 10% capacity—and requires immediate charging. This pattern often appears when you attempt to use a nearly depleted blender. Slow blinking (once per second) indicates the battery is between 10-80% charged and continues to accept power normally.
The most concerning pattern is no blinking with a red light—this means your battery isn’t accepting charge despite being connected to power. Before assuming the worst, firmly reseat the charging cable and clean the port with a dry cotton swab. If the problem persists after these steps, your battery may have failed and require replacement.
Green Light Confirmation and Saturation Phase
The indicator turns solid green only when your Ninja blender battery reaches true 100% capacity. Some models transition gradually from red to green, while others change instantly at full charge. Regardless of your model, wait an additional 15-20 minutes after the green light appears to ensure complete saturation charging.
This final phase is crucial for maximizing your battery’s performance and longevity. Skipping it might give you enough power for 1-2 blends, but you’ll notice significantly reduced performance compared to a fully saturated battery. If your green light appears but then reverts to red after unplugging, your battery isn’t holding charge properly and needs professional evaluation.
Factors That Extend Ninja Blender Charging Time
Battery Age Impact on Charging Efficiency
Batteries older than 18 months typically require 30-50% longer to charge due to natural chemical degradation. As lithium-ion cells age, their internal resistance increases, slowing the charging process. If your 2-year-old Ninja blender suddenly needs 4+ hours instead of the original 2-3 hours, battery replacement is likely necessary.
You can extend your battery’s useful life by avoiding complete discharges and storing it at 40-60% charge when not in use for extended periods. Most Ninja batteries maintain optimal performance for approximately 500-800 charge cycles before significant degradation occurs.
Temperature Effects on Charging Speed
Cold environments below 50°F can double your Ninja blender’s charging time as lithium batteries charge inefficiently in cold conditions. Always warm your blender to room temperature before charging for optimal speed. Hot conditions above 95°F trigger thermal protection circuits that pause charging intermittently to prevent damage.
For fastest charging, maintain a consistent room temperature between 65-75°F during the charging process. Never charge your blender in direct sunlight, near heating vents, or in vehicles where temperature fluctuations occur. Extreme temperatures not only slow charging but also permanently damage battery capacity over time.
Charger Specifications Determine Charging Rate
Using non-Ninja chargers significantly impacts charging speed and safety. Third-party cables often provide insufficient power (5V/1A instead of the required 5V/2A), extending charging to 4-5 hours while potentially damaging your battery. Always use the original Ninja charging cable and wall adapter for fastest, safest results.
The quality of your power source matters too—USB ports on computers typically deliver only 5V/0.5A, stretching charging to 6+ hours. For optimal performance, plug directly into a wall outlet using the manufacturer-provided adapter. If you’ve lost your original charger, purchase a replacement directly from Ninja rather than using generic alternatives.
Ninja Blender Charging Troubleshooting Guide
Cable Connection Issues Resolution
Firmly reseat the charging cable if your Ninja blender takes more than 4 hours to charge. Dust or debris in the charging port prevents proper electrical contact, significantly slowing the charging process. Clean the port gently with a dry cotton swab (never use liquids) to restore normal charging speed.
Check for physical damage to both ends of the charging cable—frayed wires or bent connectors won’t deliver proper power. If cleaning and reseating don’t resolve slow charging, try a known-good Ninja replacement cable before concluding the problem lies with the blender itself.
Power Source Verification Process
Test with a different wall adapter if your Ninja blender charges unusually slowly. Wall adapter failure commonly causes extended charging times without obvious symptoms. Use a multimeter to verify your adapter outputs 5V/2A, or simply try a different Ninja-approved adapter.
Avoid charging through USB hubs or extension cords that may introduce resistance. Plug directly into a wall outlet whenever possible. If your blender charges normally with one outlet but not another, the problematic outlet may have wiring issues affecting power delivery.
Battery Health Assessment Technique
Monitor charging time progression to evaluate battery health. A healthy Ninja blender battery should reach 50% capacity in about 40% of the total charging time. If it takes 70% of the expected time to reach 50%, your battery is significantly degraded.
Most Ninja blenders maintain 80% of original capacity after 500 charge cycles. When your charging time consistently exceeds 4 hours and blend capacity drops below 50% of original, battery replacement becomes cost-effective compared to continued slow charging and reduced performance.
Maximizing Your Ninja Blender Battery Longevity
Optimal Storage Conditions for Extended Periods
Store your Ninja blender at 40-60% charge if you won’t use it for over a month. Full discharge during storage can permanently damage lithium-ion cells. Recharge to 60% every 3 months during long-term storage to maintain battery health.
Never store your blender in garages, basements, or vehicles where temperature extremes occur. Ideal storage temperature ranges between 60-75°F—cool enough to prevent degradation but warm enough to avoid cold-related stress. Keep it in its original box or a protective case to prevent physical damage to the charging port.
Usage Patterns That Extend Battery Life
Recharge when battery drops to 20-30% rather than waiting for complete discharge. Deep discharges stress lithium cells and gradually increase future charging times while reducing overall capacity. Partial discharges between 20-80% represent the optimal usage pattern for maximum battery lifespan.
Avoid leaving your blender plugged in continuously after reaching 100% charge, as this creates unnecessary stress on the battery management system. Unplug once the green light has been solid for 20 minutes to maintain optimal battery health and consistent charging times.
Your Ninja blender’s charging time directly reflects its battery health and your charging habits. While 2-3 hours represents the standard for most models, implementing these proper charging practices ensures consistent performance and prevents premature battery degradation. By monitoring indicator lights, using original accessories, and maintaining optimal storage conditions, you’ll keep your blender charging efficiently for years of reliable service—never again wondering how long for Ninja blender to charge when morning smoothie time arrives.


