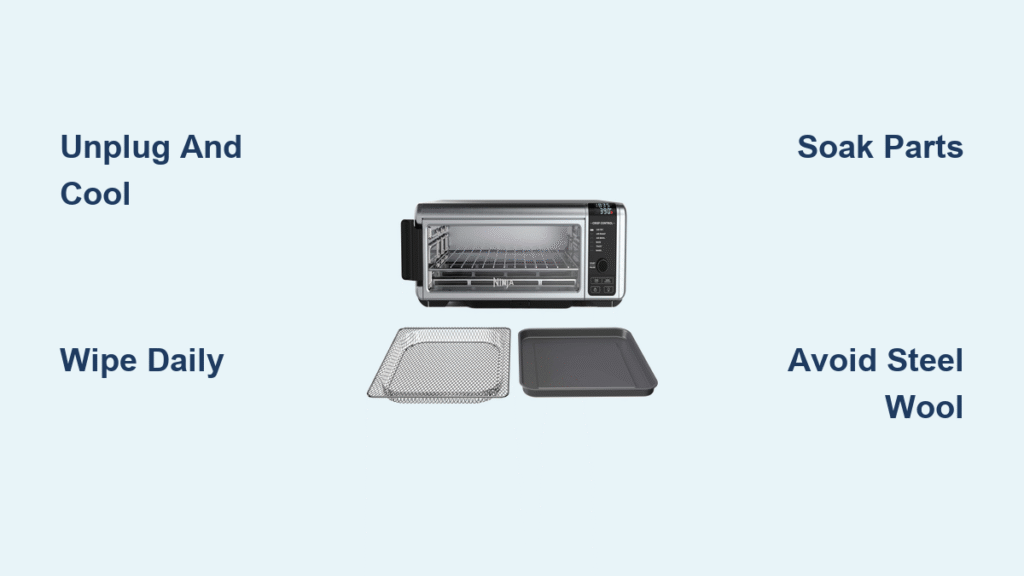
Your Ninja air fryer toaster oven just finished whipping up golden fries, but now grease splatters coat the interior and crumbs choke the crumb tray. Instead of dreading a messy cleanup, you can restore it to showroom condition in under 20 minutes with targeted techniques. This guide reveals exactly how to clean Ninja air fryer toaster oven components safely—from quick post-cooking wipes to monthly deep cleans—so you avoid costly damage and keep your appliance performing at its peak. Master these steps to prevent stubborn buildup that ruins food taste and shortens your unit’s lifespan.
Unlike regular ovens, these multi-functional appliances face unique cleaning challenges with air fryer baskets, crumb trays, and sensitive heating elements. Skipping proper care leads to smoke during operation, persistent odors, and even fire hazards from grease accumulation. But with the right approach using household items like baking soda and vinegar, you’ll spend less time scrubbing and more time enjoying crispy, evenly cooked meals. Follow this complete protocol to make cleaning your Ninja air fryer toaster oven effortless and effective.
Unplug and Cool: Critical Safety First Steps
Why Skipping This Risks Electrical Shock
Always unplug your unit immediately after cooking and wait 30+ minutes before touching interior surfaces. Heating elements stay dangerously hot long after the cycle ends—attempting to clean while warm cracks non-stick coatings and warps components. Position the oven on a heat-resistant counter away from edges to prevent tipping during cleaning. Never submerge the base unit; water contact with electrical components causes instant short circuits.
Your Must-Have Cleaning Kit
Gather these safe supplies before starting:
– Three microfiber cloths (one damp, one dry, one for soapy water)
– Soft-bristled brush (an unused paintbrush works perfectly)
– Mild dish soap like Dawn (avoid harsh degreasers)
– Never use: Steel wool, oven cleaner, bleach, or metal scrapers—they permanently scratch non-stick surfaces and void warranties.
Daily 5-Minute Wipe Down for Zero Buildup
Post-Cooking Actions That Prevent Major Scrubbing
Empty the crumb tray while food debris is still soft—use a dry brush to dislodge crumbs into the trash. Wipe interior walls with a barely damp microfiber cloth before residue hardens. Clean the air fryer basket immediately by soaking it in warm soapy water for 5 minutes; stuck-on bits wipe off effortlessly when warm. Finally, leave the door cracked open for 10 minutes to eliminate moisture that causes rust and odors overnight.
The Perfect Cleaning Solution Ratio
Mix 1 teaspoon dish soap into 2 cups warm water (never hot—it warps plastic parts). Dip a cloth, wring until it’s barely damp—dripping water seeps into heating elements and causes electrical faults. Wipe in small circles, focusing on grease-prone corners near the door seal. Rinse with a clean water-dampened cloth to remove soap residue that leaves bitter tastes on food. Dry thoroughly with a third microfiber cloth to prevent water spots.
Weekly Deep Clean for Heavy Grease Removal
Soaking Removable Parts Properly
Remove the crumb tray, air fryer basket, wire rack, and baking pan after each use. Soak them in hot soapy water for 15-20 minutes—this loosens baked-on grease without scrubbing. Use your soft brush to clean between wire rack spaces where food particles hide. Rinse until water runs completely clear; leftover soap affects your next meal’s flavor. Air-dry all components on a rack—rushing with towels traps moisture that causes rust spots within hours.
Cleaning Interior Walls Without Damage
Work top-to-bottom to avoid dripping onto cleaned areas. Wrap a damp cloth around a wooden spoon handle to safely reach the ceiling without touching heating elements. Never spray cleaners directly into the unit—moisture damage to electrical components is irreversible. For grease buildup near the door hinge, apply baking soda paste (3 parts soda, 1 part water), wait 10 minutes, then wipe gently. Finish with a dry cloth to prevent streaks.
Fix Burnt-On Food in 3 Hours (No Scraping!)
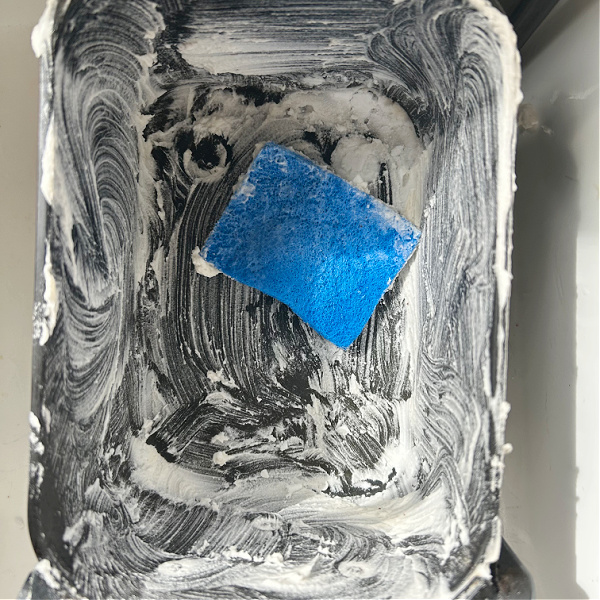
Baking Soda Paste Method for Tough Residue
Create a thick paste with 3 tablespoons baking soda and 1 tablespoon water. Apply it only to affected areas—never on heating elements—using a toothpick for precision. Cover the paste with a damp cloth and let sit 2-3 hours (or overnight for severe burns). The paste gently lifts carbonized food without scratching. Wipe away with a damp cloth; repeat if needed. Never scrape—metal tools gouge non-stick coatings, exposing metal that rusts and ruins food.
Door Seal and Window Rescue
Grease accumulates along the rubber door seal, causing leaks and odors. Mix equal parts white vinegar and warm water in a spray bottle, but spray only on your cloth—not the oven. Wipe the seal and glass in circular motions, then dry immediately with a microfiber cloth to prevent streaks. For sticky residue, rub the seal with a dry toothpick before wiping. Skipping this step leads to poor sealing and uneven cooking.
Monthly Maintenance That Prevents Costly Repairs
Heating Element Care Protocol
Only clean elements when stone-cold. Use a vacuum with a brush attachment or dry soft brush to remove dust—never apply liquids. Gently flick debris off coils; aggressive scrubbing damages the protective coating, causing hotspots and premature failure. If elements look heavily soiled after cleaning, unplug and contact Ninja support—this often indicates internal issues.
Vent and Crumb Tray Deep Clean
Vacuum air intake/exhaust vents weekly to maintain airflow—blocked vents cause overheating. For the crumb tray, sprinkle baking soda, add vinegar drops, let fizz 5 minutes, then scrub with a soft brush. Dry completely; trapped moisture here creates musty smells that linger in cooked food. Inspect the door seal for cracks monthly—replace it if food particles lodge in gaps.
4 Deadly Cleaning Mistakes That Ruin Your Oven

Instant Damage You Can’t Fix
Submerging the base unit in water causes immediate electrical failure—always clean only removable parts. Using steel wool on the air fryer basket creates micro-scratches where rust forms within 24 hours. Cleaning while components are warm (not hot) seems logical but actually bonds grease to surfaces. Forcing stuck crumb trays breaks alignment tabs, making future removal impossible.
Emergency Fixes for Accidents
If you accidentally used oven cleaner: Rinse all parts 5x with plain water and run an empty cycle at 350°F for 5 minutes with lemon water to neutralize chemicals. For rust spots: Apply baking soda paste, scrub gently, dry completely, then rub with a drop of food-grade mineral oil. If the door won’t seal after cleaning: Check for debris in the hinge—wipe with vinegar solution and work the door back and forth.
Pre-Use Safety Checklist (Skip This = Fire Risk)
Before plugging in after cleaning, verify:
– All components bone-dry (especially crumb tray grooves)
– Heating elements clear of cloth fibers or debris
– Door seals completely (test by closing a dollar bill—it shouldn’t slip out)
– No soap residue visible on racks or baskets
– Crumb tray fully seated (misalignment causes smoke during use)
Pro Maintenance Schedule for Lifelong Performance
After Every Use:
– Empty crumb tray → Wipe interior with damp cloth → Clean basket while warm
Weekly:
– Soak all accessories → Deep-clean door seal → Vacuum vents
Monthly:
– Clean heating elements → Inspect seal for wear → Polish exterior
Seasonal:
– Replace worn baskets → Deep-clean before storage → Test all functions
Your Ninja air fryer toaster oven pays back meticulous care with years of reliable service. The daily 5-minute wipe-down prevents the dreaded 2-hour scrub sessions when grease hardens. By following these targeted steps, you’ll avoid the #1 cause of premature failure: neglected maintenance. Now that you know how to clean Ninja air fryer toaster oven safely, make cleanup as effortless as cooking—your crispy, perfectly cooked meals depend on it.

