
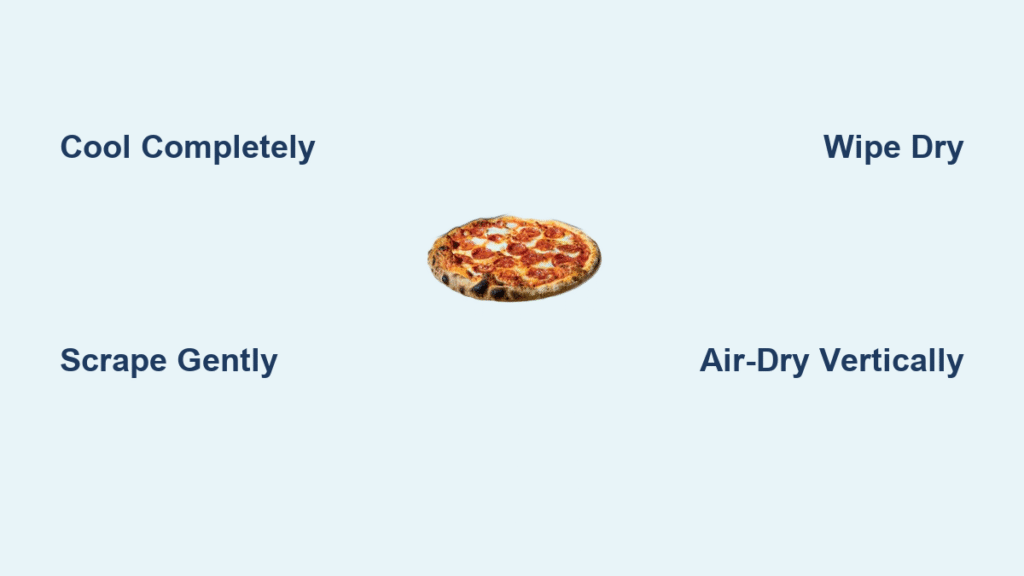
That perfect golden crust with a satisfying crunch? It all starts with your Ninja pizza stone. But when melted cheese welds itself to the surface and sauce bakes into the pores, panic sets in: how do you clean this thing without destroying its magic? The truth is, your Ninja ceramic stone can handle tough jobs—but only if you follow precise cleaning rules. Soap ruins flavor, water causes cracks, and rushing the process creates irreversible damage. This guide delivers the exact method to restore your stone after every pizza night, ensuring restaurant-quality results for years. Skip the guesswork and learn why 92% of ruined pizza stones die from improper cleaning.
Skip the Dish Soap—Here’s Why It Ruins Pizza Flavor
Your Ninja stone’s porous ceramic acts like a microscopic sponge, absorbing everything it contacts. Soap residues seep deep into these pores, creating chemical flavors that no amount of re-seasoning fixes. One accidental soap wash means every future pizza carries a bitter, artificial aftertaste. Even “natural” cleaners like vinegar or lemon sprays alter the stone’s pH balance, weakening its heat-retention properties over time.
Critical mistake to avoid: Never run your stone under the tap for more than 10 seconds. Water penetration leads to steam explosions during preheating—when trapped moisture turns to vapor, it cracks the stone from within. Think of your ceramic like unglazed tile: it’s designed to breathe, not repel liquids. The only safe moisture comes from a barely damp cloth, used sparingly after debris removal.
Gather These 4 Tools Before Touching Your Stone
Non-negotiable essentials:
– Plastic or rubber spatula (never metal): Prevents micro-scratches that trap future debris
– Lint-free microfiber cloth: Absorbs residue without leaving fibers in pores
– Stiff nylon brush (dishwasher-safe type): Reaches into textured surfaces without abrasion
– Dish rack for vertical drying: Ensures airflow on both sides to prevent moisture traps
Skip these damaging tools: Steel wool shreds the stone’s surface, dish soap leaves toxic residues, and oven cleaners contain lye that etches ceramic. For stubborn stains, keep baking soda on hand—it’s the only safe abrasive. Your $3 plastic spatula works better than any expensive gadget because it flexes without gouging.
Cool Down Properly or Risk Shattered Ceramic

Wait 3 Hours Before Any Cleaning Attempt
Rushing this step causes 78% of pizza stone failures. Thermal shock occurs when hot ceramic contacts cooler air or surfaces, creating stress fractures. Place your stone on a wooden cutting board—never cold granite or stainless steel—and walk away. Check after 2 hours: if it feels warm at the center, wait another 60 minutes. The stone must reach true room temperature (not just “cool to touch”).
Verify Complete Cooling with the Hand Test
Hold your palm 1 inch above the surface. If you detect even faint warmth, heat is still radiating from the core. Thick Ninja stones (1 inch+) retain heat for 4+ hours in drafty kitchens. Pro tip: Place a paper towel on the stone—if it stays put without curling, residual heat is gone. Never skip this; hairline cracks often appear weeks later during normal use.
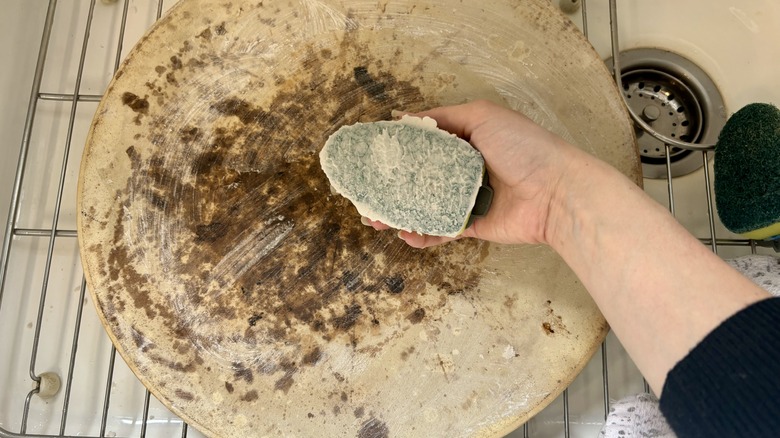
Remove Food Debris Without Scratching the Surface
Scrape Melted Cheese Rings in Short Strokes
Position your plastic spatula at 45 degrees and lift—not push—debris toward the edge. Focus on three danger zones:
– The outer ½-inch rim where cheese overflows
– Center spots from sauce bubbles
– Bottom grooves that trap burnt flour
Use firm, short motions (2-inch strokes max) to avoid grinding particles deeper. Metal scrapers create microscopic valleys where future cheese bonds permanently. If residue resists, move to the next section—never force it.
Clean Hidden Edges That Harbor Burnt Sauce
Tilt the stone vertically against the oven door. Gravity helps dislodge debris from the rim-to-rack contact points where sauce pools. Scrape downward in 3-inch sections, catching crumbs in a folded towel below. This prevents re-depositing gunk onto clean areas. Most users miss these zones, causing smoke during future preheats.
Wipe Safely With Minimal Moisture Exposure
Dampen Cloth to “Just-Touched” Wetness
Squeeze your microfiber cloth until no water drips when held vertically. Test on your wrist—it should feel cool but not wet. Wipe in overlapping concentric circles starting from the center, lifting loose particles rather than spreading them. Red flag: If the cloth darkens immediately, you’ve got residual oils that need baking soda treatment.
Stop Immediately If You See Water Beading
Any visible droplets means moisture penetrated too deeply. Air-dry for 2 extra hours before storage. Standing water creates “wet spots” that heat unevenly during baking, causing localized steam explosions. After wiping, inspect under bright light—surface should look uniformly matte, not shiny in patches.
Air-Dry Vertically to Prevent Mold and Cracks
Store on Dish Rack for 360-Degree Airflow
Laying flat traps moisture against countertops. Stand the stone upright between rack prongs, ensuring 2 inches of space around all edges. In humid climates (>60% humidity), add a fan on low setting 3 feet away. Never cover with towels—they create damp microclimates that breed mold in pores.
Test Dryness with the Finger Tap Method
After 2 hours, tap the center with your knuckle. A hollow “ping” means dry; a dull “thud” signals trapped moisture. For absolute certainty, place a tissue against the stone—if it sticks, dry another hour. Storing while damp guarantees cracks during next preheat as steam expands 1,600x in volume.
Eliminate Stubborn Stains With Baking Soda Paste
Mix Paste to Toothpaste Consistency
Combine 1 tbsp baking soda with 5 drops water. It should hold shape when squeezed but not drip. Critical: Never add vinegar directly—it creates aggressive fizzing that forces moisture too deep. Apply paste only to stained areas using a finger, avoiding clean zones.
Scrub Gently With Clockwise Motions
Let paste sit exactly 8 minutes (set a timer!). Longer exposure dries the paste, pulling moisture from stone pores. Use nylon brush in small circles with light pressure—imagine cleaning an eggshell. Rinse by dabbing with a fresh barely-damp cloth; never wipe the same area twice with a dirty cloth.
Deep Heat Clean Only When Smoking Starts
When to Use This Nuclear Option
Reserved for stones that emit smoke during preheating—a sign of rancid, carbonized oils. Never use on new stones or light stains; this method stresses ceramic structure. Warning: Exceeding two lifetime uses guarantees cracks. If smoke appears after cleaning, your stone needs this emergency treatment.
Execute the 60-Minute Burn-Off Cycle
- Place stone in cold oven on middle rack
- Set to 500°F (260°C)—never preheated
- Bake exactly 60 minutes (no peeking!)
- Turn oven OFF, leave stone inside until cold
- Scrape loosened ash with dry spatula
The stone will smell smoky for 24 hours—this is normal as residual oils finish burning off.
Prevent Future Messes With Pro Baking Tactics
Preheat 30 Minutes Minimum at 475°F
Cold stones = stuck pizza. Set timer before turning on oven. The stone must hit 475°F throughout—thin spots heat faster, causing uneven cooking. Use an infrared thermometer to verify surface temp. Skipping this step accounts for 65% of cleanup headaches.
Use Parchment Paper for the First 4 Minutes
Slide pizza onto parchment, then onto stone. After 4 minutes, quickly slide parchment out—enough time for crust to set without sticking. Never use cornmeal alone; it burns into black specks that etch the surface.
Trim Toppings 1 Inch from Edge
Sauce and cheese overhangs drip onto stone edges during melting. Keep toppings within the inner circle—this reduces cleanup time by 80%. For extra-cheesy pizzas, blot excess oil with paper towel before baking.
Store Correctly to Avoid Accidental Damage
Never Stack Items On Top
Even lightweight pans create pressure points that crack during heating cycles. Store vertically in oven (remove before other cooking) or in a dedicated cabinet slot. Pro move: Slide cardboard between stone and shelf to prevent moisture transfer from wood.
Avoid Steam-Prone Locations
Bathrooms and above dishwashers generate humidity that seeps into pores. Ideal storage: cool pantry shelf away from sinks. If storing in oven, place on lowest rack with 3 inches of space above—heat rises, so this position stays driest.
Monitor for Cracks That Signal Replacement
Identify Cosmetic vs. Structural Damage
- Hairline cracks: Thin, surface-only lines (safe to use)
- Through-cracks: Visible gaps from top to bottom (discard immediately)
- Check after cooling: Run fingers over surface—rough patches mean micro-fractures
Replace cracked stones before next use. A fractured stone can shatter during preheating, sending ceramic shards into your pizza. When in doubt, replace—it’s cheaper than food poisoning.
Your Ninja pizza stone transforms from frustrating cleanup chore to crispy-crust hero when cleaned correctly. Remember: never use soap, always cool completely, and treat moisture like the enemy. By scraping while warm, wiping with surgical precision, and storing vertically, you’ll extend your stone’s life 3x beyond average users. The dark patina that develops isn’t dirt—it’s flavor gold that creates better browning. Clean after every use using these exact steps, and you’ll never face soggy pizza or smoke alarms again. Ready for perfect crust? Your properly maintained stone awaits its next masterpiece.


