
You just poured the last frosty sip of your homemade slushie, but now sticky syrup coats the container walls and hardened sugar clings to the blade assembly. If you’ve ever wondered how to clean Ninja slushie maker properly without damaging those precision blades or voiding your warranty, you’re not alone. Many owners make the critical mistake of letting sugary residues harden overnight, turning simple maintenance into a 30-minute scrubbing nightmare. The good news? With Ninja’s specific cleaning requirements in mind, you can keep your machine sparkling in just 10-15 minutes daily—preventing mold growth, eliminating odors, and extending your appliance’s life by years. This guide reveals the exact cleaning sequence Ninja engineers recommend, including ingredient-specific tricks for sugar crystals and dairy residues that most users miss.
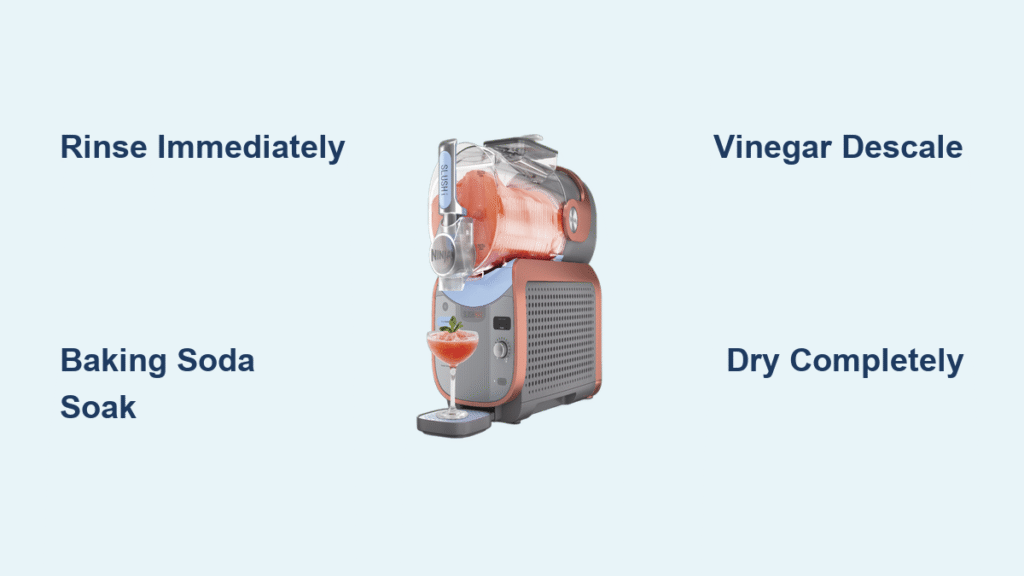
Immediate Post-Use Cleaning Steps (5 Minutes)
Unplug and Cool Down Protocol
Never skip this critical safety step: Immediately unplug your Ninja slushie maker after use and let all components cool for 15-20 minutes. Thermal shock from cold water hitting warm plastic can crack the container, while rushing disassembly near sharp blades risks serious injury. While waiting, scrape out remaining slushie with a silicone spatula—this removes 90% of residues while they’re still pliable. Pro tip: Run a damp paper towel along the motor base’s ventilation slots now to prevent sugar dust buildup that causes overheating.
Quick Rinse Cycle for Fresh Residues
Disassemble the pitcher, lid, and blade assembly while ingredients remain soft. Fill the container halfway with warm water (never hot—exceeding 120°F damages seals), add 2-3 drops of Dawn Ultra dish soap, and run on the lowest speed for 30 seconds. Watch for the cleaning vortex to form—that swirling action reaches hidden crevices where syrup hides. Empty immediately and rinse under running water until completely clear. Critical mistake to avoid: Letting soapy water sit longer than 45 seconds can force residues deeper into blade assemblies.
Deep Clean After Every Slushie Session
Baking Soda Soak for Sugar Residues
Create a natural cleaning solution by mixing 1 tablespoon baking soda with 1 quart warm water—this dissolves crystallized sugars without scratching surfaces. Soak all removable parts (container, lid, blade assembly) for exactly 10 minutes; longer soaks weaken plastic seals. Use a bottle brush to target four problem zones: container walls near the max-fill line, lid threading grooves, blade assembly crevices, and seal ring channels. Visual cue: When bubbles stop forming on the seal ring, residue is fully broken down. Rinse thoroughly until water sheets off smoothly.
Blade Assembly Handling Safety
Always grip the blade assembly by its plastic housing—not the blades—to avoid cuts. Dip a soft-bristled toothbrush in baking soda paste and gently scrub along the blade edges where fruit fibers wrap tightly. Never use metal scrubbers; they scratch stainless steel, creating rust points. For stubborn pulp, hold the assembly under running water while carefully twisting it to expose hidden areas. Dry completely with a microfiber cloth before storage—any moisture left in the blade cavity causes mold within 24 hours.
Weekly Vinegar Treatment for Mineral Deposits
Descaling Process for Hard Water Areas
Hard water leaves chalky deposits that reduce crushing efficiency. Mix equal parts white vinegar and warm water (1 cup each), fill to the max line, and run on medium speed for 60 seconds. Let sit for exactly 25 minutes—the sweet spot where minerals dissolve without vinegar damaging rubber seals. Empty, then run two rinse cycles: first with plain water, then with lemon-water solution (1 lemon slice per quart) to neutralize odors. Warning: Never use undiluted vinegar—it degrades gaskets over time.
Seal Ring Inspection and Cleaning
Twist the seal ring counterclockwise to remove it from the blade assembly. Soak in 50/50 vinegar solution for 30 minutes, then scrub both sides with a soft toothbrush. Check for damage by stretching the ring slightly—it should snap back immediately. Replace if you see cracks, permanent stretching, or cloudiness. Air-dry completely on a clean towel; moisture trapped in the groove causes mold that leaks into drinks.
Monthly Intensive Maintenance Protocol
Complete Disassembly Cleaning Sequence

Once monthly, fully dismantle your machine: 1) Twist blade assembly counterclockwise off the container, 2) Remove seal ring, 3) Take apart lid components if center cap is removable, 4) Wipe drive gear with a damp cloth. Soak plastic parts in baking soda solution for 15 minutes, then hand-scrub with a nylon brush. Critical step: Clean the drive gear teeth with a cotton swab dipped in vinegar—mineral buildup here causes grinding noises during operation.
Motor Base Care You’re Missing
Unplug and cool the base completely. Dampen a microfiber cloth with water (never spray directly), then wipe exterior surfaces. Use compressed air to blast sugar crystals from ventilation slots—hold 6 inches away to avoid moisture contact. Inspect the power cord for fraying near the base; damaged cords are the #1 cause of Ninja slushie maker failures. Never immerse the base—even brief contact with water voids warranties.
Ingredient-Specific Cleaning Fixes
Sugar Crystal Removal Technique
When hardened sugar glazes the container, skip scrubbing. Fill halfway with warm water and let soak for 10 minutes—this re-dissolves crystals. For stubborn spots, apply baking soda paste with a soft cloth and let sit 5 minutes before gentle rubbing. Never use hot water on sugar residues; it caramelizes them into permanent stains.
Dairy Residue Protocol
Rinse immediately with cold water—hot water cooks proteins onto surfaces. Fill with enzyme-based cleaner (like Biokleen Bac-Out), run on low for 20 seconds, then soak 15 minutes. Finish with a sanitizing rinse: 1 tablespoon Star San per gallon of water. Pro tip: Add a splash of vinegar to dairy cleaning solutions to prevent sour odors.
Troubleshooting Persistent Issues
Eliminating Sour Odors in 2 Hours
Create a deodorizing soak with 2 tablespoons baking soda in 1 quart warm water. Let sit overnight in the container, then add lemon slices and run for 15 seconds. The citric acid neutralizes odor molecules while the vortex cleans internal pathways. For extreme cases, drop two denture tablets in warm water and soak for 30 minutes—the effervescence lifts stains without scratching.
Clearing Cloudy Containers Safely
Hard water causes permanent cloudiness if ignored. Dissolve two denture tablets in warm water, submerge the container for 30 minutes, then rinse thoroughly. Never use bleach—it reacts with plastic to create toxic fumes. If cloudiness persists after two treatments, replace the container; scratched surfaces harbor bacteria.
Essential Cleaning Toolkit Checklist
Must-Have Tools for Effective Cleaning
- Long-handled bottle brush (6+ inches) for container walls
- Detail brushes (3 sizes) for blade crevices and seal rings
- Cut-resistant gloves (level 3 minimum) for blade handling
- Silicone spatula for residue removal without scratching
- Microfiber cloths (lint-free) for drying critical components
Approved Cleaning Solutions Only
Stick to Ninja-recommended agents: white vinegar, baking soda, lemon juice, or Ninja’s official cleaner. Avoid these warranty-voiding products: abrasive powders (Comet), chlorine bleach, or dishwasher detergent in the machine. For dairy, use food-safe enzyme cleaners; for mold, a diluted Star San solution (1 oz per 5 gallons).
Storage Best Practices to Prevent Mold
Post-Cleaning Dry-Down Protocol
Assemble components only when bone-dry—use a hairdryer on cool setting for 30 seconds on blade cavities. Store the container upside down on the base with the lid slightly ajar (use a folded paper towel as a spacer). Place a silica gel packet inside the container to absorb ambient moisture. Critical error: Sealing the lid creates a humid environment where mold grows in 48 hours.
Preventive Maintenance Schedule
- Daily: Rinse cycle within 20 minutes of use
- Weekly: Vinegar descaling treatment
- Monthly: Full disassembly and seal ring inspection
- Quarterly: Replace seal rings and check drive gear
Following this Ninja slushie maker cleaning routine prevents the #1 cause of premature failure: sugar crystallization in blade assemblies. Your machine will maintain peak crushing performance, eliminate foul odors, and last years beyond the warranty period. Remember—the 5 minutes you spend cleaning immediately after use saves 30 minutes of scrubbing later and protects your investment. Start tonight: disassemble your machine while residues are soft, run the baking soda cycle, and enjoy worry-free slushies tomorrow. For persistent issues, contact Ninja’s customer service with your cleaning log—they’ll often replace parts free if you prove proper maintenance.


