
Tired of rubbery tilapia that falls apart the moment your fork touches it? Your Ninja Foodi air fryer transforms this budget-friendly fish into a restaurant-quality meal with golden, crunchy edges and tender, flaky centers—all in under 15 minutes. Unlike oven-baking that dries out delicate fillets or pan-frying that leaves greasy residue, the Foodi’s rapid air circulation locks in moisture while creating that irresistible crispness without drowning your fish in oil. Whether you’re grabbing fresh fillets from the market or using frozen ones straight from your freezer, this method delivers foolproof results with minimal cleanup. Discover how to turn tilapia from bland to brilliant using the exact timing, temperature, and techniques that make your Foodi the ultimate seafood secret weapon.
Why Your Ninja Foodi Outperforms Oven and Pan Methods
Faster cooking with zero preheat wait revolutionizes weeknight dinners. While traditional ovens require 15+ minutes of preheating plus 20 minutes of baking, your Foodi goes from cold start to crispy tilapia in 8-10 minutes flat. The enclosed cooking chamber traps heat efficiently, eliminating cold spots that cause uneven cooking in conventional ovens. You’ll never waste energy heating a full oven for a single meal again.
Healthier results without sacrificing texture make this method ideal for keto or paleo diets. Each serving contains just 2-3g net carbs while using 70% less oil than pan-frying. The Foodi’s rapid air movement creates a Maillard reaction on the surface—browning the exterior for flavor—while steam generated from the fish’s natural moisture keeps the interior succulent. No more chalky, dry fillets that ruin tilapia’s reputation.
Cleanup takes 30 seconds when you use parchment liners. Unlike baked sheets crusted with fish residue or stovetops splattered with oil, the Foodi’s non-stick basket wipes clean with a paper towel. No scrubbing required—just toss the liner and wipe the basket.
Critical Preheating Mistake to Avoid
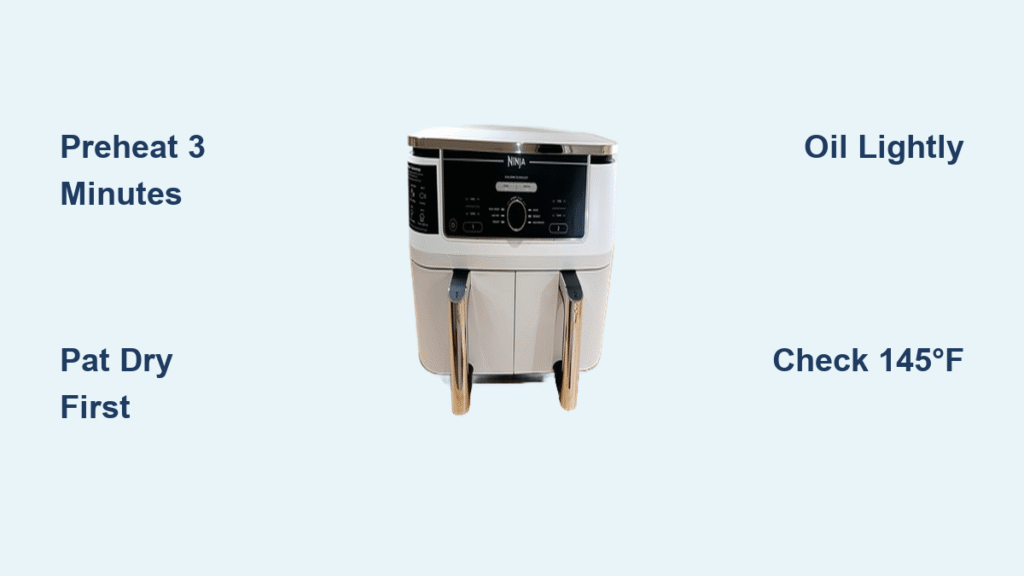
Never skip the 3-minute preheat—it’s non-negotiable for crispiness. An unpreheated basket steams rather than sears the fish, creating soggy skin. Set your Foodi to 400°F (200°C) for exactly 3 minutes before adding fillets. Longer preheating risks burning parchment liners or overheating the basket.
Basket Placement Matters
Position fillets in the center of the basket, not touching the sides. Air needs ½-inch clearance around each piece to circulate properly. Overcrowding traps steam, resulting in uneven cooking where edges burn while centers stay raw. Two standard 6-8 oz fillets is the maximum per batch in an 8-quart model.
Selecting Tilapia That Won’t Disappoint

Fresh vs. Frozen: What Actually Works
Fresh tilapia must pass the sniff test: Firm, translucent flesh with no fishy odor. Avoid grayish or yellow-tinged fillets—they’re past their prime. The ideal thickness is 1 inch; thinner cuts overcook instantly in the Foodi’s intense heat.
Frozen fillets require smart handling: Choose individually vacuum-sealed portions, not bulk bags where ice crystals form. Skip thawing—cook straight from frozen using the 5-minute initial thaw technique (detailed later). Vacuum-sealed fish retains moisture better than freezer-burned alternatives.
Thickness-Based Timing Adjustments
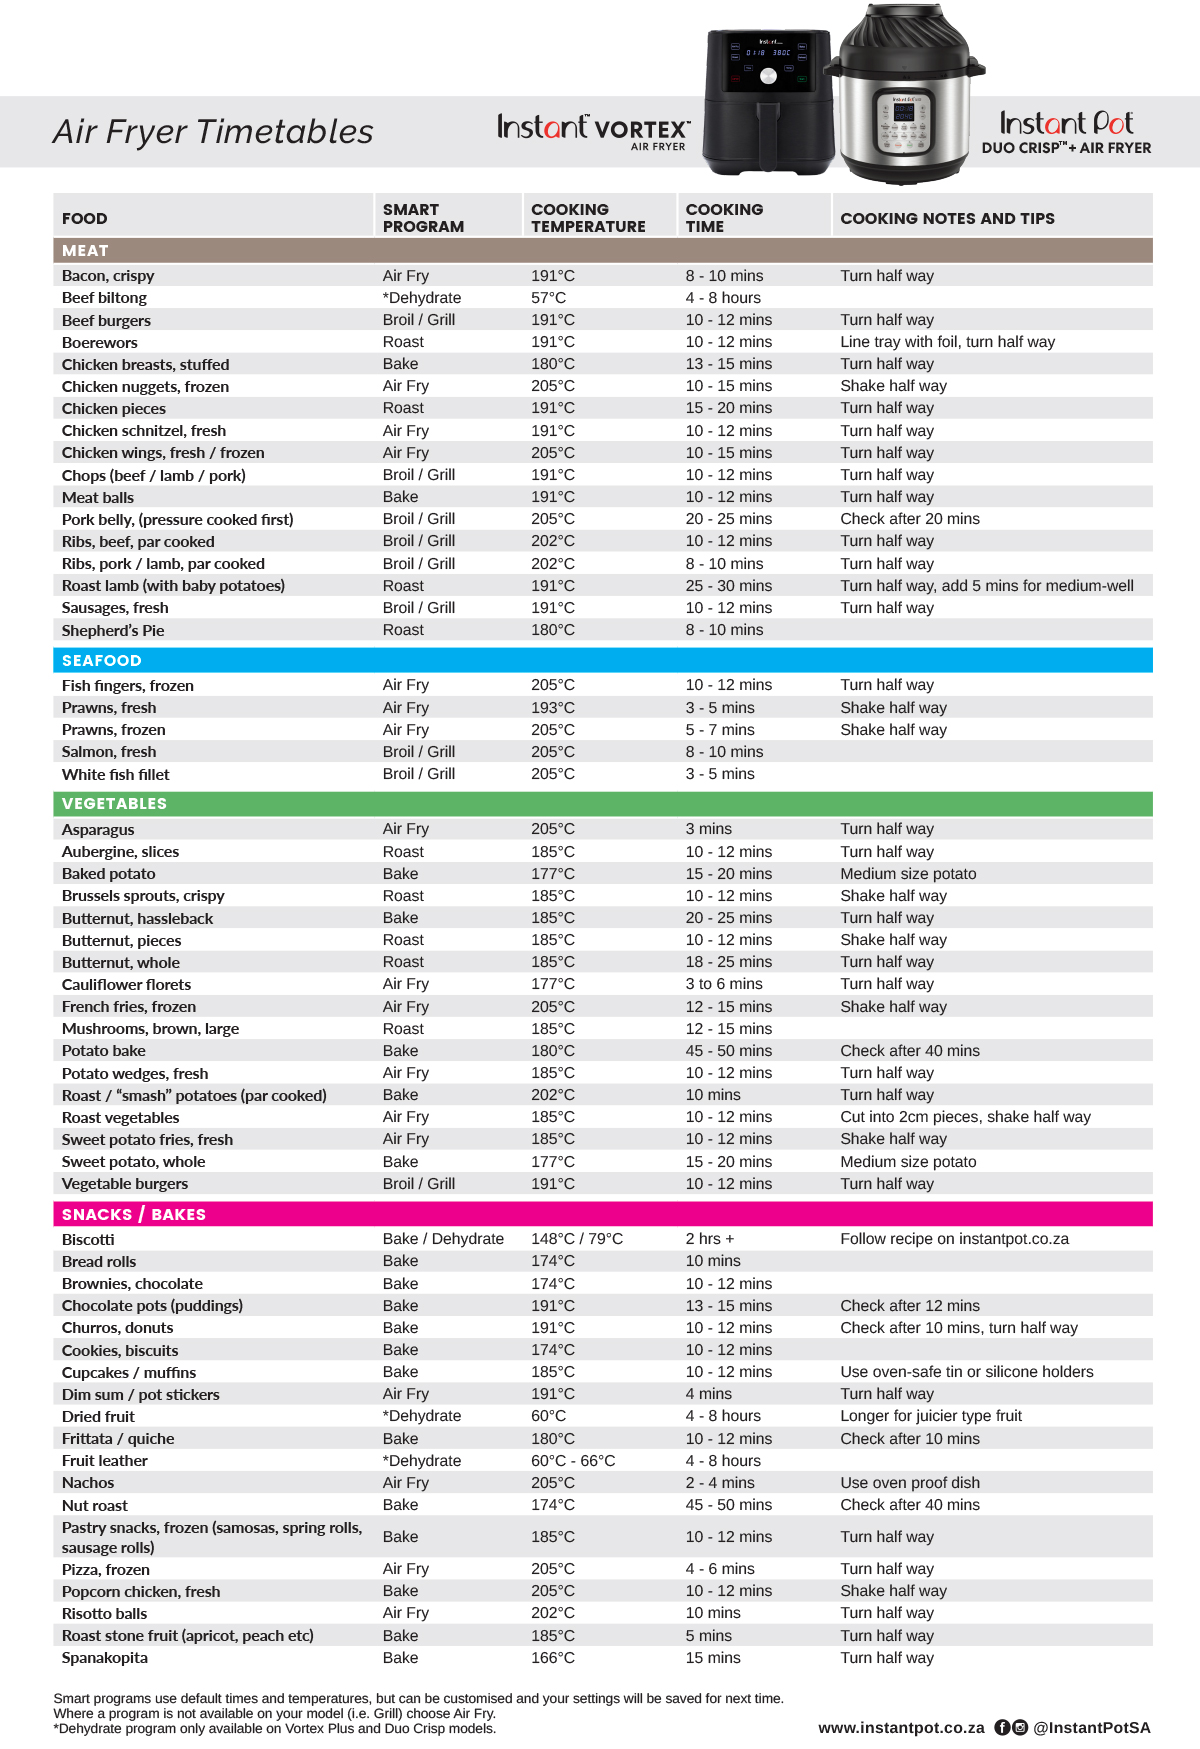
Cooking time depends entirely on thickness, not weight:
– ½-inch fillets (common in frozen bags): Cook 6-7 minutes fresh, 9-10 minutes frozen
– ¾-inch fillets (ideal for Foodi): 8-9 minutes fresh, 11-12 minutes frozen
– 1-inch+ fillets: 10-12 minutes fresh, 13-15 minutes frozen
Always check internal temperature at the 7-minute mark—you’ll avoid dryness 100% of the time.
Foolproof Seasoning Blends That Stick

Cajun Parmesan Crust (No Flaking)
Mix 1 tsp Cajun seasoning + 2 tbsp freshly grated Parmesan (not pre-shredded—it won’t crisp). After oiling fillets, press the mixture firmly onto the surface. The cheese melts into a golden crust while spices add depth. Pro tip: Add ½ tsp smoked paprika for restaurant-level complexity.
Lemon Herb Magic (No Mustard = Disaster)
Combine 1 tsp lemon pepper + 1 tsp garlic powder + 1 tbsp chopped chives. Crucial step: Whisk in 1 tbsp yellow mustard before applying—it binds seasonings so they don’t blow off in the air stream. The mustard disappears during cooking, leaving bright citrus notes.
Simple Garlic Butter Finish
Whisk 2 minced garlic cloves + 1 tbsp lemon juice + 2 tbsp melted butter. Brush this over fillets during the last 2 minutes of cooking. The residual heat infuses flavor without burning the garlic—a trick most home cooks miss.
Fresh Tilapia Cooking: Step-by-Step
Dry, Oil, Season—In That Order
- Pat bone-dry with paper towels (moisture = steam = soggy skin)
- Mist both sides with avocado oil using a spray bottle (hold 6 inches away for even coverage)
- Season aggressively—tilapia needs bold flavors to shine
- Place in preheated basket skin-side down if skin-on
Flip or Don’t Flip? The Truth
- Never flip fillets under ¾-inch thick: The Foodi’s top-down heat cooks them evenly without disturbance. Flipping breaks delicate flesh.
- Flip thicker cuts at 6 minutes: Use silicone tongs to gently turn fillets. The second side needs just 2-4 minutes—over-flipping dries out fish.
Visual Doneness Cues
Stop guessing with timers. Look for:
– Golden-brown edges (not pale white)
– Opaque white flesh (no translucent patches)
– Flakes that separate easily when nudged with a fork at 45 degrees
– Internal temperature of 145°F (63°C) at the thickest point
Frozen Tilapia Shortcut Method
The 5-Minute Thaw Trick
- Cook frozen fillets at 392°F (200°C) for 5 minutes
- Remove basket—you’ll see ice crystals melting but fish still firm
- Immediately oil and season (this 30-second window is critical—surface must be tacky, not wet)
- Return to Foodi for final cooking time based on thickness
Why This Beats Overnight Thawing
Partial thawing creates a slightly sticky surface that holds seasonings. Fully thawed fish releases too much liquid, making coatings slide off. You’ll achieve better crust adhesion and avoid the mushy texture of slow-thawed fillets.
Crispy Crust Secrets Most Cooks Miss
Panko Perfection Without Sogginess
Roll oiled fillets in panko, pressing gently to adhere. Critical step: Spray the panko lightly with oil before cooking—this triggers browning without excess grease. Gluten-free panko works identically; no timing adjustments needed.
Paleo Coating That Actually Crisps
Replace breadcrumbs with 2 tbsp cassava flour + 1 tsp garlic powder. The starch mimics wheat’s crispness while staying grain-free. Season the flour mixture directly—adding spices after coating causes uneven flavor distribution.
Avoid These Costly Mistakes
Sticking Solutions That Work
- Always line with 8-inch parchment: Crimp edges to prevent lifting
- Never use aerosol sprays—propellants degrade non-stick coating
- If sticking occurs mid-cook, pause the Foodi for 60 seconds before attempting removal
Overcooking Prevention Protocol
Remove fillets at 140°F (60°C)—residual heat will carry them to 145°F during 2-minute rest. Overcooked tilapia shows opaque white color with visible white beads of protein (a sign moisture is gone). Undercooked fish remains translucent and resists flaking.
Reheating Leftovers Without Ruin
Air Fryer Method Only
Microwaves destroy texture—skip them entirely. For perfect reheating:
– Place cold fillets in preheated 350°F (175°C) basket
– Cook 4 minutes (no oil needed)
– Check at 3 minutes—overheating turns leftovers rubbery
This method restores 90% of original crispness. Never reheat more than once.
Freezing Cooked Fillets Right
Cool completely, then layer with parchment paper in an airtight container. Freeze up to 3 months. Reheat from frozen: add 2 minutes to standard cooking time. Thawed leftovers last 4 days refrigerated—discard after day 5.
Pro Tips for Consistent Success
Batch Cooking Without Quality Loss
Cook identical thickness fillets together. If mixing sizes, place thicker pieces toward the basket’s center (hottest zone). Never stack fillets—cook in batches with 1-minute basket cooldown between rounds.
Oil Application Mastery
Fill a reusable spray bottle with avocado oil. Hold 6-8 inches from fillets for a fine mist. Closer = oil pools and burns; farther = uneven coverage. One 2-second spray per side is perfect—excess oil causes smoking.
Temperature Verification Hack
Test multiple spots on thick fillets. Tilapia’s irregular shape means edges might hit 155°F while centers lag at 135°F. Always check the thickest part near the tail—that’s your doneness indicator.
Master these techniques and your Ninja Foodi transforms tilapia into a weeknight hero—crisp, moist, and ready faster than takeout. Start with fresh ¾-inch fillets and the Cajun Parmesan blend for guaranteed success, then experiment with panko crusts or frozen shortcuts. Remember: timing is secondary to temperature—invest in a $10 thermometer for perfect results every time. Pair your air fryer tilapia with cauliflower rice pilaf (cook it in the Foodi basket right after the fish) and you’ve got a restaurant-quality meal in under 20 minutes. Ready to level up? Try the lemon herb variation next—it’s the secret weapon at coastal seafood spots.


