
Your Ninja Air Crisp promises restaurant-quality crunch without the oil bath, yet many home cooks struggle to achieve that perfect golden exterior. Whether your fries emerge limp or your chicken wings stay soggy, mastering this function transforms weeknight dinners into crispy masterpieces. This guide walks you through every step—from unboxing to that first satisfying crunch—using the exact techniques verified by Ninja’s engineering team. When you learn how to use Ninja Air Crisp properly, you’ll consistently get foods with shatteringly crisp exteriors and juicy interiors, cutting cooking times by up to 30% compared to conventional ovens.
Position Your Ninja for Optimal Airflow and Safety
Avoid Heat Damage with Correct Placement
Place your Ninja appliance on a heat-resistant surface with 6 inches clearance from walls and cabinets. This critical spacing prevents heat buildup that could warp cabinets or trigger safety shutoffs. Never tuck it into tight corners—steam vents on the sides need room to breathe, or you’ll get uneven cooking and potential smoke alarms. If your countertop feels warm after use, relocate the unit immediately; sustained heat exposure risks damaging both your appliance and surfaces.
First-Time Cleaning Steps for Maximum Crispiness
Remove all packaging materials and wash the air fry basket, crisper plate, and drip tray in warm, soapy water. Dry completely before assembly—moisture creates steam that fights crispiness by lowering effective cooking temperatures. Run an empty test cycle at 400°F for 5 minutes to eliminate manufacturing residues; this “burn-off” phase prevents plastic odors from contaminating your first meal. Skip this step, and you’ll taste chemical notes in delicate foods like fish or reheated pizza.
Set Up Air Crisp Controls Like a Pro
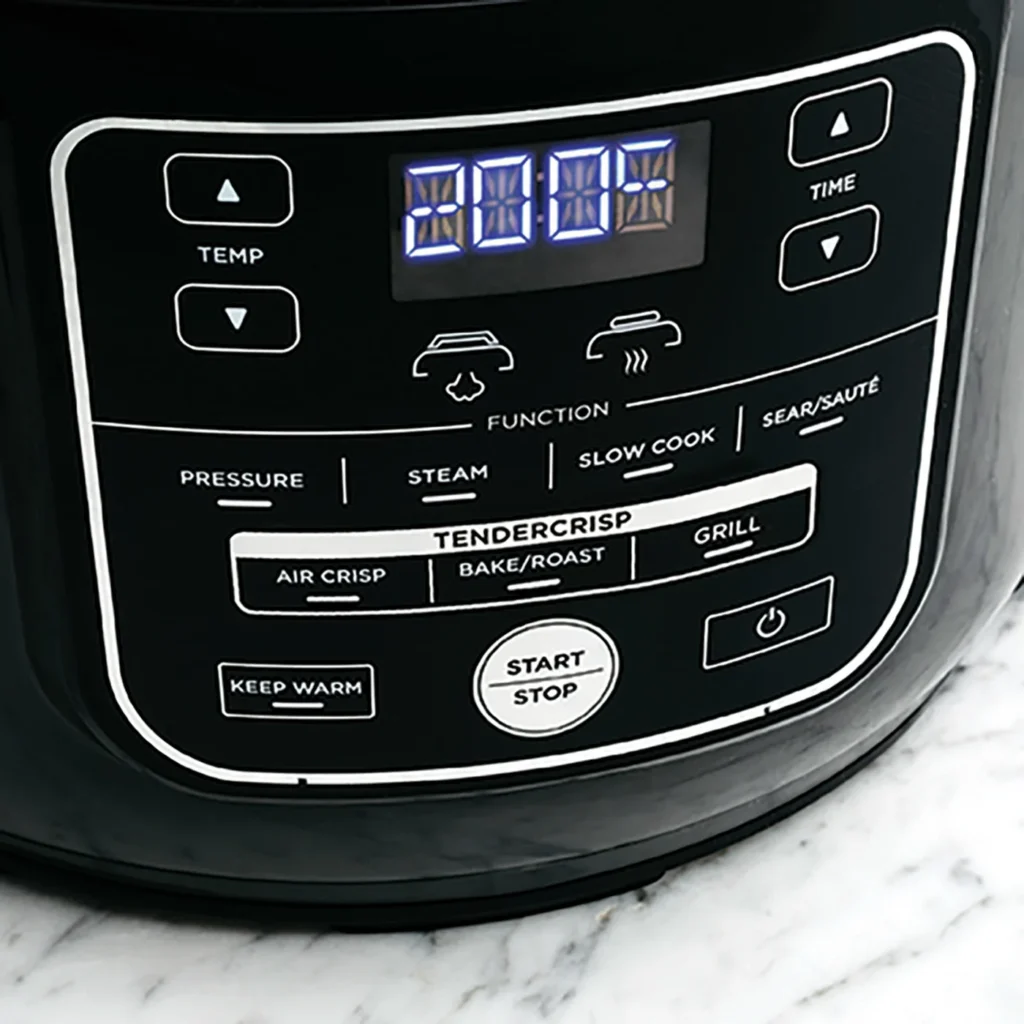
Activate and Calibrate the Air Crisp Function
Press the power button, then select AIR CRISP mode. The display defaults to 390°F, but adjust based on your food: 300-350°F for reheating pizza or delicate fish, 375-400°F for most proteins and vegetables, and 400-450°F for maximum crunch on fries or wings. Use the temperature arrows to fine-tune—never guess. A 25°F difference determines whether chicken skin blisters perfectly or burns.
Preheat for Restaurant-Quality Sear
Set the timer for 3-5 minutes at your target temperature with the empty basket inside. Preheating creates instant surface searing that locks in moisture—skip it, and foods steam instead of crisp. Listen for the confirmation beep before adding food; opening the unit too early drops internal temperatures by 50°F+, extending cooking time and creating soggy results. Models without auto-preheat require this manual step for reliable outcomes.
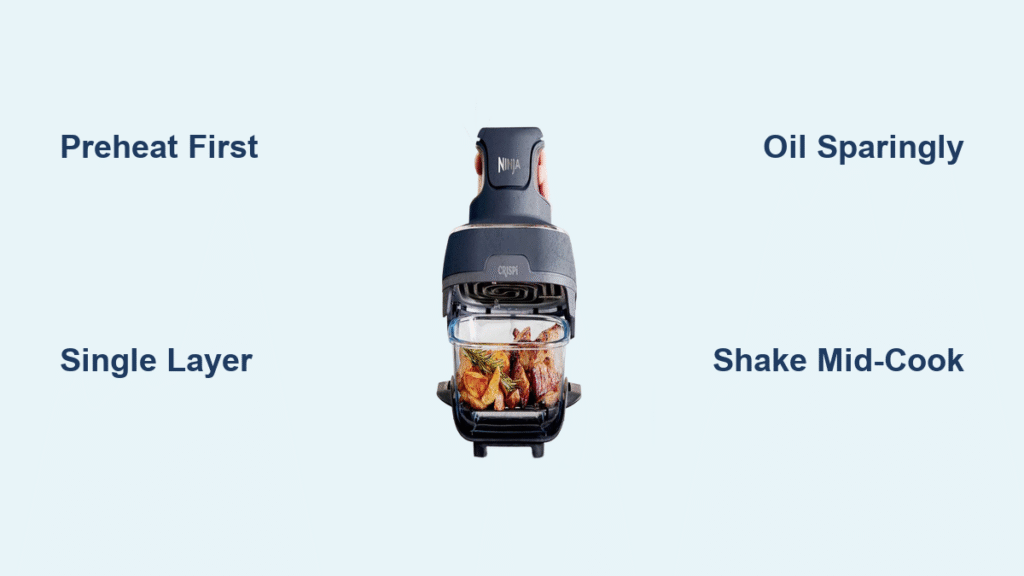
Load Food to Guarantee Crisp, Not Soggy, Results
Prevent Steam Traps with Single-Layer Placement
Spread food in one even layer with space between pieces—crowding traps steam and creates soggy spots. Never fill past the ⅔ mark on the basket’s max-fill line. For large batches, cook in smaller portions: overfilling by just 20% increases cook time by 8 minutes and cuts crispiness by half. Shake fries at the 8-minute mark, but flip wings with tongs at 15 minutes to avoid breaking delicate skin.
Apply Oil Strategically Without Smoke
Lightly spray or toss food with 1-2 teaspoons of avocado or peanut oil using a mister—not aerosol sprays that damage non-stick coatings. Too much oil drips into the drip tray and creates smoke; too little yields dry, leathery results. Pat proteins with paper towels first—surface moisture repels oil and prevents browning. For extra crunch, dust chicken in cornstarch before oiling; this draws out moisture for a shatteringly crisp crust.
Cook Perfectly Crispy Foods by Type
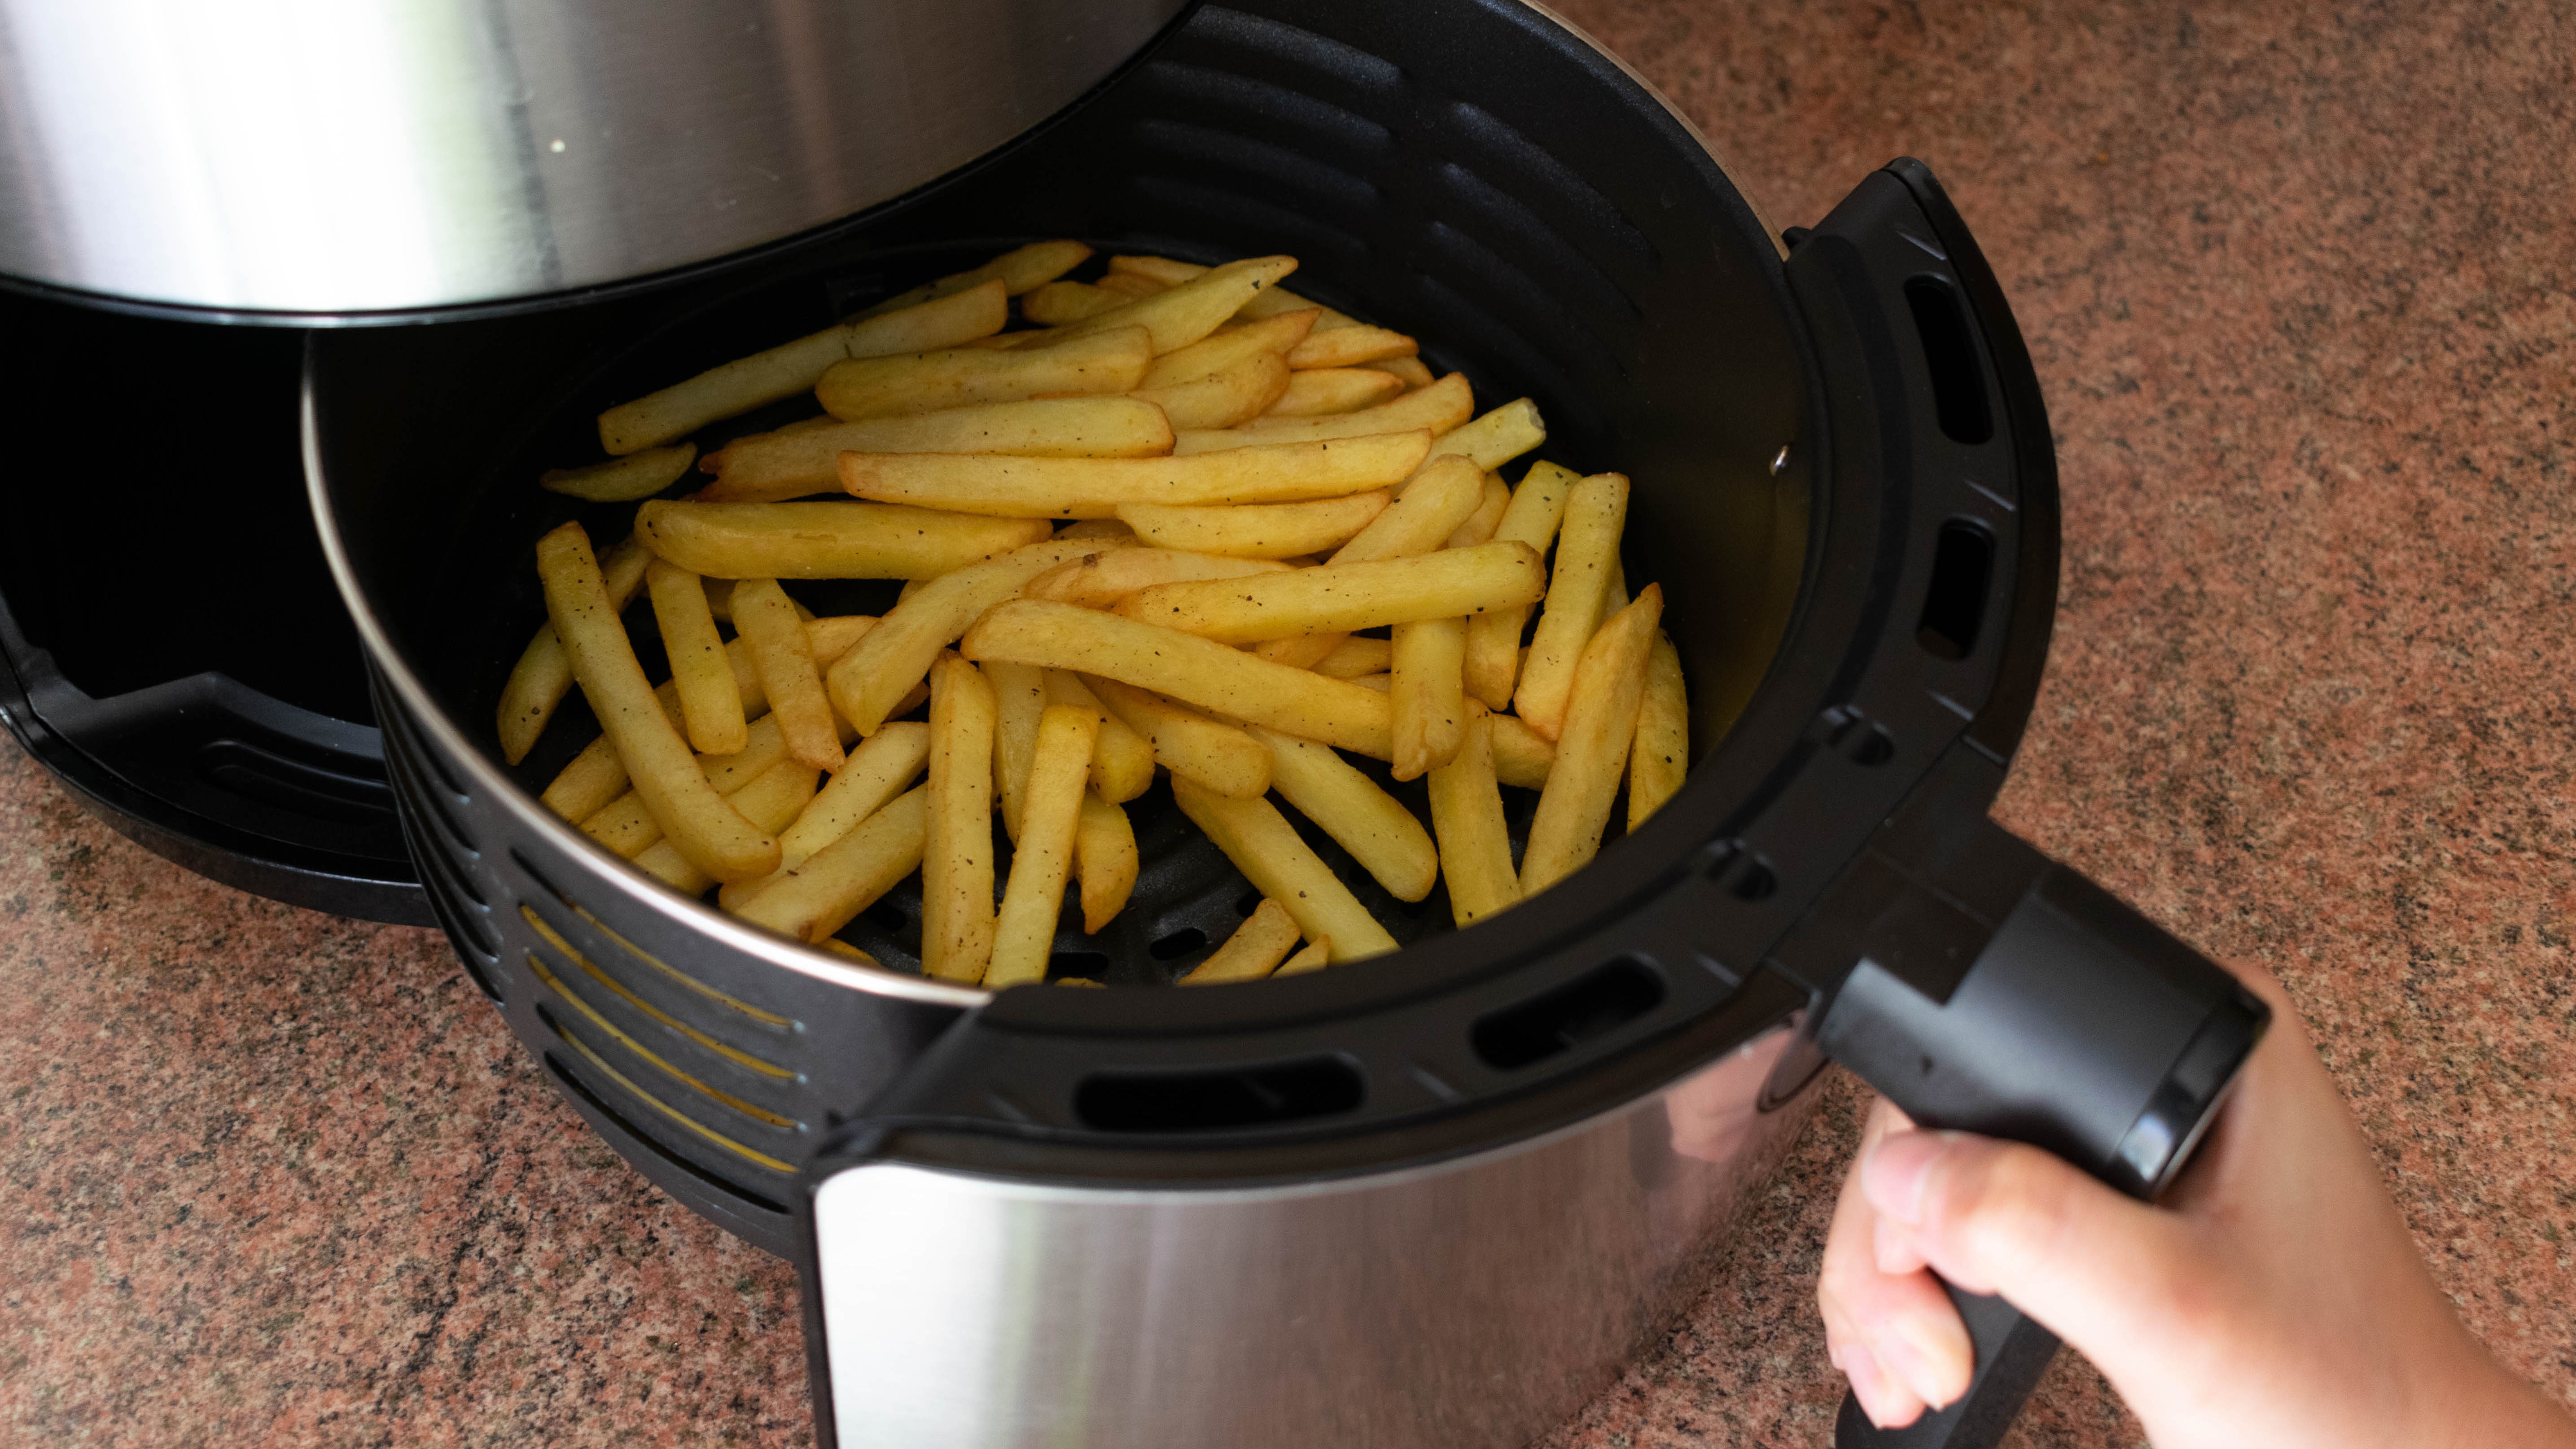
Frozen Foods: Timing and Technique Breakdown
French fries need 400°F for 15-20 minutes with a shake at 8 minutes—undercooked centers cause limpness. Chicken wings require 390°F for 25-30 minutes; flip at 15 minutes to render fat evenly. Mozzarella sticks cook best at 380°F for 6-8 minutes with no shaking (heat melts cheese too fast). Tater tots need two shakes—at 8 and 12 minutes—to avoid mushy bottoms. Always check internal temps: wings must hit 165°F.
Fresh Vegetables: Crisp Without Burning
Broccoli florets take 375°F for 8-10 minutes tossed with 1 tsp oil—halve larger pieces for even browning. Brussels sprouts (halved) need 390°F for 15-18 minutes; shake at 10 minutes to expose cut sides. Sweet potatoes require 400°F for 15-20 minutes with two shakes to prevent caramelized edges from burning. Underseasoned veggies steam instead of crisp—toss with salt pre-cooking to draw out moisture.
Fix Common Crisp Failures Immediately

Rescue Soggy Food Mid-Cook
If fries or wings emerge limp, increase the temperature by 25°F and extend cooking by 2-3 minutes. Immediately reduce your next batch size—overcrowding is the #1 cause of sogginess. Wipe excess moisture from food with paper towels before cooking; frozen items especially release steam that sabotages crispiness. For recurring issues, clean the drip tray thoroughly; built-up oil absorbs heat instead of circulating it.
Stop Smoke Before It Triggers Alarms
Smoke means oil drips hit heating elements. Reduce oil quantity by half and ensure the drip tray is empty pre-cooking. Clean debris from vents weekly with a soft brush—clogged airflow causes flare-ups. If smoke persists, lower the temperature 25°F; high-heat cooking requires precise oil control. Always position the unit away from walls; restricted ventilation traps smoke and overheats components.
Clean to Maintain Peak Performance
Post-Cook Routine That Prevents Sticking
Unplug and cool for 30 minutes minimum before cleaning. Remove the basket with heat-resistant gloves and empty the drip tray while warm—dried grease hardens into stubborn residue. Soak basket and crisper plate in warm, soapy water for 10 minutes; use a non-abrasive sponge on burnt bits. Never submerge the base unit—wring out cloths well before wiping interior walls. Skipping this step leads to food sticking and uneven heating.
Monthly Deep Clean for Consistent Results
Tighten basket handle screws monthly—they loosen from thermal expansion, causing wobbling that disrupts airflow. Replace the crisper plate if non-stick coating chips; damaged surfaces create hot spots that burn foods. Run a deodorizing cycle monthly: 400°F for 10 minutes with lemon slices to neutralize odors from fish or strong spices. Store with the basket removed to prevent moisture buildup that dulls heating elements.
Pro Techniques for Next-Level Crispiness
Double-Cook Method for Unbeatable Fries
Start at 325°F for 15 minutes to cook potatoes through without browning, then increase to 400°F for 5-8 minutes for final crisping. This mimics restaurant techniques without oil baths. Soak cut potatoes in cold water for 30 minutes pre-cooking to remove excess starch—this prevents gumminess and boosts crunch. Never skip the rest period: let fries sit 2 minutes on a wire rack post-cooking; residual heat continues crisping while steam escapes.
Batch Cooking Without Quality Loss
Preheat between batches for consistent results—residual heat drops 100°F+ when adding cold food. Keep early batches warm on a wire rack in a 200°F oven; stacking on paper towels traps steam and softens crusts. Wipe the basket between batches if crumbs accumulate—they burn during subsequent cycles and create bitter flavors. Note timing adjustments: second batches often cook 1-2 minutes faster due to retained heat.
Safety First Guidelines During Operation
Never operate with wet hands or when the unit is wet—electrical hazards increase dramatically. Keep children and pets 3+ feet away; exterior surfaces exceed 300°F during use. Always unplug before cleaning and allow 60 minutes of cooling time; rushing causes burns from hidden hot zones near vents. Position the power cord away from walkways and hot surfaces to prevent tripping or melting. If smoke appears, unplug immediately and let the unit cool—never open the basket mid-smoke as oxygen feeds flare-ups.
Master these techniques and your Ninja Air Crisp becomes your secret weapon for healthier, crunchier versions of your favorite foods. Start with simple frozen fries to dial in your technique, then graduate to fresh vegetables and proteins. The perfect crunch awaits—just preheat, load smart, and let the super-heated air work its magic. With consistent practice, you’ll cut cooking times by 25% while achieving textures impossible in conventional ovens.


