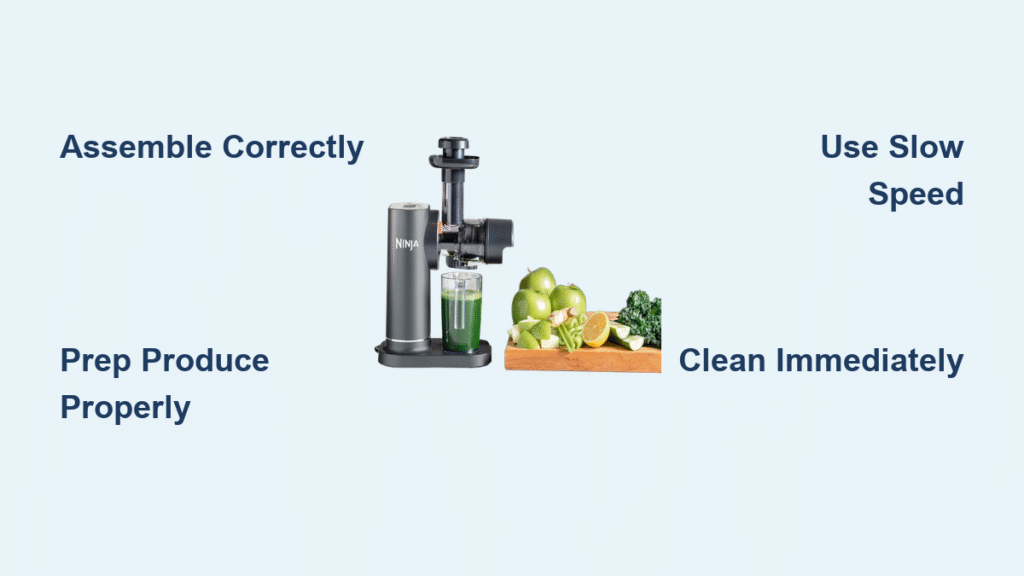
You’ve unpacked your new Ninja cold press juicer, but the sleek machine sitting on your counter feels more intimidating than exciting. Between the auger, filter baskets, and multiple speed settings, you wonder if making fresh juice will require a degree in mechanical engineering. The good news? Once you understand the basics, this powerful juicer becomes your gateway to vibrant, nutrient-packed juices that make store-bought versions taste like colored water.
Mastering your Ninja cold press juicer isn’t just about following instructions—it’s about transforming whole fruits and vegetables into liquid nutrition while preserving enzymes that heat-based juicers destroy. This guide walks you through every step, from first assembly to cleaning protocols that prevent the dreaded pulp buildup. By the time you finish reading, you’ll confidently extract maximum nutrition from your produce without wasting a single drop.
Initial Setup and Assembly

Setting up your Ninja cold press juicer correctly prevents 90% of future problems. The precision-engineered parts work together seamlessly when aligned properly, but one misaligned component can cause everything from poor juice yield to motor strain. Take five minutes for proper assembly, and you’ll avoid hours of frustration later when pulp backs up or the machine makes unusual noises.
Required Parts Checklist
Before your first juice session, verify every component sits on your counter:
– Main motor base with non-slip feet that won’t slide during operation
– Auger/screw – the spiral that crushes produce (looks like a large corkscrew)
– Juicing bowl with separate pulp and juice outlets clearly marked
– Filter basket (fine mesh for juice, coarse mesh for smoothies)
– Hopper and food pusher for safe feeding of ingredients
– Juice and pulp containers (usually BPA-free plastic with measurement markings)
– Cleaning brush with stiff bristles designed for filter maintenance
Assembly Sequence
Start with the motor base on a dry, stable surface away from counter edges. Align the juicing bowl using the arrow indicators molded into the plastic—this clicks into place with gentle downward pressure. Insert the filter basket into the bowl, ensuring the small tabs lock securely into the designated slots with an audible snap. The auger slides vertically into the filter basket’s center post; you’ll feel it seat properly when resistance decreases and it rotates freely. Finally, attach the hopper by twisting clockwise until you hear the safety mechanism engage.
Pro tip: Assemble the juicer near your sink for easy cleanup. Keep the food pusher within reach—never use your hands to force produce through the hopper.
Pre-Juice Preparation
Your Ninja cold press juicer extracts maximum nutrition, but only if you prepare produce correctly. Skipping prep steps leads to jammed augers, bitter juice, and disappointing yields that make the grocery investment feel wasted. Proper preparation transforms fibrous kale into silky green juice and turns tough beets into vibrant, earthy elixirs.
Produce Size Guidelines
Cut everything into 1-2 inch pieces regardless of original size. Apples need quartering, carrots become 2-inch sticks, and leafy greens should be rolled into cigar shapes. These dimensions let the auger grab and process efficiently without overwhelming the motor. Remove pits from peaches, mango seeds, and apple cores—your juicer will crush them, but they add bitterness and reduce juice quality. For citrus fruits like oranges and grapefruits, remove all peel and white pith unless you specifically want bitter notes in your juice.
Pre-Cutting Checklist
- Remove all large seeds/pits (stone fruits, apples, mangoes) – these contain trace cyanide compounds
- Peel citrus unless you enjoy bitter oils in your juice – the rind contains essential oils that can overwhelm flavor
- Chop fibrous vegetables (celery, kale stems) into 1-inch pieces to prevent clogging
- Soak leafy greens in cold water for 5 minutes to crisp them and remove hidden dirt
- Alternate soft and hard produce in your prep pile for smoother processing – this creates natural lubrication
Cold Press Operation Steps
Operating your Ninja cold press juicer feels like conducting a symphony—each step has its rhythm and timing. The slow 80 RPM motor extracts up to 35% more juice than centrifugal models, but only when you respect the process timing. Rushing leads to poor extraction and potential jams that require disassembly mid-process.
Step-by-Step Juicing Process
- Power on the juicer with the bowl empty and lid securely fastened – listen for the quiet startup hum
- Start with soft produce (tomatoes, berries) to lubricate the system before introducing harder items
- Add hard vegetables (carrots, beets) using the food pusher—never your hand – apply steady, gentle pressure
- Alternate textures throughout: soft apple → celery → kale → cucumber to maintain optimal flow
- Use reverse function if produce jams (hold for 3 seconds, then resume forward) – this clears minor blockages
- Process leafy greens last for maximum extraction – they benefit from the lubrication of previous ingredients
Pro tip: Feed produce at a steady pace—too fast causes backup, too slow reduces efficiency. The motor’s quiet hum should remain consistent; grinding sounds indicate overfeeding. For best results, fill the hopper ¾ full before starting the motor.
Optimal Speed Settings
Most Ninja models offer two speeds:
– Speed 1 (Soft): Berries, tomatoes, citrus, leafy greens – preserves delicate flavors
– Speed 2 (Hard): Carrots, beets, apples, ginger, fibrous vegetables – provides extra crushing power
Switch speeds between produce types, not mid-ingredient. The auger adapts automatically, but manual speed control prevents motor strain and improves juice clarity. For mixed recipes, begin with Speed 1 for soft ingredients, then switch to Speed 2 for harder components.
Common Juicing Problems

Even experienced users hit snags with their cold press juicer. Understanding quick fixes prevents ruined batches and extends your machine’s lifespan significantly. These troubleshooting techniques have saved countless juicing sessions from becoming kitchen disasters.
Juicer Won’t Turn On
Check the safety lock mechanism first—Ninja models won’t operate unless every component clicks into place. Remove and reassemble the bowl, ensuring the arrow indicators align perfectly. If the power light flashes red, the motor overheated; unplug for 30 minutes before retrying. Verify the electrical outlet works by plugging in another device—sometimes the issue is as simple as a tripped circuit breaker.
Poor Juice Yield
Low output usually stems from dull produce or clogged filters. Massage carrots and apples between your hands to check firmness—soft produce yields less juice. Clean the filter basket every 3-4 cups of produce; dried pulp blocks extraction holes and reduces efficiency by 40%. For stubborn clogs, use the cleaning brush provided to gently dislodge fibers from the mesh without bending the delicate wires.
Foam and Separation Issues
Excessive foam indicates overripe produce or incorrect filter choice. Switch to the fine filter basket for clearer juice—this catches more pulp particles. If separation occurs within 10 minutes, add a teaspoon of lemon juice to stabilize—this prevents oxidation without affecting flavor. For green juices, include a small piece of ginger to reduce foaming naturally.
Cleaning Protocol
Proper cleaning transforms from chore to 5-minute routine when you follow the Ninja-recommended sequence. Neglecting this step creates mold issues and off-flavors that ruin future juices. Many users don’t realize that dried pulp becomes nearly impossible to remove after 15 minutes—making immediate cleaning essential.
Immediate Post-Juice Steps
Disassemble immediately after use—dried pulp becomes cement-like within 30 minutes. Rinse all parts under warm running water, using the included brush to scrub filter basket holes in a circular motion. Pay special attention to the auger’s spiral grooves where fiber accumulates; hold it under running water while rotating. Never use abrasive cleaners that could scratch plastic components or damage the food-grade finish.
Deep Cleaning Schedule
- Daily: Rinse and air-dry all parts completely before storage
- Weekly: Soak filter basket in 1:1 vinegar/water solution for 15 minutes to remove mineral deposits
- Monthly: Run a lemon-water cycle (1 lemon, 2 cups water) to sanitize hard-to-reach areas
Critical warning: Never submerge the motor base in water or run it under the faucet. Wipe it with a damp cloth only—water intrusion will void your warranty and damage electrical components.
Juice Storage Guidelines
Your Ninja cold press juicer creates nutrient-dense juice, but improper storage turns liquid gold into brown, bitter disappointment. Understanding oxidation helps you maintain flavor and nutrition longer, making your juicing efforts truly worthwhile. The enzymes preserved by cold pressing continue working even after extraction, which affects storage differently than centrifugal juices.
Optimal Storage Methods
Fill glass containers to the brim, minimizing air exposure that causes oxidation. Store immediately in the coldest refrigerator section (not the door) at 35-38°F. Most juices maintain peak quality for 48-72 hours, though enzyme activity continues degrading nutrients. Add ½ teaspoon vitamin C powder per 16 oz to extend freshness by 24 hours without altering taste significantly. Mason jars with tight-sealing lids work better than plastic containers for preserving flavor integrity.
What Not to Store
Avoid storing these combinations—they separate or ferment quickly:
– Pineapple + dairy-based ingredients (creates unpleasant curdling)
– Melon + citrus (creates bitter compounds through enzymatic reaction)
– Avocado + anything (oxidizes to brown mush within hours)
Maintenance Schedule
Following a simple maintenance calendar prevents expensive repairs and maintains juice quality. Most Ninja cold press juicers last 8-10 years with proper care, but neglected machines often develop performance issues within months. Regular maintenance keeps your juicer running quietly and efficiently.
Weekly Maintenance Tasks
- Inspect auger seal for cracks or wear – replace if you notice juice leaking into the motor housing
- Check filter basket for bent or missing mesh sections – these reduce filtration effectiveness
- Test safety mechanisms by disassembling/reassembling twice – ensures proper function
- Wipe motor base with damp cloth (never submerge) – prevents dust buildup around vents
Pro Tips for Longevity
Store your juicer assembled with the auger removed to prevent accidental damage to the delicate spiral. Keep the food pusher nested in the hopper to avoid misplacing this critical safety component. When not in use for extended periods, place silica gel packets inside the storage container to prevent moisture buildup.
Your Ninja cold press juicer transforms from intimidating appliance to daily health companion once these fundamentals click. Start with simple combinations—apple-carrot-ginger becomes your gateway recipe—then experiment boldly. The slow, deliberate process of cold pressing connects you to your food in ways high-speed juicers never achieve. Clean after each use, respect the motor’s quiet strength, and you’ll craft juices that make the morning coffee ritual feel obsolete. Remember that perfect juicing isn’t about complexity—it’s about consistency with these proven techniques that turn produce into liquid vitality.

