
That frustrating moment when your single-serve machine delivers weak, watered-down coffee that barely wakes you up? The Ninja PB051 Pods & Grounds Specialty Coffee Maker eliminates this problem by giving you two brewing options in one compact unit—no more choosing between convenience and quality. This powerhouse fits in tight kitchen spaces while delivering seven brew sizes, four drink styles, and an integrated milk frother for café-quality lattes without the $5 price tag. Whether you’re switching from a Keurig or upgrading from a basic drip machine, learning how to use Ninja pods and grounds coffee maker properly unlocks bold, barista-level coffee at home.
Mastering this dual-system brewer means you’ll never waste coffee grounds or settle for mediocre flavor again. You’ll discover exactly how to maximize your machine’s capabilities while avoiding the most common mistakes that ruin your morning cup.
First-Time Setup and Initial Flush for Optimal Performance
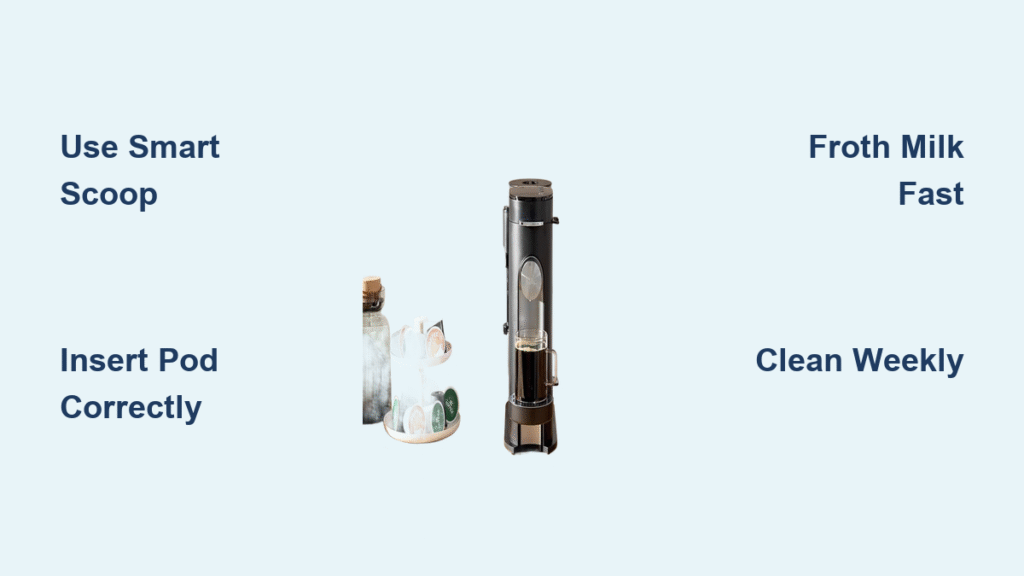
Before brewing your first cup, proper setup ensures your Ninja PB051 delivers peak flavor from day one. Unboxing reveals the main unit, 56-ounce reservoir, permanent filter, pod adapter, fold-away frother, and the smart scoop with built-in measurements—all essential for perfect coffee.
Essential First Steps for New Machine
Remove all packaging materials and wash the water reservoir, permanent filter, and drip tray with warm, soapy water. Rinse thoroughly to eliminate manufacturing residues that could affect coffee flavor. Fill the reservoir to the MAX line with fresh, cold water and run a complete 24-ounce “Classic” cycle without coffee—this flushes the internal system and prepares your machine for perfect brewing. This critical step takes about two minutes and prevents that “new appliance” taste in your first cup.
Adapter Storage System for Clutter-Free Countertops
The Ninja PB051’s genius lies in its dual-brew capability. When using grounds, insert the permanent filter into the brew basket. For pod brewing, swap in the pod adapter—both adapters store neatly in the side compartment when not in use, keeping your countertop organized. This built-in storage solution means you’ll never lose an adapter or clutter your space with extra parts.
Brewing Perfect Coffee with Grounds Using Smart Measurements
Grounds brewing unlocks the PB051’s full potential, offering sizes from 6 to 24 ounces and access to all four brew styles. The key to avoiding weak or bitter coffee lies in precise measurements and proper adapter placement.
Grounds Measurement Guide for Ideal Strength
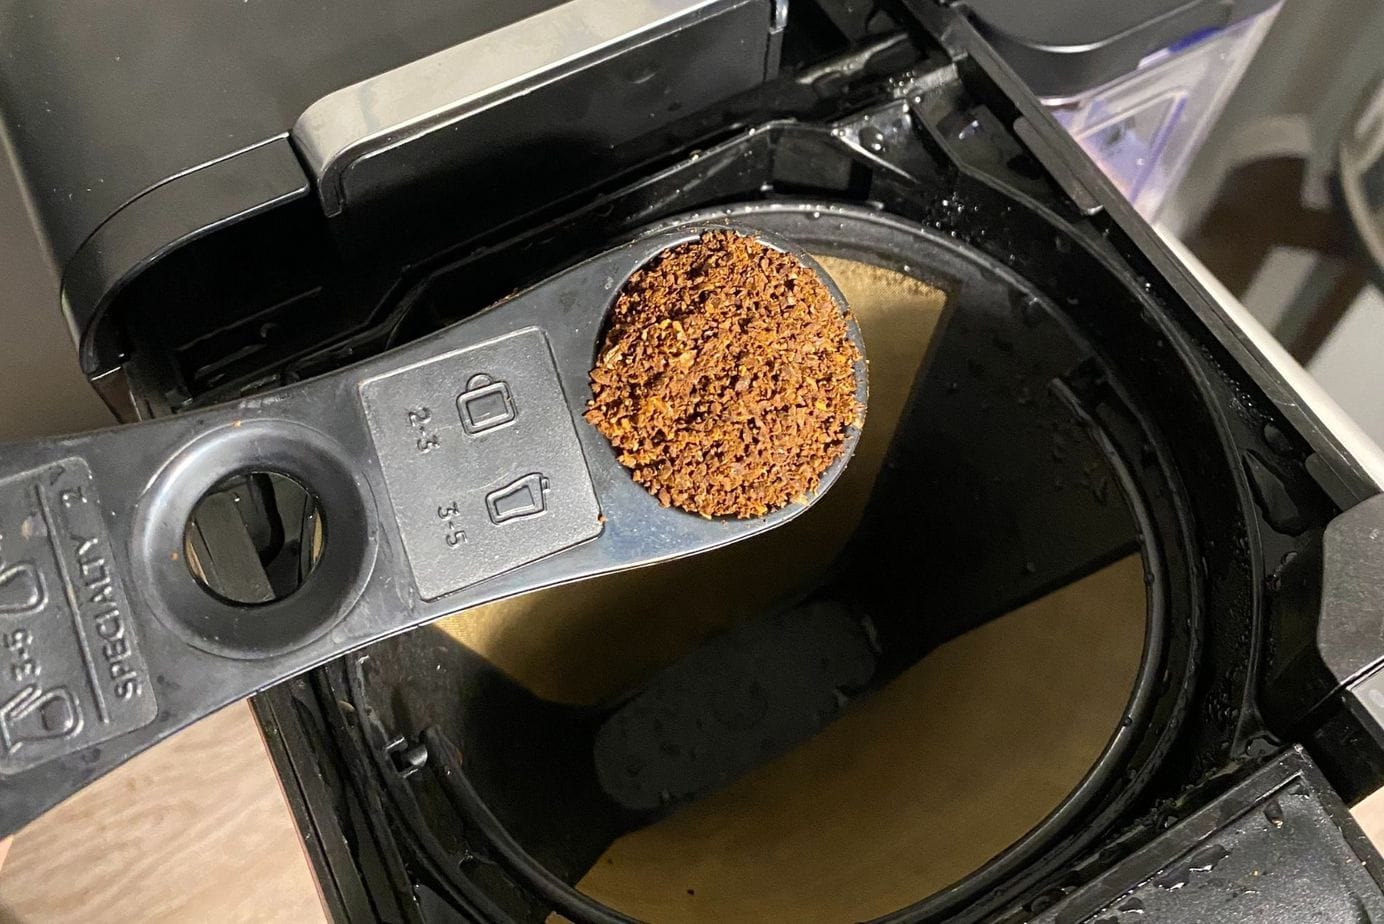
Use the included smart scoop for foolproof ratios:
– 6 oz: 1 level scoop (≈1 tablespoon)
– 8 oz: 1.5 scoops
– 12 oz: 2.5 scoops
– 24 oz: 5 scoops
Medium-grind coffee works best—too fine causes overflow, while coarse grinds produce weak flavor. Level each scoop rather than packing grounds down. For Specialty mode (4-ounce concentrate), you’ll need approximately 4 scoops to achieve that intense espresso-like shot perfect for lattes.
Brew Style Selection Process for Custom Flavor
Choose your style before brewing:
– Classic: Balanced, everyday coffee
– Rich: Bolder extraction for milk-based drinks
– Over Ice: Optimized flow prevents dilution
– Specialty: 4-ounce concentrate for lattes (grounds only)
Adjust the drip tray height to match your cup size—this prevents splashing and ensures proper extraction. The machine’s instant heat-up (0 seconds) means you’re brewing within seconds of pressing the button, unlike Keurig models that require 1-3 minutes to warm up.
Mastering Pod Brewing Technique Without Compromising Flavor

Pod brewing offers convenience without sacrificing quality, though sizes limit to 6-12 ounces and Specialty mode isn’t available. The process differs slightly from grounds brewing but remains equally straightforward when you know the proper technique.
Proper Pod Insertion to Prevent Brewing Failures
Insert the pod adapter into the brew basket, then place your K-Cup inside. Close the lid firmly until you hear a distinct click—this punctures the pod correctly and prevents brewing failures. Always remove pods immediately after brewing to prevent clogging from expanding grounds. If your machine rejects a pod, check that it’s seated flat and the lid clicks securely.
Size and Style Optimization for Maximum Pod Flavor
Select sizes based on pod strength preferences:
– 6 oz: Maximum intensity from standard pods
– 8-10 oz: Balanced strength
– 12 oz: Milder flavor, perfect for travel mugs
Note that Over Ice mode works exceptionally well with pods, creating smooth iced coffee without the watered-down taste common with traditional brewing. Unlike grounds brewing, pods don’t offer the Specialty mode, making them better for standard coffee rather than espresso-style drinks.
Milk Frothing for Café-Quality Specialty Drinks at Home
Transform your kitchen into a café with the integrated frother—no separate appliance needed. This fold-away wand creates hot or cold foam in under 30 seconds, though some users report it occasionally requires twisting to unlock properly.
Frothing Technique Steps for Perfect Foam
Pull the wand straight out until it locks into position. Fill your cup with up to 6 ounces of milk (cold or pre-warmed). Submerge the whisk end just below the milk surface—too deep creates hot milk without foam, while too shallow produces large bubbles. Press the button and froth for 15-30 seconds, adjusting time based on desired foam thickness. Cold milk froths best at refrigerator temperature (38-40°F), while whole milk creates creamier foam than skim.
Cleaning After Frothing to Maintain Performance
Immediately rinse the wand under warm running water—milk residue hardens quickly and can affect future frothing performance. The wand detaches for thorough cleaning but isn’t dishwasher safe. For stubborn residue, soak briefly in warm soapy water, then rinse clean. This daily maintenance prevents the buildup that causes frothing issues down the line.
Troubleshooting Common Issues Before Calling Support
Even reliable machines encounter occasional hiccups. Most problems stem from simple oversights easily corrected with these quick fixes that save you time and frustration.
No Water Flow Solutions for Immediate Brewing
If your machine won’t brew, check these basics first:
– Ensure the reservoir clicks fully into place
– Verify water level above minimum line
– Clear air locks by removing and reseating the reservoir
– Run a clean cycle if scale buildup is suspected
This addresses 90% of “no water” issues without requiring professional service.
Overflow Prevention for Mess-Free Brewing
Coffee grounds overflowing indicates:
– Overfilled filter: Reduce grounds to recommended levels
– Incorrect grind: Use medium grind only
– Pod seating: Ensure K-Cups sit flat in adapter
For repeated overflow issues, check the exit needle for clogs—use a paperclip to gently clear any obstructions. This simple fix prevents the messy situation where hot grounds “explode” from the chamber.
Maintenance and Cleaning Schedule for Long Machine Life

Regular maintenance extends your machine’s life and ensures consistent flavor quality. The PB051’s automated cleaning cycle simplifies deep cleaning, but daily care prevents most problems before they start.
Daily Care Routine for Peak Performance
After each use:
– Empty and rinse the drip tray
– Rinse the frother wand immediately
– Leave the reservoir lid open to air-dry
– Wipe the exterior with a damp cloth
This five-minute routine prevents the buildup that leads to clogs, odors, and inconsistent brewing.
Deep Cleaning Process When “Clean” Light Illuminates
When the “Clean” light illuminates (approximately every 90 brews), initiate the 75-minute automated cycle:
1. Fill reservoir with 16 oz white vinegar plus water to MAX
2. Place large vessel (56+ oz) on base
3. Press and hold “Clean” for 3 seconds until light flashes
4. Allow cycle completion without interruption
5. Rinse reservoir and run 24 oz water-only cycle to flush
The reservoir, permanent filter, and drip tray are dishwasher-safe (top rack) for convenient weekly cleaning, saving you time on maintenance.
Performance Optimization Tips from Experienced Users
Maximize your PB051’s capabilities with these pro tips gathered from extensive user testing and verified reviews that transform good coffee into exceptional coffee.
Flavor Enhancement Techniques for Café-Quality Results
- Pre-warm your mug with hot water for hotter final temperature
- Use filtered water to prevent mineral buildup and improve taste
- Experiment with coffee-to-water ratios using the smart scoop markings
- Try Rich mode for stronger flavor without bitterness
These small adjustments make a dramatic difference in your final cup, especially when comparing to Keurig models that often produce “vegetal” tasting coffee due to inferior temperature control.
Space-Saving Strategies for Small Kitchens
The 5.5-inch width fits narrow counters, but placement matters:
– Position near outlets—the power cord is shorter than Keurig models
– Ensure 6 inches clearance above for easy reservoir removal
– Utilize the side storage compartment to keep adapters organized
This compact design makes it perfect for small NYC kitchens or any space where counter real estate is precious.
Your Ninja PB051 represents the perfect marriage of convenience and quality—whether you’re rushing out the door with a quick pod brew or crafting weekend lattes with freshly ground beans. Master these techniques, maintain the simple cleaning schedule, and you’ll enjoy café-quality coffee from a machine that takes up less space than a sheet of paper. The investment in understanding how to use Ninja pods and grounds coffee maker properly pays dividends in every perfect cup you create, eliminating the need for multiple appliances while delivering consistently bold, flavorful coffee that wakes you up properly.


