
Picture this: It’s 3 PM, you’re craving something fizzy, but your fridge only holds flat water and yesterday’s coffee. The soda aisle feels like a sugar trap, and those trendy sparkling waters? They cost a fortune and create a mountain of cans. Enter the Ninja Thirsti—a countertop wizard that transforms plain water into customized, zero-sugar beverages in seconds. Whether you’re hosting friends, managing health goals, or simply want variety without waste, understanding how to use Ninja Thirsti properly unlocks its full potential. This guide shows you exactly how to master every feature while avoiding common pitfalls that leave beginners with flat drinks and frustration.
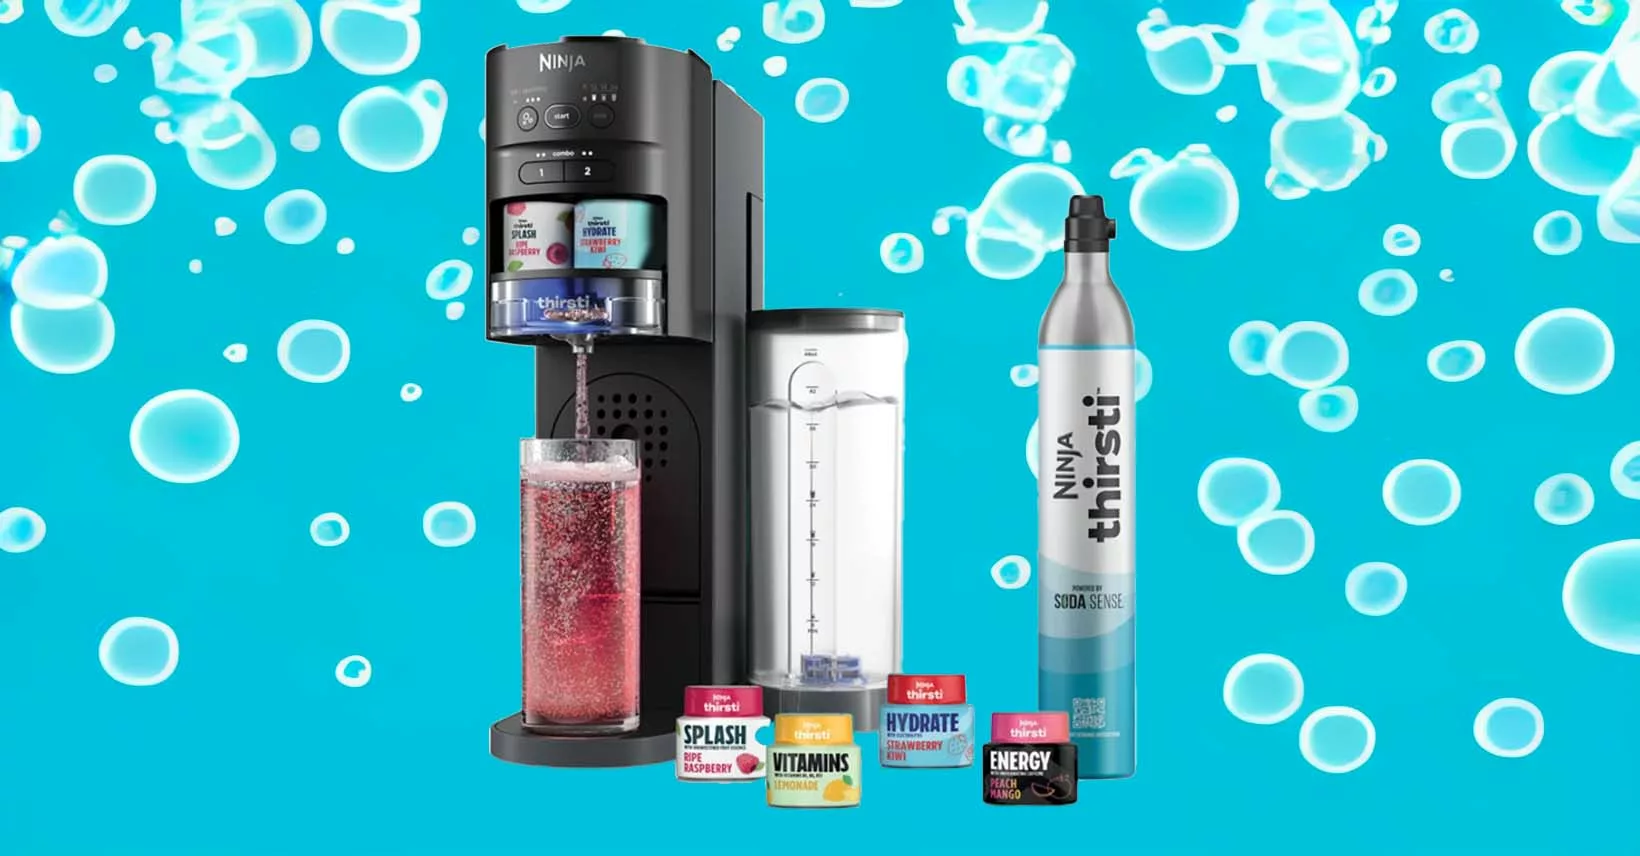
With over 25 flavor options and four carbonation levels, your Ninja Thirsti delivers restaurant-quality beverages right from your kitchen counter. The system eliminates waste from single-use bottles while giving you complete control over sweetness and fizz—perfect for those transitioning from sugary sodas to healthier alternatives. In just minutes of setup, you’ll be creating everything from subtle cucumber mint waters to bold zero-sugar colas that rival your favorite store-bought brands.
Position Your Ninja Thirsti for Optimal Performance
Secure Proper Countertop Placement
Finding the right home for your Ninja Thirsti ensures trouble-free operation. Place the unit on a stable, level surface near your water source but away from heat-generating appliances. The compact design fits most countertops, but maintain 6 inches of clearance above for comfortable pod insertion and reservoir access. Avoid positioning near your dishwasher or stove—steam and temperature fluctuations interfere with carbonation consistency. For households with limited counter space, consider installing a small shelf above your coffee maker; the Ninja Thirsti’s sleek profile makes it an attractive display piece when properly positioned.
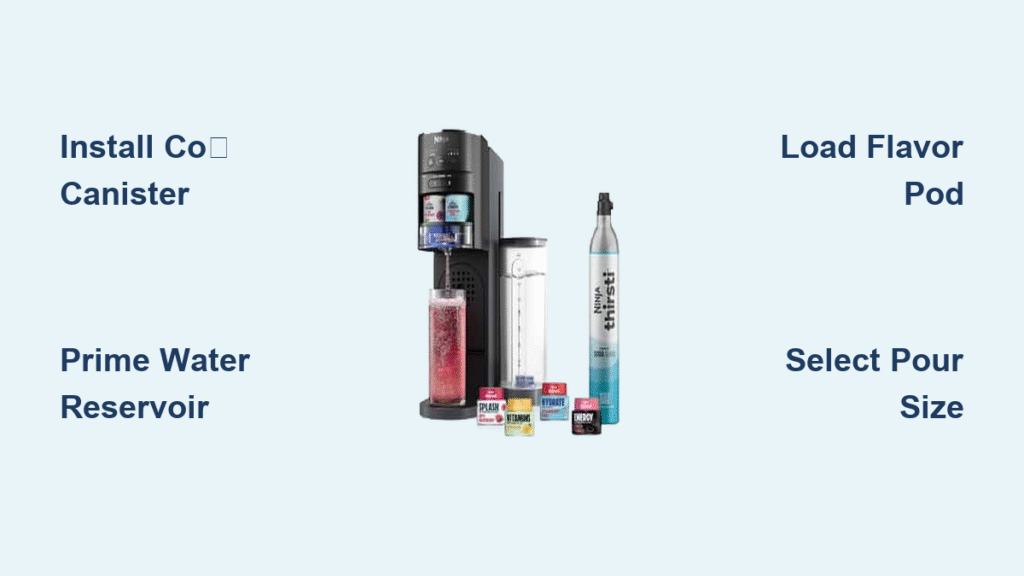
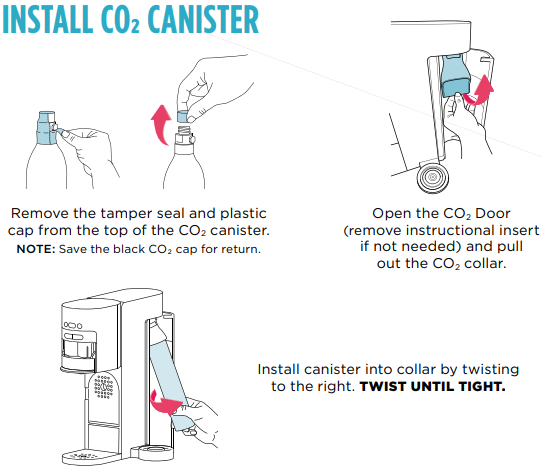
Install CO₂ Canister Without Common Mistakes
Many beginners struggle with CO₂ installation, causing weak carbonation or leaks. Open the back compartment by lifting the cover and insert the CO₂ canister neck-first. Twist clockwise until you hear a distinct click—this confirms proper seating. The WC1001B bundle includes your first canister, but replacement canisters require separate purchase through the Soda Sense CO₂ Refill Club. Before securing, check that the canister seal is intact; damaged seals cause immediate CO₂ loss. If you don’t hear the click, gently wiggle the canister while turning—it should seat smoothly without excessive force. This simple step prevents the most frequent issue reported by new users: unexpectedly flat beverages.
Prime Water Reservoir for Maximum Carbonation
Fill the reservoir with cold, filtered water to the max line indicator—never exceeding this point. Cold water (below 60°F) carbonates significantly better than room temperature water, delivering crisper bubbles and more consistent results. If your tap water contains high mineral content, use filtered water to prevent buildup that affects taste and machine performance. Replace the reservoir by aligning the base grooves precisely and pressing down until it locks with an audible click. Test the seal by gently tugging upward—properly installed, it shouldn’t budge. For best results, refrigerate your water reservoir overnight when preparing for large gatherings to ensure maximum carbonation efficiency.
Create Perfect Beverages in Three Simple Steps
Load Flavor Pods for Leak-Free Operation
Lift the front flavor compartment lid and insert one flavor pod label-side up, pushing until it clicks into place. The Ninja Thirsti system accepts all 25+ proprietary pods, from zero-sugar cola to refreshing cucumber mint. Crucially, remove the foil seal completely before insertion—partial removal causes leaks and inconsistent flavor distribution. If you encounter resistance when inserting pods, check for debris in the puncture mechanism; a quick wipe with a damp cloth often resolves the issue. For stronger flavor concentration, leave the pod in place for multiple pours before replacing—each pod flavors approximately 12 liters of water depending on your selected pour size.
Select Ideal Pour Size for Any Occasion
Press the size button to cycle through 6, 12, 18, or 24 oz options displayed on the LED panel. For solo enjoyment, the 12 oz setting balances flavor intensity and carbonation perfectly in standard drinking glasses. When entertaining guests, the 24 oz option efficiently fills multiple tumblers without repeated operations. The 6 oz setting shines for taste testing new flavors or creating concentrated bases for mocktails. Seasoned users save time by memorizing their household’s preferred settings—most families quickly identify 1-2 go-to sizes that cover 90% of their usage. Always position your glass directly under the spout before starting the pour to prevent spills during carbonation.
Customize Carbonation Level to Taste Preference
Tap the fizz button to select your desired sparkle level, cycling through four distinct options. “No bubbles” delivers still water with subtle flavor infusion—ideal for morning hydration when excessive fizz feels too stimulating. “Light fizz” provides gentle effervescence similar to wine coolers, perfect for pairing with meals. “Medium fizz” replicates traditional soda pop bubbles for those transitioning from sugary colas. “Heavy fizz” creates champagne-level sparkle that satisfies serious sparkling water enthusiasts. Pro users often start with medium fizz and adjust downward over time as their palate adapts to less carbonation—this gradual approach helps break soda addiction while maintaining satisfaction.
Troubleshoot Real-World Problems Immediately
Fix Weak Carbonation in Under Two Minutes
When your drinks taste disappointingly flat despite high settings, check three critical factors. First, verify your CO₂ canister isn’t empty by performing the “hiss test”—briefly press the carbonation button without water to hear the characteristic gas release sound. Second, confirm your water temperature is below 60°F; warm water simply won’t carbonate properly regardless of settings. Third, inspect the CO₂ tube behind the reservoir for kinks or disconnections—this often occurs during cleaning and requires only gentle repositioning. These quick checks resolve 95% of carbonation issues without professional assistance.
Solve Flavor Pod Dispensing Failures
When pods fail to dispense correctly, examine three common culprits. Check the pod’s expiration date—old pods develop thicker membranes that resist puncturing. Clean the flavor compartment monthly by running warm water through the mechanism to dissolve flavor residue that causes clogs. Ensure the compartment lid closes completely; a partially open lid prevents proper pod puncture. If problems persist, try a different flavor pod—some formulations have slightly different membrane thicknesses that may work better with your specific unit. Most users find that rotating between 2-3 favorite flavors prevents the buildup that causes inconsistent dispensing.
Stop Leaking During Dispensing Immediately
If water leaks from the base during operation, stop the process and address these critical points. Remove and reseat the reservoir—misalignment is the primary cause of overflow issues. Examine the reservoir for hairline cracks, especially around the base where impacts often occur during cleaning. Verify the flavor pod punctures correctly by checking for a clean, round hole; irregular punctures cause uneven flow that leads to leaks. For persistent issues, run a diagnostic cycle with no flavor pod to isolate whether the problem originates from the water system or flavor mechanism.
Extend Your System’s Lifespan with Smart Maintenance
Implement Daily Cleaning Habits That Take Seconds
Empty and rinse the reservoir daily with cool water to prevent mineral buildup. Wipe the flavor compartment exterior with a damp microfiber cloth after each use to avoid sticky residue accumulation. Clean the spout weekly by running a vinegar solution through a short cycle, then rinse thoroughly with plain water. Never use abrasive cleaners on the exterior—mild soap and water maintain the finish without damaging the surface. These simple habits prevent 80% of maintenance issues reported by long-term users.
Schedule Monthly Deep Cleans for Peak Performance
Once monthly, run a 12 oz cycle with plain water and 1 tablespoon white vinegar to clear mineral deposits from internal tubing. Allow the solution to sit in the system for 10 minutes before dispensing completely. Follow with two full reservoir cycles of plain water to eliminate any vinegar taste. This routine maintains optimal carbonation efficiency and prevents flavor contamination between different beverages. Many users set phone reminders for the first Sunday of each month—consistency here extends your system’s functional life by years.
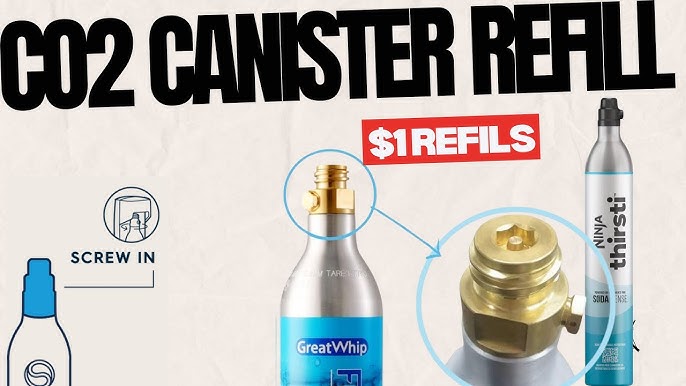
Track CO₂ Usage to Avoid Mid-Party Disasters
Each 60L CO₂ canister produces approximately 60 liters of sparkling water, but actual usage varies based on carbonation preferences. Track your consumption by noting the installation date on your calendar—most households replace canisters every 4-6 weeks. Join the Soda Sense refill club through your online account for automatic deliveries before you run out. When your carbonation suddenly weakens mid-cycle, it’s time for a replacement; don’t wait until the canister is completely empty, as partial canisters sometimes deliver inconsistent results. Smart users keep a spare canister stored upright in a cool, dry place for emergency situations.
Your Ninja Thirsti transforms from simple appliance to lifestyle upgrade when you master these techniques. Start with basic operation, then experiment boldly—this system rewards creativity while supporting your health, budget, and environmental goals. The perfect fizz awaits at the touch of a button, and with these proven strategies, you’ll enjoy flawless beverages every time. Whether you’re replacing daily soda habits or creating signature mocktails for guests, knowing how to use Ninja Thirsti properly delivers endless refreshment possibilities without the waste, cost, or sugar of traditional beverages.


