
Your Ninja Air Fryer rack isn’t just another accessory—it’s the secret weapon that transforms your appliance from a single-layer cooker into a versatile culinary powerhouse. When you master how to use rack in Ninja Air Fryer properly, you’ll double your cooking capacity while achieving restaurant-quality results at home. Most home cooks underutilize their racks, settling for single-layer cooking that wastes valuable space and time.
Imagine preparing crispy chicken wings on the lower rack while roasted vegetables caramelize perfectly above—all in the same cooking cycle. This isn’t just convenient; it’s a game-changer for busy weeknights and entertaining. By understanding proper rack placement, food positioning, and timing adjustments, you’ll unlock your Ninja Air Fryer’s full potential and consistently achieve perfectly cooked meals every time.
Ninja Air Fryer Rack Types and Compatibility

Single vs Dual-Layer Systems
Your Ninja Air Fryer comes with specific rack configurations designed for optimal performance. The standard single-layer rack provides an 8.5-inch cooking surface with 0.75-inch clearance for essential airflow—perfect for everyday cooking like chicken breasts or roasted vegetables. This basic setup works with most Ninja models but represents only half your appliance’s potential.
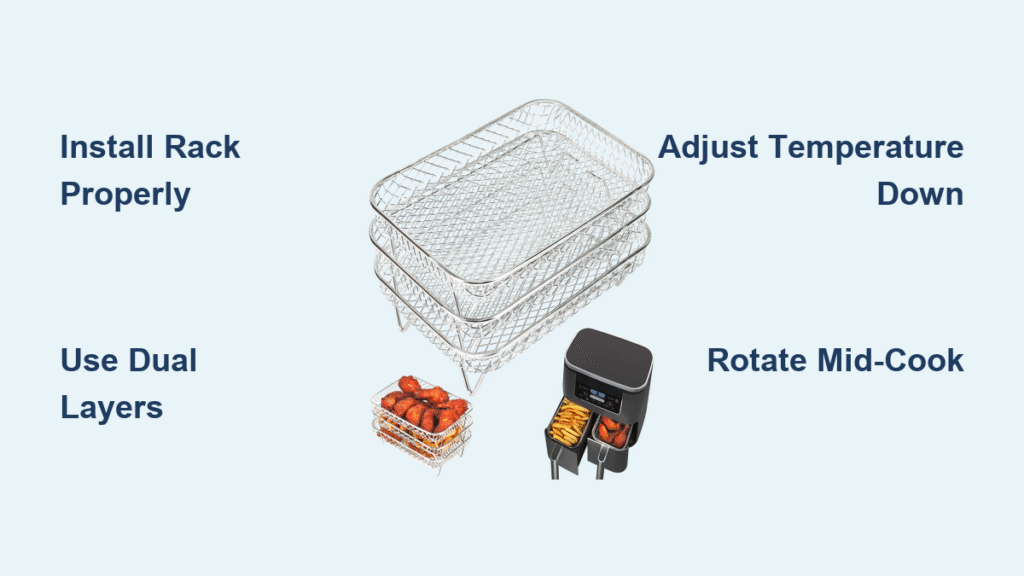
The dual-layer rack system dramatically increases your cooking capacity by adding a second tier with 2.5 inches of spacing between levels. Each tier safely supports up to 3 pounds of food, allowing you to cook complete meals simultaneously without significantly increasing cooking time. This configuration shines when preparing dinner for a family—crispy protein on the lower rack while vegetables roast above.
Model-Specific Requirements
Before using any rack configuration, verify your model’s compatibility to prevent performance issues:
- AF100 series: Single-layer rack only—attempting dual-layer setups may cause overheating
- AF160 series: Supports both single and dual-layer configurations with proper installation
- OL500 Foodi series: Accommodates all rack types including the specialized 5-tier dehydrator system
- DualZone models: Use only model-specific racks—standard racks won’t fit properly
Pro tip: Check your model number on the appliance base before purchasing additional rack accessories. Using incompatible racks can lead to uneven cooking and potential safety hazards.
Proper Rack Installation Steps
Single-Layer Setup
Installing your rack correctly prevents wobbling and ensures even cooking results. Start by fully extending the basket to its lowest position. Align the rack’s four feet with the raised ridges inside the basket—think of it like positioning a lid on a pot. The rack should settle flush against the basket bottom with no gaps or tilting.
Test stability by pressing lightly on the rack’s center. A properly installed rack feels solid with zero movement. If you detect wobbling, remove and reposition until perfectly level. This small step makes a significant difference in cooking performance.
Assembling Dual-Layer Systems
The dual-layer system requires careful attention to the twist-lock mechanism. After placing the bottom tier, insert the support posts into each corner slot—twist clockwise until you feel resistance. The upper tier then locks onto these posts with a satisfying click.
Critical safety note: Always verify the upper tier’s security before adding food. A loose upper rack can collapse mid-cooking, creating both safety hazards and ruined meals. Gently press on each corner to ensure it’s firmly locked in place.
Strategic Food Positioning for Optimal Results

Protein Placement Rules
Chicken pieces achieve optimal crispiness skin-side up on the upper rack when using dual-layer systems. Space pieces 0.5 inches apart—crowding creates steam that prevents proper browning. For thicker cuts like chicken breasts, position the larger pieces on the lower rack where heat exposure is more direct.
Fish fillets require careful attention to thickness. Place thicker portions (cod, halibut) on the lower rack, reserving the upper rack for delicate varieties like sole or tilapia. Prevent sticking by using perforated parchment paper on the lower rack, especially for marinated fish.
Steak cuts demand strategic positioning based on thickness. One-inch or thicker steaks belong on the lower rack for intense searing. For thinner cuts, the upper rack prevents overcooking while still achieving that coveted crust.
Vegetable Distribution Strategy
Root vegetables (potatoes, carrots, beets) thrive on the lower rack where longer cooking times and direct heat break down starches effectively. Cut uniform pieces—1-inch cubes work perfectly—to ensure even cooking across the batch.
Delicate vegetables (broccoli, bell peppers, zucchini) prefer the upper rack’s gentler heat. This positioning prevents burning while allowing edges to caramelize beautifully. When cooking mixed vegetables, place quick-cooking varieties (mushrooms, zucchini) on the upper rack, longer-cooking items below.
Leafy greens require special handling. Position kale chips or Brussels sprout halves on the upper rack with maximum spacing. The circulating air crisps edges without burning, creating chip-like texture impossible to achieve in traditional ovens.
Temperature and Time Adjustments for Multi-Rack Cooking
Multi-Rack Cooking Modifications
Using rack systems requires recalibrating your approach to temperature and timing. Reduce standard recipe temperatures by 25°F to compensate for closer proximity to heating elements. This prevents burning while ensuring thorough cooking.
Extend cooking time by 20-30% when utilizing both rack levels simultaneously. However, this isn’t a simple multiplication—monitor doneness closely, especially during the final third of cooking time.
Rotation schedule: For dual-layer cooking, swap rack positions exactly halfway through cooking time. This simple step eliminates hot spots and ensures uniform results across both levels.
Specific Food Timing Guide
- Frozen French fries: Add 3-5 minutes per additional rack layer, checking every 2 minutes after the initial cook time
- Chicken wings: Increase total time by 5-7 minutes, flipping individual pieces during rotation
- Vegetables: Maintain original time after the 25°F temperature reduction, checking for doneness 5 minutes early
Quick reference chart:
– Single rack: Use standard recipe
– Dual rack (same food): -25°F, +20% time
– Dual rack (mixed foods): -25°F, +25% time, rotate halfway
Cleaning and Maintenance Protocol
Daily Cleaning Routine
Never clean hot racks—allow 30 minutes minimum cooling time. Remove food debris using a soft brush or paper towel while racks are still slightly warm. This prevents sticking and reduces scrubbing time significantly.
Hand washing method: Use non-abrasive sponge and mild detergent. The stainless steel construction resists most stains, but harsh scrubbers create micro-scratches that harbor bacteria and affect future food release. Rinse thoroughly and dry immediately to prevent water spots.
Monthly Maintenance Checks
Inspect racks monthly for bent wires or loose connections. Even slight warping affects stability and cooking performance. Check connection points on dual-layer systems—the twist-lock mechanism requires occasional tightening to maintain security.
Storage best practices: Store racks in the original packaging if available. Avoid stacking heavy items on top, which can bend the wire structure. Keep in a dry location to prevent rust formation that could compromise food safety.
Troubleshooting Common Issues
Stability Problems
Wobbling during cooking usually indicates incorrect basket insertion or bent rack feet. Verify the basket sits fully in its track, then check each rack foot for damage. Even minor bends create instability that worsens with food weight.
Difficulty removing hot racks responds to patience and proper tools. Allow complete cooling, then use silicone-tipped tongs for grip. Apply a gentle rocking motion while lifting—never force a stuck rack, which can damage both rack and basket.
Uneven Cooking Solutions
Uneven browning often results from overcrowding. Reduce quantity per rack level and maintain 0.25-inch minimum gaps between items. Verify temperature accuracy using an oven thermometer—many users discover their air fryer runs 25-50°F hot or cold.
Sticking problems improve dramatically with proper preparation. Lightly oil the rack before cooking, or use perforated parchment paper for delicate items. Avoid sugar-heavy marinades directly on the rack surface—these create stubborn, baked-on residue that’s difficult to clean.
Pro Tips for Daily Use
Reheating mastery: Position pizza slices on the upper rack for 3-4 minutes at 350°F—this recreates fresh-oven crispiness better than microwaving. For fried foods, use the lower rack at 375°F for 2-3 minutes to restore crunch without drying.
Defrosting shortcut: Set the rack in the lowest position and use 200°F for 5-8 minutes. Check and rotate every 2 minutes to prevent partial cooking—this method defrosts chicken breasts evenly without creating rubbery texture.
Vertical cooking hack: Roll bacon strips into tight spirals and stand them upright between rack wires. The vertical positioning allows fat to drip away while creating perfectly crisp bacon without the mess of traditional pan cooking.
Mastering how to use rack in Ninja Air Fryer transforms everyday cooking into efficient, restaurant-quality meal preparation. Start with single-layer basics, then gradually explore dual-layer techniques as confidence builds. Remember: proper rack usage isn’t just about capacity—it’s about achieving consistent, delicious results every time you cook.
The key lies in understanding your specific model’s capabilities, respecting the airflow requirements, and making small adjustments to temperature and timing. With these fundamentals mastered, your Ninja Air Fryer becomes the most versatile appliance in your kitchen—capable of handling everything from weeknight dinners to special occasion meals with professional results.


