
Imagine typing urgently when your spacebar suddenly sticks, or your “E” key registers double presses. That gritty crunch under your fingers isn’t just annoying—it’s crumbs, dust, and skin flakes jamming your keyboard’s delicate switches. Left unchecked, this debris causes permanent damage to mechanical or membrane keyboards. While compressed air seems like the obvious fix, using an air duster on keyboard incorrectly can freeze circuits or blast keycaps across the room. This guide reveals the exact method technicians use to deep-clean keyboards safely, including critical mistakes 90% of users make with canned air. You’ll learn how to dislodge even stubborn gunk from between keys without risking $100 repairs.
Critical Air Duster Safety Rules You Must Follow

Skipping these steps risks destroying your keyboard permanently. These aren’t suggestions—they’re non-negotiable protocols based on compressed air physics and electronics vulnerability.
Why Inverting the Can Causes Instant Keyboard Failure
NEVER tilt or shake the air duster can while spraying. When upside down, liquid propellant (not gas) shoots out at -60°F (-51°C). This super-cold fluid instantly freezes keyboard circuits, melting solder points or cracking PCB traces. You’ll hear a hissing “wet” sound instead of dry air—a dead giveaway you’re damaging your device. Keep the can perfectly upright at all times, even when reaching under the spacebar.
Essential Pre-Cleaning Safety Checklist
- Work outdoors or near an open window: Propellant gases and dislodged dust are flammable and irritate lungs in enclosed spaces.
- Remove all ignition sources: Keep 10+ feet from stoves, candles, or electronics with exposed wires—air duster contents ignite easily.
- Wear safety glasses: High-pressure air blasts debris toward your eyes at 200+ mph.
- Unplug AND remove batteries first: For wireless keyboards, take out batteries to prevent short circuits from dislodged metal particles.
- Cover nearby electronics: Dust blown from your keyboard will settle on monitors or laptops—drape them with microfiber cloths.
Step-by-Step Keyboard Cleaning Procedure with Air Duster
This sequence maximizes debris removal while protecting fragile switches. Follow it exactly—deviations cause missed grime or damage.
Step 1: Power Down and Initial Debris Removal (2 Minutes)
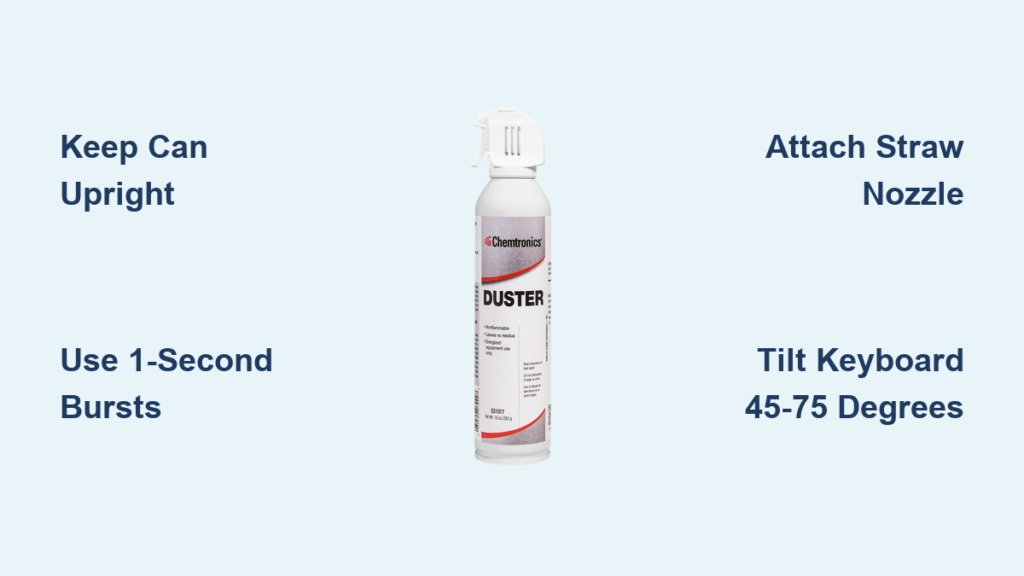
Unplug wired keyboards or switch off wireless models. Remove batteries immediately—residual power can cause sparks when dust contacts circuits. Hold the keyboard upside down over a trash can and firmly tap the back 5-6 times. This dislodges loose crumbs before spraying, preventing compressed air from forcing them deeper into switch housings. For mechanical keyboards, skip keycap removal unless you have a puller—but never attempt this on laptops or low-profile models where keys snap off permanently.
Step 2: Optimal Keyboard Positioning for Complete Debris Extraction
Tilt your keyboard 45-75 degrees with keys facing downward—never flat. Gravity pulls dislodged particles out instead of recirculating them. Angle the spacebar toward the trash can since it traps the most debris. For split or ergonomic keyboards, clean one half at a time while holding the other section steady. If cleaning a laptop, close the screen and rest the base on a towel at a 60-degree angle against a wall.
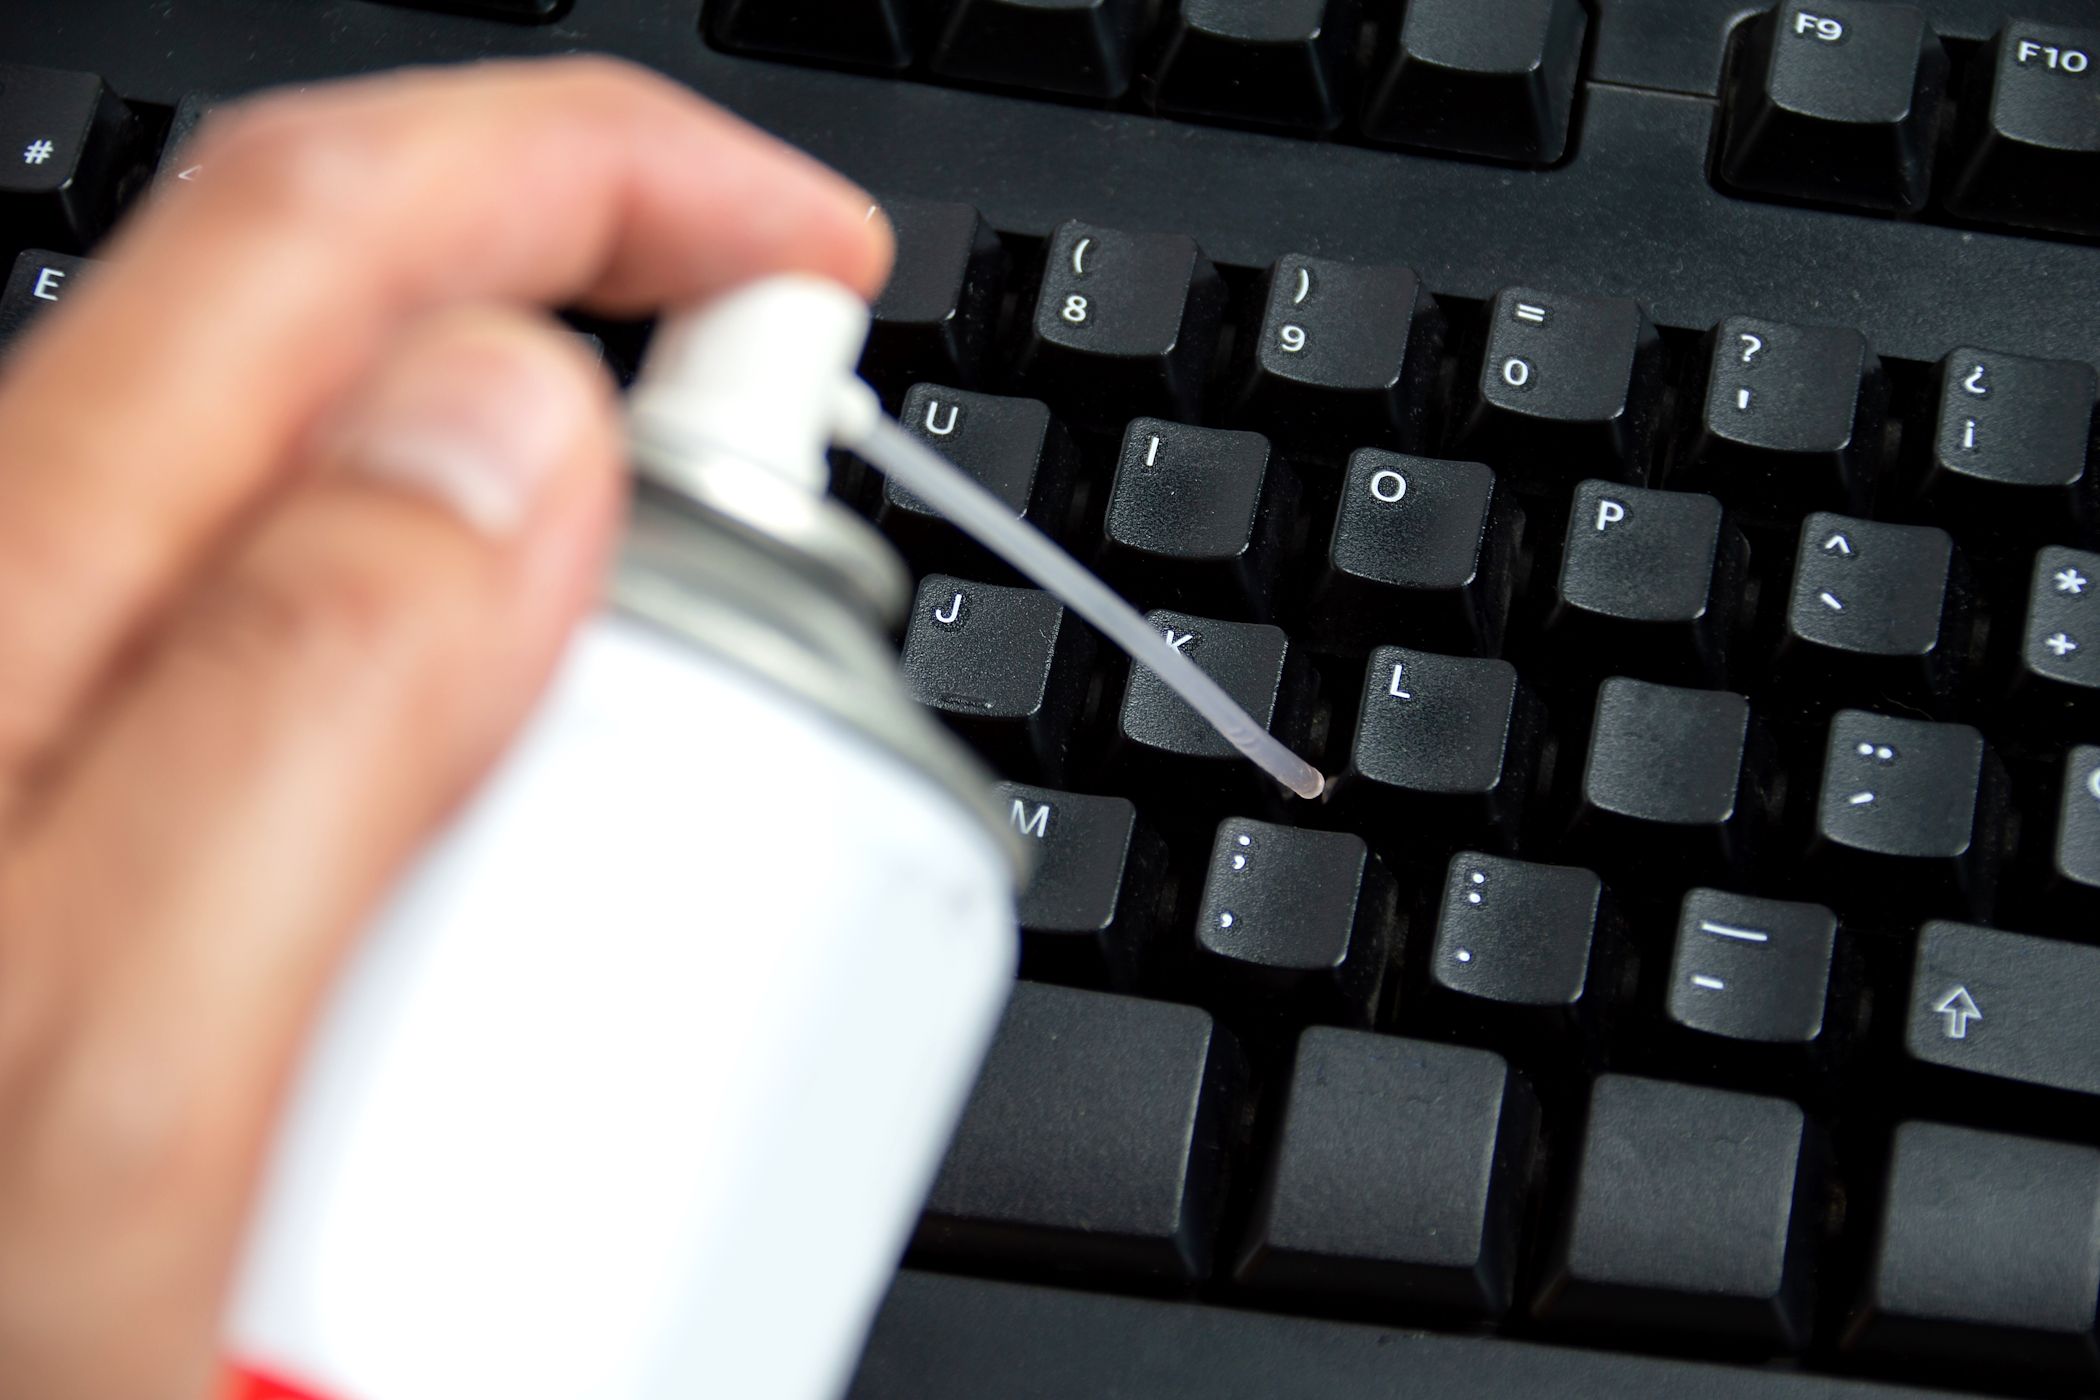
Step 3: Precision Air Duster Technique for Stubborn Grime
Insert the included red straw nozzle and hold the can 2-3 inches from keys. Spray in 1-second bursts—any longer freezes the can’s valve, reducing pressure. Start at the top (F1-F12 keys) and work downward in 2-inch sections. Angle the straw 45 degrees across key rows (not straight down) to blow debris sideways and out. For the spacebar, arrow keys, or WASD cluster, tilt the keyboard slightly left/right between bursts to exploit gravity. Use extra-short 0.5-second bursts on laptop scissor switches—they detach easily under pressure.
Step 4: Final Debris Clearance and Sanitizing
After the main pass, flip the keyboard completely upside down. Spray upward through the key wells while gently shaking the unit—this flushes trapped particles. Wait 5 minutes for any condensation to evaporate. Then, wipe keycaps with a microfiber cloth dampened (not soaked) in 90%+ isopropyl alcohol. Never spray liquid directly onto the keyboard—alcohol can seep into switches and cause corrosion. For sticky residue, dip a cotton swab in alcohol and clean around the key stem only.
Top 5 Air Duster Mistakes That Ruin Keyboards
These errors cause more damage than dirt itself. Avoid them like electrical shorts.
Inverted Can Spraying: The #1 Keyboard Killer
Over 70% of “failed” keyboards after air duster use result from this. Liquid propellant pools in switch housings, freezing metal contacts. The keyboard may work briefly when warm but fails permanently within days as moisture corrodes circuits. Pro Tip: Mark an upright arrow on your can with tape as a visual reminder.
Continuous Spraying Wastes Product and Damages Components
Holding the trigger for >3 seconds chills the can below -40°F, causing condensation inside the keyboard. This moisture attracts more dust and risks short circuits. Always use 1-second bursts with 2-second pauses between.
Skipping the Straw Nozzle Reduces Effectiveness by 80%
Without the straw, air pressure dissipates before reaching between keys. You’ll blow surface dust around but miss embedded grime. Always attach the straw—it concentrates force exactly where needed.
Ignoring Keyboard Type Causes Physical Damage
Laptop keys detach under standard air duster pressure. For slim keyboards:
– Double the distance (4-6 inches from keys)
– Use half-second bursts
– Spray parallel to the surface (not downward)
– Skip the spacebar entirely—clean it with a soft brush
Blowing Dust Onto Your Workspace Spreads Contaminants
You’re not removing debris—you’re relocating it. Always spray over a trash can or use an electric duster with a vacuum function. Wipe your desk afterward with alcohol wipes to prevent redepositing dust.
Best Air Duster Alternatives for Different Keyboards

Choose the right tool based on your keyboard type and cleaning frequency.
| Tool Type | Best For | Critical Limitations |
|---|---|---|
| Canned Air (Disposable) | Occasional cleaning, travel | Propellant risk if tilted; 30-50 uses per can |
| Electric Air Duster | Mechanical keyboards, frequent use | $35-$80 cost; requires outlet |
| Manual Blower (Bulb) | Laptops, vintage keyboards | Weak pressure; ineffective for crumbs |
For mechanical keyboard enthusiasts: Electric dusters like the Metro DataVac eliminate propellant risks and static buildup. Their vacuum mode captures dislodged debris instead of scattering it. For coffee-spill emergencies: Use a manual blower first to move liquid away from switches, then dry for 48 hours before attempting air duster cleaning.
Troubleshooting Post-Cleaning Keyboard Failures
If keys malfunction after cleaning, these fixes often resolve the issue without professional repair.
Unresponsive Keys After Air Duster Use
This usually means debris shifted into switch housings. Do not respray. Instead:
1. Unplug the keyboard for 10 minutes to reset circuits
2. Press the sticky key 20+ times rapidly to dislodge particles
3. If unresponsive, remove the keycap (if possible) and clean the switch stem with an alcohol-dampened cotton swab
Keys That Double-Register
Compressed air often jams membrane layers together. Flip the keyboard upside down and gently flex the base to separate the layers. If persistent, the membrane may need replacement—a $20 part requiring full disassembly.
Liquid Spill Protocol (Do NOT Use Air Duster!)
If you spilled liquid before cleaning: Immediately disconnect power, invert the keyboard, and let it drain for 24 hours. Never spray air duster on a wet keyboard—it forces liquid deeper into circuits. After drying, use isopropyl alcohol on a swab for spot cleaning only.
Final Note: A properly executed air duster session takes 8 minutes and extends keyboard life by 2+ years. For daily maintenance, blast keys upright with 3-second bursts weekly. For deep cleans, follow this guide quarterly—especially if you eat near your desk. Always store air duster cans upright below 75°F to prevent pressure loss. If your keyboard still malfunctions after troubleshooting, internal switch damage likely requires replacement, but you’ve now mastered the safest method to prevent future disasters. Keep this guide bookmarked for your next cleaning session—it’s the difference between a responsive keyboard and a $120 replacement.


