
Nothing ruins a tent camping trip faster than spoiled food. When you’re miles from the nearest store, knowing how to keep food cold while tent camping becomes critical for safety and enjoyment. Without proper cooling, your perishables can enter the danger zone (40°F to 140°F) where bacteria multiply rapidly. But with the right cooler, ice strategy, and packing techniques, you can keep food safely chilled for 5-7 days—even in summer heat.
This guide reveals battle-tested methods used by experienced campers to maintain a reliable cold chain. You’ll learn exactly how to choose gear, pack like a pro, and troubleshoot common cooling failures. Let’s transform your cooler from an ice bucket into a mobile refrigerator.
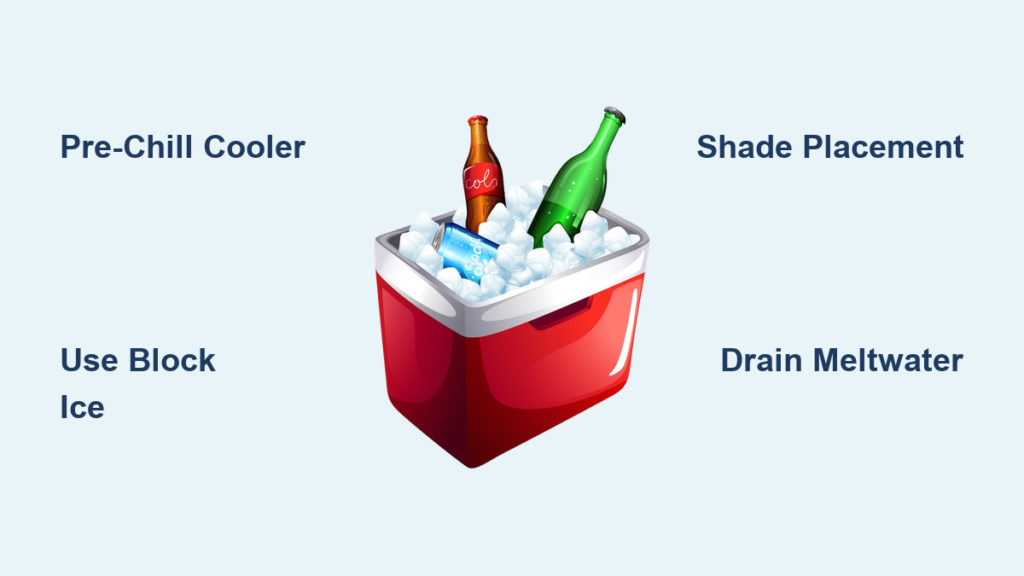
How to Pick a Cooler That Keeps Ice for 5+ Days (and Pre-Chill It Right)

Your cooler’s performance makes or breaks your ability to keep food cold while tent camping. For trips exceeding 48 hours, skip cheap foam models—invest in a high-performance roto-molded cooler with 2+ inches of insulation and a pressure-injected lid seal. These retain ice 3-4 times longer than basic coolers, often maintaining cold temperatures for 5-7 days in 90°F heat. Check for rubberized gaskets and non-slip feet that create an airtight seal when closed.
Pre-chilling is non-negotiable—never pack warm items into a warm cooler. Start 6 hours before departure: Fill your empty cooler with 5-10 lbs of ice, close the lid, and let it sit in a shaded spot. Just before packing, dump the meltwater and wipe the interior dry. This critical step eliminates the “heat load” that would otherwise melt your primary ice supply. Simultaneously, refrigerate all food for 24 hours pre-trip, and freeze items like meats, bread, and water bottles—they’ll double as cooling agents.
The Pre-Packing Checklist That Prevents Early Melting
- Cooler test: Place ice cubes inside sealed for 1 hour—any significant melt indicates poor insulation
- Seal inspection: Run your finger along gaskets for cracks or debris compromising the seal
- Freeze your water: Fill gallon jugs ¾ full (to prevent bursting) and freeze vertically for custom ice blocks
Packing Your Cooler Like a Pro: The Reverse Meal Order Method
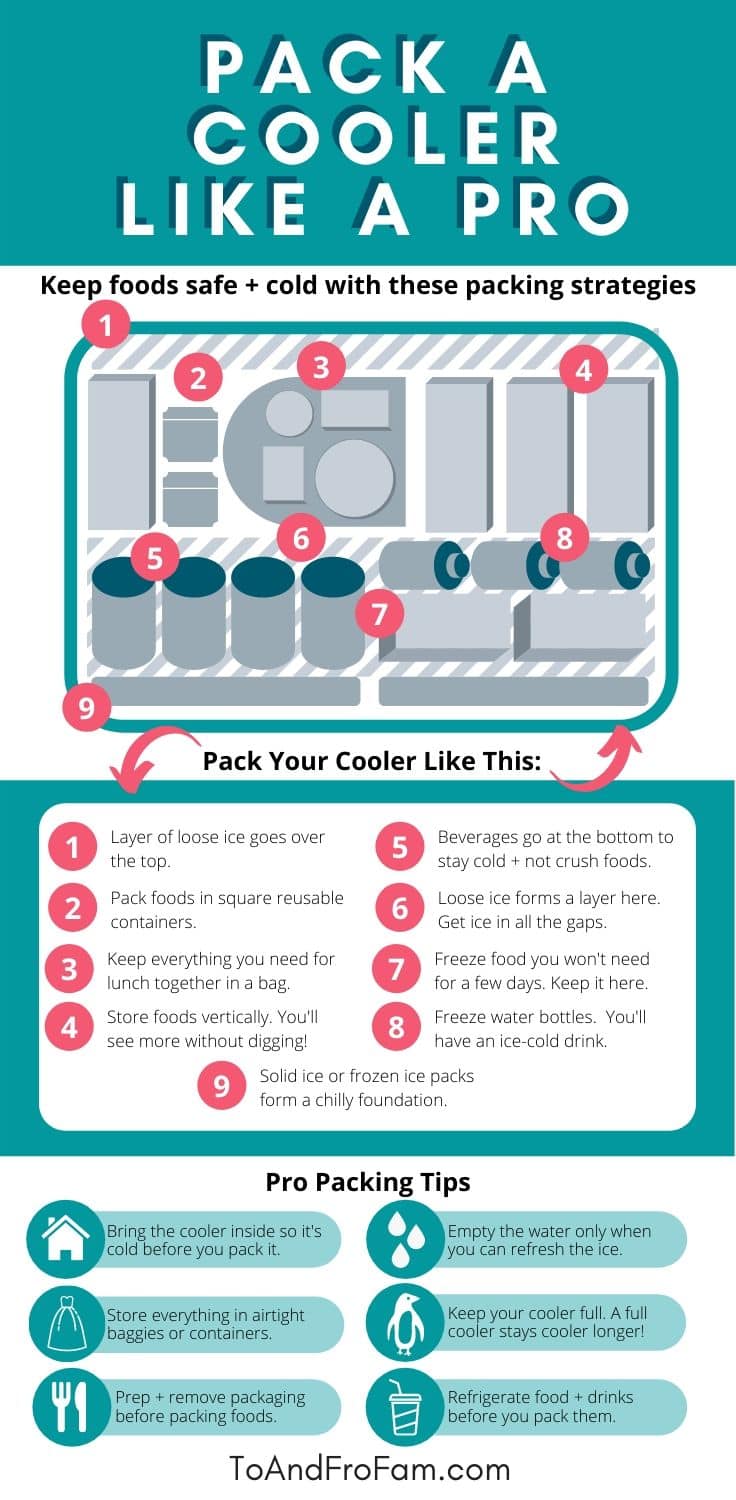
How you load your cooler determines whether ice lasts 2 days or 7. Begin with a 2-3 inch foundation of cubed ice at the bottom—this creates a cold floor that protects food from ground heat. Next, place your largest frozen items (like gallon water jugs or block ice) vertically in the center—they’re your thermal anchors.
The reverse meal order technique is essential for minimizing lid openings. Pack Day 4 meals first (at the bottom), followed by Day 3, then Day 2. Your first-night dinner goes on top. This “first in, last out” system means you never dig through the entire cooler. For critical items like raw meat, use the “cooler-in-cooler” trick: place them in a sealed plastic bin surrounded by extra ice inside your main cooler. Finally, fill every air gap with loose ice—empty space lets warm air circulate, accelerating melt.
Why Your Ice Melts Faster Than It Should
- Air pockets: Every unfilled inch creates convection currents that distribute heat
- Warm food placement: Never add room-temperature items—they drain cooling capacity instantly
- Improper layering: Perishables not touching ice thaw first—bury them deep in frozen zones
Block Ice vs. Cubes: The Ice Strategy That Extends Cooling by 3 Days
Not all ice performs equally when keeping food cold while tent camping. Block ice (or frozen gallon jugs) melts 2-3 times slower than cubes due to lower surface-area exposure. A single 10 lb block can outperform 15 lbs of cubed ice. Use blocks as your core cooling source, surrounded by cubed ice that fills crevices and chills items faster initially.
Drain meltwater strategically: For trips under 48 hours, keep the slush—it conducts cold efficiently. Beyond that, drain water every morning using your cooler’s plug. Why? 33°F meltwater actually transfers heat into food faster than ice. After draining, add fresh ice to maintain full capacity. Never use dry ice unless you’re experienced—it requires special handling to avoid CO₂ buildup and freezer burns.
Ice Quantity Calculator for Your Trip
| Trip Length | Minimum Ice Weight | Critical Tip |
|---|---|---|
| 1-2 days | 1 lb per food lb | Keep meltwater in cooler |
| 3-5 days | 1.5 lbs per food lb | Drain water daily |
| 6+ days | 2+ lbs per food lb | Use 50% block ice |
Where to Place Your Cooler in Camp (and the 5-Second Rule That Saves Ice)
Your cooler’s location matters as much as its contents. Shade is mandatory—direct sun can raise internal temperatures 20°F within an hour. Position it under dense tree cover, and rotate its position as shadows shift. When shade is unavailable, drape a reflective emergency blanket (shiny side out) over it or wrap in a damp wool blanket for evaporative cooling in dry climates. Elevate the cooler 2 inches off the ground using logs to prevent conductive heat from warm soil.
Adopt the 5-second rule: Plan exactly what you need before opening the lid. Every second open replaces cold, dense air with warm, humid air. Designate one person per meal to access the cooler—no “just checking” visits. For high-traffic items, use a separate drink cooler. This keeps your main food cooler sealed 90% of the time, extending ice life by up to 40%.
The Morning Maintenance Routine
- Drain water (if trip >48 hours)
- Check ice depth—replenish if below 2 inches
- Rotate food—move bottom items to top for next day’s access
- Reposition to follow shifting shade patterns
Freeze These Foods Before Camping to Turn Them Into Extra Ice Packs
Strategic pre-freezing turns your food into active cooling agents. Hard cheeses like cheddar freeze well and thaw slowly, while pre-cooked meals (chili, soups) act as dual-purpose ice blocks. Vacuum-seal portions to prevent freezer burn and maximize space. Even bread and tortillas freeze beautifully—they’ll thaw by lunchtime and won’t get soggy.
Avoid freezing eggs in shells or carbonated drinks—they’ll expand and rupture. Instead, focus on high-water-content items: grapes become instant slushies, and frozen berries keep yogurt cool. For perishables like raw meat, double-bag in ziplocks to contain juices. This pre-freeze approach reduces your ice needs by 30% while ensuring dinner is ready to reheat.
Top 5 Freeze-Forward Foods
- Water bottles (2L containers)—slow-melting ice + drinking water
- Marinated meats—thaw into ready-to-cook meals
- Butter sticks—thaw gradually for cooking
- Fresh herbs in oil—freeze in ice cube trays
- Pre-portioned pancake batter—cook straight from frozen
The Earth Cellar Method: Burying Your Cooler for 10°F Extra Cooling

For trips exceeding 5 days in hot climates, deploy the earth cellar technique. Dig a shallow pit 12-18 inches deep in shaded, cool soil—avoid rocky or sunny spots. Submerge your pre-packed cooler until the lid sits 2-3 inches below ground level. The earth’s natural insulation (typically 50-55°F underground) creates a passive cooling chamber. Cover the buried cooler with a tarp and soil, leaving the drain plug accessible.
This method requires caution: Only use in areas without burrowing animals, and fill the hole completely when departing. In dry climates, wrap the cooler in a damp towel before burial—the evaporating moisture adds 5-10°F of extra cooling. Monitor with a thermometer; ideal internal temps stay between 34-38°F. Never bury coolers in flood-prone areas or national parks where digging is prohibited.
Why Your Ice Melted Overnight (and How to Fix It by Morning)
Rapid ice melt always has a fixable cause. If your cooler warms unexpectedly, first check for compromised seals—dirt or food debris prevents lid closure. Clean gaskets with a vinegar solution and ensure latches click firmly. Next, verify shade coverage; even 15 minutes of direct sun spikes temperatures. Relocate immediately and cover with a reflective blanket.
The hand test diagnoses problems instantly: Place your palm on packed food. If it feels cool but not icy, add block ice immediately. If warm, discard perishables that exceeded 40°F for 2+ hours (or 1 hour above 90°F). To prevent recurrence, double-bag wet items like lettuce, and place a wire rack at the cooler’s base to lift food from meltwater. For persistent issues, switch to a dedicated food-only cooler—using one for drinks guarantees excessive openings.
Never ignore these red flags:
– Cloudy ice = contamination (sanitize cooler with 1:10 bleach solution)
– Warm spots = air gaps (refill with ice cubes immediately)
– Foul odors = spoiled food (remove source and add baking soda)
By mastering these techniques, you’ll spend less time worrying about food safety and more time enjoying campfire stories. Remember: keeping food cold while tent camping hinges on preparation, not luck. Pack your cooler like a pro, guard that ice, and you’ll feast on fresh meals even on day 5. When heading home, drain all water and leave the lid ajar to prevent mildew—your cooler will be ready for the next adventure.


