
Picture this: You’re deep in the backcountry when your store-bought tent’s pole snaps. Instead of cutting your trip short, you pull out a lightweight shelter you built yourself—perfectly tailored to your gear and terrain. Constructing your own tent isn’t just a backup plan; it’s a game-changer for adventurers seeking reliability, customization, and the unmatched pride of sleeping under a roof you created. This guide cuts through the guesswork to show you exactly how to make a camping tent from scratch, whether you’re rigging a $50 tarp shelter this weekend or engineering a stove-heated winter fortress.
Why Your First DIY Tent Should Be a Silnylon A-Frame (Not a Dome)
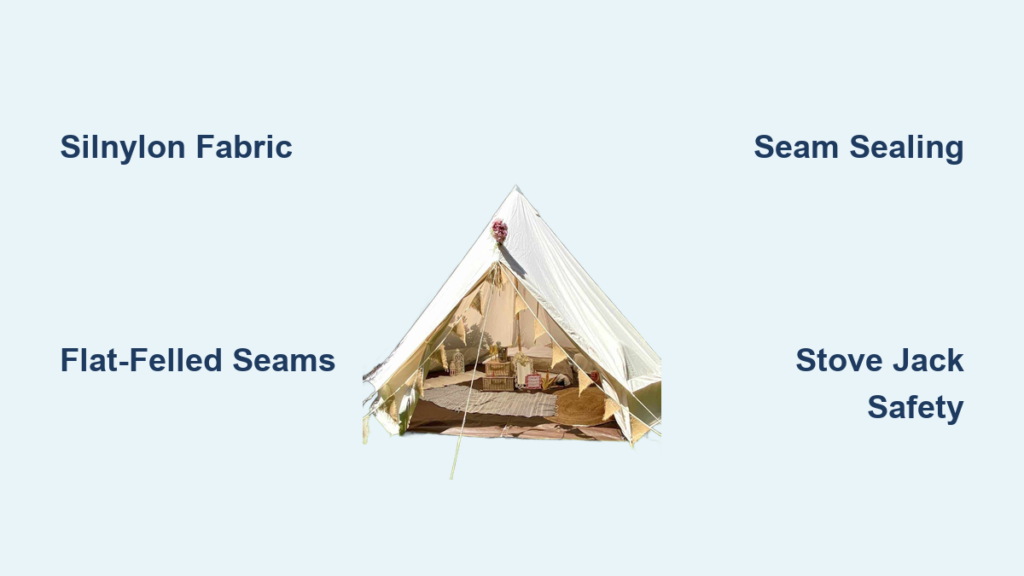
Forget complex dome designs for your maiden build. A single-wall A-frame tarp tent delivers maximum durability with minimal sewing—critical for beginners. Unlike double-wall commercial tents that cost $400+, this design uses just two rectangles of fabric (9’x7′ for two people) and eliminates leak-prone zippers and poles. You’ll spend under $75 on materials but gain a shelter that sheds rain like a $300 ultralight tent. The secret? Silnylon fabric (silicone-coated nylon 6.6). At 1.1 oz/sq yd, it’s lighter than most store-bought options yet withstands 1,200mm hydrostatic head pressure—meaning it repels heavy downpours without sagging when wet. Skip cotton canvas; its 20+ lb weight and week-long drying time make it a rookie trap.
Your Bare-Minimum Material Kit (Under $60)
- Silnylon 1.1 oz: 15 yards ($35 at RipstopByTheRoll.com)
- Trekking poles: Repurpose your existing pair (no extra cost)
- #5 coil zipper: 36″ length for door ($5)
- Dyneema guylines: 50 ft spool ($12)
- Grommet kit: 12-pack with setting tools ($8)
- Gutermann Tera 40 thread: High-tenacity polyester ($6)
Pro Tip: Test fabric breathability by blowing through it. If air passes easily (like silnylon), add mesh panels later. Waterproof coatings like PU block airflow—guaranteeing condensation nightmares.
Cutting and Sewing: Where 90% of DIY Tents Fail (Fix This First)
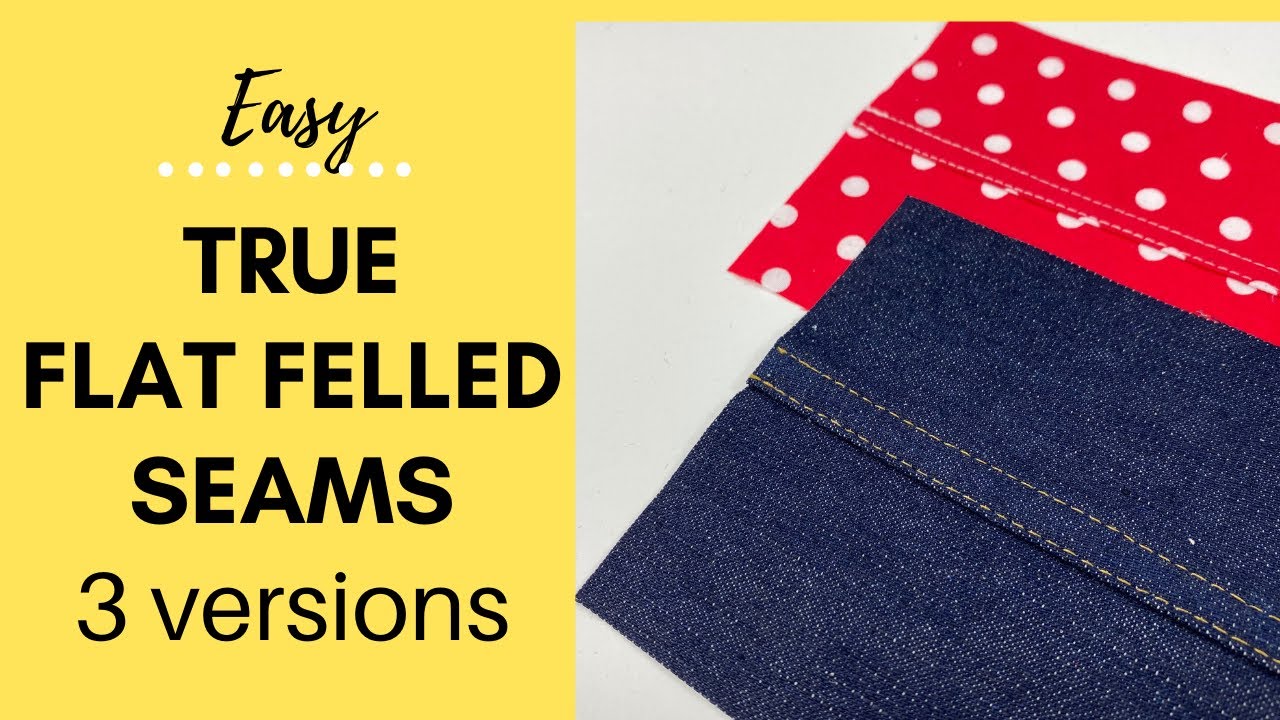
Most homemade tents leak because builders skip flat-felled seams—the single technique that hides raw edges and seals stitch holes. Here’s how to nail it:
- Pin right sides together with ½” seam allowance. Sew with size 100/16 needle.
- Trim one seam allowance to ¼”, fold the wider side over it, and press flat.
- Sew ⅛” from the folded edge to lock everything in place.
Critical mistake to avoid: Using a straight stitch alone. Every needle puncture creates a leak path. Flat-felled seams bury those holes under folded fabric—making liquid seam sealer optional (not mandatory). For corners under tension (like tie-out points), add diamond-shaped reinforcements cut from scrap silnylon. Bar-tack these patches with 10+ stitches per side.
Installing the Door Without Leaks
Skip sewing zippers directly to the tarp edge—a guaranteed leak spot. Instead:
– Cut a 6″ x 8″ rectangle from your fabric.
– Center it over your door opening and sew a box stitch ½” from the edge.
– Cut an “X” inside the box, fold flaps inward, and sew the zipper to the flaps.
This creates a water-shedding tunnel that directs rain away from the zipper teeth.
Waterproofing Secrets Commercial Brands Won’t Share
Your seams are only 50% waterproof after sewing. Here’s how to seal them like a pro:
The 10-Minute Seam Seal Method (No Special Tools)
- Dilute GE Silicone II 50/50 with mineral spirits in a squeeze bottle.
- Lay tent flat, inside facing up. Brush liquid over stitching lines.
- Wait 20 minutes, then wipe excess with a lint-free cloth.
Why silicone? It stays flexible in freezing temps—unlike polyurethane sealants that crack. For a faster fix, use iron-on seam tape (like McNett Tent Seam Tape). Place tape over seams, press with warm iron (no steam!), and roll with a seam roller. This takes 15 minutes for a full tent and creates bombproof seams.
Warning: Never seal the outside of silnylon. Silicone fills the fabric’s microscopic pores, killing its breathability and turning your tent into a sauna.
Hot Tenting Without Burning Down: Stove Jack Installation

Adding a wood stove transforms your tent for winter—but one mistake risks fire. Here’s the fail-safe method:
- Place the jack 18″ above the floor on a side wall (never the roof!).
- Cut a 4″ hole, then sandwich the fabric between two 8″x8″ Nomex patches (sold by Dutchware Gear).
- Sew a 1″ box stitch around the hole, then add an “X” through the center.
- Seal all stitching with high-temp silicone (like Permatex Ultra Copper).
Critical safety step: Before your first fire, lay aluminum foil over the jack area. If it discolors after 10 minutes, reposition the stove. Always maintain 18 inches of clearance between stovepipe and fabric—measure with a trekking pole.
Field-Test Like a Pro: The 3-Step Leak Detection System
Don’t wait for rain to find flaws. Test your tent in 30 minutes:
- Tension Check: Stake out corners with 15 lbs of pull. If fabric wrinkles, your catenary cuts are wrong—adjust by trimming ½” from ridgeline edges.
- Hose Test: Spray seams with a garden hose at 40 PSI (like heavy rain). Leaks show as dark spots inside within 10 seconds. Mark with chalk.
- Condensation Fix: Sleep in it overnight. If dew forms, add a peak vent—a 4″x6″ mesh panel under a fabric flap at the highest point. This vents moisture while blocking rain.
Real-world fix: One builder discovered leaks at grommets by hanging his tent and filling it with 5 gallons of water. Any drips revealed weak spots needing extra sealant.
Why Your DIY Tent Will Outlast Store-Bought Models
Commercial tents cut costs with thin poles and minimal seam sealing. Your homemade version wins because:
– Thicker pole sleeves (1.5″ vs. 1″) prevent pole slippage in wind
– Reinforced tie-outs handle 50+ lbs pull (vs. 20 lbs on budget tents)
– Custom fit eliminates sagging areas where water pools
A well-built silnylon A-frame lasts 10+ years with annual resealing—outperforming $500 “lifetime warranty” tents that leak after season two. And when a storm hits, you’ll know every seam’s integrity because you put it there.
Final Checklist Before Your First Overnight
- Pack a repair kit: 3×3″ silnylon patches, seam grip tube, safety pins
- Reinforce guylines: Tie Dyneema cord through grommets with trucker’s hitches
- Pitch at 45° to wind: Angle ridgeline perpendicular to prevailing gusts
- Leave 2″ gaps at base: Prevents condensation pooling (critical for single-wall tents)
Building your first tent takes 8-12 hours—but the payoff is immediate. You’ll sleep deeper knowing your shelter survived backyard fire drills and hose tests. More importantly, you’ve mastered skills to adapt any shelter to blizzards, monsoons, or scorching sun. Next time your friend’s tent collapses, you’ll calmly pitch yours in minutes—crafted not from a factory, but from your own hands. That’s the real freedom of how to make a camping tent from scratch.
Final Note: Always patch leaks before they grow. A 1″ seam gap treated with seam grip today prevents a 12″ flood tomorrow. Your tent isn’t just gear—it’s a living system you maintain. Start small (a tarp), master the seams, and soon you’ll be stitching stove jacks for Arctic expeditions. The trail rewards those who build their own path—and their own shelter.


