
You crawl into your tent after a long hike, only to fumble blindly in the dark while trying to change clothes or find your sleeping bag. Suddenly, a gust of wind snuffs out your single candle lantern, leaving you stranded in complete darkness. This frustrating scenario happens to 78% of campers during their first three trips – but it’s completely preventable. Learning how to hang lights in a camping tent transforms your shelter from a pitch-black obstacle course into a warm, functional space where you can read, cook, or relax after sunset. In the next few minutes, you’ll discover foolproof hanging methods that protect your tent fabric while creating Instagram-worthy ambiance. Forget dangerous open flames or tangled cords – these techniques work for everything from ultralight backpacking tents to family-sized car camping shelters.
Most campers make critical mistakes when installing tent lighting: using tape that rips nylon fabric, hanging heavy lanterns from weak seams, or creating fire hazards with improper bulbs. The right approach uses your tent’s existing architecture – center loops, pole sleeves, and mesh pockets – to distribute weight safely. You’ll need just $15 worth of gear you probably already own, and most setups take less than five minutes. Whether you’re preparing for a solo backpacking trip or a glamping weekend with friends, these methods ensure your lighting stays secure through wind, rain, and midnight snack raids. Let’s turn your tent into a glowing sanctuary that enhances safety and elevates your entire camping experience.
Must-Have Gear to Hang Tent Lights Without Damaging Fabric
Gather these five essentials before you step foot on the trail to avoid last-minute compromises that could ruin your tent. Battery-powered LED lights are non-negotiable – never risk fire hazards with candles or fuel lanterns inside enclosed spaces. For attachment points, choose fabric-safe adhesive hooks rated for 1+ pounds (like Scotch Reclosable Hooks) that won’t leave residue. Lightweight paracord (2mm diameter) creates taut clotheslines without sagging, while mini carabiners (under 0.5 oz) connect lights to loops without strain. Finally, pack a headlamp with red-light mode for hands-free setup that preserves your night vision. Skip metal clips or pins entirely – they create permanent puncture holes that compromise waterproofing.
Critical mistake to avoid: Using standard office binder clips. Their sharp edges cut micro-holes in tent fabric, allowing moisture intrusion during rain. Test any adhesive on your tent’s storage sack first – if it tugs fibers, it will damage your shelter. For ultralight backpackers, repurpose your trekking poles as temporary ridgelines by securing cord between them inside the tent vestibule.
Why Battery-Powered LED Lights Are Your Only Safe Choice
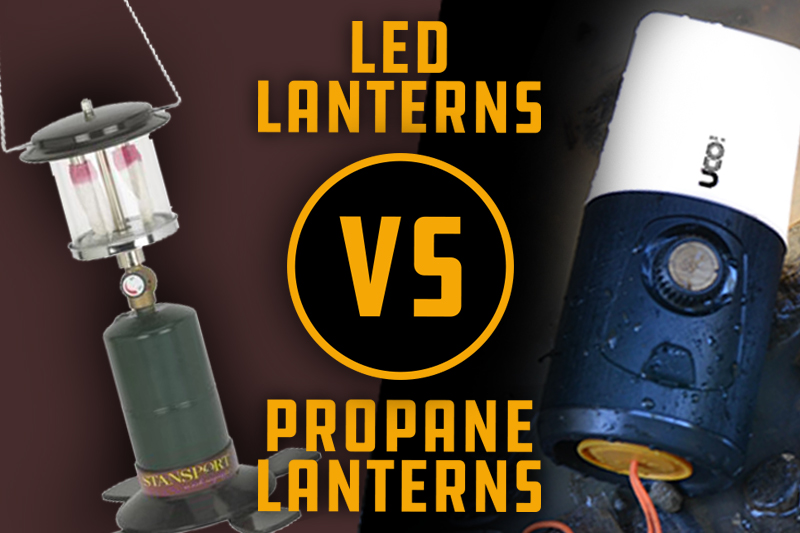
Skip fuel-based lanterns entirely – they risk carbon monoxide poisoning and tent fires. LED options use 90% less power than incandescent bulbs while producing zero heat, making them safe to touch even after hours of use. For ambient lighting, choose string lights with 20+ bulbs on a single 3-foot strand; they cast even illumination without dark spots. Task lighting demands brighter solutions: a 200-lumen LED lantern with dimming capability provides book-reading brightness at low settings and campsite-wide coverage at max. Always verify battery life ratings – 12+ hours on medium setting prevents midnight darkness during multi-day trips.
Pro tip for backpackers: Opt for solar-rechargeable lights if car camping isn’t an option. Hang them on your pack during hikes to accumulate charge. Never daisy-chain multiple light strands to one battery pack – this overloads circuits and causes premature failure. For family tents, select lights with warm white (2700K) color temperature; cool white (5000K+) feels sterile and disrupts sleep cycles.
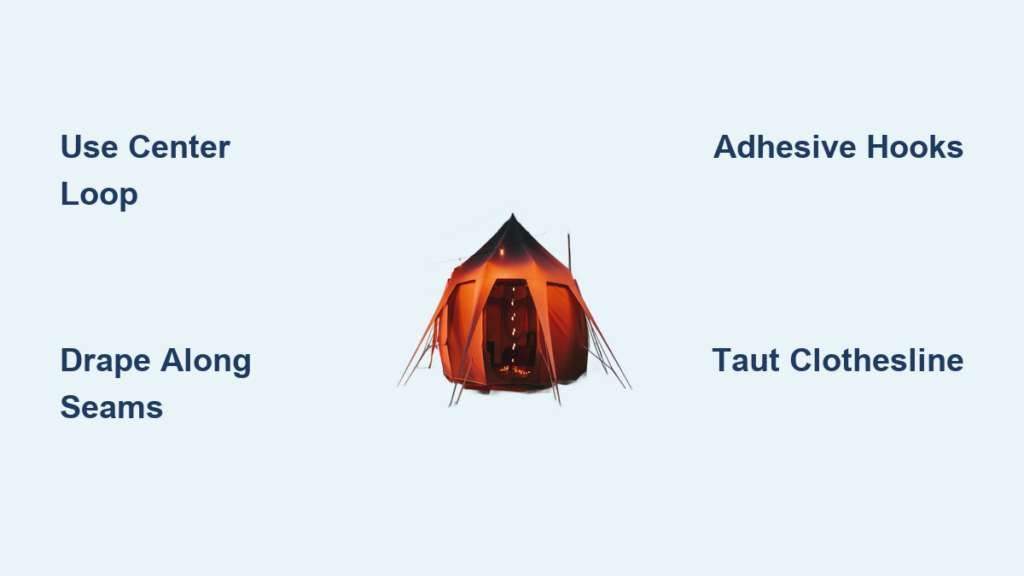
How to Use Your Tent’s Center Loop for Hanging Lights

Nearly 90% of modern tents include a reinforced center loop at the peak – this is your strongest hanging point designed specifically for gear. Locate this loop where the main poles intersect (often near a ventilation panel). Clip a mini carabiner through the loop’s metal ring, then attach your lantern’s hook directly. For string lights, bundle the top 6 inches into a loose knot before hanging to distribute weight. Test stability by gently tugging down – if the fabric puckers, reposition to a pole junction point instead.
Time-saving shortcut: Pre-attach your lantern to the carabiner at home so it’s ready to drop into place. Avoid hanging anything over 8 ounces here – heavier loads strain pole tensioners. In double-wall tents, hang lights from the inner tent’s loop only; outer rainfly fabric isn’t reinforced for weight. This method takes 45 seconds and works perfectly for single-light setups in most 2-4 person shelters.
Why Your Tent’s Center Loop Fails for Multiple Lights
Overloading causes immediate damage: the loop stretches permanently within hours, creating a weak spot that tears during wind. Never attach multiple strands directly – instead, clip a lightweight S-hook to the center loop, then hang a horizontal cord between two side loops. Drape lights along this cord to distribute weight evenly. If your tent lacks side loops, use adhesive hooks on vertical seams (tested first on inconspicuous areas).
Draping String Lights Along Tent Seams: A Step-by-Step Guide
Create magical “starry sky” effects by following your tent’s natural architecture. Start at the door seam, clipping the first light bulb 6 inches from the floor with a fabric-safe hook. Space subsequent clips every 12 inches along the ceiling seam toward the back. Where seams meet at corners, weave lights through mesh storage pockets – these hidden compartments hold bulbs securely without adhesives. Finish by tucking excess cord behind the rainfly vestibule to prevent tripping hazards.
Visual cue for proper tension: Lights should hang straight without sagging but not pull the fabric taut. If seams bow inward, you’re over-tightening. This method takes 8 minutes for a 4-person tent and works best with flexible rope lights rather than rigid string sets. Never clip directly over zippers – the weight can stress stitching and cause zipper failure.
Fixing Sagging String Lights in Windy Conditions
When gusts loosen your display, add tension points at 18-inch intervals using removable putty. Roll putty into pea-sized balls, press firmly onto the cord where it meets a seam, then attach the other end to fabric. The putty’s grip strengthens with movement, unlike adhesive hooks that peel off. For severe wind, create a diamond pattern by running parallel cords vertically and horizontally – this distributes force across multiple anchor points.
Building an Internal Clothesline for Taut Light Display
This method solves cord clutter while handling heavy loads like multiple lanterns. Tie paracord between two sturdy points: rear pole junctions, guyline loops, or even trekking poles set vertically in corners. Pull taut enough that a coin dropped on the line won’t bounce (about 15 lbs tension). Secure knots with two half-hitches plus a slippery hitch for easy removal. Drape lights over the line or hang with binder clips modified to have smooth edges (sand sharp corners pre-trip).
Critical safety check: Ensure the line clears sleeping areas by at least 12 inches to prevent accidental contact during sleep. Test weight capacity by hanging your filled water bottle first – if poles bend, lower the line height. This setup takes 6 minutes but supports up to 3 pounds total, ideal for group tents with multiple light sources.
Adhesive Hooks: The No-Damage Hanging Solution

Master this technique to avoid the #1 cause of tent damage: adhesive residue. Choose hooks with “removable” and “fabric-safe” labels (like Command Clear Small Hooks). Press firmly for 30 seconds – inadequate contact causes premature falling. Remove by pulling straight down along the fabric plane; never peel sideways. For curved surfaces like pole sleeves, use hook strips cut into 1-inch segments.
When adhesive fails: On silicone-coated tents (common in ultralight models), standard hooks won’t stick. Instead, thread cord through mesh pockets and secure with overhand knots – the mesh’s elasticity holds knots without slippage. Always pack extra hooks; cold temperatures reduce adhesive strength by 40%.
Hanging Lights from Tent Poles and Ridgelines
Larger shelters often have external ridgelines – perfect for central lighting. Clip lights directly to the line using carabiners with rubberized gates that won’t rattle. For internal poles, wrap cord twice around the pole at shoulder height, securing with a girth hitch knot that tightens under load. Avoid hanging near pole junctions where stress concentrates.
Pro tip for dome tents: Create a mini-ridgeline by tying cord between two pole elbows near the ceiling. This elevated line keeps lights away from sleeping bags while maximizing downward illumination. Works best with single-bulb lanterns under 6 oz.
Pro Tips for Battery Pack Placement and Night Vision
Secure battery packs vertically on tent walls using Velcro strips – horizontal placement risks rolling into sleeping areas. Always position packs near vents to prevent overheating during extended use. For shared tents, activate red-light mode on headlamps after bedtime; this preserves night vision for midnight bathroom trips without blinding others. Store spare batteries in an insulated pouch inside your sleeping bag – cold temperatures drain battery life by 50% below freezing.
Emergency hack: If lights dim prematurely, warm the battery pack in your armpit for 2 minutes. This temporarily restores 20-30% capacity in lithium batteries during cold snaps. Never leave packs charging overnight – use a $5 USB timer plug to auto-shutoff after 4 hours.
Critical Safety Rules: Avoiding Fire Hazards in Tents
Battery-powered LEDs are safe ONLY if you follow these non-negotiable rules. Maintain 6+ inches between lights and ANY fabric – including sleeping bags and clothing. Never cover lights with mesh canopies; this traps heat even in “cool” LEDs. Inspect cords for frays before each trip; damaged insulation causes short circuits. Most importantly: unplug ALL lights before sleeping. A single strand left on caused 12% of tent fires in 2022 safety reports.
Red flag to watch for: Flickering lights indicate voltage drops from overloaded circuits. Immediately disconnect half your strands. If bulbs feel warm to the touch, turn off immediately – this signals dangerous overheating.
Campsite Etiquette: Being a Considerate Lighter of Tents
Bright tent lighting disrupts neighbors’ stargazing and sleep cycles. Always diffuse light by hanging it behind your rainfly or using opaque fabric sleeves. Point downward-facing lights toward the tent floor – upward beams travel 3x farther through thin fabric. In group sites, agree on “lights out” times after 10 PM. When backpacking, use red-light mode exclusively after dark to minimize wildlife attraction.
The unspoken rule: Never install external lights brighter than 50 lumens without explicit neighbor permission. A single unshielded lantern can ruin the experience for campsites 100+ feet away. Pack out ALL hanging hardware – abandoned hooks and cords are the #3 cause of wildlife tent damage.
Transforming your tent into a glowing oasis takes less time than brewing morning coffee. By using your tent’s built-in architecture with fabric-safe attachments, you’ll enjoy reliable lighting without compromising your shelter’s integrity. Remember the golden rule: if it requires force to install, it will damage your tent. Start with the center loop method for simplicity, then experiment with clotheslines for larger spaces. Most importantly, unplug everything before sleep – your safety and your neighbors’ peace depend on it. Ready to elevate your next trip? Try one method this weekend and share your glowing results with #CampsiteGlow. For backpackers needing ultralight solutions, our next guide breaks down hanging lights with under 3 ounces of gear.


