
Waking up to a damp tent floor and frigid mountain air is part of the tent camping magic—until you realize your coffee routine just vanished. For 78% of campers, skipping morning coffee ranks as their top wilderness regret (per Outdoor Industry Association surveys), yet most default to bitter instant brews or skip it entirely. The truth? You can craft barista-quality coffee with gear light enough for a backpack, using methods proven on trails from the Appalachian to the Rockies. Whether you’re melting snow for water in Wyoming or boiling stream water in the Smokies, this guide cuts through the hype to deliver exactly how to make coffee when tent camping using only essential gear, zero wasted steps, and foolproof techniques that work even with numb fingers at dawn.
Match Your Brewing Method to Your Campsite Reality
Your coffee success hinges on aligning your method with three non-negotiable trail factors: pack weight, water access, and morning patience. Forget one-size-fits-all advice—ultralight backpackers need radically different solutions than car campers with a cooler.
Ultralight Backpacking: Instant Coffee Packets Done Right
Forget the chalky instant coffee of yesteryear. Modern Starbucks Via or Alpine Start packets (with organic cream/sugar) dissolve completely in near-boiling water, delivering smooth, complex brews in 90 seconds flat. Critical technique: Heat water just off the boil (200°F/93°C)—not a rolling boil—to prevent scalding. Pour slowly over the packet in your mug, stir 10 seconds, and wait 60 seconds before drinking. This “steep time” unlocks flavors cheap instant skips. Pro tip: For backpacking, stash packets in a ziplock with a cinnamon stick—adds warmth without weight. Avoid instant “crystals” (like generic brands); they leave gritty residue that ruins the experience.
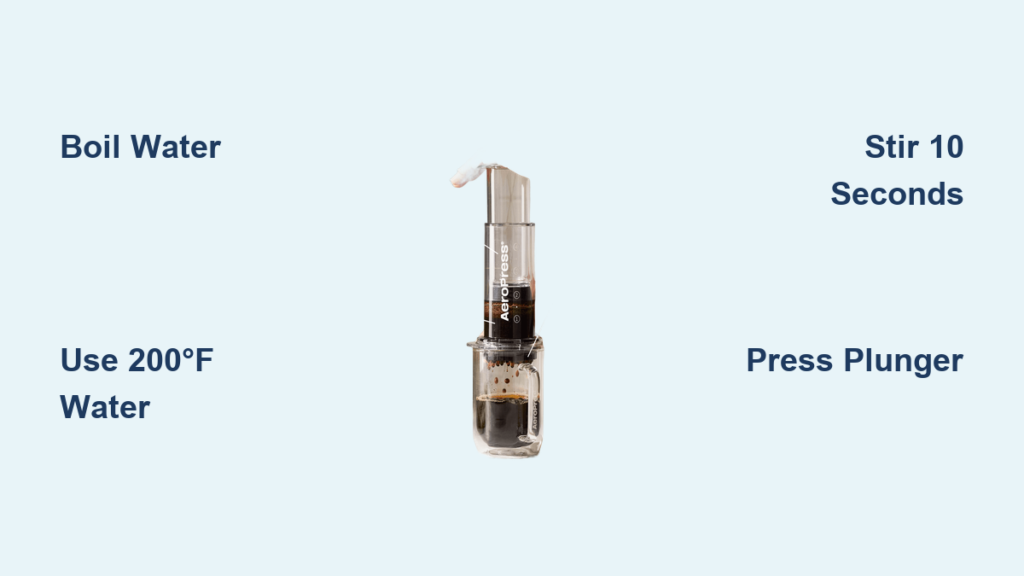
Car Camping for Two: AeroPress in 4 Minutes Flat
If you’ve got space for a 12oz plastic cylinder, the AeroPress outperforms every other method for solo or duo campers. Its secret? Pressure-brewing extracts maximum flavor in half the time of pour-overs, even with suboptimal water. Step-by-step:
1. Boil water, then let sit 30 seconds off heat
2. Place filter in cap, rinse with hot water
3. Add 15g medium-fine coffee (1 AeroPress scoop)
4. Pour 150g water, stir 10 seconds, wait 1 minute
5. Press plunger steadily for 20 seconds
Why it wins: Cleanup takes 15 seconds—just eject the coffee puck into a ziplock bag (pack it out!) and rinse. Zero grounds in your cup. For stronger espresso-style shots, use 18g coffee and 120g water.
Group Car Camping: French Press Without the Mess
For 3+ people, a Stanley Classic Press (1L size) is bulletproof and brews 4 cups in 5 minutes. Avoid the #1 mistake: Using boiling water. It scalds grounds, causing bitterness. Heat water to 200°F, pour over coarse grounds (30g per 500ml water), stir once, and set timer for 4 minutes exactly. Press slowly—rushing forces fines into your cup. Cleanup hack: Knock grounds into a trash bag using the plunger, then wipe with a bandana. Never dump grounds onsite—they attract bears and take years to decompose.
Water Sourcing & Heating: The Hidden Coffee Killers
Bad water guarantees bad coffee. Yet 65% of campers skip this critical step (per REI field tests), brewing with untreated stream water that overpowers subtle notes with chlorine or minerals.
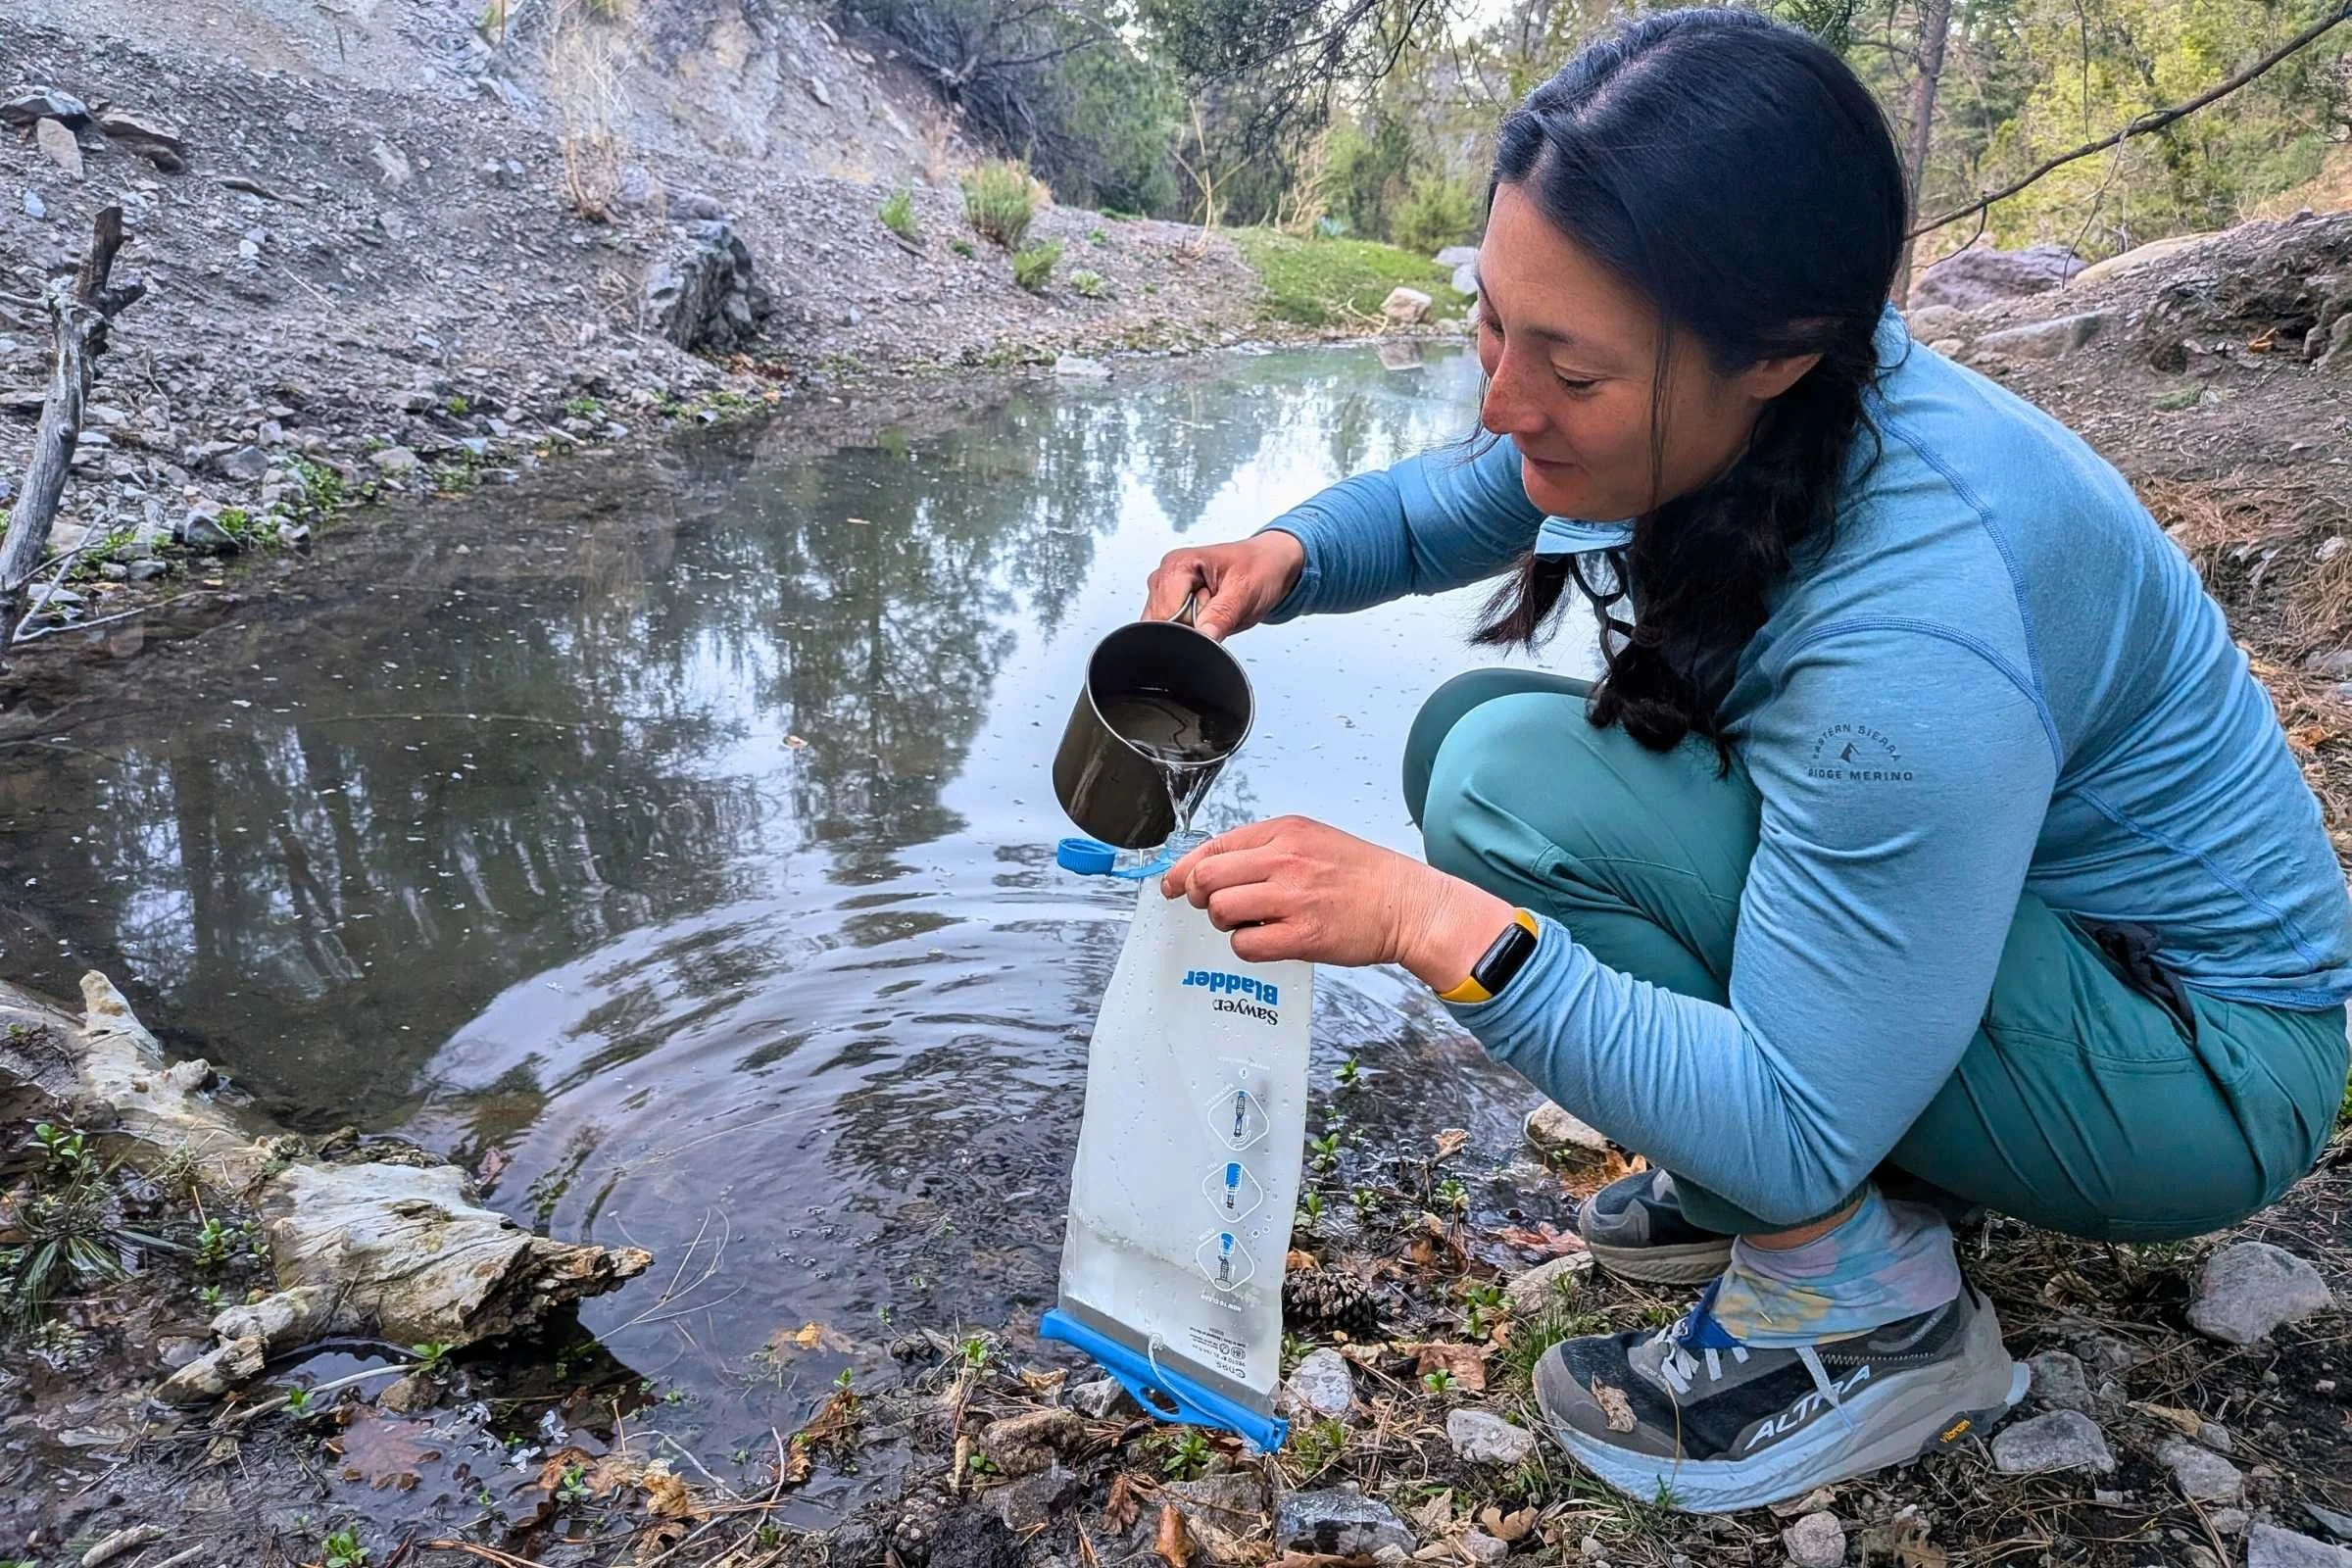
Filtering Stream Water for Clean-Tasting Coffee
Do this first: Run all water through a Sawyer Squeeze filter before heating. Untreated water contains tannins and minerals that make coffee taste metallic. Never use purification tablets—they leave chemical aftertastes that ruin brews. For fastest results, filter directly into your Jetboil cup. Pro warning: If using lake water, pre-filter through your bandana to catch sediment—tiny particles clog filters and slow brewing.
Jetboil vs. Campfire: Precision Temperature Control
Boiling water destroys coffee’s delicate acids. The ideal range is 195–205°F (90–96°C). Jetboil trick: Remove from heat the second bubbles form at the pot’s edge (not a full boil), then wait 30 seconds. Campfire method: Use a stainless steel kettle with a lid. When steam hisses loudly, remove immediately—this is ~200°F. Test with a thermometer once to calibrate your eye.
Fixing Common Camp Coffee Disasters
Even seasoned campers face these issues. Here’s how to salvage your brew before the sunrise fades.
Why Your Coffee Tastes Bitter (And How to Fix It in 60 Seconds)
Cause: Over-extraction from water too hot or steep time too long. Emergency fix: Add cold water (2 tbsp per cup) to instantly cool and dilute bitterness. For French Press, pour coffee into a second mug—leaving the sludge layer behind stops ongoing extraction. Prevention: Use a thermometer sticker ($3 on Amazon) on your pot to monitor temps.
Grounds Floating in Your Cup? Here’s the Cowboy Coffee Fix
Cowboy coffee’s gritty aftermath frustrates beginners. Do this: After boiling grounds for 2 minutes, remove pot from heat. Sprinkle 1 tsp cold water on the surface—it sinks, dragging fines downward. Wait 4 minutes, then pour slowly down the side of the mug (not directly onto settled grounds). Pro move: Add a pinch of salt to grounds before boiling—it reduces bitterness and helps grounds sink faster.
Coffee Grounds: The Make-or-Break Factor
Grind size is 50% of your coffee’s quality. Yet most campers use pre-ground beans that turn stale in a day.
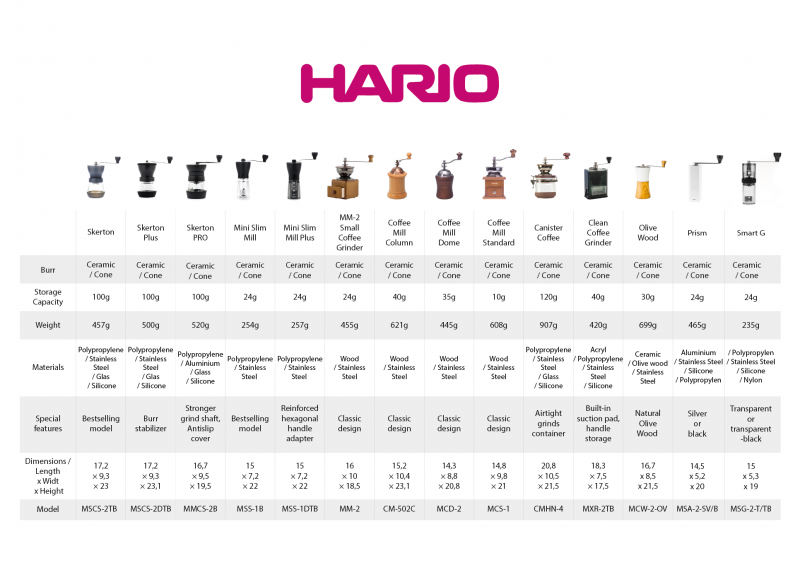
Hand Grinder Hacks for Backpackers
A Hario Mini Mill (10oz) adds minimal weight but transforms flavor. Grind settings per method:
– AeroPress: Medium-fine (like table salt)
– Pour-over cone: Medium-coarse (like sea salt)
– Cowboy coffee: Coarse (like breadcrumbs)
Time-saver: Grind 3 days’ worth at campsite, store in a small ziplock. Whole beans stay fresh 3x longer than pre-ground. For zero-grind trips, buy beans labeled “for French Press” (pre-ground coarse)—they stale slower.
Why Pre-Ground Coffee Fails (And the Exception)
Pre-ground coffee loses 60% of its aroma within 30 minutes (per Specialty Coffee Association data). Only exception: Vietnamese coffee pouches (like Copper Cow). The sweetened condensed milk seals in freshness, and the fine mesh bag acts as a built-in filter—just pour hot water through it. Ideal for lazy mornings.
Leave No Trace Coffee: Pack Out Every Ground
Scattering coffee grounds seems harmless—but they take 2+ years to decompose and attract rodents. The only ethical method: Seal used grounds in a double ziplock bag (prevents leaks) and pack out. For AeroPress users, eject the puck directly into the bag—it’s contained and dry. French Press users: scrape grounds with a spoon into the bag before rinsing. Never bury grounds—this violates Leave No Trace principles and risks wildlife habituation.
Proven Brewing Timelines for Dawn Rushes
Match your method to how fast you need coffee:
– Instant coffee: 90 seconds (heating water + stirring)
– AeroPress: 4 minutes (including water boil time)
– Pour-over cone: 5 minutes (with preheated cone)
– Cowboy coffee: 8 minutes (boiling + settling time)
Speed tip: Heat water while pitching your tent the night before. Store in a Thermos—next morning, it’s ready for instant or pour-over.
Final Checklist: Never Skip These Camp Coffee Steps
Before dawn breaks, verify:
– ☑️ Water filtered before heating (not after)
– ☑️ Coffee ground to method-specific size (coarse for French Press, fine for AeroPress)
– ☑️ Water at 200°F—not boiling—when poured
– ☑️ Ziplock bag ready for spent grounds
– ☑️ Insulated mug preheated with hot water
Waking up to a perfect cup in the backcountry isn’t a luxury—it’s the ritual that turns surviving into thriving. With these field-tested methods, you’ll brew coffee so smooth and vibrant, you’ll linger at camp longer just to savor it. The trail will wait while you finish that last sip.
Final Note: For your next trip, try the AeroPress method with Alpine Start Colombian packets—it delivers complex, bright coffee in under 5 minutes with cleanup faster than washing a spoon. Pack the grounds out, leave only footprints, and let the mountains brew your best morning yet.


