
Waking up at 5 AM because your tent glows like a lantern isn’t just annoying—it’s a trip-ruiner. As sunlight floods through thin tent fabric, interior temperatures can skyrocket 20°F above outside temps, turning your sleeping space into a sweltering greenhouse. For parents, this means cranky toddlers; for backpackers, it saps energy needed for trail miles. The good news? You don’t need a $500 blackout tent to fix this. With simple, proven techniques using gear you likely own, you can transform your tent into a cool, pitch-black sanctuary. This guide reveals exactly how to darken tent camping spaces using methods tested in 100°F+ heat, from ultralight backpacking hacks to family-camping game changers.
Darkness isn’t just about sleep—it’s survival. In Portugal, one camper measured 122°F inside a lightweight tent despite shade, proving how rapidly solar gain compromises safety. A properly darkened tent blocks infrared radiation, keeping interiors near ambient temperature while tricking your brain into deeper sleep. Whether you’re battling northern summer midnight sun or desert glare, mastering tent darkening means waking refreshed instead of roasted. Let’s fix your tent in under 30 minutes.
Why Your Tent Becomes a Morning Sun Prison (and How Darkening Fixes It)
Tent fabric designed for breathability sacrifices light-blocking. Most silnylon or polyester tents transmit 30-50% of visible light, turning dawn into an instant wake-up call. But the bigger danger is heat: sunlight penetrates fabric, heats interior surfaces, and traps energy through the greenhouse effect. A darkened tent with proper airflow can stay 15-25°F cooler than untreated models—critical when temperatures exceed 90°F.
How Solar Gain Turns Your Tent Into an Oven
When UV rays hit tent walls, they convert to infrared radiation (heat) that can’t escape through breathable fabric. Without intervention:
– Single-wall tents absorb heat directly into sleeping areas
– Rainflies magnify heat through convection between layers
– Light-colored tents ironically worsen the problem by reflecting light inside the tent
The solution? Block light before it converts to heat. External shading reflects 80%+ of radiation, while internal blackout methods prevent residual light from disrupting sleep cycles.
Assess Your Tent Type and Darkening Needs in 3 Steps
Not all tents need the same approach. A 2-person backpacking shelter requires different solutions than a 6-person family cabin tent. Before modifying anything, answer these:
What’s Your Primary Goal?
- Blocking dawn light? Focus on east-facing windows and sleep-area pods
- Beating afternoon heat? Prioritize overhead sunshades and reflective tarps
- Creating nap zones for kids? Target bunk ends with Reflectix panels
What’s Your Camping Style?
- Ultralight backpackers: Use emergency blankets (3 oz) rigged over rainflies
- Car campers: Invest in Reflectix window inserts + PUGS-style covers
- Festival campers: Rig large silver tarps 12+ inches above tents for airflow
How Permanent Should It Be?
For weekend trips, clip-on solutions work best. For frequent use, sew Velcro tabs onto tent windows to attach blackout panels in seconds. Never permanently alter fabrics—this voids warranties and traps moisture.
Critical Ventilation Warning: Avoid Condensation Traps When Darkening
Never block vents or use non-breathable plastics against inner tent walls. One common mistake turns tents into saunas: sealing every gap to keep light out. Without airflow, body heat and humidity create condensation that soaks sleeping bags. Instead:
- Maintain 6+ inches of airspace between any darkening layer and tent fabric
- Use breathable materials like weed barrier fabric (opaque but air-permeable)
- Always leave 2+ vents open, even when using window covers
If you notice moisture pooling after darkening, immediately add cross-ventilation. A dark, damp tent is worse than a bright dry one.
Pitch a Reflective Tarp Over Your Tent: The #1 Heat-Blocking Method
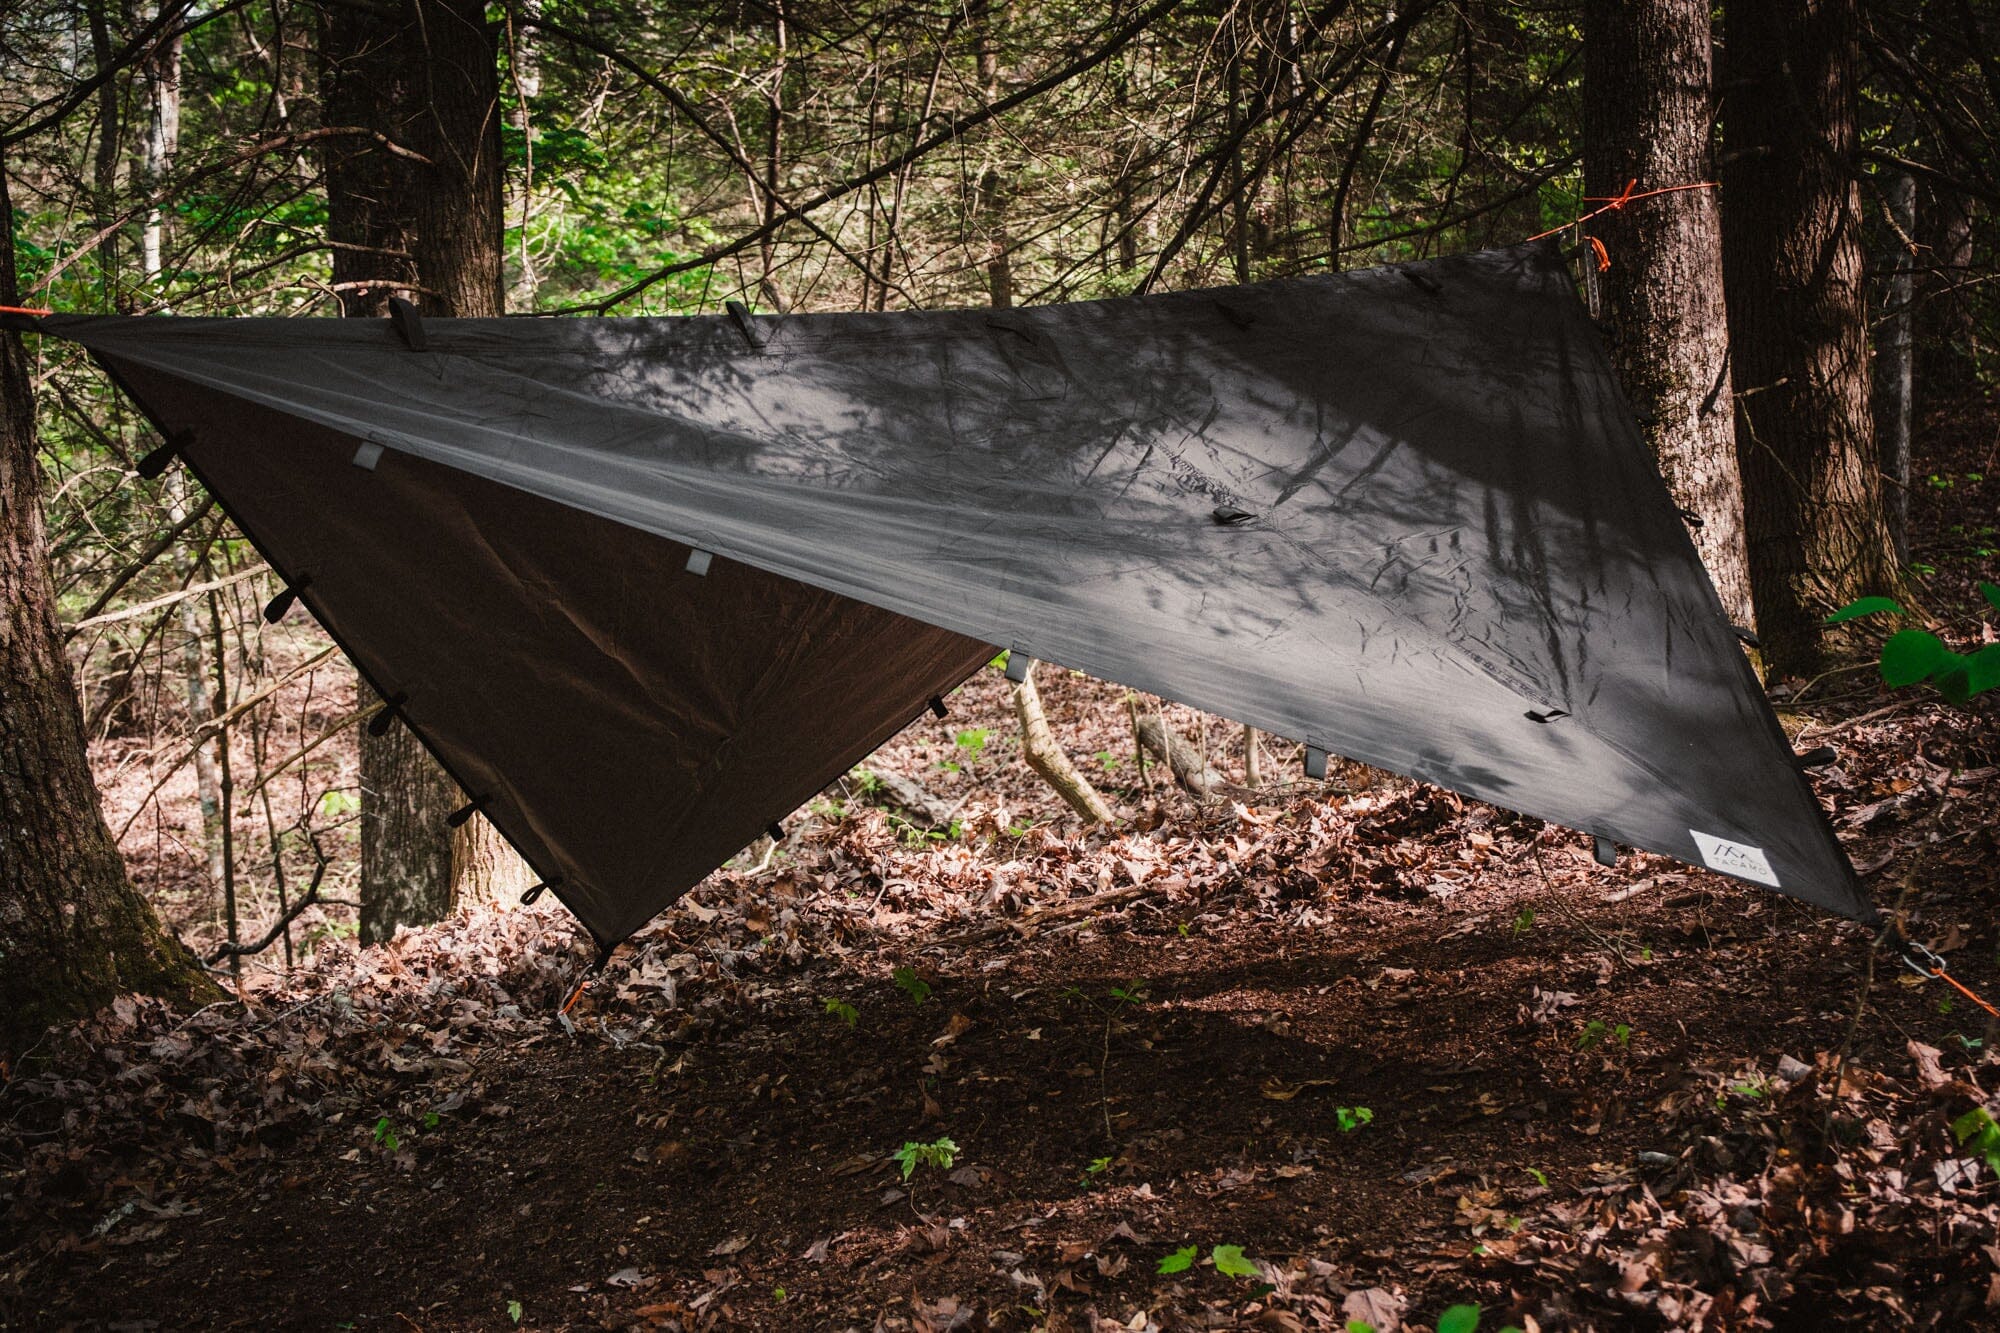
This stops 90% of heat before it hits your tent. Forget basic tarps—silver-coated or Mylar options reflect infrared radiation while allowing airflow.
How to Rig a Cooling Tarp in 10 Minutes
- Choose your material: Emergency space blankets (ultralight) or 8×10 silver tarps (durable)
- Position for airflow: Drape tarp 12+ inches above tent peak using trekking poles
- Anchor strategically: Stake tarp edges 3+ feet from tent corners to create cross-breeze
- Angle for sun direction: Pitch higher on east side to block morning rays
Pro Tip: In wind, replace noisy Mylar with Tyvek 1443R—it’s quieter, more durable, and equally reflective. Test setups in your backyard first; a poorly rigged tarp can funnel rain into your tent.
Install Reflectix Panels to Tent Windows for Instant Blackout
For total darkness where it matters most (sleeping areas), Reflectix is the camping community’s gold standard. This foil-bubble-foil insulation blocks 100% of light while adding minimal weight.
Step-by-Step: Create Perfect Blackout in 5 Minutes
- Trace window shape onto Reflectix sheet (available at hardware stores)
- Cut precisely with utility knife—no need for tape if cut to exact size
- Press panel into window from inside; friction holds it securely
- Add Velcro dots for frequent removal (optional but recommended)
Why it works: The bubble layer creates dead air space that insulates against heat transfer. One family camper reported turning midday sun into “pitch black” conditions for toddler naps—no eye masks needed.
Create a DIY Blackout Pod for Family Tent Sleeping Areas

When full-tent darkening isn’t practical, isolate sleep zones. This is ideal for cabins with separate rooms or large tents where kids sleep.
Build a Breathable Sleep Cave in 15 Minutes
- Cut weed barrier fabric (sold at garden centers) 6 inches larger than sleeping area
- Attach with shock cords to tent poles overhead, creating a draped canopy
- Seal edges with magnetic strips along walls (prevents light leaks)
- Leave 4-inch gap at floor for airflow—never seal completely
Key benefit: This method uses breathable fabric that won’t cause condensation like plastic sheets. Parents report 2+ extra hours of sleep for children during summer camping.
Avoid These 3 Critical Darkening Mistakes (Paint, Poor Ventilation, Ignoring the Floor)

Even experienced campers sabotage their efforts with these errors:
❌ Painting or Dyeing Tent Fabric
Why it fails: Paint clogs fabric pores, destroying breathability. Waterproof coatings degrade, leading to leaks. One tester’s “darkened” tent hit 130°F inside while condensation pooled on walls. Never alter factory tent coatings.
❌ Sealing Every Vent for Darkness
Consequence: Trapped humidity soaks sleeping bags within hours. Always prioritize airflow—use breathable blackout materials and keep at least two opposite vents open.
❌ Ignoring Ground Reflection
Light bounces off pale soil or sand into tent floors. Fix: Place a dark groundsheet under your tent footprint, or lay a black fleece blanket inside over sleeping areas. This absorbs reflected glare that keeps you awake.
Troubleshoot Dark Tent Condensation and Light Leaks in Minutes
When problems arise, diagnose fast:
“My Tent is Dark but Damp”
- Cause: Non-breathable material pressed against inner walls
- Fix: Elevate Reflectix panels 1+ inch from fabric using foam spacers
“Morning Light Sneaks Through Corners”
- Cause: Gaps between DIY panels and window frames
- Fix: Apply magnetic tape to panel edges for light-sealing contact
“Tarp Makes Tent Too Hot”
- Cause: Tarp too close to tent (less than 6 inches)
- Fix: Raise tarp height using taller poles—critical for airflow
Final Note: Darkening your tent isn’t about blocking the outdoors—it’s about reclaiming rest. For backpackers, a $2 emergency blanket draped over your rainfly cuts heat dramatically. Families should prioritize Reflectix window inserts and sleep pods for kid-friendly naps. Always pair darkness with airflow: shade the tent roof, blackout the sleep zone, and keep vents clear. Test one method on your next backyard campout, and you’ll never wake up to a sun-drenched tent again. Ready for deeper solutions? Explore UV-blocking tent liners or commercial “dark room” models for frequent hot-weather campers—but remember, the simplest fixes work best when done right.


