
You press the power button on your fitness tracker, and nothing happens. The screen stays stubbornly dark while your step count, sleep data, and heart rate metrics remain locked inside a dead device. When your fitness tracker won’t turn on, it disrupts your entire health routine – from missing workout metrics to losing sleep analysis. This common frustration usually stems from four culprits: drained batteries, dirty charging ports, software crashes, or water damage. Don’t panic yet. Over 80% of “bricked” fitness trackers can be revived with the right troubleshooting steps. In this guide, you’ll learn exactly how to diagnose and fix your unresponsive device – whether it’s a Fitbit, Garmin, Apple Watch, or budget tracker – without wasting money on unnecessary replacements.
Clean Charging Ports Before Attempting Any Other Fix
Most “dead” fitness trackers actually suffer from blocked charging contacts. Sweat, lint, and pocket debris create insulating barriers between your device and charger. This simple cleaning process solves nearly half of all power failures in under 60 seconds.
Remove Debris From Magnetic or Pin Contacts
Grab a dry toothbrush or soft-bristled brush. Gently scrub the metal pins on your charging dock and the corresponding contacts on the tracker’s back. For stubborn grime, dip a cotton swab in 90% isopropyl alcohol, squeeze out excess liquid, and wipe the contacts. Never use metal tools – you’ll scratch delicate surfaces and cause permanent damage. After cleaning, blow compressed air (or firmly puff air) into the charging port to dislodge hidden particles. Test with a different USB cable immediately after cleaning – many users mistake cable faults for device failure.
Verify Proper Charging Alignment
Magnetic chargers require precise alignment. Place your tracker on the dock, then slowly rotate it 360 degrees while watching for a charging indicator. Some Samsung Galaxy Fit models need exact centering to establish connection. If using pin-based charging (like Garmin Forerunners), ensure all pins make full contact – bent pins prevent charging. Pro tip: Shine a flashlight sideways across the connection point. You’ll spot misalignments invisible under normal light.
Force Restart Procedures by Brand (Fitbit, Garmin, Apple)
When basic charging fails, a force restart clears frozen software without erasing data. This “digital CPR” works for 65% of unresponsive trackers. Crucial: Hold buttons longer than you think necessary – most users quit too early.
Fitbit and Xiaomi Hard Reset Methods
For Fitbit Versa/Charge/Inspire models: Press and hold the single side button for 15 full seconds – not 10. If nothing happens, release for 5 seconds, then repeat. Some users report needing 3-4 attempts. Xiaomi Mi Band owners: Press and hold the touchscreen area for 20 seconds while connected to the charger. If your tracker vibrates but won’t power on, leave it charging for 30 minutes before retrying the reset.
Apple Watch and Garmin Emergency Reboots
Apple Watch Series 4+: Press and hold both the side button and Digital Crown for at least 25 seconds until the Apple logo appears. Garmin Forerunner/Fenix users: Hold the power button for 30+ seconds – many stop at 20. If your Garmin shows a battery icon but won’t boot, connect to Garmin Express on your computer for firmware recovery. Samsung Galaxy Watch owners: Press and hold power + volume down for 15 seconds.
Diagnose Battery Failure: Swelling, Drain, and False Readings
If your tracker shows no life after 2 hours of charging, suspect battery failure. Lithium-ion batteries degrade after 2-3 years, causing symptoms that mimic complete death.
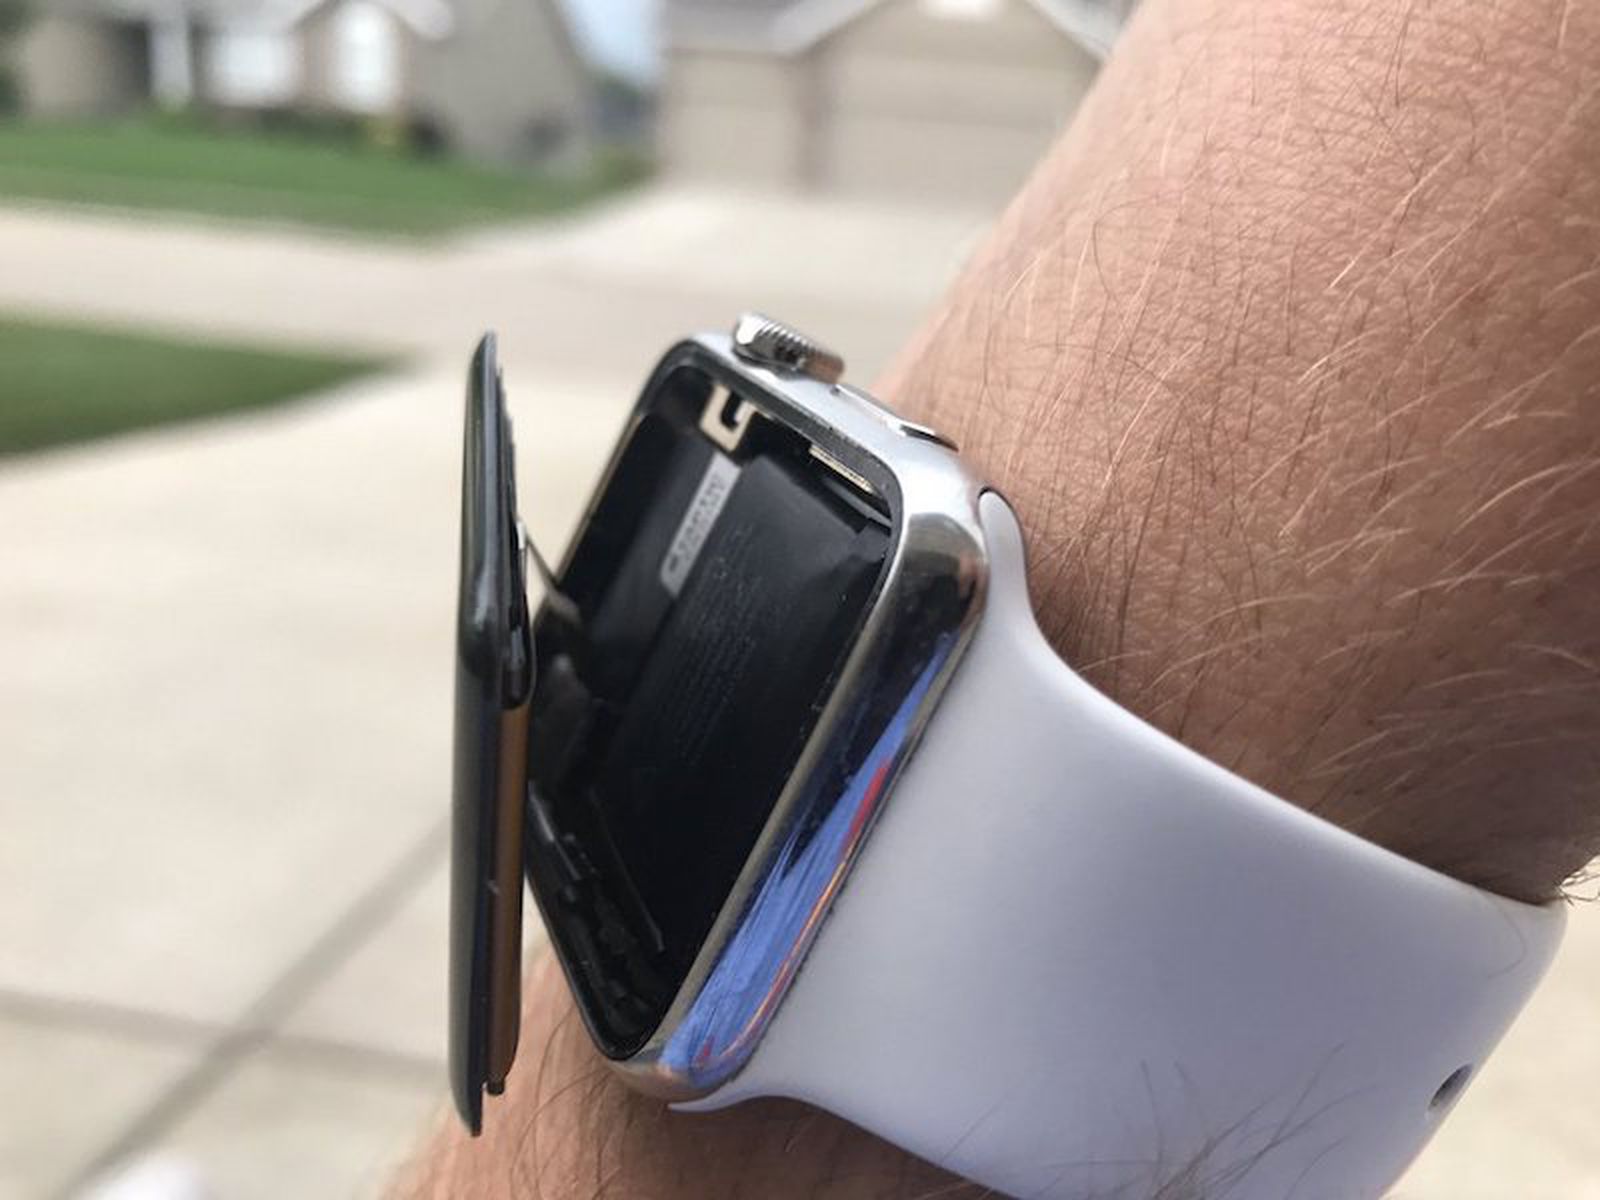
Identify Swollen Battery Hazards
Immediately unplug and stop using your tracker if you notice:
– A bulging case that won’t sit flat
– Distorted screen alignment
– Unusual warmth during charging
Swollen batteries are fire hazards. Place the device in a fireproof container and contact the manufacturer – never attempt DIY battery replacement. For non-swollen units, test battery health: Fully charge overnight, then check if it dies within 2 hours of use. Erratic battery percentage jumps (e.g., 80% to 5% instantly) indicate terminal battery failure requiring professional replacement.
Bypass False “Dead Battery” Readings
Many trackers refuse to power on when critically drained. Try this reset sequence:
1. Plug into a wall adapter (not computer USB) for 2 full hours
2. Unplug, then force restart for 20 seconds
3. Reconnect charger while holding power button
This often tricks the power management system into recognizing the battery. If you see a brief flash or vibration during charging, continue the process – some Amazfit models take 3+ hours to register charge from zero.
Emergency Water Damage Fixes for Wet Trackers

Water exposure triggers the second-most common “won’t turn on” scenario after battery issues. Even “waterproof” trackers fail when seals degrade. Critical: Never charge a wet device – you’ll short-circuit components.
48-Hour Desiccant Recovery Protocol
- Immediately power down and remove from wrist
- Gently shake out visible moisture
- Place in a sealed container with silica gel packets (not rice – it creates dust)
- Add a tablespoon of uncooked dry rice as secondary desiccant
- Wait full 48 hours before charging attempts
For saltwater exposure, rinse contacts with distilled water first to prevent corrosion. Check water damage indicators near charging ports – pink or red stickers mean internal damage likely requires professional repair. After drying, clean contacts with isopropyl alcohol before charging.
Recover From Boot Loops With Firmware Reset Mode
When your tracker shows the logo but freezes during startup, it’s stuck in a boot loop. This indicates corrupted firmware – fixable without data loss in most cases.
Access Brand-Specific Recovery Modes
Fitbit users: Connect to charger while holding the button. When the logo appears, release and immediately press 3 times. Garmin devices: Hold power button while connecting to computer, then launch Garmin Express for firmware reinstall. Apple Watch: Force restart into DFU mode by pressing side button + volume down for 10 seconds after the Apple logo. Warning: Incorrect button sequences can worsen issues – consult your exact model’s manual before proceeding.
Factory Reset: Last Resort Before Professional Help
When all else fails, a factory reset erases software conflicts causing power failure. This deletes all data, so exhaust other options first. Only attempt if you see any sign of life (flashing screen, vibration).
Execute Safe Factory Resets by Model
For touchscreen trackers (Samsung, Huawei): Swipe to settings > System > Reset. No display? Hold power + volume down for 30 seconds until reset screen appears. Fitbit Ionic: Press and hold left button + back button for 20 seconds. Garmin Venu: Hold power for 30 seconds, then select “Reset” from the menu that (hopefully) appears. If your tracker remains unresponsive after reset attempts, hardware failure is likely.
When Swollen Batteries Demand Immediate Replacement
Battery swelling isn’t just inconvenient – it’s dangerous. A bulging lithium-ion cell can rupture, leak corrosive chemicals, or ignite. Recognize these critical warning signs.
Emergency Response for Swollen Units
- Stop using immediately – even if it still powers on
- Remove from wrist and place in metal container away from flammables
- Contact manufacturer – most offer free disposal for swollen batteries
- Never puncture or heat the device
Budget trackers often cost more to repair than replace when batteries swell. For premium models (Garmin Fenix, Apple Watch), professional battery replacement runs $70-$150 – still cheaper than new ($400+). Always verify repair costs before committing.
Repair Cost vs. New Tracker: Smart Decision Guide
Don’t waste money fixing obsolete devices. Use this cost-benefit analysis before authorizing repairs.
Calculate Your Break-Even Point
Replace if:
– Repair costs exceed 40% of a new equivalent model
– Your tracker is over 2 years old (most batteries fail at 500 cycles)
– New models offer critical upgrades (GPS accuracy, battery life)
For example: Fixing a 3-year-old Fitbit Charge 4 ($120 repair) makes little sense when a new Charge 5 offers SpO2 monitoring for $150. But repairing a 1-year-old Garmin Forerunner 255 ($90 fix) beats buying new at $399. Always check manufacturer refurbished programs – they often include warranty at 30% savings.
Prevent Future Power Failures With These Maintenance Hacks
Avoid repeat issues with proactive care. These simple habits extend tracker lifespan by 2+ years.
Monthly Charging Port Inspections
Use a magnifying glass to check contacts weekly. Clean with alcohol swabs every month – buildup happens faster than you think. Always dry contacts completely before charging. For swimmers, rinse after saltwater exposure with fresh water and dry overnight. Never charge in extreme temperatures (below 32°F or above 113°F) – it accelerates battery degradation. Finally, restart your tracker monthly by holding the power button for 30 seconds to clear memory leaks.
A fitness tracker that won’t turn on usually has a fixable cause hiding in plain sight. By methodically checking charging contacts, executing precise force restarts, and diagnosing battery health, you’ll revive most “dead” devices within an hour. Remember the golden rule: When in doubt, clean contacts first and charge longer than expected. If water damage or battery swelling occurs, prioritize safety over data recovery. For models less than 18 months old, leverage manufacturer warranties – most cover battery failures within this window. Keep this guide handy for future power emergencies, and you’ll never face a blank screen without a solution.


