
That vintage floor lamp in your attic isn’t just tarnished—it’s whispering stories of decades past. When greenish-blue patina coats its brass stem or copper base, many abandon it as beyond repair. But how can you clean patina from an old floor lamp without damaging its antique charm? The truth is, most patina responds beautifully to gentle, targeted methods that respect the metal’s history. This guide cuts through the confusion with field-tested techniques proven on 1920s brass torchères to mid-century copper fixtures. You’ll learn exactly which cleaners to avoid (hint: steel wool is a death sentence for plated finishes), how to identify your lamp’s metal in 30 seconds, and why preserving some patina actually increases value.
Patina isn’t dirt—it’s nature’s artwork formed by oxidation over years. While copper develops that signature green verdigris and brass turns dark brown, these layers protect the metal underneath. Aggressive scrubbing strips away irreplaceable character and thins delicate plating. I’ve seen collectors ruin $500 heirlooms by dousing them in vinegar overnight. Instead, we’ll use chemistry-focused approaches that dissolve tarnish while honoring craftsmanship. By the end, you’ll confidently tackle everything from light surface film to stubborn green corrosion—transforming that neglected lamp into a conversation piece that honors its past while shining for the future.
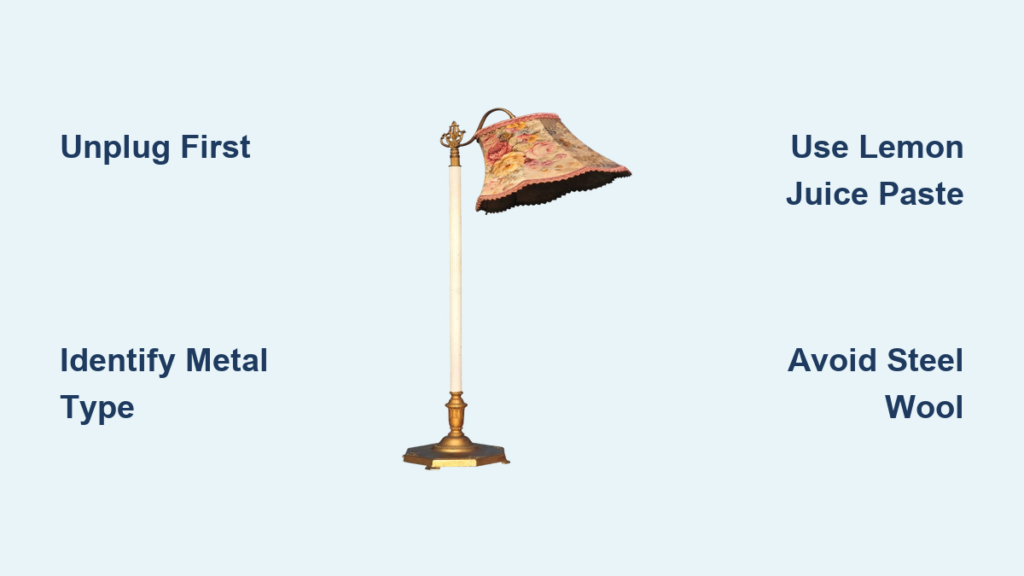
Unplug and Disassemble Your Lamp Before Patina Removal
Never skip this critical safety step. Start by unplugging the lamp and removing the bulb, shade, and any glass/crystal elements. For lamps with electrical components, wrap sockets and wiring in plastic bags—never immerse these parts. Lay out all pieces on a rubber mat to prevent scratches. If your lamp has a felt base, peel it back to check for hidden tarnish underneath (a common trouble spot).
Essential Supplies Checklist
Gather these before starting:
– Non-negotiables: Rubber gloves, microfiber cloths, cotton swabs, soft-bristled toothbrush
– Metal-specific cleaners: Brasso (for solid brass), lemon juice/vinegar (for copper), baking soda
– Avoid these: Steel wool (rips plating), ammonia-based cleaners (eats copper), undiluted vinegar (etches metal)
Why Magnet Testing Prevents Costly Mistakes
Hold a refrigerator magnet against the base. If it sticks, your lamp is brass-plated over steel or iron—requiring extreme gentleness. Non-magnetic metal indicates solid brass or copper, which tolerates slightly stronger methods. Test cleaners on a hidden area (like the bottom rim) first; if the finish smudges, it’s lacquered and needs acetone-free approaches.
Identify Your Lamp’s Metal: Brass, Copper, or Plated?
Your cleaning method depends entirely on the underlying metal. Misidentification causes irreversible damage—like using acid on plated finishes that strips the thin metal layer.
The Lacquer Coating Test
Dab nail polish remover on a cotton swab and rub an inconspicuous spot. If the swab turns sticky or the metal color transfers, your lamp has a clear lacquer sealant. Do not use acidic cleaners—they’ll dissolve the coating. Stick to soap-and-water cleaning only.
Spotting Plated vs. Solid Metal
Examine seams or screw holes. Plated lamps show a different-colored base metal (often dull gray) where plating has worn thin. Solid brass/copper maintains consistent color throughout. If you see flaking or “alligator skin” texture, it’s plated—requiring feather-light pressure during cleaning.
Remove Light Patina with Lemon Juice and Salt Paste
For surface-level tarnish (yellowish-brown for brass, light green for copper), skip harsh chemicals. The acid in lemon juice safely breaks down oxidation without abrasives.
3-Step Paste Application
- Mix 2 tbsp fresh lemon juice + 1 tsp salt into a thick paste
- Apply with microfiber cloth in small circular motions (5 minutes max per section)
- Rinse immediately with water-dampened cloth—never let it dry
Pro Tip: For intricate filigree, dip cotton swabs in the paste. Work in 2-inch sections, replacing swabs every 30 seconds to avoid redepositing grime.
Why Vinegar Requires Caution
While 1:1 vinegar-water solutions work for solid copper/brass, they’re too aggressive for plated lamps. If using vinegar, limit contact time to 10 minutes max and always add 1 tbsp salt to buffer acidity. Never soak—dampen a cloth and wipe on/off.
Solid Brass vs. Plated Lamps: Tailored Cleaning Approaches

One-size-fits-all methods destroy vintage finishes. Customize your approach based on metal type.
Solid Brass Lamp Protocol
Use Brasso or Wright’s Polish:
– Apply dime-sized amount to cloth (never directly on lamp)
– Rub with the metal grain using light pressure
– For crevices, use cotton swab dipped in polish
– Buff immediately with dry microfiber cloth
Brass-Plated Lamp Survival Guide
Never use commercial polishes—they strip plating. Instead:
1. Dampen cloth in mild soapy water (1 drop Dawn per cup water)
2. Wipe gently in one direction
3. Dry instantly with soft towel
4. Apply Renaissance Wax with microfiber cloth for protection
Electrolysis Method for Heavy Brass Patina Removal
For lamps with severe green/blue corrosion (like outdoor-exposed copper), electrolysis lifts tarnish without touching the metal—ideal for intricate bases.
DIY Electrolysis Setup
- Fill plastic tub with 1 gallon warm water + 1 tbsp baking soda
- Submerge non-electrical lamp parts
- Attach negative wire from 9V battery to lamp
- Attach positive wire to stainless steel spoon (submerged)
- Run 15 minutes until tarnish lifts
Warning: Only attempt this on solid metal lamps. Never use on plated finishes—it’ll cause pitting.
Fix Green Verdigris and Water Spots on Copper Lamps

Copper’s iconic green patina (verdigris) requires special handling. Left untreated, it becomes powdery and destructive.
Emergency Verdigris Treatment
- Make paste: 2 tbsp buttermilk + 1 tsp kosher salt
- Apply to green spots with cotton swab
- Wait 5 minutes—do not scrub
- Rinse with baking soda-water solution (neutralizes acid)
- Dry thoroughly with hairdryer on cool setting
Erase Water Spots in 60 Seconds
Mix equal parts vinegar and water. Dip corner of microfiber cloth, rub spot in tight circles for 20 seconds, then polish with dry cloth. For stubborn deposits, make baking soda paste and gently rub before rinsing.
LED Bulb Conversion to Prevent Future Patina Buildup
Heat accelerates oxidation—incandescent bulbs cook patina into metal. Switching to LEDs solves 70% of future tarnish.
Conversion Checklist
- Use warm-white LEDs (2700K) to maintain vintage ambiance
- Choose A19 shape bulbs for standard lamp sockets
- Ensure enclosed-fixture rating if using glass shades
- Never exceed original wattage equivalent
Place silica gel packets inside the lamp base to absorb moisture. Pair with annual waxing (Renaissance Wax applied with cotton cloth) for museum-level protection.
5 Dangerous Mistakes That Ruin Vintage Lamp Finishes
Avoid these patina-removal pitfalls that turn restorations into regrets:
- Letting cleaners dry on metal → Causes etching (always rinse immediately)
- Using paper towels → Contains wood fibers that scratch soft metals
- Ignoring humidity → Store lamps with moisture absorbers in dry closets
- Skipping protective wax → Unprotected metal tarnishes 3x faster
- Over-polishing → Thins metal by 0.001″ per session (visible after 50 cleanings)
When to Call a Professional Lamp Restorer
For these lamps, DIY risks catastrophic damage:
– Art Deco pieces with gold leaf accents
– Tiffany-style glass shades ($$$ value)
– Lamps with electrical damage (frayed wires, cracked sockets)
– Family heirlooms with provenance documentation
Seek restorers certified by the American Institute for Conservation. They use micro-abrasive tools and pH-neutral solutions that preserve patina depth while stabilizing corrosion.
Restore your lamp patiently—patina removal isn’t a sprint. Start with the gentlest method (soap/water), progress only if needed, and always preserve original character. Within an hour, that once-dull base will glow with a warm, honeyed luster that honors its age while showcasing craftsmanship. Most importantly, you’ve transformed a forgotten relic into a legacy piece that’ll gleam for generations. For ongoing care, dust weekly with microfiber, apply wax quarterly, and keep your lamp away from humid bathrooms. The real magic isn’t in making it “like new”—it’s in revealing the beauty time tried to hide.


