
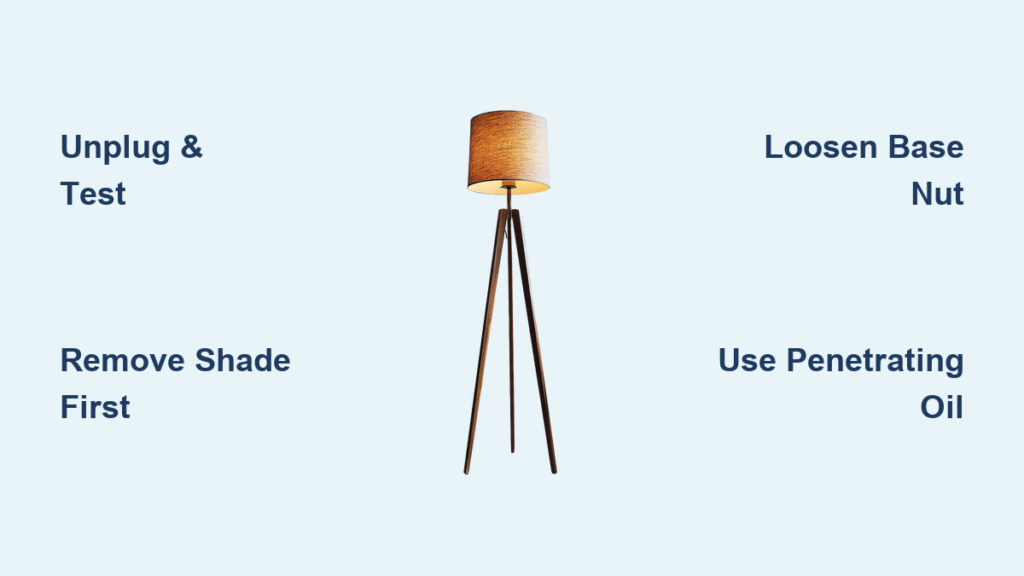
Your floor lamp suddenly stops working after years of reliable service. Or maybe you’re preparing for a move and need to pack it safely. Whatever the reason, knowing how to disassemble a floor lamp correctly prevents broken parts, electrical hazards, and frustrating reassembly nightmares. Most lamp damage occurs during improper disassembly—not from the original problem. This guide reveals the exact sequence for taking apart any standard floor lamp safely, whether you’re fixing wiring, replacing a bulb socket, or preparing for relocation. You’ll learn model-specific tricks for IKEA, Holtkoetter, and vintage lamps that professional repair technicians use—but without their $75/hour fee.
Critical Safety Steps Before Touching Your Lamp
Never skip power verification—even if you unplugged it hours ago. Faulty wiring can retain dangerous current. First, unplug the lamp and test the outlet with a phone charger or nightlight to confirm zero power. For lamps with USB ports or built-in outlets (like many modern IKEA models), disconnect all devices. Then wait 15 minutes for capacitors to discharge. While waiting, put on safety glasses and work gloves—glass shades shatter unexpectedly, and metal edges cut fingers during disassembly.
Gather these non-negotiable tools:
– Phillips and flathead screwdrivers (sizes #1 and #2)
– Adjustable wrench + rubber strap wrench (prevents scratches on poles)
– Needle-nose pliers (for wire handling)
– Small container for screws (magnetic trays prevent loss)
– Penetrating oil (WD-40) for stuck parts
– Smartphone for photos (your reassembly lifeline)
Clear a soft workspace—lay towels on hardwood floors to avoid scratches. Place all tools within arm’s reach. Rushing disassembly causes stripped screws and broken components, turning a 20-minute job into a lamp replacement.
Executing the Disassembly Sequence Without Damage
Remove Lampshade and Bulb in 30 Seconds
Start here—90% of DIYers damage shades by forcing them. Unscrew the finial (top decorative knob) by turning it counterclockwise. If it sticks, wrap a rubber band around it for grip. Gently lift the shade off the harp (metal frame). For clip-on shades like IKEA HEKTAR models, press the metal clip inward while sliding the shade up. Remove the bulb last—always cool to the touch. Critical mistake alert: Never pull shades sideways; this bends harp wires irreparably.
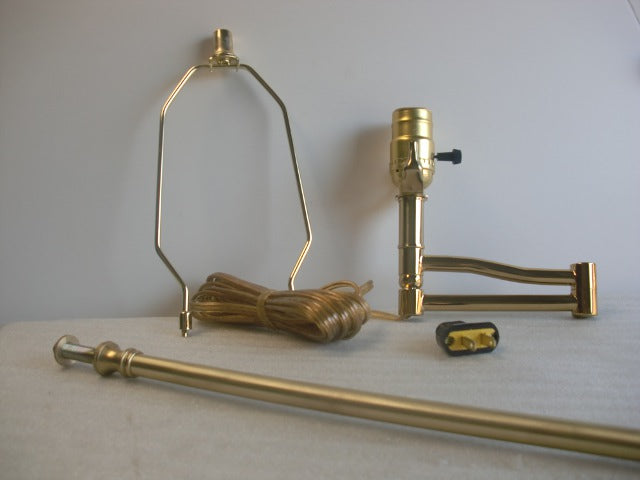
Free the Harp and Socket Assembly Safely
The harp base screws directly into the socket shell. Hold the socket firmly with one hand while unscrewing the harp base counterclockwise with the other. If it resists, apply penetrating oil to the seam and wait 10 minutes. For Holtkoetter swing-arm lamps, locate the tiny set screw under the decorative cap near the harp base—loosen it with a 1.5mm hex key before unscrewing. Once detached, you’ll see the socket’s outer shell. Look for “PRESS” stamped on its side. Squeeze the shell and base together firmly, then pull straight up to expose wiring. Pro tip: Take a photo of wire connections now—colors vary by manufacturer.
Access Internal Wiring Without Short Circuits
With the socket shell removed, you’ll see two terminal screws connecting wires. Loosen these screws just enough to slide wires free—don’t yank them. Note: Black (hot) and white (neutral) wires often attach to brass and silver screws respectively, but vintage lamps may reverse this. For arc lamps like the IKEA FÖRHÖJA, follow wiring down the pole to the base. Disconnect at the terminal block inside the base—not mid-pole—to avoid cutting wires too short. Warning: If wires feel brittle or cracked, stop disassembly. You need professional rewiring before proceeding.
Separate Pole From Base Without Stripping Threads
This step causes most DIY disasters. First, peel back the felt pad on the base bottom—many hide a large central nut. For weighted bases (common in tripod lamps), use an adjustable wrench on the nut while holding the pole steady. Counter-clockwise rotation usually loosens it. Sectional poles (e.g., IKEA SIMRISHAMN) require unscrewing upper sections from the base. Key insight: Wrap rubber bands around smooth poles for grip if your hands slip—never use metal pliers directly on finishes. If resistance occurs, apply penetrating oil to the seam between pole and base, wait 15 minutes, then try again.
Free Stuck Components Using Professional Techniques
When parts won’t budge:
1. Penetrating oil method: Apply WD-40 to threads, wait 30 minutes, then tap the stuck part with a rubber mallet while rotating counterclockwise.
2. Heat expansion trick: Blow a hairdryer on metal bases for 60 seconds—heat expands outer metal, breaking corrosion bonds. Never use open flames.
3. Rubber grip hack: Wrap a bicycle inner tube around the pole, then clamp channel-lock pliers over it. The rubber prevents scratches while providing torque.
Never force parts—if you hear metal grinding, stop immediately. Stripped threads require costly replacements. For vintage brass lamps, apply vinegar to corrosion spots first; acidic properties dissolve mineral deposits gently.
Fixing Model-Specific Disassembly Nightmares
IKEA Floor Lamps (HEKTAR/FÖRHÖJA)
Skip the manual—IKEA hides fasteners cleverly. For HEKTAR models, remove two screws under the base plate to detach the pole. The wiring runs through a channel in the base—don’t pull wires until the plate is off. FÖRHÖJA lamps require unscrewing the top finial first, then sliding the entire shade assembly upward to expose hidden base screws. Critical note: IKEA poles often have reverse threads—loosen clockwise instead of counterclockwise.
Holtkoetter #9424 Swing-Arm Lamps
These luxury lamps have ball-joint arms that seize over time. Locate the 3mm set screw under the decorative cap near the pivot point. Remove it with a hex key, then gently tap the arm upward with a rubber mallet to release the ball bearing. Warning: Brass arms scratch easily—use plastic pry tools, never metal. Once separated, withdraw wiring through the arm using a flexible wire snake tool.
Vintage or Tiffany-Style Lamps
Handle with museum-level care. Stained glass panels are held by lead cames (strips). Insert a plastic spudger under the lead to gently lift panels—never pry with metal. For corroded sockets in antique brass lamps, soak overnight in vinegar before attempting removal. Pro tip: Photograph every panel’s position; reassembly requires exact glass alignment.
Advanced Disassembly Hacks You Won’t Find Online
:max_bytes(150000):strip_icc()/electrical-wire-color-coding-1152863-1885f3461ba9443f8bcf14a1f9236a2d.png)
- The photo protocol: Snap pictures at every disassembly stage—not just key steps. Include close-ups of wire connections and screw placements.
- Magnetic organization: Place a magnet under your parts container. Screws stick to it, preventing loss in carpet.
- Thread identification: Most lamp poles use 27 threads per inch (TPI). If reassembly feels “wrong,” check for reverse threads—common in European lamps.
- Temporary wire labeling: Wrap colored tape around disconnected wires (e.g., red for hot) before removing socket shells.
Final Pre-Disassembly Safety Checklist
Before touching tools, verify:
1. Lamp is unplugged AND outlet tested with another device
2. Bulb is cool (wait 30+ minutes if recently on)
3. Safety glasses and gloves are on
4. Workspace is clear of tripping hazards
5. Smartphone camera is ready for documentation
Consequence reminder: Skipping these checks risks electrical shock or flying glass shards. One missed step here can land you in the ER.
Disassembling a floor lamp isn’t about brute force—it’s understanding hidden fasteners and material limitations. By following this sequence, you’ll avoid the #1 mistake: forcing components and creating permanent damage. Remember that penetrating oil and patience solve 95% of “stuck” issues. Once disassembled, clean corrosion from threads with vinegar, inspect wiring for brittleness, and photograph every part before reassembly. If wiring looks compromised or parts are missing, consult a professional—safety trumps DIY pride. Now that your lamp is safely apart, you’re ready for repairs, relocation, or creative repurposing. Keep this guide bookmarked for reassembly—it’s the same process in reverse, but with critical differences we’ll cover in our next guide.


