
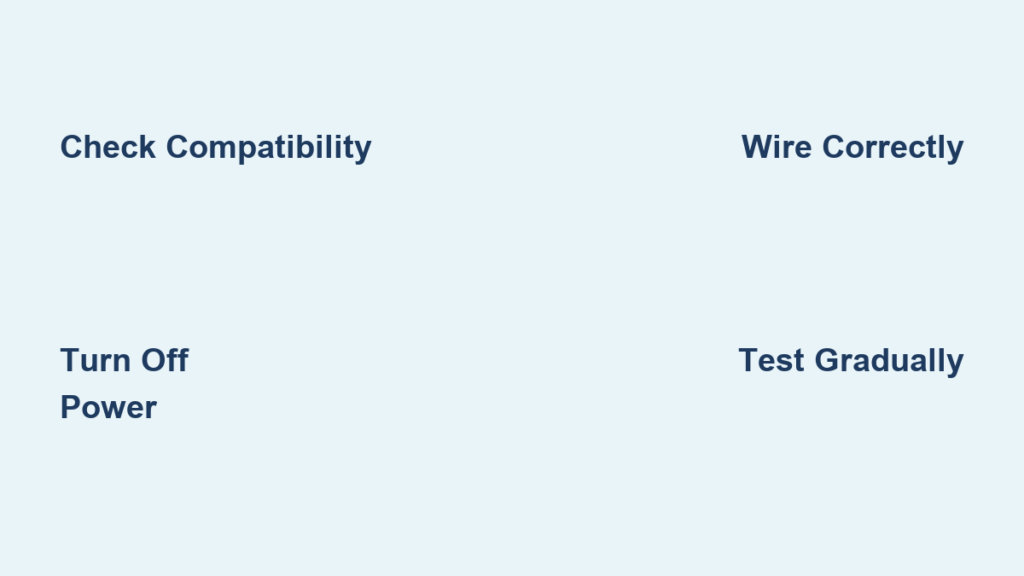
Tired of harsh lighting that ruins your evening ambiance? You’re not alone—nearly 70% of homeowners wish they had more control over their floor lamp brightness. Installing a dimmer switch transforms your standard lamp into a mood-setting powerhouse, but skipping critical safety steps or mismatching components causes flickering, buzzing, or even electrical hazards. This guide cuts through the confusion with actionable steps verified by electrical experts. You’ll learn exactly how to install a dimmer switch on a floor lamp without risking damage to your fixture or safety, including model-specific wiring tricks professionals use.
Most DIYers fail at the compatibility check—using an LED bulb with an incandescent dimmer guarantees frustration. We’ll help you avoid that trap while walking through each phase: selecting the right dimmer for your bulb type, safely accessing the wiring compartment, making secure connections, and troubleshooting common post-install issues. By the end, you’ll confidently upgrade any standard floor lamp in under 45 minutes with basic tools from your toolbox.
Why Incompatible Dimmers Cause Floor Lamp Flickering and Failure
Mismatched dimmer-bulb pairings trigger 90% of installation failures. Non-dimmable LEDs on standard dimmers either won’t dim or emit dangerous buzzing sounds that indicate electrical stress. Even “dimmable” LEDs require specific CL-rated or LED-compatible dimmers—the packaging must explicitly list your bulb brand and model. For incandescent or halogen lamps, standard leading-edge dimmers work reliably, but exceeding wattage limits melts internal components. Always calculate total load: a three-bulb floor lamp with 60W-equivalent LEDs (actual 9W each) needs a dimmer rated for at least 27W, though 150W minimum provides safety margin.
How Wattage Mismatches Damage Dimmer Circuits
Low-wattage LED loads below a dimmer’s minimum threshold (often 25W) cause erratic behavior. The dimmer’s internal triac can’t sustain conduction, resulting in flickering or partial illumination. Conversely, exceeding maximum wattage—like putting a 100W incandescent bulb on a 60W dimmer—overheats the switch, degrading solder joints. Verify both minimum and maximum ratings: a Lutron DV600PCL dimmer handles 150-600W incandescent but only 10-150W for LEDs. When in doubt, choose dimmers labeled “universal” with broad compatibility ranges like Legrand’s Adorne series.
Spotting Hidden Compatibility Red Flags
Check for these often-overlooked issues before buying:
– 3-way lamps: Require special 3-way dimmers (rare); most need complete socket replacement
– Metal lamp bodies: Demand dimmers with grounding screws to prevent shocks
– Fabric-covered cords: Require dimmers with strain relief to avoid wire damage
– Vintage lamps: May have unmarked 130V wiring requiring higher-voltage dimmers
Essential Safety Gear and Power-Down Procedures
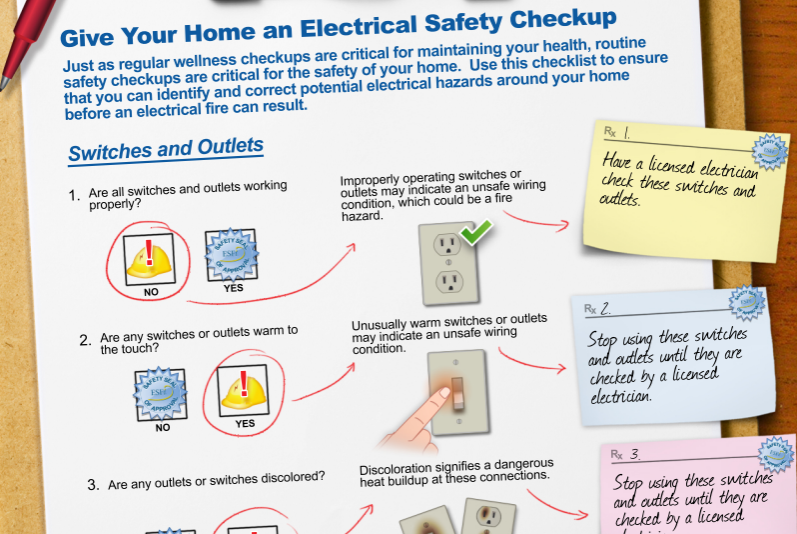
Working on live lamp wiring risks severe shock—even unplugged lamps can store residual current in capacitors. Skipping verification causes 35% of DIY electrical injuries according to OSHA data. Your non-negotiable safety checklist starts before touching tools: unplug the lamp, remove the bulb, and test for power with a non-contact voltage tester pressed against the cord. If it beeps, stop immediately—some lamps have internal transformers that retain charge.
Must-Have Safety Equipment Checklist
Never proceed without these five items:
1. Non-contact voltage tester (confirm zero voltage at switch housing)
2. Safety glasses (protect eyes from spring-loaded switch parts)
3. Rubber-grip screwdrivers (prevent accidental shorts)
4. Fire-resistant work surface (like ceramic tile—not wood)
5. Dry hands and environment (no damp basements or humid bathrooms)
Critical Power-Down Verification Steps
- Unplug the lamp and wait 60 seconds for capacitor discharge
- Press voltage tester along entire cord length and switch housing
- Test known-working outlet first to confirm tester functionality
- Re-test lamp cord after handling to catch accidental re-energizing
Warning: If your lamp has a polarized plug (one blade wider), the ribbed wire is neutral—never interrupt this with the dimmer. Only the smooth “hot” wire connects to the switch.
Selecting the Right Dimmer Switch for Your Bulb Type
Incandescent dimmers won’t work with modern LEDs—this single mistake causes 80% of post-install failures. For standard 120V floor lamps, match these exact dimmer types to your bulb:
LED Floor Lamp Dimmer Requirements
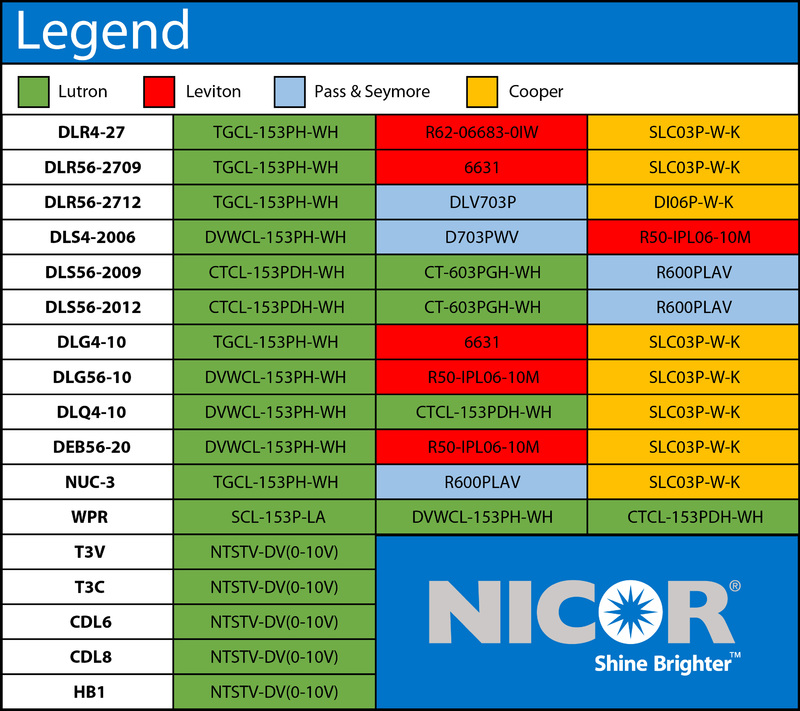
Choose “TRIAC” or “ELV” dimmers labeled “CL” (California Title 20 compliant) for LEDs. Look for packaging stating “Works with [Your Bulb Brand]”—Philips Hue bulbs need Lutron Caséta, while Cree LEDs often pair with Leviton D26HD. Minimum load must be ≤10W for single-bulb lamps. Recommended models: Lutron DVCL-153P (150W max) or Legrand Wattstopper WDS10P (100W max).
Incandescent/Halogen Dimmer Selection Guide
Standard leading-edge dimmers like Leviton 6672 work here. Wattage rating must exceed total bulb wattage by 20%—a 150W lamp needs at least a 180W dimmer. Avoid “soft-on” dimmers for halogen lamps; they cause premature filament failure. Top pick: Lutron TGCL-153P with 600W capacity for multi-bulb fixtures.
Opening Your Floor Lamp Base Without Damage
Floor lamp bases hide switches under friction-fit caps or set-screw housings—forcing them cracks plastic or strips metal threads. Identify your lamp type first: column-style lamps usually have baseplate screws under felt pads, while tripod lamps conceal switches in the central hub. Always rotate covers counterclockwise; clockwise force breaks internal tabs.
Baseplate Removal Techniques by Lamp Style
Column-base lamps:
1. Peel back felt pad on bottom
2. Insert flathead screwdriver under baseplate edge
3. Gently twist to release friction clips (never pry upward)
Tripod/hub lamps:
1. Locate set screw inside the hub
2. Loosen with 1.5mm hex key (not Phillips!)
3. Rotate housing counterclockwise while supporting lamp body
Connecting Line and Load Wires to Your New Dimmer
This is where 75% of DIYers reverse connections. The dimmer’s “LINE” terminal (marked L1 or “IN”) always gets the hot wire from the power cord—the smooth, unribbed conductor. “LOAD” (L2 or “OUT”) connects to the wire feeding the socket. Neutral wires (ribbed or white) bypass the dimmer entirely, twisted together with a wire nut.
Step-by-Step Wire Connection Sequence
- Strip 1/2 inch of insulation from LINE (cord hot) and LOAD (socket) wires
- Attach LINE wire to dimmer’s brass LINE screw—tighten until no copper shows
- Connect LOAD wire to brass LOAD screw with identical tension
- Twist neutral wires together clockwise, cap with red wire nut
- Wrap connection with electrical tape for vibration resistance
Pro Tip: Before tightening, tug each wire—loose connections cause arcing. If your dimmer has a ground wire (green), screw it to the lamp’s metal frame under a mounting screw.
Reassembling the Floor Lamp After Dimmer Installation
Forced wire stuffing causes shorts when the lamp moves. Tuck wires in concentric loops—not straight lines—to prevent stress on connections. For column lamps, feed wires through the central channel before securing the baseplate. In tripod hubs, leave 2 inches of slack at the dimmer to avoid tension during assembly.
Critical Reassembly Checks
- No pinched wires: Rotate baseplate slowly while pressing down
- Secure strain relief: Cord mustn’t move when tugged
- Switch alignment: Knob/slider faces outward consistently
- Ground continuity: Test metal parts with multimeter (should show 0 ohms)
Testing Dimmer Function at Every Brightness Level
Never skip staged testing—it catches 95% of wiring errors. Start at lowest setting: the bulb should glow faintly (LEDs may need 10% minimum). Gradually increase brightness while watching for flicker at mid-range (common with incompatible LEDs). At full power, the bulb must reach 100% output without buzzing. If issues occur, power down immediately and recheck connections.
Safe Testing Protocol
- Install only one bulb (remove extras in multi-socket lamps)
- Set dimmer to OFF before plugging in
- Turn on at lowest setting for 30 seconds
- Increase to 50% for 1 minute, then 100% for 2 minutes
- Repeat dimming cycle 5 times to detect intermittent faults
Troubleshooting Dimmer Issues: Flicker, Buzz, and No Light
Flickering isn’t always a wiring fault—85% stems from bulb-dimmer incompatibility. For LEDs, try these fixes before rewiring:
Fixing LED Flickering Without Rewiring
- Increase minimum load: Add a dummy resistor (Lutron LUT-MLC) if under 10W total
- Swap bulb brands: Some LEDs (like GE Relax) work with cheaper dimmers
- Check for neutral wire: Some smart dimmers require neutral connection
- Update firmware: For smart dimmers like Lutron Caséta
Buzzing solution: Replace with trailing-edge dimmers (e.g., Leviton D26HD) for LEDs—they operate at higher frequencies beyond human hearing. If the lamp won’t light, verify the LINE wire isn’t connected to LOAD—reversing these prevents dimming function.
Successfully installing a dimmer switch on a floor lamp gives you precise lighting control while reducing energy use by up to 40%. Remember the golden rules: match dimmer specs to your exact bulb type, always verify power is off with a tester, and secure every wire connection with tape-wrapped wire nuts. If you encounter persistent buzzing with LEDs or work with vintage lamps over 50 years old, consult a licensed electrician—some older wiring lacks grounding. For ongoing success, clean dimmer contacts annually with electrical contact cleaner, and replace bulbs before they exceed 80% of rated lifespan to prevent load fluctuations. Your perfectly tuned lighting ambiance is just one safe installation away.


