
Nothing ruins a cozy evening faster than the crash of a toppled floor lamp, especially when it shatters a bulb or creates an electrical hazard. If you’ve ever wondered how to keep a floor lamp from tipping over, you’re not alone—tall lamps with narrow bases are surprisingly vulnerable to curious pets, energetic children, and even accidental bumps from furniture movement. These accidents aren’t just inconvenient; they pose real fire risks from exposed wiring and hot bulbs contacting flammable materials, plus potential injuries from broken glass.
The good news is that securing your floor lamp doesn’t require expensive professional help or permanent modifications. Whether you live in a bustling household with pets and kids or simply want to prevent accidental knocks, this guide reveals proven methods to stabilize any floor lamp. You’ll discover solutions ranging from simple DIY fixes you can implement today to more robust systems for high-risk environments—all designed to keep your lighting safe without compromising style.
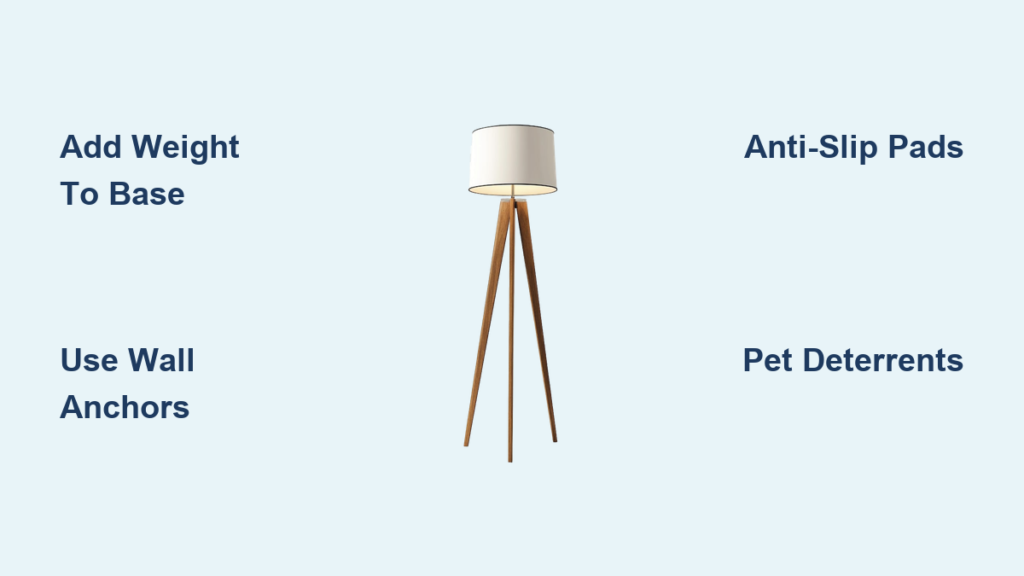
Add Weight Directly to Your Lamp’s Base for Instant Stability
The most effective way to prevent tipping starts right at the foundation—literally. A heavier base dramatically lowers the center of gravity, making your lamp far more resistant to being knocked over.
Fill Hollow Bases with Dense Materials
If your lamp has a hollow metal base (common in many arc-style lamps), you can significantly increase stability by filling it with sand, lead shot, or steel ball bearings. Seal the opening securely with epoxy or a screw-on cap to prevent spills. For solid bases that can’t be modified, attach external weights underneath using strong adhesive or bolts. Many homeowners successfully use concrete pavers wrapped in fabric sleeves or stackable weight plates designed specifically for lamp bases.
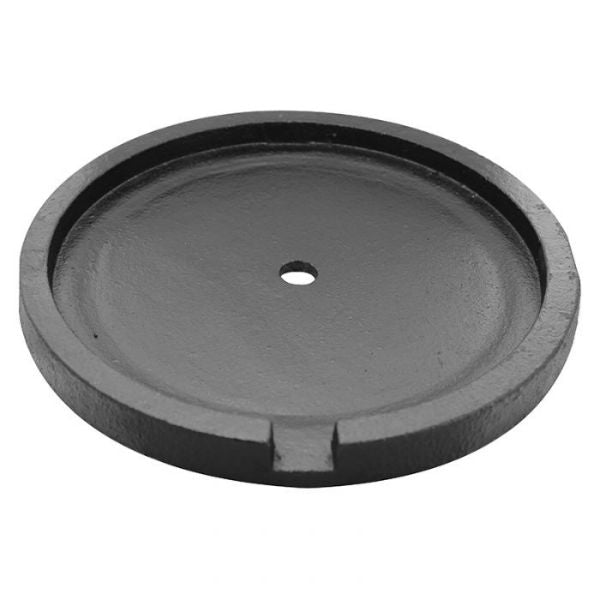
Install Commercial Weighted Base Plates
Skip DIY hassles with purpose-built solutions like 5-15 pound iron base plates that screw directly to your lamp’s bottom. These low-profile options maintain your lamp’s aesthetic while adding crucial stability. Wrought iron cross-bases provide even better resistance by distributing weight across a wider area—perfect for tall or top-heavy designs that naturally want to tip forward.
Install Wall Anchors to Prevent Catastrophic Tip-Overs
When pets or children are involved, anchoring your lamp to the wall provides the ultimate protection against dangerous falls.
Use Furniture Anti-Tip Straps for Quick Security
These adjustable web straps connect your lamp to a wall stud using tension locks and tamper-resistant screws. Installation takes minutes: locate a wall stud with a stud finder, mount the wall bracket with heavy-duty screws, then attach the strap to your lamp’s frame (not just the base, which could detach). Look for kits rated for at least twice your lamp’s weight for safety margin.
Create a Discreet Mounting System
For a cleaner look, install a French cleat mounting system where the lamp slides onto a wall bracket. Alternatively, use low-profile L-brackets screwed to baseboard molding—position them so they’re hidden behind the lamp’s base but still prevent forward movement. In earthquake-prone areas, consider flexible tether systems that allow slight movement without full tip-over.
Maximize Floor Grip with Anti-Slip Solutions
When drilling isn’t an option, dramatically improve stability by increasing friction between your lamp and the floor.
Select the Right Floor-Specific Solution
For hardwood floors: Apply museum putty or earthquake wax—these non-damaging adhesives create incredible grip without residue. A quarter-sized dollop under each contact point works wonders.
For tile surfaces: Use high-tack gel pads or suction cup systems designed for smooth surfaces. The micro-suction technology in premium pads creates vacuum-like adhesion.
For carpets: Try wide-base anti-slip pads with carpet spikes that grip deep into pile without damaging fibers.
Upgrade with Heavy-Duty Tapes
3M VHB tape provides semi-permanent security that withstands seasonal humidity changes. Cut small strips to place under the base’s contact points—this solution works surprisingly well even on slightly uneven surfaces where full pads might rock.
Pet-Proof Your Floor Lamp Against Curious Cats and Dogs

Pets, especially cats, treat floor lamps as irresistible climbing structures. Stop these accidents before they happen.
Apply Effective Deterrents
Spray pet-safe bitter apple solution on the lower shaft and base—cats hate the taste but it’s harmless. For persistent climbers, wrap the lower 18 inches with double-sided tape (cats dislike the sticky sensation on their paws). Place motion-activated air sprayers nearby that emit a harmless burst when movement is detected.
Create Physical Barriers
Surround the base with a decorative wire mesh cage painted to match your decor, or position spiky plant mats (designed for furniture protection) around the perimeter. These invisible-to-humans deterrents stop pets without altering your room’s aesthetic. For dogs prone to tail-whipping accidents, elevate the base on a small platform just out of wagging range.
Match Solutions to Your Flooring Type for Better Results
Your floor material dramatically impacts which stabilization methods work best—don’t use a carpet solution on hardwood!
Carpet-Specific Fixes
Skip standard anti-slip pads—they’ll sink into pile and become useless. Instead, use carpet anchor screws with wide heads that grip deep into padding, or place a thin plywood circle under the base to distribute weight evenly across the carpet surface.
Hardwood and Tile Hacks
On smooth surfaces, clean both the floor and base thoroughly before applying museum putty—any dust reduces effectiveness. For valuable hardwoods, test putty in an inconspicuous area first. Tile floors benefit from suction cup systems with mechanical advantage locks that maintain grip despite temperature changes.
Build a DIY Stabilization System on a Budget
You don’t need expensive gear to create effective lamp security—repurpose household items for instant stability.
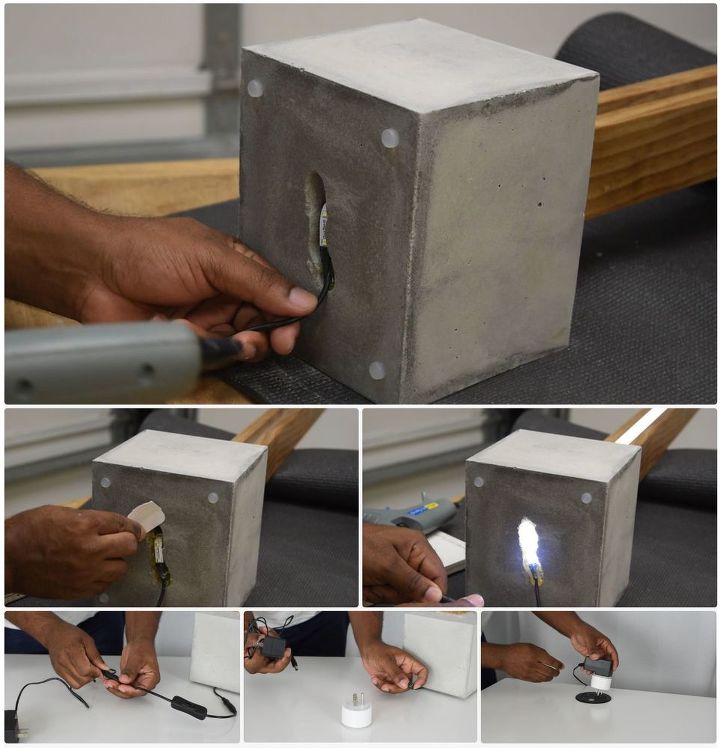
Create Weighted Extensions
Drill a hole through a concrete paver, run a bolt through your lamp’s base into the paver, and secure with washers. For hollow bases, pour sand into PVC pipe rings that fit around the base, then seal the top. Olympic weight plates (1″ hole size) often fit standard lamp bases perfectly—wrap them in fabric for a decorative touch.
Make Outriggers from Common Materials
Construct a star-shaped base from scrap wood cut into 3-4 arms, each weighted at the end with sandbags. Attach securely to your lamp’s base with L-brackets. PVC pipe works great for adjustable outriggers—simply glue elbow joints to extend the base footprint.
Maintain Your Anti-Tip Measures for Long-Term Safety
Stability systems degrade over time—make inspections part of your household routine.
Conduct Monthly Safety Checks
Test for base movement by gently pushing your lamp from different angles. Inspect anti-slip pads for dust accumulation (clean with rubbing alcohol) and replace putty every 3-6 months as it loses tackiness. Check wall straps for fraying and ensure all hardware remains tight—loose connections are the #1 failure point.
Seasonal Adjustments You Can’t Ignore
Humidity changes cause wood floors to expand and contract, affecting grip. In winter, reapply museum putty after heating systems dry the air. Before holiday gatherings with extra traffic, reinforce temporary solutions with additional anchors. After any near-miss incident, immediately upgrade your stabilization method—you got lucky once.
Final Safety Checklist Before You Finish
A truly secure floor lamp uses multiple layers of protection. Start with weighted base solutions as your first line of defense, add floor-specific grip enhancements as your second layer, then implement wall anchoring for high-risk environments. Never rely on just one method—combine approaches for redundancy. Remember that the best solution matches your specific lamp design, household risks, and flooring type. With these strategies implemented, you’ll transform your floor lamp from a potential hazard into a stable, safe lighting solution that enhances your home without worry.


