
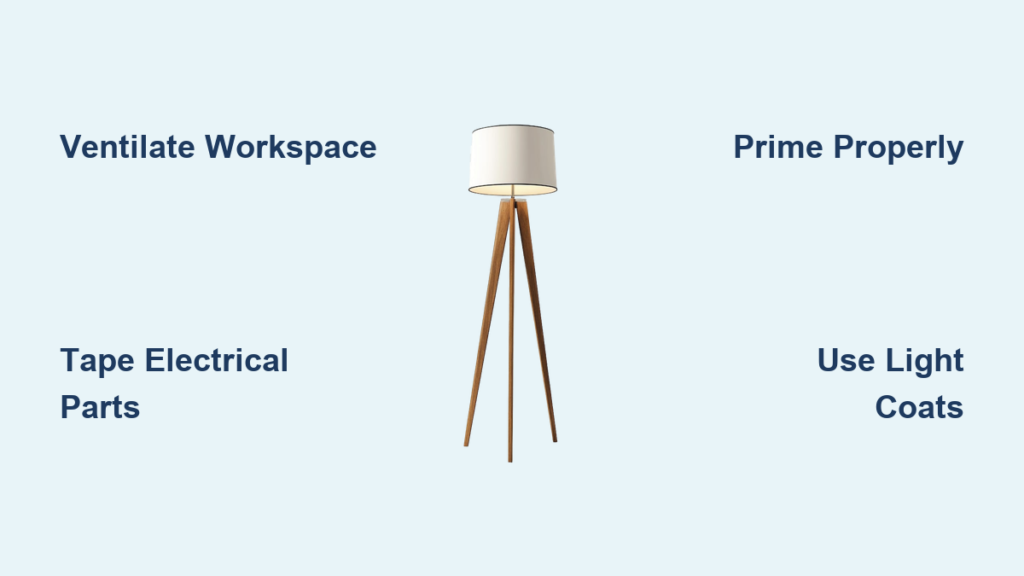
That once-stylish floor lamp now clashes with your modern decor? Instead of paying $150+ for a designer replacement, reviving your existing textured wood lamp takes just one weekend and $20 in supplies. Repainting a floor lamp properly solves two common frustrations: peeling paint from poor prep and wasted effort when colors drown out beautiful raised patterns. This guide cuts through the guesswork with field-tested techniques specifically for textured wood bases—revealing exactly how to highlight carved details while avoiding sticky drips or electrical hazards. You’ll master the spray-and-wipe method professionals use for gallery-quality finishes, plus discover why skipping one $5 primer causes 90% of DIY paint failures.
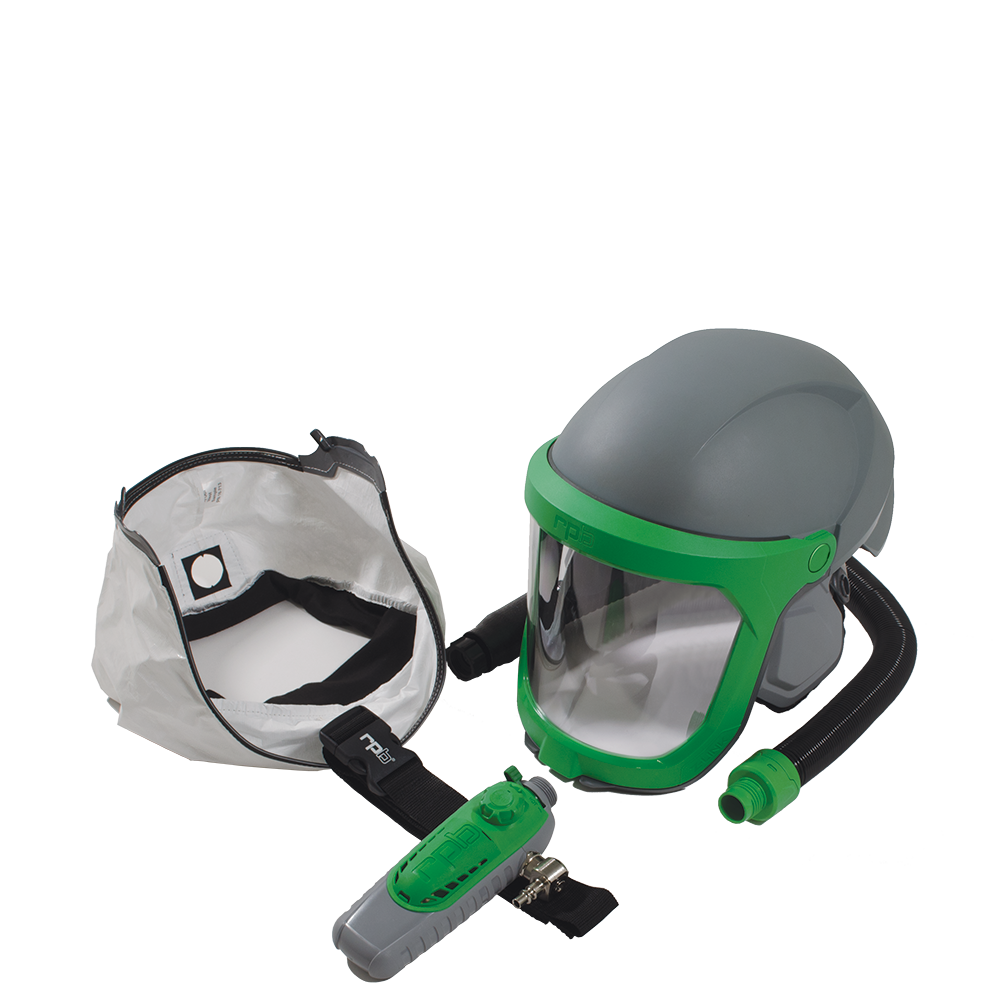
Most lamp makeovers fail at step zero: improper workspace setup. Paint fumes trapped indoors can cause headaches within minutes, while dust particles ruin smooth finishes. The solution? Treat your garage like a mini paint booth: open all doors, position a box fan blowing outward near windows, and lay overlapping cardboard sheets taped to the floor. Always wear an N95 respirator—not just a dust mask—during sanding and spraying. Keep a fire extinguisher visible since spray paint is highly flammable near electrical outlets. Never skip taping the cord plug; one accidental spray mist inside the socket creates a shock hazard when reassembled.
Critical Safety Steps for Painting a Floor Lamp Without Fumes
Ventilating Your Garage or Workshop for Spray Painting
Work only on dry, windless days with temperatures between 50-90°F. Set up two fans: one pulling fresh air in through a side door, another exhausting fumes out a garage door. Position your lamp on a wire rack (not cardboard) for 360° access—this prevents sticky bottoms from paint pooling on flat surfaces. If spraying metallic paints, drape plastic sheeting over nearby cars or tools; overspray sticks permanently to metal surfaces. Always test spray on newspaper first to check nozzle clogs—clogged nozzles cause uneven spatter that ruins textured details.
Essential Gear: Respirators, Gloves, and Drop Cloths
Ditch flimsy paper masks for a 3M Half Facepiece Respirator with organic vapor cartridges ($15 at hardware stores). Wear nitrile gloves to block paint chemicals from absorbing through skin cracks. Use blue painter’s tape (not standard masking tape) on cords—it won’t tear fabric insulation when removed. For drop cloths, choose canvas over plastic; plastic causes slippery surfaces while canvas absorbs drips. Keep a dedicated “clean zone” table 10 feet from spraying area for tools—this prevents dust-coated rags from contaminating your wet paint.
Disassembling Your Floor Lamp: Removing Bulbs and Taping Cords

Unplugging and Removing the Lampshade Safely
Always unplug the lamp before touching any components. Gently twist off the harp (the wire frame holding the shade), then lift the shade straight up—never pull sideways, which cracks glued seams. For clip-on shades, slide the clip toward the socket base while supporting the shade. If your lamp has a finial (the decorative top knob), wrap it in microfiber cloth before twisting to avoid scratching new paint later. Store small parts in labeled ziplock bags taped to the cord.
Masking Off Electrical Components with Painter’s Tape
Tape the socket threads first using 1-inch wide painter’s tape wrapped in overlapping spirals—this blocks paint from seeping into wiring holes. Cover the entire socket cup with aluminum foil before taping the edges; foil creates a removable barrier against overspray. For the cord, apply tape in 4-inch segments every 6 inches, stretching it slightly as you wrap for seamless coverage. Never tape near the plug—if paint seals the prongs, it creates electrical resistance that overheats the cord.
Deep Cleaning and Sanding Textured Wood Lamp Bases
Why Degreasers Beat Water for Lamp Cleaning
Wipe the entire base with mineral spirits on a microfiber cloth to dissolve waxes and oils invisible to the eye—water alone leaves residues that repel paint. For grimy vintage lamps, mix 1 tbsp TSP (Trisodium Phosphate) per quart of warm water, then scrub crevices with a soft-bristled toothbrush. Rinse immediately with a damp cloth and let dry 24 hours; trapped moisture causes bubbling under paint. Skip this step, and you’ll see paint peel within weeks as oils migrate through coats.
Sanding Techniques for Raised Wood Patterns
Start with 120-grit sanding sponge to scuff glossy finishes, applying light pressure in circular motions—pressing hard rounds off delicate texture peaks. Switch to 220-grit for final smoothing, sanding with the wood grain to avoid scratches. For intricate carvings, wrap sandpaper around a cotton swab dipped in mineral spirits to clean debris from recesses. Wipe all dust with a tack cloth (never a dry rag—static lifts fibers onto the surface). Stop sanding when the surface feels uniformly dull; shiny spots mean poor paint adhesion.
Applying the Right Primer for Wood Floor Lamps
Choosing Between Shellac and Water-Based Primers
Use Zinsser Bulls Eye 1-2-3 water-based primer for most wood lamps—it dries fast, blocks stains, and won’t raise wood grain. For oily woods like teak or heavily stained bases, choose shellac-based BIN primer to seal tannins. Avoid oil-based primers; they yellow under light-colored paints. Pour primer into a foam tray, not the can—dipping brushes in the can introduces dust. Apply with a 1.5-inch angled brush using feather-light strokes along texture ridges.
Sanding After Primer for a Flawless Base
Let primer dry 2 hours minimum before lightly sanding with 320-grit paper. Feel for “hills” where paint pooled in recesses—these create visible bumps under your topcoat. Wipe again with tack cloth. If you see bare wood spots after sanding, apply a second primer coat. Skipping this sanding step guarantees a rough finish that magnifies texture imperfections under light.
Spraying Your Floor Lamp Base Coat: Avoiding Drips and Sags
The 8-12 Inch Spray Distance Rule for Smooth Finish
Hold spray cans 10 inches from the surface (closer causes runs; farther creates dry patches). Move the can in steady 2-foot arcs past the lamp edges before triggering—this prevents heavy buildup at start/stop points. Spray vertically for bases, horizontally for stems. For textured areas, do one light “dusting” pass from 18 inches away first to coat recesses, then standard passes. Shake cans 2 minutes past the mixing ball sound for consistent pigment flow.
Why Multiple Light Coats Beat One Thick Coat
Apply 3 ultra-thin coats 15 minutes apart—thick coats pool in texture valleys causing drips. Test coverage on the cord weight first; if wood grain shows through, do a fourth coat. Between coats, check for “orange peel” (bumpy texture) caused by cold temperatures—warm cans in lukewarm water for smoother flow. Rushing this step creates sags that require sanding down to bare wood, adding hours of work.
Highlighting Textured Patterns: Two Proven Methods for Recessed Details

Method 1: Dry Brushing Metallic Accents on High Points
After base coat dries 24 hours, dip a stiff-bristle stencil brush in metallic acrylic paint (like FolkArt Metallics), then wipe 90% off on newspaper. Lightly drag the brush across texture peaks—paint catches only on raised areas. For deeper contrast, mix 1 part paint with 2 parts water before wiping. This technique makes carved leaves or geometric patterns “pop” without filling recesses. Avoid soft brushes; they deposit too much paint in low areas.
Method 2: Glaze Wipe Technique for Recessed Color Pop
Mix 1 part acrylic paint (e.g., antique gold) with 3 parts water-based glaze. Brush liberally over the entire base, then immediately wipe high points with a balled-up cheesecloth using circular motions. Stop when recesses hold color but peaks are clean. Work in 1-foot sections—glaze dries fast. For intricate patterns, use a cotton swab to dab excess glaze from crevices. This creates museum-quality depth where light catches shadowed details.
Sealing Painted Floor Lamps with Durable Polyurethane
Matte vs. Satin Finish: Which Protects Best?
Choose Minwax Polycrylic in matte finish—it won’t yellow under lamp heat like oil-based polyurethane. Satin adds slight sheen but shows more fingerprints on lamp bases. Spray 2 light coats 20 minutes apart, holding the can 14 inches away. Avoid brushing—bristles catch on textured surfaces. Never skip this step; unsealed paint scratches off during dusting within months.
Avoiding Bubbles in Your Clear Topcoat
Pour polycrylic into a clean foam tray, then load a microfiber roller with minimal product. Roll in one direction only along texture lines—back-rolling creates bubbles in recesses. For spray application, warm the can in your hands first to reduce viscosity. If bubbles appear, pop them immediately with a toothpick. Wait 48 hours before reassembly; premature handling leaves fingerprint dents in the soft finish.
5 Costly Floor Lamp Painting Mistakes That Ruin Your Finish
Mistake #1: Skipping the Tack Cloth After Sanding
Dust motes embed in wet paint, creating sandpaper-rough surfaces. Always use a fresh tack cloth after every sanding step—never reuse one, as it sheds fibers. For textured lamps, press the cloth gently into crevices with a toothpick tip.
Mistake #2: Rushing Between Paint Coats
Touch-dry isn’t cure-dry. Spraying new coats before 15 minutes causes wrinkling; waiting over 2 hours creates adhesion failures. Set phone timers for each stage. Humid days require doubling drying times—use a hygrometer to check levels below 60%.
Metallic Accent Technique: Dusting Gold on Black Floor Lamps
Hold gold spray paint 18 inches from a black base coat. Do one ultra-light “ghosting” pass in broad arcs—enough to catch in recesses but not coat peaks. Immediately wipe high points with a microfiber cloth dampened with mineral spirits. This creates subtle dimension where light reveals hidden patterns. For dramatic contrast, repeat after 24 hours. Always test on the cord weight first; metallic paints dry darker than cans suggest.
Your transformed lamp now showcases every carved detail with professional depth—all for less than a tank of gas. Remember: the 24-hour cure time before plugging in isn’t optional; heat from bulbs softens uncured paint. For maintenance, dust with a dry microfiber cloth—never damp cloths that degrade the sealant. Tackle one lamp at a time using this method, then apply the same principles to side tables or chair legs. Within weeks, you’ll have a custom-designed lighting collection that looks like it came from a boutique. The real victory? Knowing you saved $300 while creating something uniquely yours—proof that the right paint technique turns dated decor into conversation starters.


