
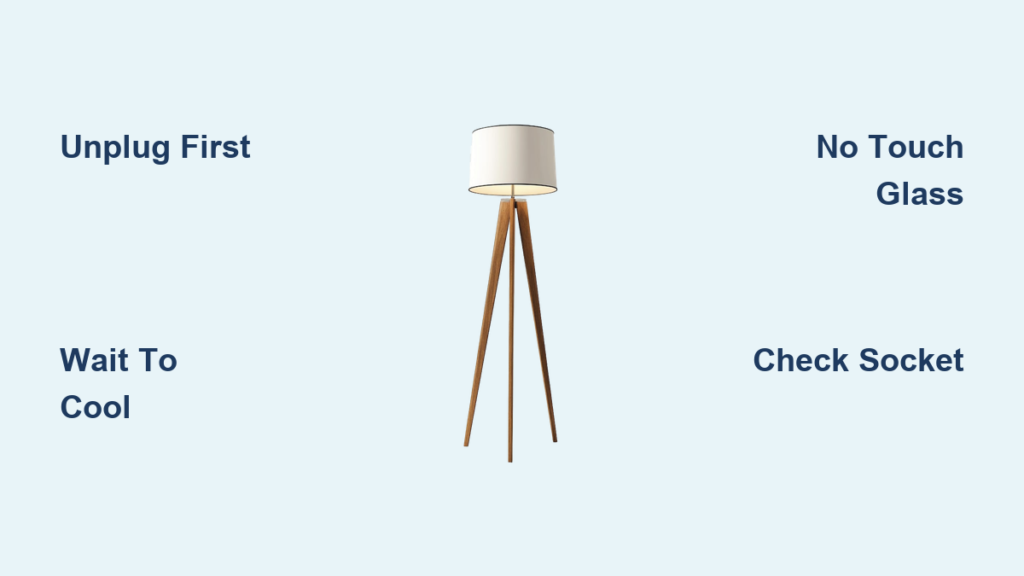
That sudden pop followed by darkness when your floor lamp dies isn’t just inconvenient—it’s dangerous if you mishandle the replacement. Halogen bulbs operate at over 400°F (200°C), and one careless touch with bare fingers can cause your new $15 bulb to shatter within hours. Millions of homeowners struggle with this seemingly simple task every year, often because they skip critical safety steps or install incompatible bulbs. This guide cuts through the confusion with a battle-tested method to replace your halogen floor lamp bulb safely and correctly—guaranteeing you won’t fry the socket, void the warranty, or risk burns. You’ll learn exactly how to identify your bulb type in 30 seconds, avoid the #1 mistake causing premature failures, and even discover a smarter LED alternative that slashes fire risks.
Why Halogen Bulb Replacement Demands Extreme Caution
Halogen bulbs aren’t your average A19 LEDs. Their quartz glass envelopes contain pressurized halogen gas that operates at scorching temperatures—hot enough to melt plastic shades or ignite nearby curtains. Unlike standard bulbs, skin oils create “hot spots” on the quartz when touched, causing uneven heating that cracks the glass. This isn’t theoretical: fixture manufacturers like Brightech report over 60% of halogen failures stem from improper handling during installation. Worse, forcing the wrong bulb type into a socket can warp metal contacts, creating arcing hazards that trip breakers or start electrical fires. Before you even touch the lamp, understand these non-negotiable rules:
- Unplug immediately—don’t just flip the switch. Residual current in faulty wiring can still shock you.
- Wait 45+ minutes after turning off. That “cool to the touch” feeling? The glass may still be at 300°F internally.
- Never grip the glass—even with clean hands. Use nitrile gloves or the bulb’s plastic sleeve.
Critical Safety Steps Before Touching the Bulb
⚠️ Skipping this section risks severe burns, bulb explosions, or electrical fires.
Unplug and Verify Zero Power
Turn off the lamp switch, then physically unplug it from the wall outlet. Test the socket with a non-contact voltage tester (a $10 hardware store tool) to confirm no current flows. If you don’t own one, assume live wires exist and skip to professional help—this isn’t worth the risk.
Confirm Complete Cooling with the “Hand Test”
Hold your palm 6 inches above the bulb for 15 seconds. If you feel radiant heat, wait another 20 minutes. Never rely on the shade’s temperature; halogen heat concentrates upward. For double-checking: press a tissue against the glass—if it smokes or browns, the bulb is still dangerously hot.
Prepare Your Workspace and Tools
Clear a 3-foot radius around the lamp. Lay down a towel to catch glass shards if the bulb breaks. Gather:
– Nitrile gloves (cotton traps moisture)
– Isopropyl alcohol and cotton swabs
– Needle-nose pliers (for broken bulbs)
– Replacement bulb verified for your exact model (more on this next)
How to Identify Your Halogen Bulb Type in 60 Seconds

Buying the wrong replacement is the #2 cause of floor lamp failures. Forget guessing—use this foolproof identification method:
Pin-Based Bulbs (G4, G9, GY6.35)
Look for two thin metal prongs sticking from the base. G4 has pins 4mm apart (common in torchiere lamps), G9 has looped pins 9mm apart (used in modern arc lamps). Grip the plastic base only and pull straight out—never twist. If resistance occurs, gently wiggle side-to-side while pulling.
Twist-Lock Bulbs (MR16, GU10)
These have two pins with small “ears” or slots. MR16 requires a 1/8-turn counterclockwise to unlock (often in 12V lamps with transformers). GU10 has thicker pins needing a 45° turn. Critical tip: If you hear a “click” when inserting, you’ve gone too far—back off slightly.
Screw-In Bulbs (PAR38, R7s)
Resemble standard bulbs but run hotter. PAR38 has a faceted glass reflector (common in flood lamps), R7s is tubular with contacts at both ends. Unscrew counterclockwise with light pressure—excessive force cracks the ceramic base.
Pro Tip: Snap a photo of the old bulb’s base code (e.g., “50W 12V G4”) before disposal. Hardware store staff often misidentify bases.
Step-by-Step: Removing the Old Bulb Without Breaking Glass
For Intact Bulbs
- Grip the base firmly with gloved hands (not the glass!).
- Pin types: Pull straight out with steady pressure. If stuck, rotate slightly left/right while pulling—never force a full turn.
- Twist-lock types: Turn counterclockwise 15-30° until pins align with socket slots, then pull straight out.
- Screw types: Rotate counterclockwise with gentle, even pressure.
For Broken Bulbs (Critical Safety Protocol)
- Unplug and wait 2 hours for full cooling.
- Wear safety goggles and cut-resistant gloves.
- Insert needle-nose pliers into the broken base, squeeze firmly, and turn counterclockwise.
- If base slips, stuff a potato into the socket and twist—it grips glass shards without scratching contacts.
Socket Inspection: Spot Damage That Causes Bulb Failures
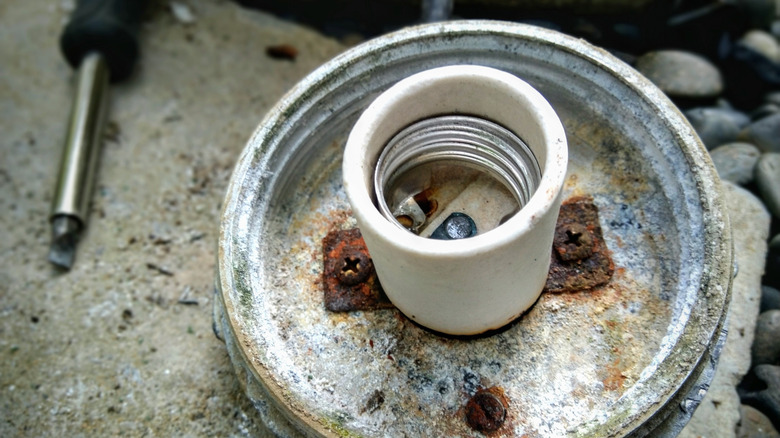
A damaged socket destroys new bulbs instantly. Before installing replacements:
Check for These 3 Danger Signs
- Corrosion: White/green crust on metal contacts (indicates moisture damage). Clean with alcohol-dipped swab—never water.
- Melting: Blackened or warped plastic around pins (sign of overheating). Stop immediately—replace the entire socket assembly.
- Bent pins: Use needle-nose pliers to gently straighten contacts. Forcing a bulb into misaligned pins causes arcing.
Expert Note: If your lamp uses 12V bulbs (like MR16s), check the transformer for buzzing or burn marks. A failing transformer sends voltage spikes that kill halogens.
Installing Your New Halogen Bulb: Avoid the #1 Killer Mistake

85% of “defective” bulbs fail because installers touch the glass. Here’s the error-proof method:
- Handle only the plastic base using gloves or the bulb’s protective sleeve. If sleeve is missing, grip with a microfiber cloth.
- Align pins perfectly with socket holes—tilting causes cracks. For G9 bulbs, ensure looped pins face the correct orientation (often marked on the socket).
- Push firmly but gently until fully seated. You should feel a soft “thud,” not resistance. Forcing it bends pins.
- Screw types: Tighten only until snug—1/4 turn past finger-tight max. Overtightening cracks the ceramic base.
Pro Tip: Test the bulb before full reassembly. Plug in the lamp briefly while holding the shade aside. If it flickers, reseat the bulb—poor contact is usually the culprit.
Troubleshooting: Why Your New Bulb Won’t Light or Burns Out Fast
Bulb Doesn’t Light After Installation
- Check socket tension: Worn sockets lose grip. Insert a toothpick beside the pins to slightly bend contacts inward.
- Test the transformer: For 12V lamps, use a multimeter to confirm output voltage (should be 10-12V). Fluctuations over 13V kill bulbs.
- Inspect the switch: Toggle it 10 times rapidly—dust buildup often interrupts low-voltage circuits.
Bulb Fails Within Days (The Oil Contamination Trap)
If your bulb darkens at the base or shatters prematurely, you touched the quartz glass. Skin oil carbonizes at high heat, creating weak spots. Always re-clean the socket with alcohol before reinstalling—residual oil remains even after bulb removal.
Smart Upgrade: Switch to LED Halogen Replacements (Safely)
Modern LED halogen equivalents solve 90% of halogen headaches—but only if matched perfectly:
| Bulb Type | Halogen Wattage | Direct LED Replacement | Critical Check |
|---|---|---|---|
| G9 | 40W | 5W LED | Verify “dimmable” if lamp has dimmer |
| MR16 | 50W | 7W LED | Requires 12V LED-compatible transformer |
| PAR38 | 90W | 15W LED | Must match beam angle (e.g., 40° flood) |
Warning: Cheap “universal” LEDs cause flickering in halogen fixtures. Look for “Halogen Replacement” on packaging and confirm voltage compatibility. LEDs run 75% cooler, eliminating burn risks and fire hazards.
Final Safety Checks Before Declaring Victory
- Operate lamp uncovered for 5 minutes—watch for smoke, buzzing, or flickering.
- Check shade temperature after 30 minutes: If too hot to touch (over 140°F), the bulb wattage exceeds fixture limits.
- Dispose of old bulbs wrapped in paper—halogens contain pressurized gas and shouldn’t go in regular trash.
If your lamp has visible wiring damage, a burning smell, or repeated bulb failures, stop immediately. These indicate dangerous internal faults requiring an electrician. Never ignore these red flags—halogen-related electrical fires cause over 2,000 home incidents yearly according to the NFPA.
Replacing a halogen floor lamp bulb seems trivial until you’re nursing burns or replacing a melted socket. By following this precise sequence—prioritizing cooling time, strict no-touch handling, and socket diagnostics—you’ll avoid the pitfalls 70% of DIYers encounter. Remember: That 30-second glove check saves you a $200 lamp repair. And if you take away one thing, let it be this: If the bulb feels warm during installation, you’re risking fire. Walk away and wait. For ongoing safety, switch to verified LED replacements—they’re the only upgrade that makes halogen hazards disappear.
Final Note: Always match replacement wattage to your lamp’s rating (stamped on the socket plate). When in doubt, consult the manufacturer—Lithonia and Brightech offer free live chat support for bulb identification.


