
That post-workout soreness that lingers for days doesn’t have to be your normal. Millions of athletes and fitness enthusiasts now rely on massage guns to accelerate recovery, but many are using them incorrectly—wasting time or even causing minor injuries. The truth is, simply pressing a vibrating device against sore muscles won’t unlock its full potential. When you know exactly how to use a massage gun properly, you can transform your recovery process, reduce muscle tension faster, and get back to training sooner. This guide reveals the precise techniques, safety protocols, and body-specific approaches that maximize your massage gun’s benefits while avoiding common pitfalls.
Selecting the Right Attachment and Settings for Your Needs
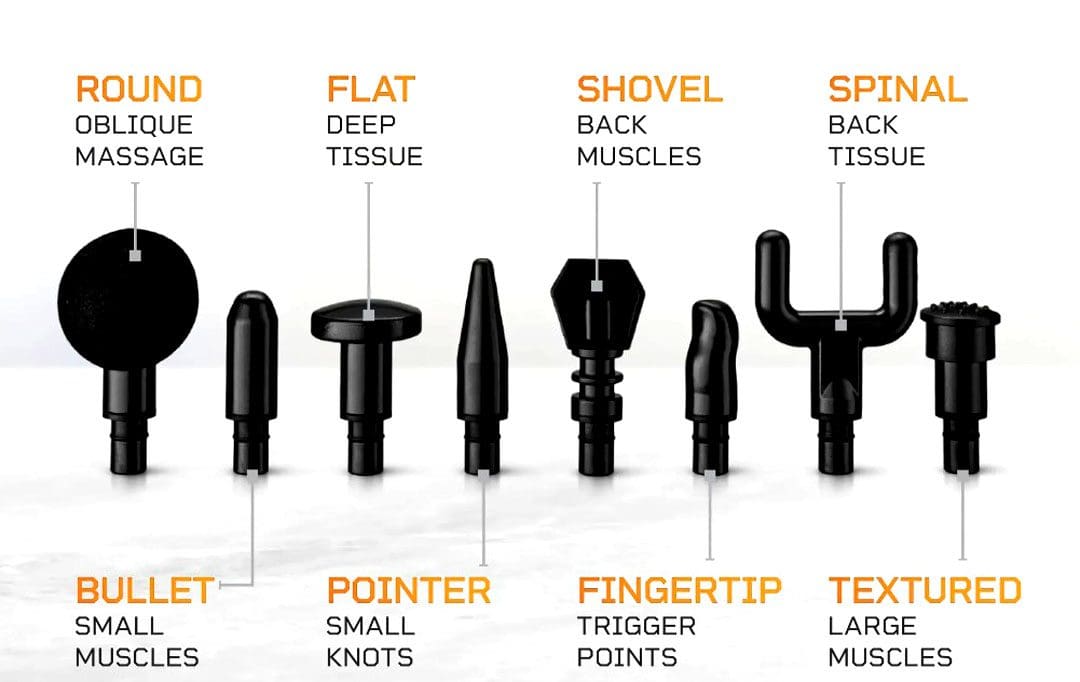
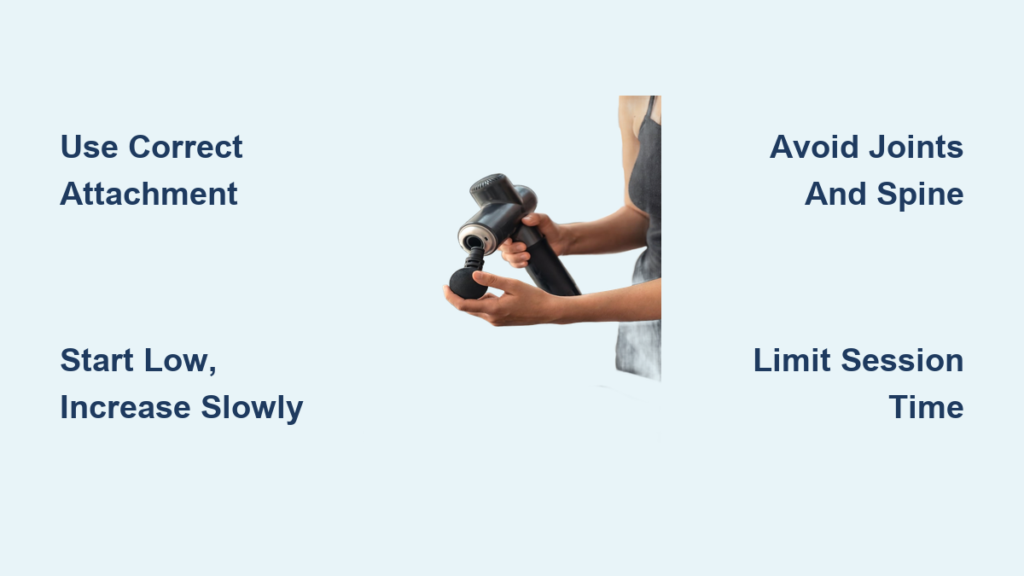
Your massage gun comes with multiple attachments designed for specific muscle groups and conditions—using the wrong one limits effectiveness and increases injury risk. Start with the large ball attachment for major muscle groups like quads, hamstrings, and back muscles where broad coverage matters most. For precise trigger point work on your rotator cuff or along the spine, switch to the bullet or fork attachment that targets tight knots without affecting surrounding tissue. The flat head works best for larger, flatter surfaces like your calves or chest muscles.
Never begin on high settings—start at the lowest speed to assess your muscle’s response. Gradually increase intensity only if needed, as excessive power on sensitive areas can cause bruising or inflammation. Most professionals recommend 15-30 seconds per muscle area before moving to the next spot, with total session time not exceeding 2 minutes per muscle group. Watch for visual cues like muscle twitching or skin discoloration—these signal you should reduce pressure immediately.
How to Apply Correct Pressure and Movement
Let the massage gun’s percussive action do the work—pressing too hard actually reduces effectiveness by compressing muscle tissue and preventing proper penetration. Hold the device at a 90-degree angle to your skin with light to moderate pressure, just enough to maintain contact as you glide slowly across the muscle. Move the gun in deliberate, overlapping strokes rather than holding it stationary, which can cause bruising. For best results, follow the direction of your muscle fibers—up and down for quads, across for shoulders.
Targeting Specific Body Areas with Precision
Different muscle groups require distinct approaches to safely deliver therapeutic benefits without causing harm. Knowing exactly how to use a massage gun on each area transforms it from a generic tool into a targeted recovery solution. The key is matching attachment type, pressure level, and movement pattern to each body part’s unique anatomy.
Leg Muscle Treatment: Quads, Hamstrings, and Calves
For quads, use the ball attachment with slow, vertical strokes from hip to knee, avoiding the knee joint itself. Spend no more than 30 seconds per quad to prevent overstimulation. When treating hamstrings, lie face down and apply the ball head along the back of your thigh from glutes to hamstring insertion, steering clear of the sciatic nerve pathway behind your knee. Calves respond best to the flat attachment with horizontal strokes across the muscle belly—never press directly on the Achilles tendon as this delicate area can easily become inflamed.
Back and Shoulder Relief Without Risking Injury
Your lower back muscles (erector spinae) benefit from the ball attachment with side-to-side motions parallel to your spine—not directly on it. Maintain at least two inches of distance from your spinal column at all times. For upper back tension between shoulder blades, use the fork attachment to straddle the spine while targeting the trapezius muscles. With shoulders, the bullet attachment works best on the rear deltoids and rotator cuff muscles—apply with extreme lightness and avoid the shoulder joint itself where excessive vibration could increase inflammation.
Treating Common Pain Conditions Safely and Effectively

Understanding how to use a massage gun for specific conditions transforms it from a general recovery tool into a targeted therapeutic device. Each condition requires precise application techniques that address the root cause without aggravating sensitive structures.
Back Pain: Targeting Muscles, Not the Spine
When treating back pain, focus exclusively on the paraspinal muscles alongside your spine—not the vertebrae themselves. Use the lowest setting with the flat attachment, moving horizontally across tight areas for 20-30 seconds. Never apply direct pressure to your kidney area (the soft tissue just above your waistline on both sides), as excessive vibration could cause discomfort. If pain persists beyond 48 hours of consistent use, consult a physical therapist before continuing treatment.
Sciatica Relief: Targeting the Piriformis Muscle
Sciatica pain often stems from piriformis muscle tension compressing the sciatic nerve. Lie on your side and locate the tender spot deep in your glute—about midway between hip and tailbone. Use the bullet attachment on low setting with very light pressure directly on this trigger point for 15-20 seconds. Follow with gentle hamstring treatment using the ball attachment to release tension along the nerve pathway. Stop immediately if you feel radiating pain—this indicates you’re irritating the nerve rather than releasing the compressing muscle.
Plantar Fasciitis Protocol: Gentle Foot Treatment
Treating plantar fasciitis requires special caution due to the foot’s delicate structures. Begin by rolling your foot on a frozen water bottle for 5 minutes to reduce inflammation. Then switch to your massage gun’s flat attachment on the lowest setting, applying feather-light pressure to the arch and heel area for just 60 seconds per foot. Never use pointed attachments on your feet—the concentrated pressure can damage sensitive plantar tissue. Focus on the muscle belly rather than the painful insertion point on your heel.
Critical Safety Zones: Where NOT to Use Your Massage Gun

Certain body areas require complete avoidance or extreme caution when using a massage gun. Ignoring these safety boundaries can cause serious injury despite the device’s therapeutic benefits elsewhere.
Neck and Spine: High-Risk Areas Requiring Extreme Caution
Never apply your massage gun directly to the front or sides of your neck where carotid arteries and major nerves reside. The only safe neck application is to the upper trapezius muscles at the very base of your skull using the flat attachment on lowest setting—keep sessions under 15 seconds. Along your spine, maintain at least a two-inch buffer zone on either side, focusing only on the muscle tissue. Any direct spinal contact can cause nerve irritation or worse.
Joints, Bones, and Sensitive Structures to Avoid
Treat joints like knees, elbows, and ankles with extreme caution—apply only to surrounding muscle tissue, never directly on the joint capsule. Avoid all bony prominences including shoulder points, hip bones, and ankles where minimal tissue padding exists. Never use your massage gun on your abdomen, throat, or any area with open wounds or recent injuries. When in doubt about an area’s safety, skip it—your massage gun’s benefits aren’t worth potential injury.
Maximizing Results: Frequency and Duration Guidelines
Most users significantly overestimate how long they should use a massage gun on each area. For optimal results without tissue damage, limit sessions to 1-2 minutes per major muscle group, with 15-30 seconds per specific trigger point. Daily use is generally safe for most people, but if you experience increased soreness or bruising, reduce frequency to every other day. The most effective massage gun routines combine brief, targeted sessions immediately post-workout with maintenance sessions on rest days.
Stop immediately if you feel sharp pain, numbness, or tingling—these indicate you’re causing nerve irritation rather than muscle relief. Remember that your massage gun complements but doesn’t replace professional medical care for persistent pain. When used correctly, how to use a massage gun properly becomes second nature, transforming your recovery process and keeping you performing at your best with minimal downtime. Consistent proper technique delivers the muscle relief and accelerated recovery you’ve been missing.


