
Your competition horse stands stiffly after yesterday’s cross-country round, muscles tight as violin strings. You’ve invested in a percussion massager hoping to ease his tension, but one wrong move could do more harm than good. Using a massage gun on horses demands precise knowledge of equine anatomy and safety protocols—this isn’t human therapy scaled up. When applied correctly, it accelerates muscle recovery and boosts relaxation; misused, it risks injury. In this guide, you’ll learn exactly where to apply pressure, how to read your horse’s reactions, and step-by-step techniques proven by equine myotherapists. Stop guessing and start using your massage gun safely and effectively.
Critical Areas to Avoid When Massaging Your Horse
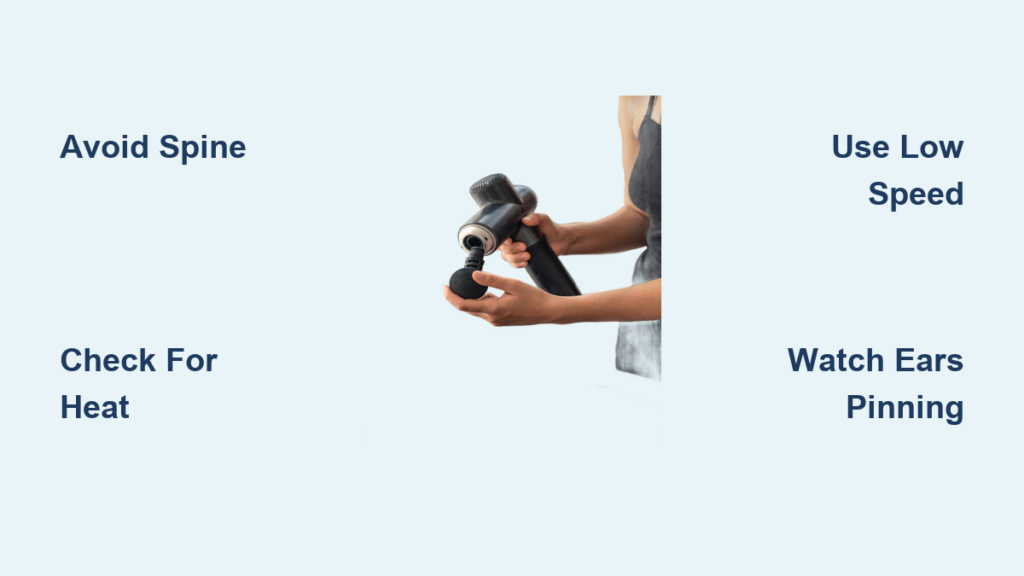
Applying a massage gun to prohibited zones risks nerve damage, bruising, or worsening injuries. These areas require absolute avoidance—no exceptions.
Spine, Head, and Joint Zones That Demand Zero Contact
Never treat these high-risk zones:
– Spinal column and vertebrae: Including the entire backline from withers to tailhead
– Neck vertebrae: Any area within 4 inches of the mane’s centerline
– All joints: Fetlocks, knees, hocks, and stifles—even if swelling seems present
– Face and head: Zero tolerance for vibration near sensitive nerves
– Lower legs: Cannon bones lack protective muscle padding
Why these restrictions matter: A single pass over the spine can trigger muscle spasms, while joint application risks tendon inflammation. One user reported their horse bucking violently after accidental hock contact—recovery took weeks.
Recognizing Hidden Danger Zones: Heat, Swelling, and Skin Issues
Stop immediately if you detect:
– Localized heat (place your palm on the area; should feel even with surrounding tissue)
– Pitting edema (press for 5 seconds; if indentation remains, skip treatment)
– Scabs, rashes, or open wounds (massage spreads infection)
– Recent injection sites (wait 72 hours minimum)
Pro Tip: Run your hands over the horse’s body for 60 seconds before starting. If he flinches when you touch his left shoulder, skip that area entirely—your massage gun could aggravate an undiagnosed strain.
Pre-Session Horse Assessment and Safety Setup
Rushing into treatment ignores critical safety checks. Proper preparation prevents trauma and builds trust.
Three-Step Calmness Verification Before Powering On
- Check vital signs: Resting heart rate should be 28-44 bpm. Elevated pulse means stress—postpone treatment.
- Observe stance: Weight evenly distributed on all four legs? Crossed legs or constant shifting signal discomfort.
- Test responsiveness: Gently pinch skin on neck; should snap back in <2 seconds. Slow recoil indicates dehydration—delay session.
Restraint Protocol: Why Cross-Ties Beat Loose Handling
Secure your horse in cross-ties with a calm handler holding the lead rope. Never attempt free-handling—sudden movement could jam the device into a spine. If your horse hates cross-ties:
– Use a stall with secure door
– Have two handlers (one for head, one for tail)
– Start sessions at 2 minutes max until trust builds
Critical Mistake Alert: Skipping grooming pushes dirt into pores. Always curry vigorously first—grit under the massage head causes micro-abrasions.
Step-by-Step Massage Gun Application on Horses
Follow this vet-approved sequence for effective, stress-free sessions. Total time: under 15 minutes.
Desensitization: Turning Fear into Acceptance in 3 Minutes
- Day 1: Hold turned-off device near horse’s shoulder. Reward sniffing with a carrot sliver.
- Day 2: Power on at lowest setting 3 feet away. Let him hear vibration while grooming.
- Day 3: Touch device (off) to rump. Power on for 5 seconds. Stop if ears pin back.
Key Insight: Equine myotherapist CluelessShowjumper notes: “Horses accept vibration faster if you massage your own arm first—they’ll mimic your calmness.”
Muscle-Specific Technique: Glutes, Back, and Shoulders
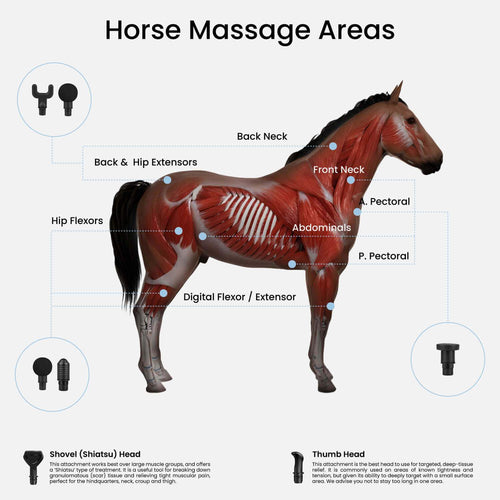
For hindquarter tension (most common issue):
– Use large ball attachment on lowest setting
– Glide in 6-inch upward strokes along hamstring direction
– Hold gun 90° to muscle—never drag sideways
– Max 45 seconds per spot before moving
For back stiffness:
– Avoid spine by 4+ inches laterally
– Start at loin junction (where saddle ends)
– Use sweeping motions toward withers (never down the back)
– Reduce pressure over ribcage—horses are sensitive here
Shoulder caution: Only treat front 1/3 of shoulder muscle. Stop 6 inches from neck base.
Visual Cue: Licking/chewing = relaxation. Tail swishing = immediate stop.
Attachment Selection and Pressure Control
Wrong attachments cause pain; right ones unlock recovery. Match tools to muscle zones.
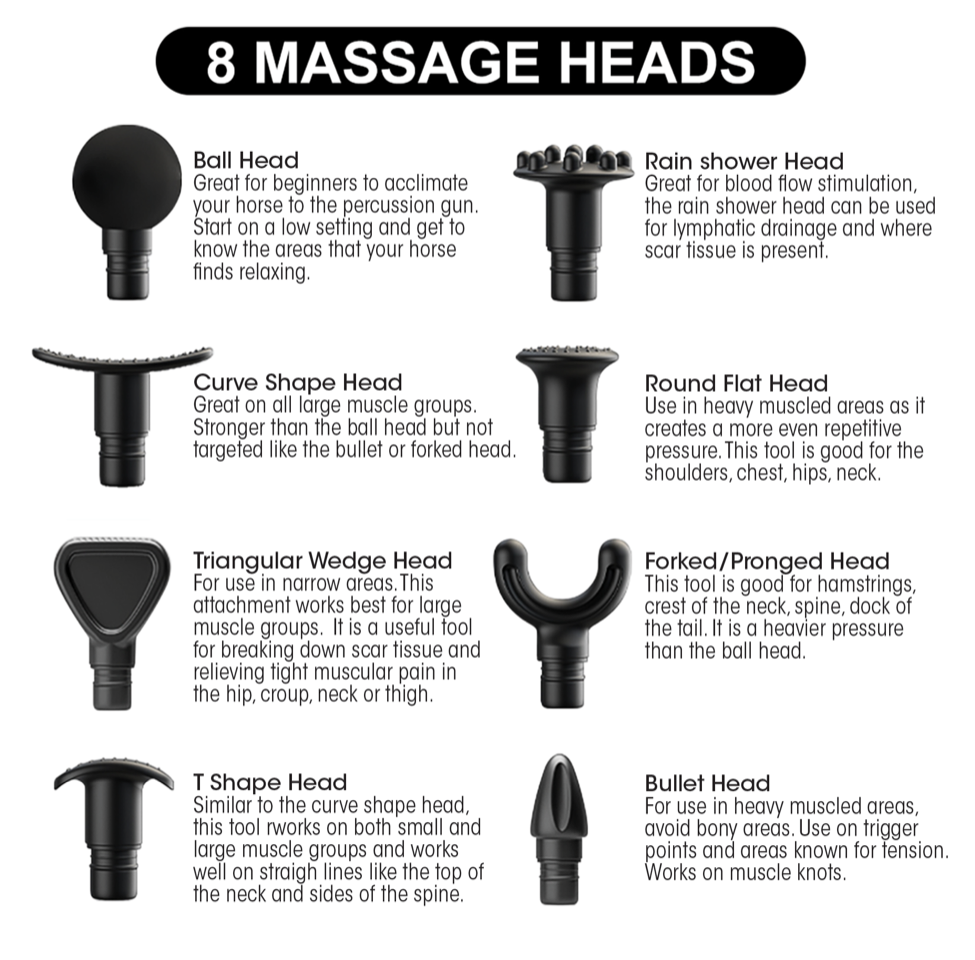
Attachment Cheat Sheet: What Works on Horses
| Attachment Type | Safe For Horses? | Best Muscle Groups | Pressure Warning |
|---|---|---|---|
| Large ball head | ✅ Yes | Glutes, neck base | Keep below medium speed |
| Flat head | ✅ Yes (low speed) | Back muscles | Use only parallel to spine |
| Bullet head | ❌ No | None | Avoid—too concentrated |
| Horse-specific foam | ✅ Ideal | All zones | Still requires 90° angle |
Pressure rule: Let the gun’s weight do the work. If you’re bracing against recoil, settings are too high. One user damaged a gelding’s shoulder by “leaning in”—muscles bruised for days.
Post-Session Protocol and Frequency Guidelines
Most owners skip critical recovery steps, negating benefits.
4-Step Cool-Down Sequence
- Walk immediately: 5 minutes at walk to circulate flushed toxins
- Hydrate: Offer electrolyte water (1 tsp salt per gallon)
- Observe: Watch for delayed soreness next 24 hours
- Reassess: Palpate treated areas—should feel warmer and suppler
Optimal Frequency by Horse Type
- Recreational horses: Once weekly (10 min max)
- Performance horses: Post-competition only (5-7 min)
- Arthritic seniors: Every 3 days at ultra-low speed (3 min/session)
- Never exceed 15 minutes total—overstimulation causes muscle fatigue
Warning: Daily use on young horses risks connective tissue strain. Wait until age 5+.
Top 3 Mistakes That Harm Horses (And How to Avoid Them)
Mistake #1: Ignoring Micro-Reactions During Sessions
New users focus on the device, not the horse. Watch for:
– Subtle signs: Flared nostrils, tense jaw, or “staring” at the gun
– Correct action: Pause for 20 seconds when you see this. Resume at lower speed.
Real case: A jumper mare developed chronic spooking after sessions ignored her pinned ears—retraining took months.
Mistake #2: Using Human Settings on Equine Muscle
Human devices often max out at 3,200 percussions/minute—too intense for horses.
– Solution: Never exceed 2,400 PPM (Level 4 on most guns)
– Test: Place gun on your palm at target setting. If uncomfortable for you, it’s too strong for the horse.
Mistake #3: Treating “Problem Areas” Without Vetting
That stiff shoulder might be an abscess, not soreness.
– Always rule out:
– Lameness (trot in straight line first)
– Fever (temp >101.5°F)
– Recent shoeing (nail prick mimics muscle pain)
When in doubt: Call your vet before session one.
When to Call a Professional
Stop DIY treatment if:
– Horse shows consistent resistance to one zone
– You detect asymmetrical muscle development
– No improvement after 3 sessions
– Pre-existing conditions like PSSM or EPM
A certified equine massage therapist can demonstrate safe pressure points in 20 minutes—worth every penny. As one therapist states: “Your massage gun is a scalpel, not a hammer. Precision prevents pain.”
Final Note: Your horse’s relaxation tells the real story. When done right, he’ll lean into the gun, eyes half-closed, with rhythmic licking motions. Start slow, respect boundaries, and you’ll transform post-ride stiffness into supple, willing movement. Always prioritize his subtle signals over your session timer—true recovery happens at the horse’s pace, not yours.


