
Your trapezius muscles—the thick bands of tissue stretching from your neck down to your mid-back—scream for attention after hours hunched over a desk or lugging heavy bags. When tension builds in these critical “trap” muscles, it triggers headaches, shoulder stiffness, and that “knot” sensation between your shoulder blades. A massage gun offers instant relief, but using a massage gun on traps incorrectly can bruise delicate tissues or aggravate nerves. This guide delivers the exact protocol for safe, effective trap muscle therapy—no guesswork, no pain. You’ll learn precise positioning, attachment selection, and pressure control to dissolve tension in under 10 minutes.
Most users make critical errors: pressing too hard near the spine, using the wrong attachment, or lingering too long on sensitive zones. These mistakes turn relief into injury. By following this method, you’ll target stubborn knots without risking nerve damage or inflammation. Let’s transform your self-care routine with science-backed techniques that deliver real results.
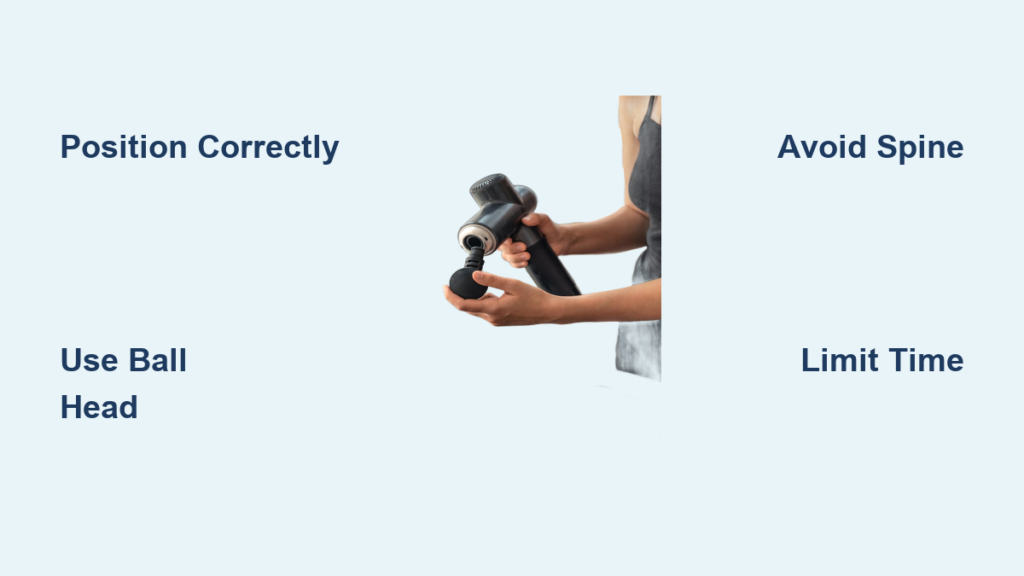
Your Trap Muscle Massage Gun Setup Checklist
Skip this step, and you risk ineffective sessions or tissue damage. Start by charging your device overnight—low battery causes inconsistent pulsations that strain muscles. Position yourself in front of a mirror with shoulders relaxed (not rolled forward) to monitor hand placement. Never use the gun while lying down; sitting upright ensures proper muscle engagement and prevents accidental slips toward the spine.
Grab your attachments but don’t attach anything yet. Test the lowest speed setting on your forearm first—this calibrates you to the sensation before touching sensitive traps. Keep a timer visible; exceeding 90 seconds per side causes micro-tears. Crucially, expose bare skin or wear thin cotton (no thick fabrics)—direct contact ensures vibrations penetrate muscle fibers, not fabric layers. If your traps feel icy cold, do 2 minutes of shoulder rolls first; massaging cold muscles increases bruising risk.
Why Trap Muscles Need Specialized Massage Gun Handling

Your trapezius isn’t a uniform slab—it’s a three-tiered muscle with distinct zones requiring different approaches. The upper traps (from base of skull to shoulders) house nerves vulnerable to excessive pressure, while mid/lower traps attach directly to vertebrae. When you use a massage gun on traps recklessly, you risk compressing the greater occipital nerve—causing electric-shock headaches—or irritating the suprascapular nerve, leading to shoulder weakness.
This area also contains trigger points disguised as “knots”: hyper-irritable spots where muscle fibers clump. Standard rolling ignores these, but a massage gun’s percussive force separates fibers when applied correctly. Key insight: traps respond best to slow, deliberate movements—not rapid gliding. Rushing spreads tension; methodical targeting melts it. Always prioritize the upper trap’s meaty outer edge (away from the spine), where 80% of tension resides without nerve proximity.
Selecting Your Trap-Specific Massage Gun Attachment

Your default ball head isn’t always optimal—choose based on your trap’s current state:
- Ball Head (for daily maintenance): Use when traps feel generally tight but not knotted. Its wide surface distributes pressure evenly across broad muscle planes, preventing pinpoint bruising. Start here for 60-second sessions.
- Flat Head (for sensitive or inflamed traps): Switch to this dampener attachment if you have recent injury, arthritis, or extreme tenderness. The broader contact area reduces intensity by 30%, ideal for warming up before deeper work.
- Bullet Head (for stubborn knots ONLY): Reserve this for isolated “marble-like” knots in the outer shoulder. Never use near the neck or spine—the concentrated force can bruise the acromion bone. Limit to 10 seconds per knot.
Pro Tip: If your gun lacks a flat head, fold a thin towel over the ball attachment for immediate dampening. Never use the fork head near traps—it’s designed for spinal沟 (grooves), not broad muscles.
Avoiding Nerve Damage: Critical Trap Massage Technique Rules
This is where 90% of users fail. Follow these non-negotiables:
- Position correctly: Sit upright, arm resting in lap. Tilt chin slightly down to stretch upper traps. Place gun on the fleshy area 2 inches below the base of your skull and 3 inches outward from your spine—never directly on the vertebrae.
- Start slow: Begin at speed 1 with ball head. Glide in 2-inch sections for 3 seconds each, moving from neck toward shoulder tip. If you hit a knot (a pea-sized hard spot), pause and hold for 10 seconds with gentle pressure—do not grind.
- Pressure threshold: Apply only enough force to feel vibration through the muscle, not bone. If your skin blanches white or you wince, reduce pressure immediately. Your traps need penetration, not punishment.
- No-go zones: Avoid the bony ridge at the skull base, collarbone, and front neck. Skip the inner shoulder where traps meet the spine—this area has zero muscle padding.
Step-by-Step Upper Trap Massage Routine for Desk Workers
Follow this sequence for instant tension release after screen marathons:
Warm Up the Muscle in 60 Seconds
Start with flat head at lowest speed. Glide vertically along the upper trap’s outer edge (from shoulder tip up to neck) for 30 seconds. Then move horizontally across the muscle toward the spine for 30 seconds. This increases blood flow without overwhelming fibers.
Target Shoulder Knots with Precision
Switch to ball head at speed 2. Locate knots by gently pressing fingers into the meaty shoulder area—knots feel like uncooked rice under skin. Hold the gun stationary on each knot for 15 seconds while taking deep breaths. Critical: Angle the gun slightly downward toward your shoulder (not toward your neck) to avoid nerve contact.
Finish with Lymphatic Drainage
Reduce to speed 1 with flat head. Glide from the base of your skull down to the shoulder blade in slow, sweeping motions for 20 seconds. This flushes metabolic waste released during therapy, preventing next-day soreness. Never massage upward toward the head—it disrupts lymph flow.
Post-Massage Trap Recovery Protocol
What you do after massaging traps determines lasting relief. Immediately perform these steps:
- Stretch immediately: Tilt your head gently toward the opposite shoulder (ear to ear) for 20 seconds. This elongates fibers while they’re warm.
- Hydrate aggressively: Drink 16oz water within 10 minutes—percussion releases lactic acid that needs flushing.
- Avoid re-tensioning: Don’t return to your desk for 15 minutes; sit upright without screens to let muscles reset.
Mild soreness for 24 hours is normal, but sharp pain or numbness means you overdid it. If symptoms persist beyond 48 hours, skip massage guns and consult a physical therapist. Never use the gun more than once daily on traps—overuse causes inflammation.
7 Trap Massage Gun Mistakes That Cause Bruising
Pressing Too Hard Near the Spine
Forcing the gun against the neck vertebrae bruises the semispinalis capitis muscle. Fix: Keep the device 3+ inches from your spine at all times—focus on the shoulder-side “meat.”
Massaging Collarbone Adhesions
The clavicle has zero muscle coverage. Applying pressure here strains ligaments. Fix: If tension feels under the collarbone, massage the pectoral muscle below it instead.
Ignoring Time Limits
Lingering over one spot beyond 90 seconds ruptures capillaries. Fix: Use a phone timer—max 60 seconds per side for maintenance, 90 for acute knots.
Using High Speed on First Session
Speed 3+ on unwarmed traps shocks muscle fibers. Fix: Always start at speed 1, increasing only after 2 weeks of consistent use.
Massaging During Acute Injury
Using a gun on recent whiplash or strains worsens inflammation. Fix: Wait 72 hours post-injury; use ice instead.
Skipping Skin Exposure
Thick fabrics absorb 50% of vibration energy. Fix: Bare skin or single-layer cotton only—no sleeves or tank tops.
Treating Trigger Points Incorrectly
Holding the gun on knots while moving creates micro-tears. Fix: Pause completely on knots and breathe deeply—never glide over them.
Mastering how to use a massage gun on traps transforms chronic tension into lasting relief—but precision is non-negotiable. Stick to the meaty outer shoulder zones, respect nerve boundaries, and never sacrifice technique for speed. Within a week of consistent 5-minute sessions, you’ll notice freer neck rotation, vanishing headaches, and shoulders that don’t feel “stuck” to your ears. For ongoing prevention, pair this routine with daily chin tucks (pressing tongue to roof of mouth while gently nodding) to combat forward-head posture. Remember: your traps thrive on gentle, targeted care—not aggressive pounding. When in doubt, less pressure and shorter sessions always beat overdoing it.


