
That stubborn knot in your shoulder won’t budge after a long workday, or your quads feel like concrete blocks post-workout. You grab your Mebak massage gun expecting instant relief, only to end up with bruising or discomfort because you’re using it wrong. You’re not alone—improper technique turns this powerful recovery tool into a potential injury risk. This guide cuts through the confusion with exactly how to use your Mebak massage gun safely and effectively. Forget generic advice: you’ll learn precise attachment selection, pressure control for different muscles, and critical safety boundaries most users miss. By the end, you’ll transform your sore-to-relieved timeline from hours to minutes.
Unbox, Charge, and Power Up Your Mebak Massage Gun
Skip the frustration of a dead battery mid-session by charging fully before first use. Your Mebak package includes the motor housing, multiple massage heads, USB-C charger, and carrying case—verify all components against the included checklist. Plug the USB-C cable into any standard power adapter (not included) and connect to the port on the motor housing. A solid red light indicates charging; when it turns green, unplug immediately to preserve battery health. Never operate while charging, as this overheats the motor and voids warranties. Wait 30 seconds after full charge before powering on to stabilize internal circuits.
Match Each Mebak Attachment to Specific Muscle Groups
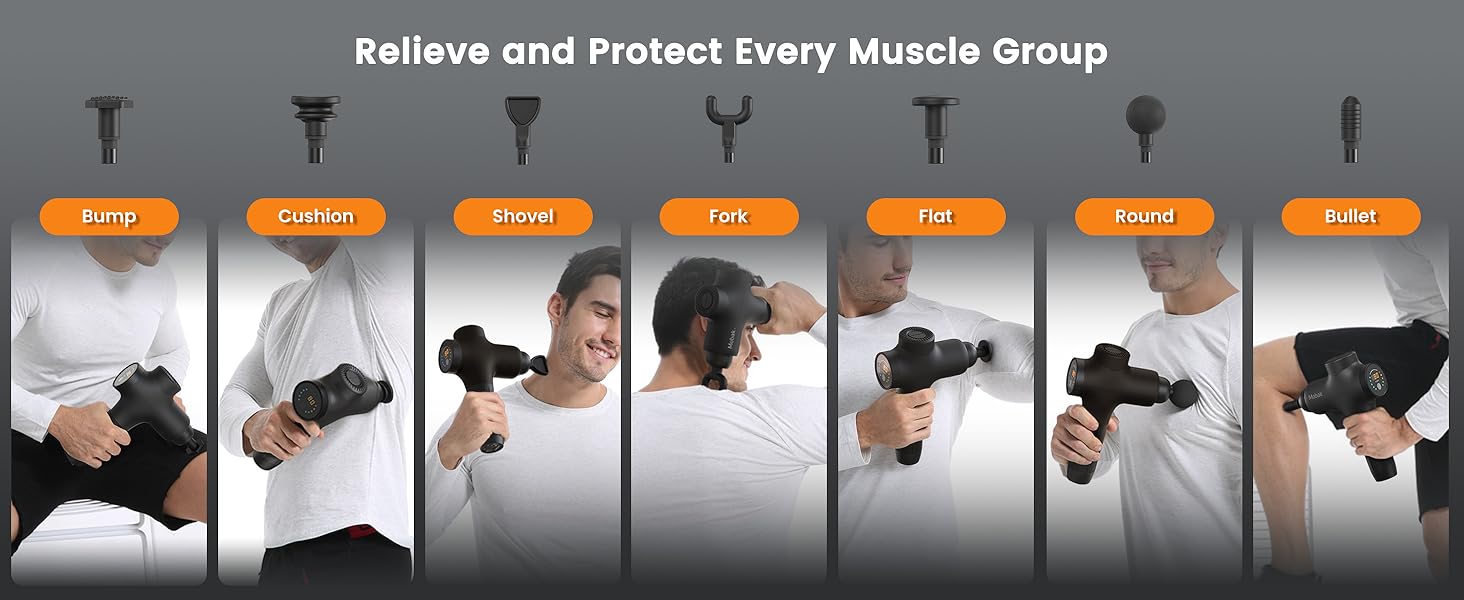
Using the wrong head on delicate areas causes bruising or nerve irritation. Your Mebak kit includes three essential attachments—each designed for anatomical precision. Match them correctly before every session to avoid tissue damage.
Why the Large Ball Head is Best for Quads and Hamstrings
Target dense muscle bellies like quadriceps with the large ball head. Its rounded surface distributes force evenly across thick tissue, preventing pinpoint pressure that causes micro-tears. Glide it slowly along the front of your thigh for 90 seconds, stopping if you feel sharp pain. Avoid pressing directly over the knee joint—stay 3 inches above and below the patella.
Using the Forked Head Safely Along the Spine
The forked head’s U-shape cradles vertebrae without compressing nerves. Place it parallel to your spine with the groove centered over bony protrusions, never directly on them. Start at the base of your neck and move downward in 2-inch increments for 45 seconds per section. If you feel tingling or radiating pain, stop immediately—this indicates nerve contact.
Flat Head for Shoulders and General Muscle Recovery
Apply the flat head to broad areas like trapezius muscles or calves. Its wide surface prevents rolling over bony scapula edges. Press firmly but maintain constant motion—stationary use here causes hematomas. Ideal for post-workout flushes: glide in downward strokes toward the heart for 60 seconds to boost circulation.
Securely Attach Heads to Prevent Slippage During Use

A loose attachment flying off mid-session can cause serious injury. Align the metal connector pin on the head with the socket on the motor housing. Press straight down with firm, even pressure until you hear a distinct click—wiggling it side-to-side risks damaging the internal mechanism. Test security by gently tugging the head; if it moves, reseat it. Never force misaligned attachments, as this strips the socket. Replace worn heads showing cracks or loose connectors immediately.
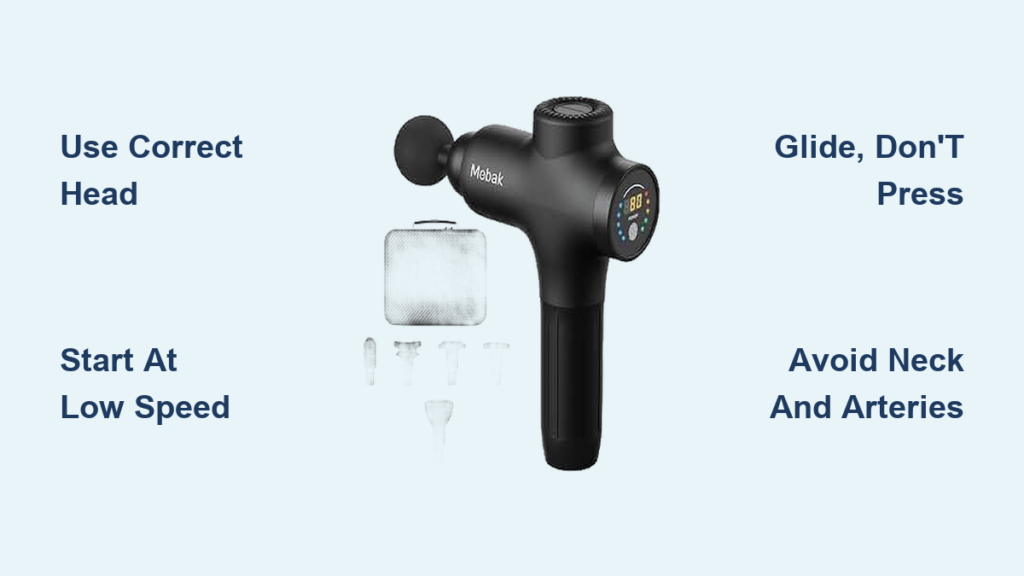
Start with Low Speed for First-Time Mebak Massage Gun Operation
Your muscles need time to adapt to percussive therapy. Power on by pressing the single control button once—the device defaults to speed level 1 (lowest intensity). Hold the gun sideways against your forearm for 15 seconds to feel the vibration threshold. Only increase speed if you feel no discomfort. Most beginners stay at level 2 for the first week; jumping to higher settings causes immediate soreness. To adjust speed, press the button rapidly: each click increments the level (typically 1-5). Never exceed level 3 on neck or lower back areas.
Glide, Don’t Press: Correct Technique for Quads and Back
Static pressure on one spot longer than 2 minutes ruptures capillaries, causing bruising. Keep the gun moving in slow, overlapping strokes—imagine painting with a roller. For quadriceps, use downward motions from hip to knee at a pace of 1 inch per second. On the back, trace diagonal lines across muscle fibers (not parallel to the spine) with light to moderate pressure. You should feel deep vibration, not bone-jarring impact. If skin turns bright red within 30 seconds, reduce pressure immediately—this signals tissue trauma.
Circular Motion for Deep Tissue Relief on Large Muscles
Target stubborn knots in glutes or lats with controlled circular patterns. Apply medium pressure (enough to dimple skin slightly) and move the gun in 2-inch diameter circles for 60 seconds max per spot. Start at the muscle’s outer edge and spiral inward toward the knot. Pause for 5 seconds if you hit a trigger point, but never hold stationary. After 60 seconds, switch to linear strokes to flush out released toxins. Overdoing circles causes inflammation—set a timer religiously.
Avoid These 3 Body Areas to Prevent Serious Injury

Ignoring these zones risks nerve damage or internal bleeding. Never use your Mebak gun on the neck—the carotid artery and cervical nerves are too vulnerable. Skip the face entirely due to fragile sinus cavities and optic nerves. Avoid direct pressure over major arteries like the femoral (inner thigh) or brachial (inner upper arm), as vibrations can dislodge plaque. If you experience numbness, dizziness, or sharp pain during use, stop immediately and consult a physical therapist before resuming.
Clean and Store Your Mebak Massager After Every Session
Residue buildup breeds bacteria and damages internal components. After each use, detach the head and wipe it with a soft, dry cloth—never submerge any part in water. Use the included cleaning brush to dislodge hair or fabric fibers from the socket. Wipe the motor housing with a slightly damp microfiber cloth, then dry thoroughly. Store in the provided case with all attachments secured; loose heads rattle internally and crack the housing. Never leave the gun in direct sunlight or temperatures above 104°F (40°C), as this degrades the lithium battery.
Build a Consistent Routine for Faster Muscle Recovery
Maximize benefits by timing sessions correctly. Use your Mebak massage gun within 30 minutes post-workout for lactic acid clearance—focus on worked muscles for 90 seconds each. For chronic tightness (like desk-job shoulders), do two 60-second sessions daily: once upon waking and once before bed. Always follow with 5 minutes of dynamic stretching to lock in gains. Track progress in a journal: note pain levels before/after and adjust pressure weekly. If soreness persists beyond 72 hours, reduce frequency to every other day—overuse delays healing.
Final Note: Consistent, correct use of your Mebak massage gun transforms muscle recovery—when you avoid stationary pressing, match attachments to anatomy, and respect safety zones. Start every session at speed level 1, glide constantly for under 2 minutes per muscle, and never touch neck or arteries. Clean attachments after each use and store in a climate-controlled space. For persistent pain beyond 72 hours, consult a sports therapist before continuing. Integrate this routine post-workout and during long workdays to keep muscles supple and pain-free. Your path to tension-free movement starts with these precise steps—no guesswork required.


