
That nagging muscle soreness after leg day won’t magically disappear. You’ve invested in your Elefor massage gun hoping for relief, but turning it on and randomly pressing it against sore spots won’t unlock its full potential. Without proper technique, you risk ineffective sessions or even muscle strain. This guide delivers the exact protocol for how to use Elefor massage gun safely and effectively—from your first charge to advanced recovery techniques—so you transform it from a fancy gadget into your most valuable recovery tool. You’ll learn muscle-specific applications, speed settings that actually work, and critical safety boundaries most users ignore.
Critical Pre-Use Safety Checks for Your Elefor Massage Gun

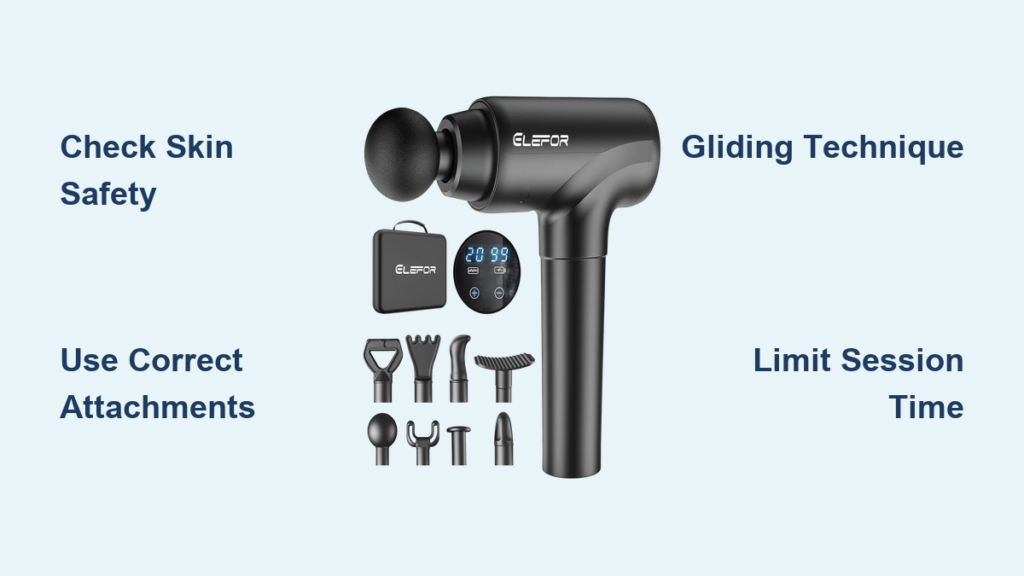
Skipping these checks risks injury or device damage. Your safety depends on verifying three non-negotiable conditions before every session.
Skin and Medical Clearance Verification
Immediately stop if you spot cuts, rashes, or inflammation on your skin. The Elefor massage gun must only contact clean, dry, intact skin—never open wounds or infected areas. Crucially, consult your doctor first if you have blood clots, pacemakers, recent fractures (within 72 hours), or are pregnant. These aren’t suggestions; they’re medical imperatives. Even minor conditions like varicose veins or fresh bruises require professional clearance before use. Ignoring this invites serious complications like bruising or nerve damage.
Device Readiness Protocol
Before touching your skin, complete this 30-second checklist:
– ✅ Confirm full charge (LED indicator shows solid light)
– ✅ Secure attachment click (hear a distinct snap when inserting)
– ✅ Wipe attachments with a mild soap-dampened cloth
– ❌ Reject damaged parts (cracks in heads or housing)
Never use the device with wet hands or on damp skin. Water exposure voids warranties and risks electrical hazards. If the gun feels unusually hot during operation, power it off immediately and let it cool for 15 minutes—overheating indicates battery stress.
First-Time Setup: Charging and Attachment Selection
Your Elefor massage gun arrives ready to activate, but improper setup cripples performance. Follow this precise sequence.
Initial Charging and Attachment Mapping
- Charge for 3 hours until the LED turns solid green (never use while charging)
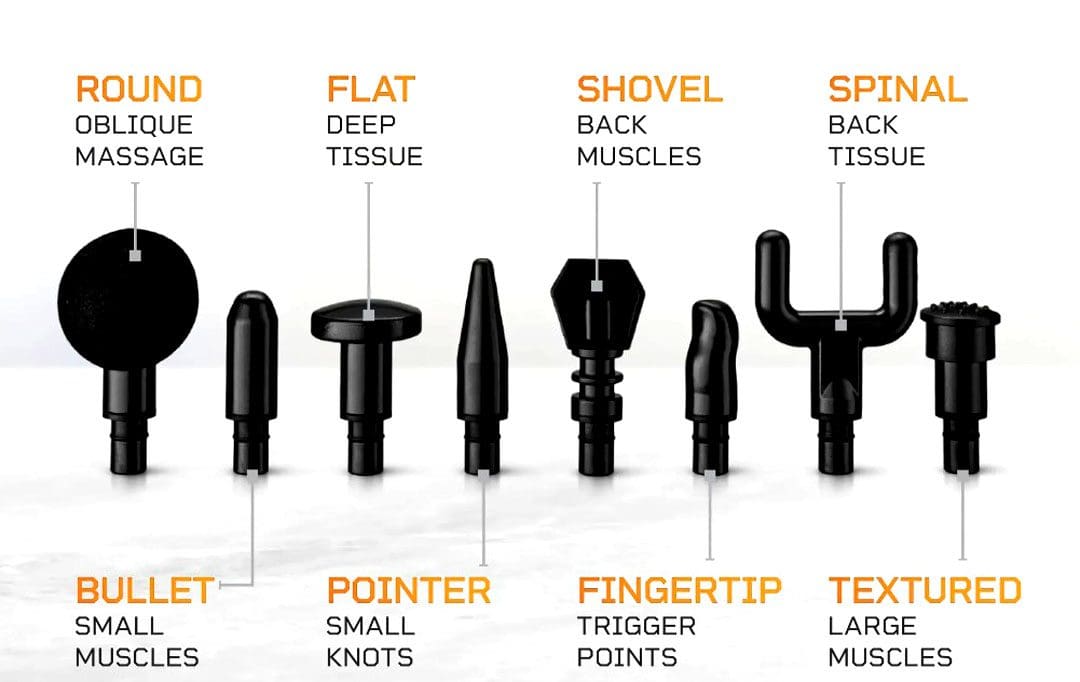
- Match attachments to your target area using this critical reference:
| Attachment | Best For | Speed Limit |
|---|---|---|
| Ball Head | Quads, glutes, back | All speeds |
| Flat Head | Calves, thighs | Speeds 1-4 |
| Bullet Head | Forearms, feet, trigger points | Speeds 1-2 only |
| U-Shaped Head | Neck muscles (beside spine) | Speed 1 only |
| Fork Head | Spine-adjacent muscles | Speeds 1-2 |
| Bindu Head | Acupressure points | Speed 1 only |
Pro Tip: For your first session, use the Ball Head at Speed 1 on your quads. This builds confidence with the least sensitive area before advancing to delicate zones like neck or shoulders.
Correct Pressure and Movement Techniques for Elefor Massage Gun
Most users jam the gun into muscles, causing bruising. Proper technique uses the device’s weight—not your strength—to penetrate tissue.
The 90-Degree Angle Rule
Hold the Elefor massage gun vertically against your skin. Never press downward—let gravity provide light contact. If you see skin dimpling or hear the motor strain, you’re applying too much force. For stubborn knots, increase speed (not pressure) to Level 3-4. Always maintain this posture:
– Arm slightly bent for control
– Gun body resting against your palm
– Elbow stabilized against your torso
Movement Speed Matters More Than You Think
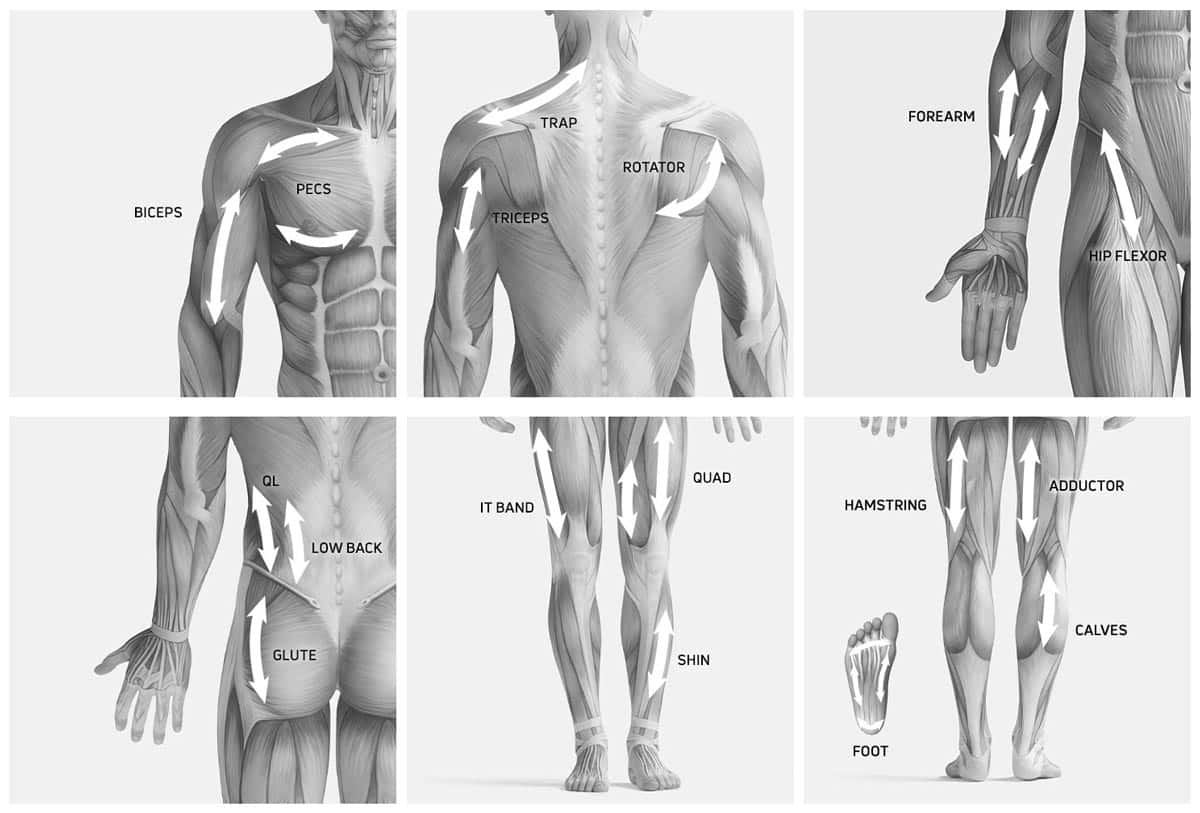
Gliding too fast (over 2 inches per second) creates superficial stimulation that won’t reach deep tissue. Move like you’re spreading butter: slow, steady, and deliberate. For quads, glide upward from knee to hip in 4-second passes. On calves, trace the muscle curve from ankle to knee. Stop instantly if you feel sharp pain—mild discomfort is normal; stabbing pain means you’ve hit a nerve or bone.
The 3-Step Process: Gliding, Stripping, and Pinning Explained
This sequence transforms random buzzing into targeted therapy. Apply it to every muscle group.
Pinning Trigger Points Without Injury
When you hit a knot (like the upper trap near your shoulder), hold the gun stationary for 10-15 seconds at Speed 2. The percussive waves will vibrate the adhesion loose. Never exceed 15 seconds—this causes microtrauma. After releasing, glide 2 inches toward the heart to flush released toxins. Repeat only once per knot; over-pinning inflames tissue.
Stripping Muscle Fibers Effectively
For tight hamstrings, position the Ball Head just above the knee. Press gently while gliding upward toward the glutes in 5-second passes. Crucial nuance: Move parallel to muscle fibers (not across them) to avoid tearing fascia. Repeat 3 times max per session. This technique works best 2 hours post-workout when muscles are warm.
How Long to Use the Elefor Massage Gun Per Muscle Group
Timing errors cause more problems than incorrect technique. Stick to these evidence-based limits.
Session Duration by Muscle Size
- Large muscles (quads, back): 60-90 seconds total
- Medium muscles (calves, shoulders): 45-60 seconds
- Small muscles (forearms, feet): 30-45 seconds
- Neck muscles: 20-30 seconds at Speed 1 only
Never exceed 15 minutes total on one area—even if soreness persists. Longer sessions trigger inflammation, worsening recovery. For severe DOMS (delayed onset muscle soreness), split sessions: 45 seconds now, then repeat in 4 hours. Track time with your phone; guessing leads to overuse.
Using the Elefor Massage Gun on Your Back Without Injury
Your spine is off-limits. Target only the muscles flanking it to avoid nerve damage.
Safe Lower Back Protocol
Position yourself seated with back against a wall. Use the U-Shaped Head at Speed 2. Place the prongs on either side of your spine (avoiding the bony ridge) and glide upward from waist to shoulders in 3-second passes. Critical boundary: Stop 2 inches below the ribcage—never massage near kidneys. If you feel tingling, stop immediately; this indicates nerve proximity.
Upper Back Trigger Point Release
For knots between shoulder blades:
1. Lie on your side with Elefor gun against wall
2. Press Ball Head against knot at Speed 1
3. Hold for 10 seconds (pinning technique)
4. Glide horizontally toward armpit for 5 seconds
5. Repeat max twice
Never use on the spine itself or the neck vertebrae. The U-Shaped Head must cradle—not press against—the cervical spine.
Leg Muscle Recovery: Quads, Hamstrings, and Calves Technique
Legs tolerate higher speeds but require precision near joints.
Shin Splint Relief Protocol
Shins are fragile. Use Bullet Head at Speed 1 only. Glide vertically along the shin bone’s outer edge (never directly on the bone) with feather-light pressure. Spend 20 seconds max per shin. If pain increases, discontinue—this indicates possible stress fracture. Always follow with 5 minutes of calf raises to activate healing.
Hamstring Tension Breaker
Sit on the floor with knee slightly bent. Place Flat Head just above the knee crease. Glide upward toward glutes at Speed 3 for 4-second passes. Pause for 5 seconds when passing the “meat” of the hamstring (mid-thigh). Repeat 4 times. Avoid the popliteal fossa (back of knee)—this area contains major nerves and blood vessels.
When NOT to Use Your Elefor Massage Gun: Critical Contraindications
Ignoring these turns therapy into danger. Discontinue immediately if you have:
- 🔴 Active blood clots (thrombophlebitis)
- 🔴 Pacemakers or electrical implants (interference risk)
- 🔴 Recent surgery (within 4 weeks)
- 🔴 Fever or active infection
- 🔴 Varicose veins in treatment area
Absolute no-touch zones: Front/sides of neck (carotid arteries), face (except with Bindu head), joints (knees, elbows), and bones. Using the gun on these areas risks stroke, joint damage, or bone bruising. If you have diabetes or poor circulation, always consult your doctor first—nerve damage may mask injury signals.
Daily Maintenance to Extend Your Elefor Massage Gun’s Life
Poor care kills your device faster than heavy use. Implement this 60-second ritual after every session.
Post-Session Care Checklist
- Wipe attachments with alcohol-free wipe (soap residue damages heads)
- Air-dry completely before storage (moisture causes mold in crevices)
- Store at 50% charge in cool, dry place (full charge degrades battery)
- Inspect connection points for hair/debris (causes power failure)
Never submerge in water or use harsh chemicals. If the gun overheats during use, let it cool 15 minutes before restarting—forcing continued operation melts internal components. For persistent weak percussion, fully discharge then recharge; this resets the battery management system.
Final Note: Mastering how to use Elefor massage gun transforms recovery from guesswork to precision. By respecting muscle-specific time limits, avoiding contraindicated zones, and applying the 3-step gliding-stripping-pinning sequence, you’ll unlock deeper tissue release without injury. Remember: consistency beats intensity—daily 5-minute sessions yield better results than weekly marathons. For chronic pain, pair your Elefor sessions with light stretching immediately after use to amplify mobility gains. Your body recovers smarter when you use this tool right.


