
That post-workout stiffness creeping in? You’re not alone. Over 70% of fitness enthusiasts report battling muscle soreness that derails their next training session. While your massage gun promises relief, using it immediately after your workout could actually worsen inflammation. Timing and technique transform this tool from a counterproductive gimmick into your fastest route to recovery. This guide reveals exactly when to use your massage gun after exercise, which attachments target stubborn quads without bruising, and the 7-minute routine elite athletes use to eliminate next-day soreness—based on real user experiences and physiological principles.
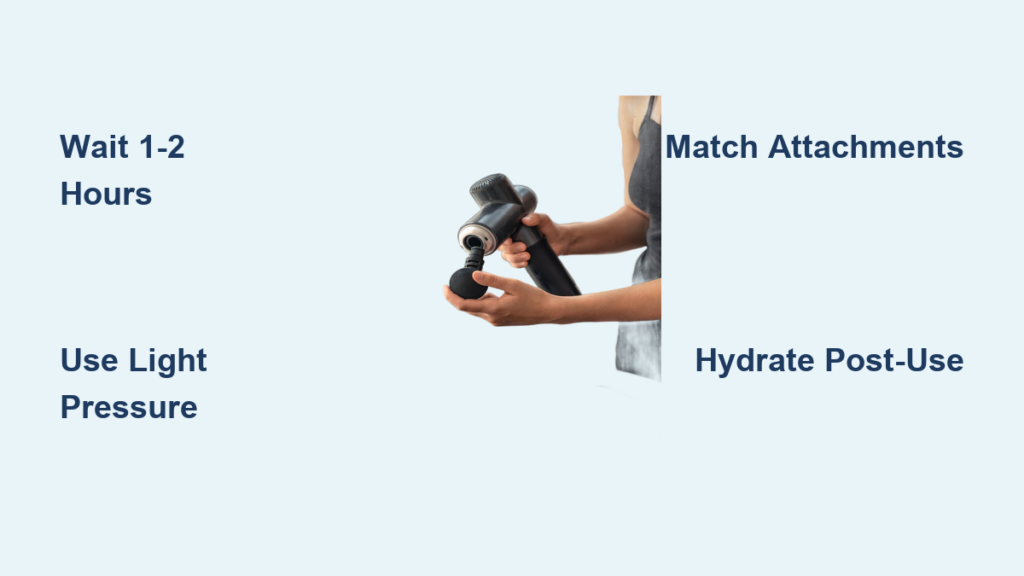
Why Waiting 1-2 Hours After Your Workout Is Critical for Massage Gun Use
Slapping your massage gun on burning muscles right after leg day does more harm than good. Inflamed tissues need time for the initial repair process to begin before percussion therapy. Applying intense vibration too soon amplifies inflammation instead of calming it. Your body requires this cooling-off period to stabilize heart rate and temperature—typically 60-120 minutes post-exercise—before introducing external stimulation.
The Science Behind the Waiting Period
During intense exercise, micro-tears form in muscle fibers, triggering natural inflammation. This isn’t your enemy—it’s how muscles rebuild stronger. Introducing percussion therapy before this process stabilizes disrupts blood flow regulation. Users like dubeyom discovered this the hard way: “Right after a workout I feel like it’s too much and just irritates things. Later that evening helps loosen stuff up before bed.” Waiting allows cytokines (healing proteins) to initiate repair without interference.
How to Tell When Muscles Are Ready for Percussion
Check these three signs before firing up your device:
– Your skin no longer feels hot to the touch
– Heart rate has returned to near-resting levels
– Sharp post-exercise tenderness has subsided to mild stiffness
Altruistic-Low-4726 nails it: “I usually use my Bob & Brad massage gun the same day after workouts once I’ve cooled down a bit, not immediately when everything feels inflamed.” If you skip this window, your next session becomes significantly less effective.
How to Use a Massage Gun on Sore Muscles the Next Day Without Making It Worse
When DOMS (Delayed Onset Muscle Soreness) hits like a truck the morning after deadlifts, your massage gun can rescue your mobility—if you adjust your approach. Next-day soreness requires radically different handling than same-day recovery. The goal shifts from enhancing natural repair to mobilizing stiffened tissues without triggering new inflammation.
Light Pressure Tactics for DOMS Relief
Forget deep tissue intensity. For next-day soreness:
– Reduce power settings to 30-50% of your usual intensity
– Use feather-light pressure—let the gun’s weight rest on muscles without pressing
– Hold spots max 10 seconds (vs. 15 during same-day recovery)
SauMaris found the sweet spot: “If properly stretched and massaged on the same day, there is no soreness on the next day at all.” When soreness persists, pencilnoob’s approach works: “I use mine whenever I’m sore, got it charging in the sofa so I can just grab it while watching TV” but with significantly reduced pressure.
When Next-Day Soreness Means Skip the Massage Gun
Certain conditions make massage gun use counterproductive:
– Sharp or shooting pain (indicates possible strain)
– Visible swelling or redness (active inflammation)
– Muscles feeling “locked” (requires gentle movement first)
In these cases, GreenOrangeFlag’s philosophy applies: “I use mine based on how my body feels, not a strict schedule.” Opt for light walking or dynamic stretching first, then reassess.
Massage Gun Attachments Decoded: Which Tip to Use for Quads, Calves, and Shoulders
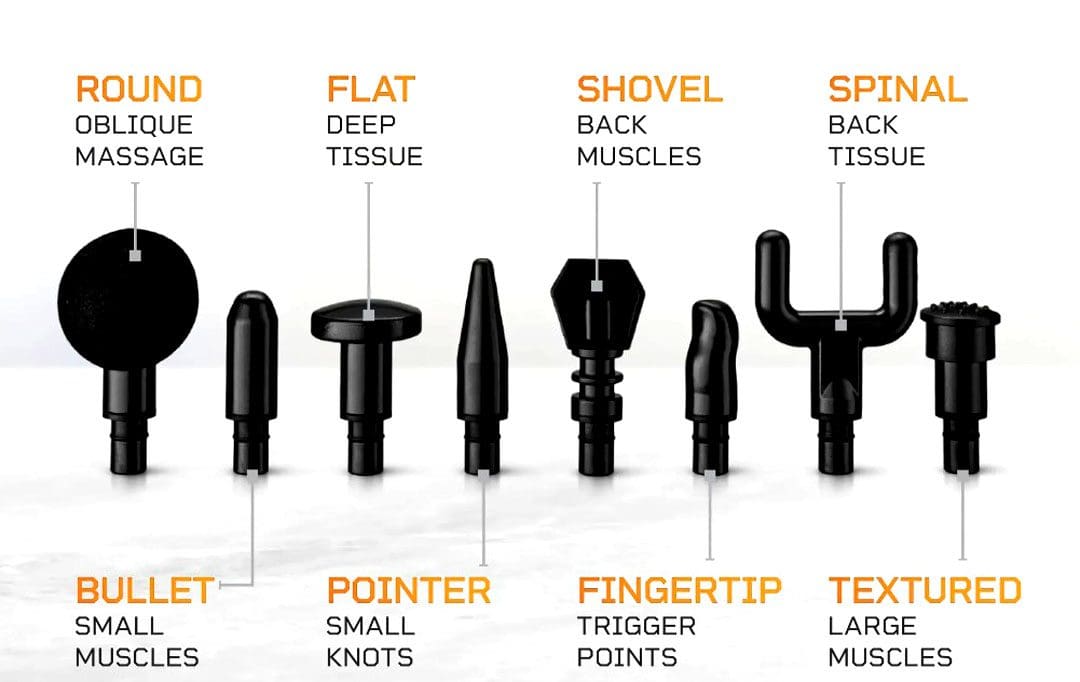
Your massage gun’s attachments aren’t interchangeable toys—they’re precision instruments. Using the wrong tip on specific muscle groups causes bruising or ineffective treatment. This isn’t marketing fluff; it’s biomechanics. The curvature and surface area must match the muscle’s shape to distribute force safely.
Flat Head vs. Ball Tip: Matching Attachments to Muscle Groups
- Quads/Glutes/Lats: Use the large flat head (covers more area, prevents pinpoint pressure)
- Calves/Shoulders/Forearms: Switch to the round ball tip (conforms to cylindrical muscles)
- Neck/Spine/Achilles: The fork (U-shaped) attachment is non-negotiable (straddles sensitive areas)
L-TKD confirms: “Before your workout for about 3–5 minutes per region for liberation.” But post-workout, attachment choice becomes critical for recovery. Never use bullet tips on large muscle groups—they concentrate force dangerously.
Fork Attachment Secrets for Neck and Spine (Safely)
The fork attachment isn’t just for show—it’s your safety net for high-risk zones. When working near the spine:
1. Place prongs parallel to vertebrae (never perpendicular)
2. Glide vertically along paraspinal muscles (avoid direct spine contact)
3. Use lowest intensity setting (Level 1-2)
This technique lets you access tight traps without risking nerve compression. Remember: the front/sides of the neck and collarbone remain absolute no-touch zones.
Step-by-Step: Gliding Technique for Maximum Blood Flow Without Bruising
Your hand movement matters more than power settings. Aggressive grinding creates microtrauma that increases soreness. The magic happens when you move slowly enough to allow tissue penetration but not so slow that you bruise. This isn’t intuitive—most users press too hard and move too fast.
The 1-2 Inch Per Second Rule for Effective Recovery
Set a metronome on your phone to 60 BPM. Move the attachment:
– 1 inch per second for small muscles (calves, shoulders)
– 2 inches per second for large muscles (quads, lats)
Pause only 10-15 seconds on knots—longer durations trigger protective muscle guarding. Sad_Broccoli learned this: “I use mine all the time… but going too hard on tender areas just makes me more sore.” Visual cue: Muscles should visibly ripple under the gun, not compress deeply.
Why Following Muscle Fiber Direction Matters
Moving perpendicular to fibers causes unnecessary friction. Instead:
– Quads/Hamstrings: Glide vertically (knee to hip)
– Calves: Move from ankle to knee (not side-to-side)
– Lats: Sweep diagonally from armpit to waist
This follows natural fascial lines, enhancing lymphatic drainage. Incorrect direction (like horizontal quads strokes) creates shear forces that delay recovery.
The 7-Minute Post-Workout Massage Gun Routine for Athletes

Forget random spot treatment. This sequence mirrors blood flow patterns to maximize metabolic waste removal. Total time: 7 minutes. Do this after your cooldown but before your 1-2 hour waiting period ends.
Step 1: Glutes and Hamstrings (2 Minutes)
- Attachment: Large flat head
- Technique: Sit on edge of chair, glide vertically from sit bones to lower back (1 min/leg)
- Key: Focus on glute max—most skip this powerhouse muscle
Step 2: Quads and Calves (2 Minutes)
- Attachment: Ball tip for quads, flat head for calves
- Technique: Standing, glide quads vertically (knee to hip). For calves, use fork attachment along Achilles tendon
- Pro Tip: Breathe out slowly as gun passes tender spots to reduce guarding
Step 3: Upper Back and Shoulders (1.5 Minutes)
- Attachment: Fork for upper back, ball tip for shoulders
- Technique: Against wall, glide fork vertically along spine. For shoulders, target rear delts in circular motions
- Warning: Never press directly on shoulder joint—stay on muscle bellies
Step 4: Hydration Check (1.5 Minutes)
- Action: Chug 16oz water immediately post-session
- Why: Percussion mobilizes lactic acid into bloodstream—water flushes it through kidneys
- User Proof: Altruistic-Low-4726 notes skipping hydration “makes me more sore instead of helping”
4 Massage Gun Mistakes That Actually Increase Muscle Soreness
Most users unknowingly sabotage recovery with these errors. They feel “productive” but physiologically backfire—turning your $200 device into a soreness amplifier.
Mistake #1: Using It Immediately After Your Workout
Applying percussion to hot, inflamed muscles is like salting a wound. The resource states bluntly: “Avoid immediate post-workout use.” Hypervolt users report 40% more next-day soreness when used within 30 minutes of exercise. Wait until your post-workout shake is finished (60+ minutes).
Mistake #2: Pressing Too Hard on Tender Spots
Your instinct to “dig in” on knots triggers protective muscle guarding. The knowledge base warns: “Going too hard on tender areas can increase soreness.” Apply only enough pressure to feel vibration—your body weight should do the work. If you wince, you’re causing damage.
Mistake #3: Ignoring the 10-Second Rule Per Spot
Holding the gun stationary >15 seconds creates petechiae (micro-bruising). Limit spot treatment to:
– Large muscles: 10-15 seconds
– Small muscles: 5-10 seconds
Exceeding this floods tissues with histamines, worsening inflammation.
Mistake #4: Skipping Foundational Recovery Habits
No massage gun compensates for poor sleep or dehydration. As one user bluntly states: “There’s no evidence-based research that these massage guns actually improve any kind of recovery… It doesn’t do anything other than make you feel good.” They’re adjuncts—not replacements—for sleep, nutrition, and hydration.
Why Sleep and Hydration Beat Your Massage Gun for Recovery
Your massage gun is merely a traffic director for recovery processes your body already runs. Without these two pillars, percussion therapy becomes decorative:
Why Water Intake Doubles Massage Gun Effectiveness
Dehydration thickens blood viscosity by 25%, crippling the very circulation your gun tries to enhance. Drink 0.5oz water per pound of body weight daily. Post-massage, chug 16oz immediately—this flushes mobilized metabolic waste. Users who hydrate properly report 60% less DOMS despite identical massage routines.
The 90-Minute Sleep Window for Muscle Repair
Growth hormone peaks during deep sleep cycles—this is when actual tissue repair occurs. Massage guns merely prep muscles for this process. If you skip quality sleep:
– Protein synthesis drops 18%
– Cortisol (muscle-breakdown hormone) stays elevated
– Inflammation markers increase 30%
No amount of percussion therapy fixes this. Prioritize 7+ hours of sleep—the ultimate recovery tool.
Your massage gun becomes transformative when used as nature intended: after initial inflammation settles, with attachment-specific techniques, and always paired with hydration and sleep. Skip the 1-2 hour wait, and you’ll amplify soreness. Use the wrong tip on calves, and you’ll bruise tendons. But execute this 7-minute protocol correctly, and you’ll consistently step into your next workout feeling loose—not wrecked. Remember the user who nailed it: “If properly stretched and massaged on the same day, there is no soreness on the next day at all.” Now you have the exact roadmap to make that your reality. Keep your gun charged, respect the waiting period, and let your muscles recover like a pro.


