
You’re holding your massage gun, ready for relief after a tough workout, but something’s wrong—the motor hums but the head doesn’t pulse, or the battery won’t hold a charge. Before you toss it in the trash or pay for expensive professional service, know that many common issues can be fixed with proper disassembly. Learning how to take apart a massage gun properly gives you access to replace batteries, clean internal components, or fix faulty switches. This guide delivers the precise steps you need to safely open your device without causing irreversible damage, whether you’re working with a premium Theragun or a budget-friendly model.
Most people fail at disassembly because they rush in with the wrong tools or apply force where finesse is needed. Massage guns are designed with hidden fasteners and delicate plastic clips that break easily when mishandled. The difference between a successful repair and a permanently damaged device comes down to preparation, patience, and knowing exactly where to apply pressure. By following this comprehensive guide, you’ll gain the confidence to access internal components while preserving your device’s structural integrity for proper reassembly.
Essential Tools and Workspace Setup for Massage Gun Disassembly

Skipping proper preparation is the fastest way to turn a simple repair into a costly mistake. Your workspace and tools directly determine whether you’ll successfully take apart your massage gun or end up with broken plastic tabs and scattered screws.
Precision Tools That Prevent Damage
Don’t reach for your regular household screwdriver—massage guns require specialized tools to avoid stripping fasteners:
- Torx Security Bit Set (T6-T10): Most premium models like Theragun and Hypervolt use tamper-resistant Torx security screws. The T8 Torx security bit is essential for Theragun models, while T6 works for many other brands.
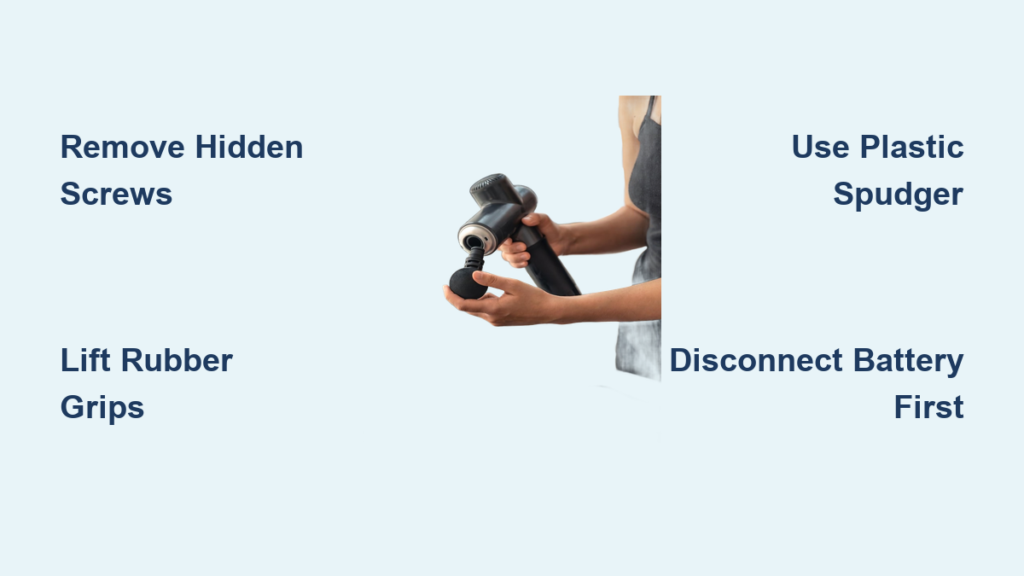
- Plastic Spudger Tools: Metal pry tools will scratch or crack your casing. Use plastic spudgers or guitar picks to gently separate housing clips without damage.
- Anti-Static Workspace: Place an anti-static mat on your work surface, or use a wooden table instead of carpeted areas that generate static electricity dangerous to circuit boards.
- Screw Organization System: A magnetic parts tray or labeled container with compartments prevents mix-ups. Place screws in the exact pattern you remove them, or photograph their positions.
Documenting Every Step Before You Begin
Taking apart a massage gun requires a reliable roadmap for reassembly—don’t skip this critical step:
- Photographic Documentation: Take high-resolution photos from multiple angles before removing any screws. Capture close-ups of cable routing and connector orientations.
- Component Mapping: Sketch a simple diagram showing where each component sits relative to others, especially for complex wiring harnesses.
- Model Identification: Note your exact model number (usually on a label under rubber feet or in the battery compartment) to reference specific disassembly guides later.
Identify Hidden Fasteners Based on Your Massage Gun Model

Manufacturers deliberately hide access points to discourage user repairs. Your disassembly approach depends entirely on whether you’re working with a metal-bodied Theragun, plastic Hypervolt, or generic budget model.
Locating Concealed Entry Points
Before applying any force, conduct a thorough inspection to find all potential fasteners:
- Peel Back Rubberized Grips: Most handles feature textured rubber that lifts to reveal hidden screws underneath—gently work a plastic spudger under the edge.
- Check Under Non-Slip Pads: Remove rubber feet on the base or handle ends to expose screws beneath.
- Examine Decorative Elements: Some models hide screws under logos or trim pieces that can be carefully pried off.
- Inspect Battery Compartment: On many models like the Toloco EM26, the battery cover hides primary fasteners rather than being the entry point itself.
Model-Specific Disassembly Strategies
- Theragun Series: Requires T8 Torx security bit to access screws hidden beneath rubber grips. Start disassembly at the handle rather than the motor housing.
- Metal-Bodied Massage Guns: These pose significant challenges with seamless construction—expect hidden clips, adhesive bonding, or ultrasonic welding rather than visible screws.
- Generic Budget Models: Typically feature multiple small Phillips screws but with thin plastic tabs prone to breakage during separation.
Step-by-Step Disassembly: From Housing to Circuit Board
Follow this sequence carefully—rushing through these steps risks damaging internal components. Patience is non-negotiable when you’re trying to take apart a massage gun successfully.
Removing External Fasteners Without Damage
- Use Proper Bit Sizing: Select the exact screwdriver bit that fits snugly in the fastener head—too small will strip the screw, too large won’t grip properly.
- Apply Steady Downward Pressure: Press firmly while turning to prevent cam-out, especially with security Torx screws.
- Organize Methodically: Place each screw in your designated container with a label indicating its location (e.g., “top handle,” “base plate”).
Separating the Housing Without Breaking Clips
This critical stage requires finesse rather than force:
- Locate the Primary Seam: Identify the natural separation line—usually a hairline gap running around the device’s circumference.
- Begin at Widest Points: Start prying at areas where the seam appears slightly wider, typically near the handle base.
- Work Progressively Around: Insert your plastic spudger and gently twist to release one clip at a time, moving systematically around the housing.
- Listen for Clicks: You’ll hear small “pop” sounds as plastic clips release—this is normal. If you hear cracking, stop immediately and reassess your approach.
Documenting and Disconnecting Internal Components
Critical Safety Step: Disconnect the battery first before touching any other components. Lithium batteries pose fire risks if shorted.
- Photograph All Connections: Take multiple close-up photos showing wire routing and connector orientations from different angles.
- Label Ribbon Cables: Use small pieces of tape to label connectors before disconnecting.
- Gentle Release Technique: For ribbon cables, lift the retaining flap with a spudger rather than pulling the cable directly.
Diagnosing and Repairing Common Internal Issues

With the housing open, you can now address the specific problem that prompted you to take apart your massage gun in the first place.
Battery Replacement Protocol
- Test Before Replacement: Use a multimeter to check voltage—many “dead” batteries still show 3.7V but fail under load.
- Note Connector Orientation: Battery connectors often have specific polarities—photograph before disconnecting.
- Document Physical Dimensions: Measure your battery’s exact size to ensure proper replacement fit.
Troubleshooting Motor and Percussion Mechanism
- Check for Obstructions: Debris in the percussion mechanism is a common cause of “motor runs but no pulse” issues.
- Inspect Eccentric Weight: Look for worn or stripped teeth on the gear that converts rotation to linear motion.
- Lubrication Points: Apply a tiny amount of lithium grease to bearing surfaces if they appear dry.
Reassembly and Critical Testing Procedures
Reassembly requires equal care to disassembly—many repairs fail at this final stage due to rushed reassembly.
Reassembly Best Practices
- Follow Reverse Documentation: Use your photos to reconnect components in the exact reverse order of disassembly.
- Test Before Final Closure: Reconnect the battery and verify all functions work before securing the housing.
- Clip Before Screwing: Ensure all internal plastic clips are properly engaged before installing screws.
Critical Post-Repair Tests
- Functional Verification: Test all speed settings and modes before final assembly.
- Thermal Monitoring: Run the device for 2 minutes and check for abnormal heating.
- Vibration Pattern Check: Confirm the percussion mechanism delivers consistent, even pulses across all settings.
Essential Safety Warnings for Massage Gun Repair
Never skip these safety precautions when you take apart a massage gun:
- Lithium Battery Hazards: Swollen batteries are fire risks—never charge or use them. Dispose of properly at an e-waste facility.
- Capacitor Discharge: Some circuit boards store electrical charge even when powered off—wait 5 minutes after disconnecting the battery before touching components.
- Anti-Static Protection: Always work on an anti-static surface and consider wearing a wrist strap when handling circuit boards.
- Know Your Limits: If you encounter water damage, severed circuit board traces, or complex ribbon cables, professional repair may be safer than risking further damage.
When performed correctly, taking apart your massage gun can extend its life significantly and save you replacement costs. The key is respecting the delicate design while systematically working through each stage of disassembly. By following these precise steps, documenting every move, and using the right tools, you’ll transform from hesitant beginner to confident repairer—ready to tackle your next massage gun maintenance challenge. Remember that proper reassembly is just as crucial as disassembly, so never skip the intermediate testing steps that prevent frustrating “it worked until I put it back together” scenarios.


