
That sharp, electric pain shooting from your lower back down your leg – sciatica doesn’t just disrupt your workouts; it hijacks your life. When sitting becomes agony and walking feels impossible, many turn to massage guns hoping for quick relief. But here’s the critical truth most miss: a massage gun won’t fix nerve compression from a herniated disc or spinal stenosis, the root causes of sciatica. Used incorrectly, it could worsen your pain. The key lies in targeting only the surrounding muscles – like the piriformis and glutes – that tighten and refer pain along the sciatic pathway. This guide reveals exactly how to use a massage gun for sciatica safely, focusing on precise techniques that ease muscular tension without risking nerve damage. You’ll learn where to apply pressure, what to avoid, and a proven 7-minute routine backed by physical therapy principles.
Sciatica sufferers often make a dangerous mistake: treating the nerve itself. Your sciatic nerve runs from L4-S3 vertebrae through your buttocks and down each leg. When compressed or inflamed, it triggers radiating pain. But percussive therapy’s real power for sciatica lies in releasing the muscles pressing on the nerve. Tight piriformis muscles in the buttocks, tense hamstrings pulling the pelvis, or rigid hip flexors can all exacerbate sciatic pain. By strategically relaxing these areas, you reduce secondary compression. Never forget: this is pain management, not a cure. Always confirm with your doctor or physical therapist that percussive therapy suits your specific diagnosis before starting. Skipping this step risks serious injury when using a massage gun for sciatica.
Why Massage Guns Ease Sciatica’s Muscle Tension (Not the Nerve Itself)

Your sciatic nerve is like a delicate electrical cable running through tight spaces. Nerve compression causes the actual sciatica pain, but surrounding muscles often develop trigger points that mimic or worsen symptoms. This is where a massage gun helps – by breaking up knots in the piriformis, gluteus maximus, and hamstrings. These muscles sit near the nerve, not on it. When they’re tight, they squeeze the nerve channel, amplifying pain. Percussive therapy increases blood flow to these muscles, flushing out inflammatory compounds and relaxing tension. Crucially, it does nothing for disc herniations or spinal narrowing. If your MRI shows significant nerve root compression, massage guns provide only temporary muscular relief. They’re a tool for managing flare-ups, not replacing spinal decompression or physical therapy.
Critical Safety Rules: Avoiding Nerve Damage with Your Massage Gun

Never Apply Pressure Directly Over the Sciatic Nerve Pathway
The sciatic nerve runs through the sciatic notch – that deep groove where your thigh meets your buttock. Placing your massage gun here is the #1 cause of worsened sciatica. You’ll feel sharp, electric pain immediately if you hit the nerve. Instead, target only the fleshy outer buttock (gluteus medius) and upper hamstring. When lying on your side, work the area from the hip bone down toward the outer thigh – never near the crease where your leg bends. If you experience tingling, numbness, or radiating pain during use, stop instantly. That’s your nerve screaming for help.
Why the Spine and Sciatic Notch Are Off-Limits
Your lower spine (lumbar region) houses fragile discs and nerve roots. Applying percussive force directly on vertebrae or the sacrum risks disc damage or increased inflammation. Always stay at least 2 inches lateral to your spine on the thick paraspinal muscles. Similarly, the sciatic notch – that bony indentation deep in your buttock – is where the nerve surfaces. Avoid the center of your buttock entirely. Focus only on the outer and upper gluteal muscles. When targeting hip flexors, stay clear of the groin crease where the femoral artery lies. Pressing here could cause bruising or vascular issues.
Recognizing the Difference Between Muscle Soreness and Nerve Pain
Muscle soreness feels like a deep ache that eases with pressure. Nerve pain is sharp, electric, or burning and radiates down your leg. During massage gun use for sciatica, you should feel “good pain” in tight muscles – uncomfortable but not alarming. If pressure triggers shooting pain into your calf or foot, you’ve hit the nerve pathway. Reduce pressure immediately or stop. Test sensitivity first: press gently with your thumb. If that causes radiating pain, skip that area entirely.
Step-by-Step: Using a Massage Gun on Sciatica Target Zones
Preparing Your Body and Massage Gun for Safe Use
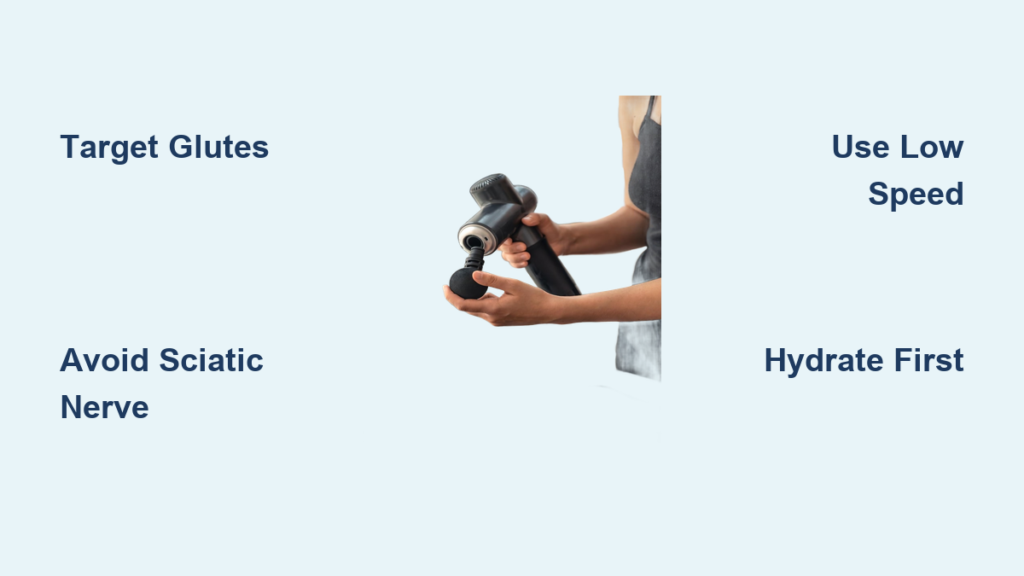
Start with the lowest speed setting and the largest ball attachment. Never use bullet or fork attachments near sciatica zones – they concentrate too much pressure. Warm your muscles first with 5 minutes of walking or a warm shower. Position yourself lying on your side on a firm surface (not a soft bed). Place a pillow between your knees to align your hips. Hydrate well beforehand – dehydrated muscles respond poorly to percussion.
Locating Safe Muscle Targets Around the Sciatic Nerve
Piriformis/Glutes: Lie on your side. Find the bony hip point (greater trochanter). Move your massage gun 2-3 inches upward and outward from there – never toward the tailbone. Work the fleshy upper buttock.
Hamstrings: Sit on a chair. Target from the sit bone down the back of your thigh, stopping 3 inches above the knee. Avoid the inner hamstring near the sciatic nerve.
Hip Flexors: Stand holding a wall. Place the gun in the front hip crease where your thigh meets your pelvis. Use feather-light pressure – no deeper than 1/4 inch.
Lower Back: Lie prone. Stay 2 inches lateral to your spine on the thick muscle bundles. Never touch the spine itself.
Correct Gliding Technique for Piriformis and Glute Relief
Glide slowly – about 1 inch per second – along muscle fibers. For glutes, move vertically from hip bone toward the top of your thigh. Spend only 15-20 seconds per spot before moving. If you find a knot, pause briefly but never exceed 30 seconds. Apply just enough pressure to feel resistance – your muscles should sink into the gun, not tense against it. Breathe deeply during passes; holding your breath increases tension.
Safe Hamstring and Hip Flexor Application Methods
For hamstrings, use short 2-inch strokes from sit bone toward knee. Reduce speed if you feel nerve sensitivity. On hip flexors, use the lowest setting with 30-second bursts max. Press the gun firmly against the wall for counter-pressure – never lean your full body weight. If you feel pain radiating down your leg, shift 1 inch outward immediately. These areas require 50% less pressure than quads or calves.
Your 7-Minute Daily Routine for Sciatica Pain Relief

Warm-Up and Hydration: Non-Negotiable First Steps
Drink 8oz of water before starting. Perform 5 minutes of cat-cow stretches on hands and knees to mobilize your spine. This preps muscles for percussion and reduces injury risk. Skipping warm-up doubles your chance of aggravating sciatica when using a massage gun.
Timing Each Muscle Group for Maximum Benefit
Follow this exact sequence:
1. Glutes/Piriformis: 60 seconds per side (outer upper buttock only)
2. Hamstrings: 60 seconds per leg (back of thigh, avoiding knee crease)
3. Lower Back: 45 seconds per side (paraspinal muscles, 2+ inches from spine)
4. Hip Flexors: 30 seconds per side (front hip crease, lightest pressure)
Never exceed 2 minutes total per muscle group. Over-treating causes inflammation. Limit sessions to every other day – daily use risks muscle bruising.
Post-Massage Steps to Maximize Sciatica Pain Relief
Hydration and Gentle Stretching Protocols
Drink another 8oz of water immediately after to flush metabolic waste. Perform these stretches only if pain-free:
– Piriformis stretch: Lie on back, cross affected ankle over opposite knee, gently pull thigh toward chest (hold 30 sec)
– Hamstring stretch: Place heel on chair, keep back straight, hinge at hips (hold 20 sec)
Never force stretches – this re-tightens muscles. Stop if you feel nerve pain.
When to Use Heat After Percussive Therapy
Apply a heating pad to your lower back or glutes for 15 minutes post-treatment. Heat boosts blood flow to recently treated muscles, easing residual soreness. Skip ice – it reduces inflammation needed for healing. If you feel increased pain after heat, discontinue; you may have nerve irritation.
When to Stop: Dangerous Signs During Sciatica Massage
Red Flags That Require Immediate Medical Attention
Stop using your massage gun for sciatica and call your doctor if you experience:
– Worsening numbness/tingling in legs or feet
– Loss of bladder/bowel control (cauda equina syndrome)
– Sharp pain radiating below the knee during or after use
– Muscle weakness (trouble lifting foot while walking)
These indicate nerve damage requiring urgent intervention.
Conditions That Make Massage Guns Unsafe for Sciatica
Avoid percussive therapy entirely if you have:
– Osteoporosis (risk of vertebral fractures)
– Blood clotting disorders (may trigger deep vein thrombosis)
– Active herniated disc with severe radiculopathy
– Recent spinal surgery (within 6 months)
When in doubt, get written clearance from your specialist before using a massage gun.
Using a massage gun for sciatica demands precision – not power. By targeting only the outer glutes, hamstrings, and hip flexors while avoiding the spine and nerve pathways, you can safely ease muscular tension that amplifies sciatic pain. Remember: this tool manages symptoms, not underlying causes. Stick to the 7-minute protocol, respect pain signals, and hydrate aggressively. For lasting relief, combine this with physical therapy exercises prescribed for your specific diagnosis. If pain persists beyond 2 weeks of consistent use, revisit your doctor – you may need imaging to address the true root cause. Your path to pain-free movement starts with smart, safe muscle care.


