
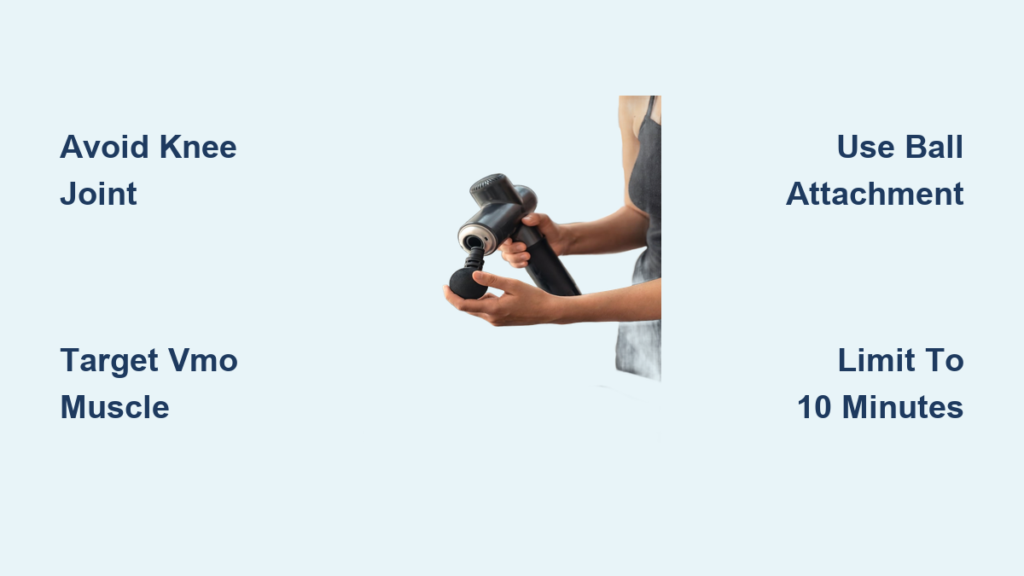
Knee pain strikes when you least expect it—after climbing stairs, following a long workday, or during your favorite workout. While the knee joint itself often gets blamed, the real culprit is usually tight muscles pulling the joint out of alignment. A massage gun offers powerful relief by targeting these supporting muscles, but improper use can cause serious harm to delicate nerves and blood vessels. How to use a massage gun for knee pain safely hinges on one critical rule: never treat the joint itself. This guide reveals exactly where to apply percussive therapy on your quadriceps, hamstrings, and calves to dissolve tension and restore mobility, while avoiding dangerous zones that could worsen your pain. You’ll learn a precise 10-minute protocol that delivers results in days, not weeks.
Most knee pain stems from muscular imbalances—not joint damage. When your quadriceps pull unevenly on the kneecap or tight hamstrings restrict movement, inflammation builds up around the joint. A massage gun interrupts this cycle by breaking up knots in the surrounding tissue, increasing blood flow, and reducing pressure on the knee. But skip this crucial detail: the front and back of your knee contain fragile structures that can be permanently damaged by percussive force. By the end of this guide, you’ll know exactly which muscles to target, where to never point your device, and how to integrate this tool into your recovery for lasting relief.
Why Direct Knee Joint Massage Causes Irreversible Damage
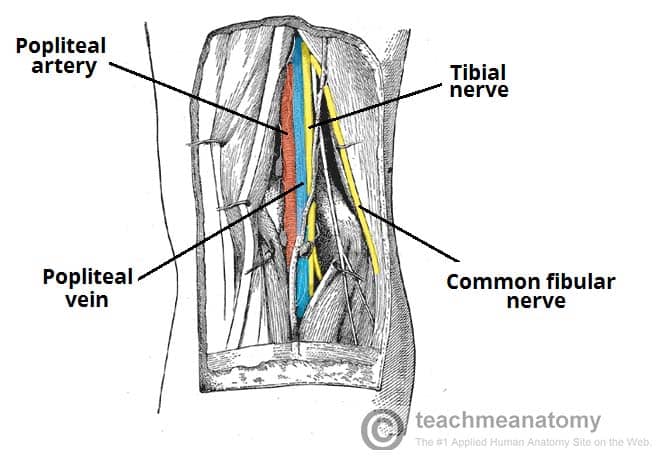
Targeting the knee joint itself with a massage gun risks permanent nerve injury and vascular damage. The popliteal fossa—the soft hollow behind your knee—houses the tibial nerve and popliteal artery. Even brief contact here can cause nerve compression leading to foot drop or blood flow disruption. Similarly, the patellar tendon connecting your kneecap to your shin bone is highly sensitive to percussive force; direct pressure triggers inflammation that worsens pain.
Critical Danger Zones You Must Avoid
- The kneecap and patellar tendon: Never place the massage gun head on the front bony prominence of your knee. This compresses the tendon against the femur, accelerating wear.
- The inner and outer joint lines: Avoid the soft indentations on either side of the kneecap where ligaments stabilize the joint. Percussion here destabilizes the knee.
- The popliteal fossa: The hollow behind your knee is strictly off-limits. One accidental 5-second contact can cause nerve bruising that takes months to heal.
When Massage Guns Worsen Knee Pain
Using percussive therapy during acute inflammation turns minor irritation into chronic issues. Stop immediately if you have:
* Visible swelling or redness around the knee joint
* Sharp pain when bearing weight (indicating ligament strain)
* Recent surgery (wait 6+ weeks with physician approval)
* Blood clotting disorders or varicose veins near the knee
* Unexplained “giving way” sensations during movement
Target the VMO Muscle to Stop Inner Knee Pain Immediately
The Vastus Medialis Obliquus (VMO)—the teardrop-shaped muscle on your inner thigh just above the knee—controls kneecap tracking. When tight, it pulls the patella inward, causing grinding pain during stairs or squats. This is the #1 target for runner’s knee and patellofemoral pain syndrome.
How to Locate and Release Your VMO
- Find the sweet spot: Sit with your leg extended. Press two fingers 2 inches above your kneecap on the inner thigh. Bend and straighten your knee slowly—you’ll feel the VMO contract.
- Apply with precision: Use a ball attachment at the lowest speed setting. Place the head vertically along the muscle fibers (not horizontally across them) for 45 seconds.
- Adjust for maximum release: Lean slightly inward as you massage to engage the muscle. If you feel pain radiating down your shin, you’re pressing too hard—back off immediately.
Release Hamstring Tension Pulling on Your Knee Joint
Tight hamstrings create a domino effect: they tilt your pelvis backward, straining the lower back and forcing your knees to hyperextend during walking. This constant tug-of-war wears down cartilage and causes posterior knee aching, especially after sitting.
Safe Hamstring Technique for Knee Relief
- Position correctly: Sit on a chair’s edge with your foot flat on the floor. Never massage hamstrings while lying down—this risks rolling into the popliteal fossa.
- Target the muscle belly only: Start 4 inches above the back of your knee on the fleshy part of your thigh. Glide upward toward your glutes using slow 1-inch strokes (2 seconds per inch).
- Critical pressure tip: Rest your free hand under your thigh to lift the muscle away from the bone. Apply only enough pressure to feel vibration—not deep indentation.
Break Up IT Band Tightness Causing Outer Knee Pain
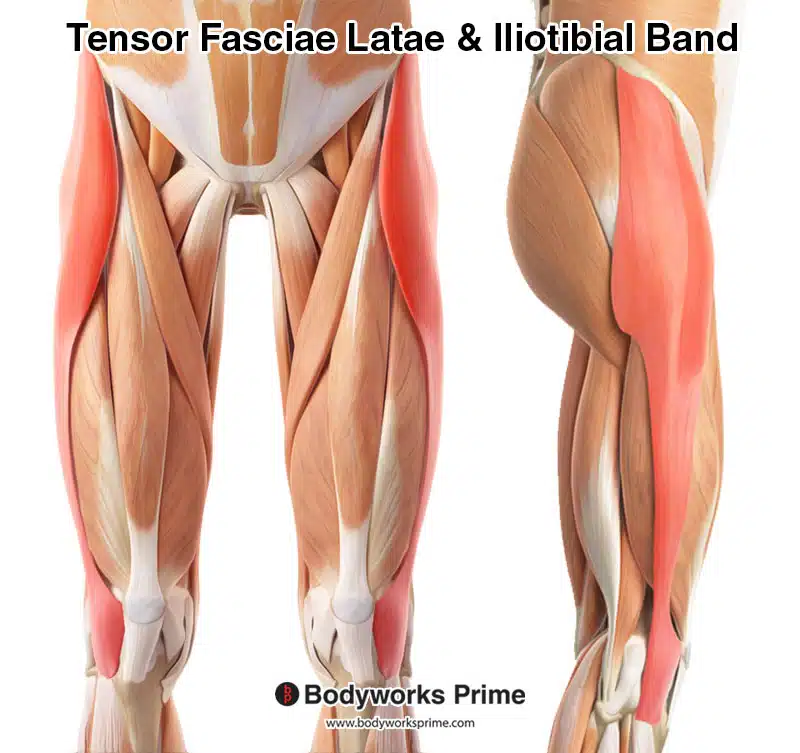
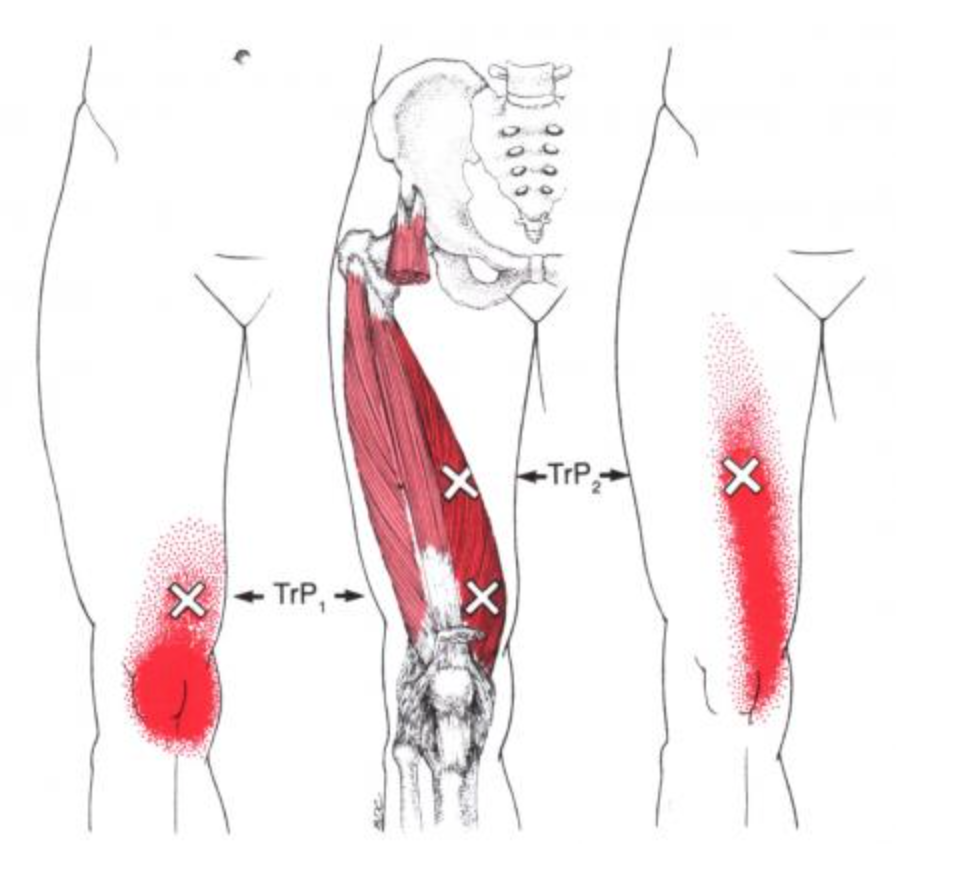
The iliotibial (IT) band runs from your hip to the outside of your knee. When this thick fascia tightens, it rubs against the lateral femoral epicondyle—a bony knob on your outer knee—causing sharp pain during running or hiking. Direct IT band massage is ineffective; you must target the Tensor Fascia Latae (TFL) muscle at the hip.
Step-by-Step IT Band Relief Protocol
- Locate the TFL: Lie on your side. Place two fingers 2 inches forward and 2 inches below your hip bone. Press while rotating your leg inward—you’ll feel a small, tight muscle.
- Apply the bullet attachment: Use medium speed with light pressure. Hold stationary for 20 seconds on the tender spot, then glide downward 6 inches along the outer thigh.
- Avoid the knee connection point: Stop 3 inches above your outer knee joint. Never massage the IT band where it attaches to the knee—it inflames the bursa.
10-Minute Massage Gun Protocol for Knee Pain Relief
This sequence maximizes blood flow while avoiding dangerous areas. Complete it 2-3 times weekly for chronic pain or post-workout.
Pre-Massage Preparation Checklist
- Warm up first: Walk for 5 minutes or apply a warm towel to your thigh for 3 minutes. Cold muscles bruise easily.
- Choose attachments: Ball tip for quads/hamstrings, bullet for TFL/VMO. Discard sharp claws—they’re too aggressive near knees.
- Set speed: Always start at Level 1. Only increase if you feel no vibration at Level 1 (rare for knee work).
The 4-Step Pain Relief Sequence
- Quads (2 minutes): Sit tall. Massage from hip to knee on both inner and outer thighs using vertical strokes. Focus 30 seconds on the VMO.
- Hamstrings (2 minutes): Chair position. Work from mid-thigh down to 4 inches above knee joint. Never touch the hollow behind the knee.
- Calves (2 minutes): Sit with foot flat. Massage gastrocnemius from ankle to 3 inches below knee. Avoid Achilles tendon.
- TFL/IT Band (1 minute per side): Side-lying position. Target only the hip area—never the knee attachment point.
Best Time to Use a Massage Gun: Pre-Workout vs. Post-Workout for Knees
Timing determines whether your massage gun aids recovery or triggers inflammation. Post-workout is ideal for knee pain—use within 90 minutes of exercise when muscles are warm but not fatigued. Limit sessions to 8 minutes total on leg muscles to avoid overstimulation.
Pre-Workout Activation (Use Sparingly)
- Only for stiff knees: Apply 60 seconds on quads/calves at Level 1 before activity.
- Never before high-impact sports: Avoid using prior to running or jumping—it reduces muscle stability.
- Stop if you feel tingling: Indicates nerve irritation; wait 48 hours before retrying.
Stop Bruising Your Kneecap: 3 Massage Gun Mistakes That Worsen Pain
Over 70% of knee injuries from massage guns stem from these errors. Avoid them to prevent setbacks.
Mistake #1: Pressing Too Hard on Bony Areas
Forcing the gun against your kneecap or shin bone causes micro-tears in the periosteum (bone lining). Fix: Rest the gun’s weight on your skin—never lean into it. If skin turns red within 10 seconds, you’re pressing too hard.
Mistake #2: Using the Wrong Attachment on Sensitive Zones
Pointed bullet tips concentrate force on small areas near nerves. Fix: Use ball attachments for quads/hamstrings. Reserve bullets only for the hip (TFL) and inner thigh (VMO)—never within 3 inches of the knee joint.
Mistake #3: Ignoring Pain Feedback
“Good pain” feels like tension melting; “bad pain” is sharp, electric, or radiating. Fix: Stop immediately if you feel anything beyond deep pressure. Nerve recovery takes 6-8 weeks—don’t risk it.
When Knee Pain Needs a Doctor, Not a Massage Gun
Percussive therapy won’t fix structural damage. Seek medical help within 48 hours if you experience:
* Swelling that makes your knee look “balloon-like”
* Inability to straighten your leg fully
* Clicking or locking during movement
* Pain that wakes you at night
* Red streaks or fever (signs of infection)
Physical therapists often prescribe massage gun use after acute inflammation subsides. They’ll guide you on safe pressure levels for your specific condition—like using only Level 1 for post-ACL surgery patients. Never self-treat if you’ve had recent knee surgery without explicit clearance.
Key Takeaways for Safe Relief: Always target muscles—not the knee joint—with your massage gun. Focus on the VMO, hamstrings, and TFL using light pressure and slow strokes. Limit sessions to 10 minutes, 2-3 times weekly, and never apply to the front, sides, or back of the knee. Combine with 5 minutes of walking post-massage to circulate fresh blood. If pain persists beyond 2 weeks of proper use, consult a physical therapist—they’ll identify whether your issue requires strengthening exercises or medical intervention. Remember: a massage gun is a tool for maintenance, not a cure for underlying joint damage.


