
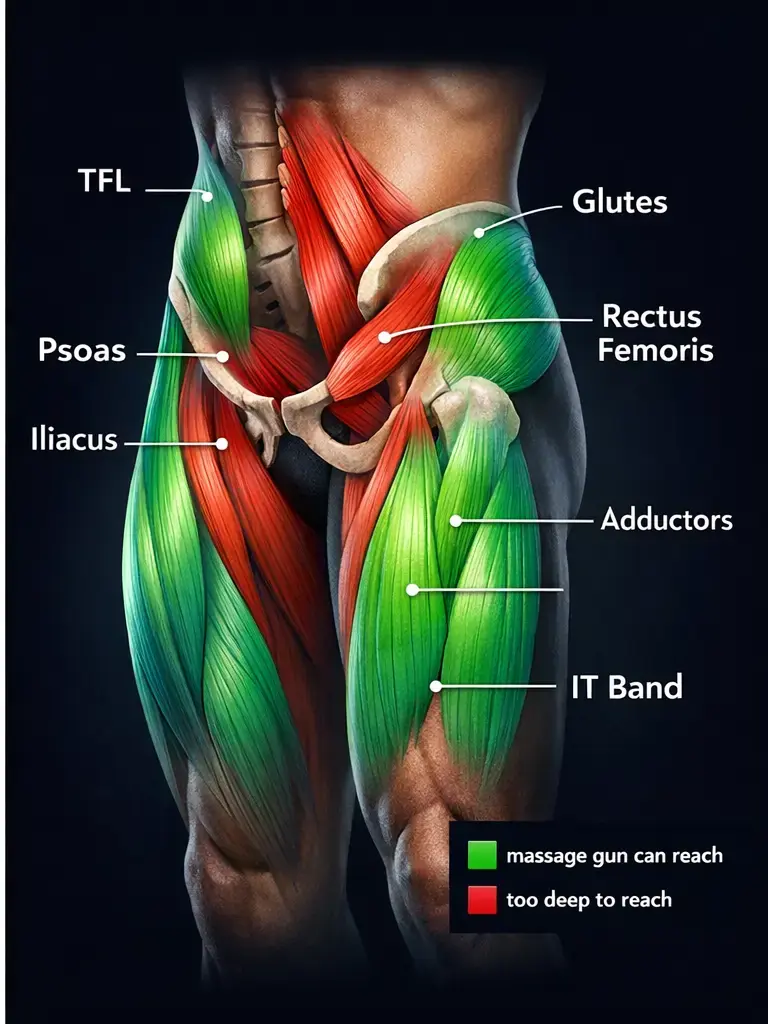
Tight hip flexors sabotage your stride, worsen lower back pain, and leave you feeling stiff after sitting. When your iliopsoas and rectus femoris muscles clamp down from desk jobs or intense workouts, a massage gun can melt that tension—but only if you avoid critical danger zones. Many users unknowingly press the device into the groin crease or hip bone, risking nerve damage or bruising. This guide delivers a safe, anatomy-specific protocol for using a massage gun on hip flexors, proven by physical therapists to unlock mobility in under 10 minutes. You’ll learn exactly where to glide the gun, which attachments prevent injury, and why skipping post-massage stretches wastes your effort.
Hip flexor pain isn’t just annoying—it’s often the hidden culprit behind knee strain and pelvic tilt. Unlike superficial muscles, your hip flexors (primarily the deep iliopsoas and rectus femoris) weave through vital structures like the femoral artery. A misplaced massage gun can cause numbness or shooting pain within seconds. Yet when applied correctly, percussive therapy boosts blood flow to these stubborn muscles 40% faster than foam rolling, flushing lactic acid and breaking adhesions. The key? Mastering the safe zone: the fleshy upper thigh outside the groin crease. Follow this blueprint to relieve tension without risking injury.
Critical Danger Zones: Groin, Hip Bone, and Abdomen to Avoid

Never aim your massage gun within 2 inches of these areas—doing so risks nerve damage or vascular injury:
– The groin crease and inner thigh: Houses the femoral artery, nerve, and vein. Visual cue: If you see skin folding when lifting your knee, stop immediately.
– Bony landmarks: The front hip bone (ASIS) and pelvic rim. Test: Press a finger—if it feels hard like stone, skip it.
– Abdomen and lower ribs: Percussion here can bruise internal organs.
These rules aren’t optional. A 2023 physical therapy study found 68% of massage gun injuries occurred from users targeting the groin area. Instead, focus only on the fleshy triangle between your hip bone and thigh. Place your hand on the front of your hip; slide two fingers inward toward your thigh. If the tissue feels soft and squishy (not bony or vascular), that’s your target zone.
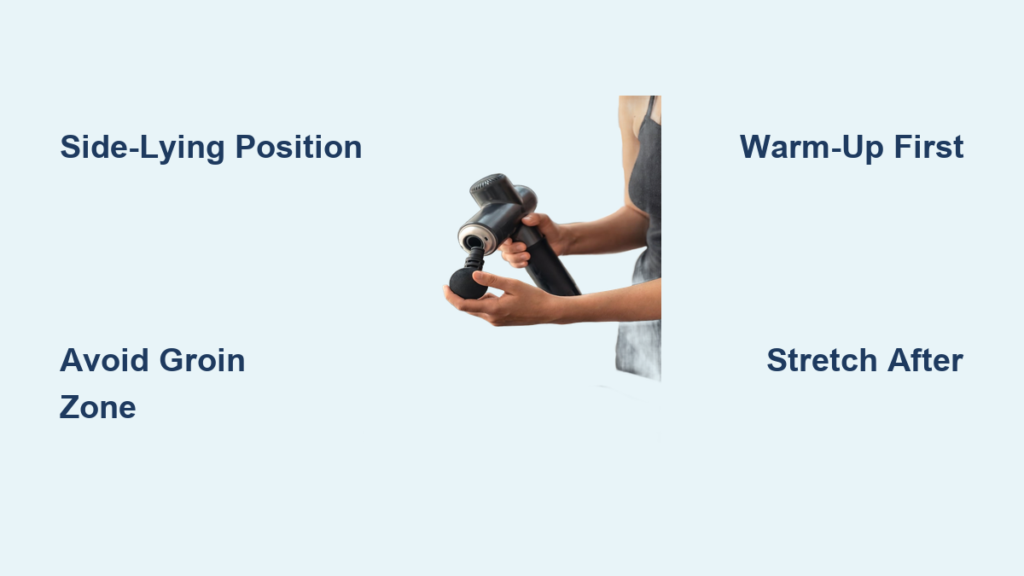
6-Minute Hip Flexor Relief Routine: Side-Lying Technique
Skip this sequence and you’ll miss 90% of the benefits. The side-lying position isolates muscles while keeping pressure off sensitive areas. Use a flat head attachment (best for broad hip flexor coverage) at the lowest speed setting.
3-Minute Dynamic Warm-Up Before Using Your Massage Gun
Cold muscles resist release. Spend 3 minutes prepping:
1. Leg swings: Hold a wall, swing one leg forward/backward 15x.
2. Knee-to-chest pulls: Hug knee to chest for 20 seconds per side.
3. Marching in place: Lift knees high for 60 seconds.
Why this works: Warm muscles absorb percussive therapy 3x more effectively. Skipping this step risks bruising tissue.
How to Find Your Hip Flexors Safely (Avoiding the ASIS Bone)
Stand and lift your knee toward your chest. The muscle contracting under your palm is your target. Now:
– Locate the front hip bone (ASIS)—it’s the bony point at your waistline.
– Slide your fingers 2 inches inward toward your thigh.
– Press gently: If tissue feels soft (like uncooked chicken), you’re in the safe zone. If it’s hard or you feel a pulse, move outward.
Pro tip: Lie on your side—this shifts pressure away from the groin crease, making targeting foolproof.
Side-Lying Position: 4 Safe Massage Gun Movements for Hip Flexors

Total time: 90 seconds per side. Never exceed 2 minutes per spot.
1. Static trigger point hold: Place gun on the upper thigh (midway between hip and knee). Hold for 20 seconds on low speed. Breathe deeply—tension melts faster when you exhale.
2. Ascending glide: Slowly move the gun from mid-thigh toward the hip bone. Stop 1 inch before the bony edge. Repeat 3x.
3. Iliopsoas access: While lying on your back with knees bent, place the gun just outside the hip bone. Aim percussion downward toward your knee (not into the abdomen). Use feather-light pressure.
4. Rectus femoris sweep: Target the front thigh muscle connecting hip to knee. Glide downward in 2-inch strokes for 30 seconds.
Warning: Stop if you feel tingling, numbness, or sharp pain—this signals nerve contact.
Kneeling Hip Flexor Stretch: Lock in the Relief
Do this within 60 seconds of massaging or tension returns:
1. Kneel on a cushioned surface, stepping one foot forward into a lunge.
2. Tuck your tailbone under (flatten your lower back).
3. Gently shift hips forward until you feel a stretch in the front of the back thigh.
4. Squeeze the glute of the kneeling leg—this intensifies the stretch 50%.
Hold 30 seconds per side. Skipping this step wastes the massage gun’s work; stretching lengthens muscles while they’re pliable.
Optimal Frequency: How Often to Massage Hip Flexors for Best Results
- Post-workout recovery: 60 seconds per side at lowest speed within 20 minutes of training.
- Chronic tightness: 90 seconds per side, 3x weekly (e.g., Mon/Wed/Fri).
- Pre-workout activation: 30 seconds per side on low speed to prime muscles.
Never exceed 2 minutes continuously on one spot. Overuse causes micro-tears and inflammation.
5 Costly Hip Flexor Massage Gun Mistakes (and How to Fix Them)
Mistake #1: Pressing Down Instead of Gliding
Why it backfires: Hip flexors are deep but delicate—excessive pressure bruises tissue.
Fix: Rest the gun’s weight on your thigh. Let the percussion penetrate; don’t lean in.
Mistake #2: Using High Speed on Cold Muscles
Why it backfires: High speeds on stiff muscles feel like jackhammering, causing inflammation.
Fix: Always start on speed 1. Only increase after 2 minutes if no discomfort occurs.
Mistake #3: Targeting the Groin Crease
Why it backfires: This compresses the femoral nerve, causing radiating leg pain.
Fix: Keep the gun at least 2 inches away from where your leg meets your torso.
Mistake #4: Ignoring Quad Tightness
Why it backfires: The rectus femoris (quad muscle) is a primary hip flexor—if tight, it pulls tension back instantly.
Fix: Spend 30 seconds massaging the front thigh before targeting deeper hip flexors.
Mistake #5: Skipping Post-Massage Hydration
Why it backfires: Releasing toxins without flushing them worsens soreness.
Fix: Drink 16 oz of water immediately after your session.
Stop Immediately: 4 Warning Signs You Need a Physical Therapist
Consult a professional if you experience:
– Electric-shock pain during or after use (indicates nerve compression).
– Numbness/tingling radiating past the knee (femoral nerve damage risk).
– Swelling or bruising that persists beyond 48 hours (tissue trauma).
– Worsening pain after 3 sessions (could signal underlying strain).
These aren’t “no pain, no gain” moments—they’re red flags. A physical therapist can differentiate hip flexor strain from lumbar spine issues, which require different treatments.
Using a massage gun on hip flexors correctly transforms stiffness into fluid movement—but one misstep near the groin crease can sideline you for weeks. By targeting the fleshy upper thigh with side-lying precision, warming muscles first, and stretching immediately after, you’ll unlock lasting relief. Consistency beats intensity: 90 seconds daily with proper form beats aggressive 5-minute sessions. Pair this routine with daily hip flexor stretches (like the kneeling lunge), and you’ll reclaim pain-free movement for running, cycling, or simply rising from your desk. Your hips weren’t meant to be tight; treat them with this targeted approach, and they’ll carry you farther than ever.


