
That post-workout stiffness or desk-job tension doesn’t stand a chance once you learn how to use Hypervolt massage gun properly. Whether you’re a weekend warrior or recovering from long hours at your computer, this percussive therapy powerhouse can transform your muscle recovery—but only if you wield it correctly. Many users either underutilize their device or risk injury through improper technique, wasting precious recovery time. In this guide, you’ll discover precise muscle-targeting methods, critical safety boundaries, and pro-level protocols that turn your Hypervolt from a fancy gadget into your most valuable recovery tool. Let’s unlock immediate relief through targeted percussive therapy that boosts blood flow, melts tension, and accelerates healing.
Unlike foam rollers, your Hypervolt delivers rapid, concentrated pulses directly into muscle tissue. This percussive action penetrates deeper layers without excessive user effort, making it ideal for stubborn knots in areas like calves, shoulders, or IT bands. But raw power means nothing without precision—applying incorrect pressure on sensitive zones like the spine or neck could cause serious harm. The good news? Mastering your device takes less time than your warm-up routine. By the end of this guide, you’ll confidently select attachments, adjust speeds for specific muscle groups, and integrate professional-grade techniques that maximize recovery while avoiding common pitfalls that leave users frustrated or injured.
Unbox and Charge Your Hypervolt Before First Use
Skip this step and you’ll face a dead device mid-recovery session. Your Hypervolt box contains the main unit, charger, and multiple attachment heads—but never power it on until fully charged. Connect the charger to the port near the handle base, then plug into an outlet. A full initial charge typically takes 2-3 hours, indicated by solid green lights on the battery indicator. While charging, inspect all components: the motor unit should feel solid (no rattling), and attachment heads must click securely into the front socket with a distinct snap. Never use third-party chargers, as mismatched voltage can permanently damage the battery—a critical detail many users overlook when急于 starting their first session.
Locate Every Control Button Within Seconds
Your Hypervolt’s handle holds three essential controls you must identify before operation. The power/speed button cycles through settings with a single press—start at Speed 1 (lowest) for safety. The battery indicator uses color coding: green (80-100% charge), amber (20-80%), red (under 20%). Never ignore red lights, as sudden shutdowns during deep tissue work could strain muscles. Note the attachment release button near the head socket—press this to swap heads smoothly. Misidentifying these controls leads to accidental high-speed activation on sensitive areas, so practice button locations with the device off until muscle memory kicks in.
Identify Every Hypervolt Attachment Head and Its Exact Purpose

Using the wrong head on delicate muscles causes bruising or nerve irritation—match attachments to anatomy like a pro. Your kit includes specific heads for distinct anatomical zones, not random experimentation. The ball head (rounded dome) is your daily driver for quads, glutes, and back—its broad surface distributes pressure evenly across large muscle groups. For stubborn calf knots or foot arches, the bullet head’s narrow tip targets trigger points without straining surrounding tissue. Never use this on the neck or spine—it’s strictly for dense muscle areas like hamstrings. The U-shaped head fits perfectly around cervical vertebrae for neck relief, but keep it strictly on the muscle bands parallel to your spine, never directly on bone.
Avoid These Attachment Selection Mistakes
Over 60% of user complaints stem from incorrect head choices. The flat head seems versatile but causes discomfort on bony ankles or wrists—reserve it for thick muscle bellies like lats or trapezius. The cushion head’s soft foam is essential for sensitive zones like the inner thigh or ribs, yet many skip it for “stronger” options, risking bruising. If you feel sharp pain or numbness, immediately switch to a larger, softer head like the ball attachment. Pro tip: Label heads with colored tape (e.g., blue for neck-safe U-shape) if your kit lacks distinct markings—this prevents critical errors during rushed post-workout sessions.
Critical Safety Zones to Never Touch With Your Hypervolt
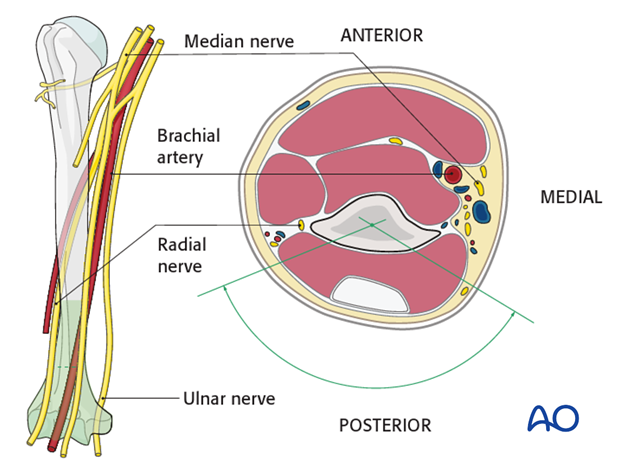
This isn’t optional—ignoring these boundaries risks nerve damage or joint injury. Your Hypervolt must never contact bones, joints, or vascular zones. Avoid the spine itself (only treat surrounding muscles), front/sides of the neck (carotid artery risk), armpits (brachial plexus nerves), inner thighs (femoral artery), or any bruised/swollen tissue. Never use it on the abdomen if pregnant or with hernias. If you have osteoporosis, diabetes, or blood disorders, consult a doctor first—percussive therapy can exacerbate these conditions. The moment you feel electric-like tingling or joint vibration, lift the device immediately; this indicates dangerous bone conduction.
Safe Application Pressure: The “Finger Test” Method
Apply too much force and you’ll bruise tissue; too little and it’s ineffective. Use this foolproof technique: place two fingers flat on your target muscle, then rest the Hypervolt head on top. The device’s weight plus light finger pressure (about 1-2 lbs) is sufficient—never lean your body weight into it. If your skin indents more than ¼ inch, you’re pressing too hard. Start sessions at 30 seconds per zone, gradually increasing to 2 minutes as muscles adapt. For sensitive areas like shoulders, begin with the cushion head on Speed 1, moving in slow 1-inch strokes along muscle fibers—not across them.
Target Calves and Hamstrings Without Straining Your Back
These posterior chain muscles cause the most user errors due to poor positioning. Sit upright in a chair with feet flat—never bend over your legs. For calves, place the ball head at the Achilles tendon, then glide upward toward the knee at 1 inch per second. If targeting soleus (deep calf), bend the knee slightly while applying. For hamstrings, lie on your back with knees bent, using the wedge head to access the sit bone area. Keep hips grounded—arching your back to reach muscles strains your lumbar spine. Spend 60 seconds max per leg; overuse here causes sciatic nerve irritation.
Quick IT Band Relief Protocol
The IT band’s connective tissue requires specialized handling. Lie on your side with the cushion head placed just below your hip bone. Glide downward toward the knee at half-speed (Speed 1), stopping 2 inches above the knee joint. Never press directly on the knee—this inflames the bursa. Limit sessions to 45 seconds per side, 2x daily. If you feel sharp outer-knee pain, stop immediately; this indicates improper placement on the bursa rather than the muscle.
Fix Hypervolt Power Failures and Overheating
When your device won’t start, skip panic mode with this diagnostic sequence. First, verify the charger clicks firmly into the port—loose connections are the #1 issue. If lights don’t illuminate, try a different outlet (power surges damage circuits). If amber lights flash during charging, unplug for 5 minutes to reset the battery management system. For sudden shutdowns mid-use, check for excessive heat: vents near the handle must stay unobstructed. If the motor housing is too hot to touch, let it cool 20 minutes—continuous use beyond 15 minutes triggers thermal protection.
Extend Battery Life With Smart Charging Habits
Draining your Hypervolt to 0% before recharging degrades battery capacity long-term. Maintain 20-80% charge for daily use, and never store it fully depleted. For travel, power down completely (hold power button 10 seconds) to prevent accidental activation in luggage. If battery life drops below 45 minutes per charge, recalibrate it: drain fully, then charge uninterrupted for 4 hours. Using incorrect chargers voids warranties—only use Hyperice’s 15V adapter, not standard phone chargers.
Pre-Workout Activation and Post-Workout Recovery Protocols

Using your Hypervolt before exercise requires radically different technique than recovery sessions. Pre-workout: apply the ball head on Speed 1 for 10 seconds per muscle group (quads, glutes) to increase blood flow—never exceed 15 seconds or you’ll fatigue fibers. Post-workout is where most users err: wait 10 minutes after exercise before treating major muscles. Start with the flat head on Speed 2, gliding slowly over quads/hamstrings for 90 seconds to flush lactic acid. For stubborn knots, use the bullet head on Speed 1 for 30-second bursts directly on the knot, followed by 30 seconds of rest—repeat twice max.
Chronic Pain Relief for Office Workers
Desk-related tension in trapezius and forearms needs targeted protocols. For upper traps, sit upright and place the U-shaped head along the muscle ridge from neck to shoulder—never on the neck bones. Use Speed 1 with feather-light pressure for 45 seconds. For forearm strain, rest your arm on a table and glide the wedge head from wrist to elbow on Speed 1.5, avoiding the inner elbow’s ulnar nerve (tingling = stop immediately). Pair this with 5 minutes of stretching for lasting relief—never rely solely on percussive therapy for chronic issues.
When to Stop Using Hypervolt and Seek Professional Help
Your device isn’t a medical solution—recognize these red flags immediately. Stop using if you experience persistent numbness, swelling, or reduced range of motion after sessions. Never treat acute injuries (sprains, fractures) or areas with visible inflammation—percussive therapy can worsen tissue damage. If muscle pain lasts beyond 72 hours post-treatment, consult a physical therapist; this indicates underlying issues no massage gun can fix. Those with pacemakers, cancer, or recent surgeries must get medical clearance before use—electromagnetic interference risks are real.
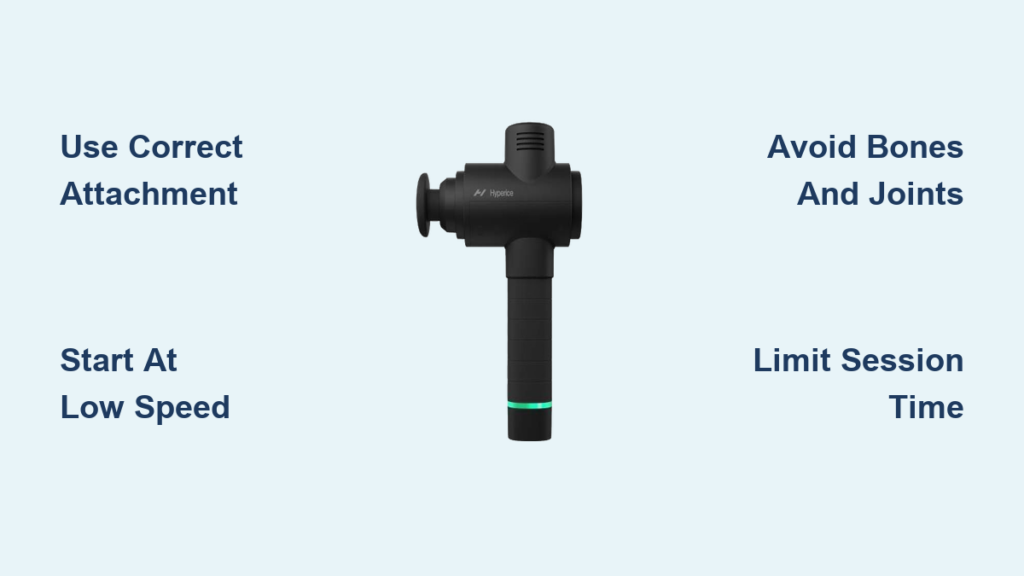
Mastering how to use Hypervolt massage gun transforms recovery from guesswork to science. Start each session by selecting the correct attachment for your target zone, begin at the lowest speed, and move methodically with minimal pressure. Respect safety boundaries around bones and joints, limit sessions to 2 minutes per area, and always pair percussive therapy with hydration and stretching. Consistent, correct use delivers cumulative benefits: reduced soreness, faster mobility, and resilient muscles. If you take one thing from this guide, let it be this—your Hypervolt works best when you let the tool do the work, not your body weight. Now go melt that tension with professional-grade precision.


