
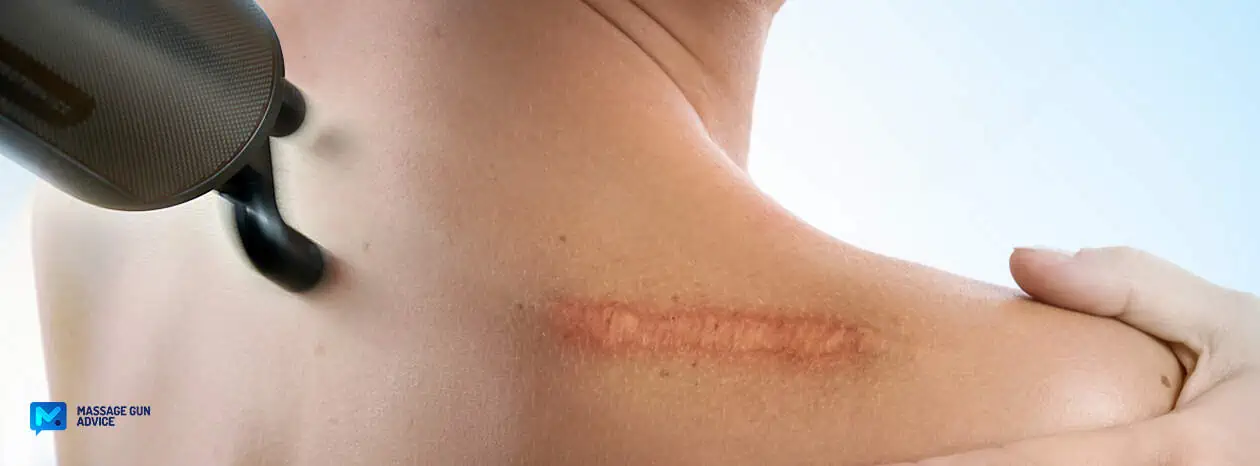
Your scar tissue feels like a stiff, unyielding barrier beneath your skin. That surgical incision or injury site limits your movement, causes persistent discomfort, and refuses to soften months after healing. You’ve tried stretching and foam rolling with limited success. What if your massage gun—the same device you use for sore muscles—could actually remodel that stubborn scar tissue? When applied correctly, percussive therapy breaks down fibrous adhesions, boosts blood flow to the area, and restores flexibility. This guide reveals precisely how to use a massage gun for scar tissue without causing damage, transforming rigid scars into supple, mobile tissue through scientifically backed techniques.
How Percussive Therapy Breaks Down Scar Tissue Fibers

Scar tissue forms dense, cross-linked fibers that bind muscles and fascia together—unlike healthy tissue, it lacks elasticity and glides poorly. This creates “adhesions” that pull on surrounding structures, causing pain and restricted movement. Your massage gun combats this through rapid, targeted pulses that penetrate deep into the scar matrix. Unlike rolling or kneading, percussive therapy delivers concentrated mechanical force that physically disrupts these rigid cross-fibers.
Why Scar Tissue Causes Stiffness and Pain
Your body lays down collagen haphazardly during scar formation, creating a tangled web that restricts movement. This disorganized structure pulls on nerve endings and limits gliding between tissue layers. When you move, these adhesions create friction and tension—like trying to bend a sheet of dried glue. Percussive pulses introduce controlled micro-stress that loosens these bonds, allowing fibers to gradually reorganize into a more flexible alignment.
Boosting Blood Flow to Accelerate Scar Healing
Scar tissue is naturally poorly vascularized, starving it of oxygen and nutrients needed for remodeling. The massage gun’s rapid pulses act like a hydraulic pump—squeezing blood vessels to flush out stagnant fluid while triggering vasodilation. This surge in circulation delivers fresh oxygen and healing factors directly to the scar, accelerating the natural maturation process where stiff collagen gradually softens over time.
Restoring Range of Motion in Scarred Areas
As adhesions break down, the real magic happens: restored tissue gliding. Percussive therapy separates bound layers of fascia, muscle, and skin that have fused together. You’ll notice this as newfound ease when moving through previously restricted motions—like finally bending your knee fully after a leg surgery or raising your arm pain-free post-mastectomy. Consistent treatment literally “unsticks” your body from within.
Critical Safety Steps for Scar Tissue Massage Gun Use
Before touching your scar, prioritize safety—improper use can worsen adhesions or cause bruising. These non-negotiable steps protect fragile tissue while maximizing treatment effectiveness.
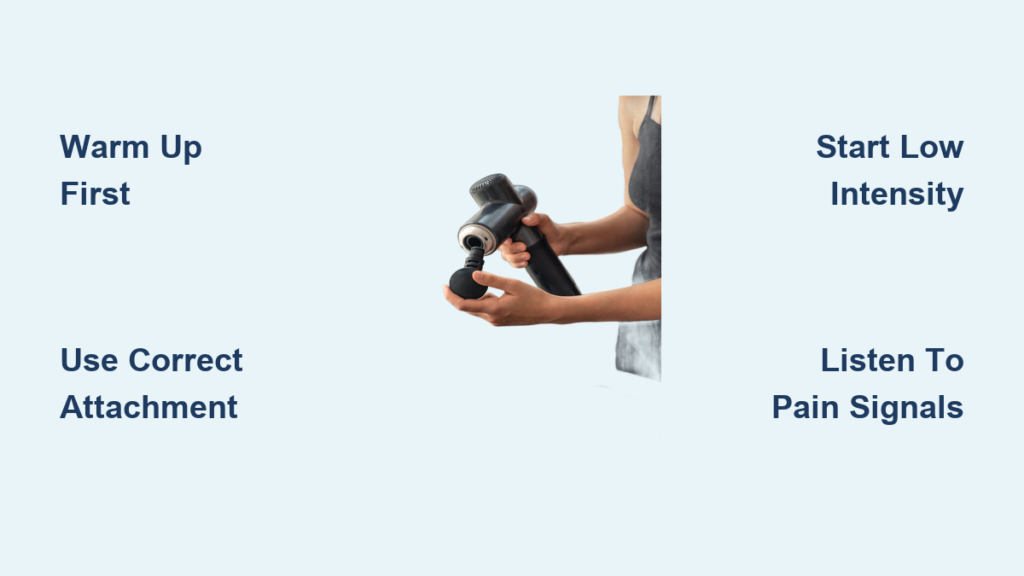
Choosing the Right Attachment for Scar Tissue (Ball, Bullet, or Wedge)
Never use flat or standard attachments on scars. Opt for:
– Ball attachment for large, flat scars (like abdominal incisions)
– Bullet or wedge for precise targeting of small, raised scars (knee surgeries, C-sections)
– Avoid U-shaped heads—they concentrate too much pressure on edges
The curved surfaces of ball/bullet attachments distribute force evenly across scar tissue without pinching edges. Test attachments on healthy muscle first to gauge pressure tolerance.
Why Warming Up Before Scar Treatment Is Non-Negotiable
Cold scar tissue is brittle and prone to micro-tears. Always:
1. Take a 10-minute warm shower
2. Perform 5 minutes of gentle movement (arm circles for shoulder scars, ankle pumps for leg scars)
3. Apply heat pack for 3 minutes if scar feels particularly rigid
Warm collagen becomes 40% more pliable—critical for safe adhesion breakdown. Skipping this step risks creating new micro-injuries that worsen scarring.
Interpreting Pain Signals During Scar Tissue Therapy
Discomfort is normal; sharp pain is dangerous. During treatment:
– Mild “achy” sensation = productive tissue release
– Burning or shooting pain = STOP immediately
– Bruising that lasts >48 hours = excessive pressure
Start at 20% intensity and gradually increase only if no pain occurs after 30 seconds. Your scar should feel “worked” but not assaulted—like a deep tissue massage, not a hammer strike.
Contraindications: When NOT to Use a Massage Gun on Scars
Avoid treatment if:
– Scar is less than 6 weeks old (use only if cleared by surgeon)
– Skin shows redness, warmth, or drainage (signs of infection)
– You have a history of keloid scarring (raised, overgrown tissue)
– Blood thinners are in your medication regimen
– Deep vein thrombosis risk exists in the area
When in doubt, consult your physical therapist—they can assess scar maturity and safety.
5-Step Scar Tissue Breakdown Protocol with Massage Gun
This timed sequence maximizes adhesion release while protecting fragile tissue. Total session: 12 minutes.
Step 1: Preparing the Scar Area with Oil and Light Strokes (2-3 Minutes)
Apply almond or coconut oil liberally over the scar and 2-inch perimeter. Begin with the massage gun on lowest speed using broad, sweeping motions. Glide slowly across healthy tissue surrounding the scar—never directly on it yet. This primes blood flow and “warms up” the interface between scar and normal tissue. Watch for skin flushing; if no pinkness appears in 60 seconds, increase speed slightly.
Step 2: Activating Surrounding Tissue with Low-Speed Percussion (1-2 Minutes)
Move the gun in slow circles 1-2 inches away from the scar edge. Focus on muscles that anchor into the scarred area (e.g., quadriceps around knee scars). This “pre-stretches” connected tissues, reducing tension on the scar itself. Critical visual cue: Healthy tissue should visibly ripple under the gun—scar tissue won’t. If you see rippling directly on the scar, reduce pressure immediately.
Step 3: Horizontal and Vertical Glides Across Scar Fibers (4-5 Minutes)
Now approach the scar directly:
1. Set gun to medium speed (3-4 out of 10)
2. Glide perpendicular to scar direction (if scar runs vertically, move gun horizontally)
3. Cover entire scar width plus 1-inch margins
4. Spend 5 seconds per inch—slower than you think
Pro Tip: Place one finger lightly on the scar edge. If you feel the gun’s vibration traveling into your finger, you’re applying safe pressure. If your finger jiggles violently, back off immediately.
Step 4: Precision Targeting of Dense Adhesions (2-3 Minutes)
Identify “knots”—spots that feel harder than surrounding scar tissue:
– Switch to bullet attachment
– Apply light pressure (1-2 lbs)
– Hold on knot for 15 seconds max
– Move to next spot after 5-second pause
Never exceed 30 seconds on one adhesion. Over-treating causes inflammation that rebuilds thicker scar tissue. Track progress by comparing pre- and post-treatment flexibility (e.g., measure knee bend angle).
Step 5: Cooling Down with Stretching for Lasting Results (2-3 Minutes)
Finish with gun on lowest setting circling the scar periphery for 60 seconds. Then perform gentle static stretches:
– Hold each stretch 30 seconds
– Target movements restricted by the scar
– Stop at first resistance point (no bouncing)
This guides newly mobilized collagen into optimal alignment as it cools. Hydrate with 16oz water immediately after to flush released metabolic waste.
Maximizing Results: 4 Key Treatment Principles
Why Less Pressure Delivers Better Scar Tissue Results
Your massage gun’s motor does 90% of the work—your hand provides only guidance. Excessive pressure:
– Compresses blood vessels, reducing oxygen delivery
– Triggers protective muscle guarding
– Causes micro-hemorrhages that worsen scarring
Apply just enough force to keep the gun in contact during pulses. If skin indents more than 1/4 inch, you’re pressing too hard.
Listening to Your Body: Discomfort vs. Dangerous Pain
In the first 90 seconds, expect moderate discomfort as adhesions release. This should decrease by 30% as treatment continues. If pain:
– Increases after 2 minutes → STOP
– Lingers >2 hours post-treatment → reduce intensity next session
– Causes night pain → skip 48 hours before retrying
Your scar’s response is your best treatment guide—honor its feedback.
The Weekly Treatment Schedule for Optimal Scar Remodeling
Consistency beats intensity:
– Weeks 1-2: 3 sessions/week (5 minutes each)
– Weeks 3-4: 4 sessions/week (6 minutes)
– Ongoing: 2 sessions/week for maintenance
Never treat the same scar two days consecutively—tissue needs 48 hours to remodel. Track progress with weekly photos and range-of-motion measurements.
Hydration’s Role in Flushing Toxins After Scar Therapy
Breaking down scar tissue releases cellular debris into your lymphatic system. Drink 8oz water during treatment and another 16oz within 30 minutes after. Add electrolytes if sessions exceed 10 minutes—this prevents post-treatment soreness by accelerating waste clearance.
7 Signs You Need a Professional for Scar Tissue Treatment
Severe Pain or Bruising After Massage Gun Use
If you develop purple bruising that spreads beyond the treatment area or pain requiring medication, stop immediately. This indicates tissue trauma—not productive release. See a physical therapist within 48 hours.
Treating Keloid and Hypertrophic Scars Safely
Raised, ropey scars (keloids) or thick, red scars (hypertrophic) require specialized protocols. Massage guns can worsen these by stimulating excess collagen. Professionals use lower frequencies and combine with silicone sheeting—never attempt DIY on these scar types.
When Medical Conditions Complicate Scar Tissue Therapy
Diabetes, autoimmune disorders, or vascular diseases alter scar healing. If you have:
– Neuropathy (reduced sensation)
– Lymphedema
– History of poor wound healing
Consult your doctor before starting. They may adjust timing or intensity.
Uncertain Scar Types: Why Professional Assessment Matters
Not all scars respond to percussion—some need myofascial release or instrument-assisted techniques. If after 4 weeks you see no improvement in flexibility, see a scar-specialized physical therapist. They’ll assess scar mobility with specialized tests and create a targeted plan.
Consistent, precise massage gun use transforms rigid scars into flexible tissue—but only when applied with knowledge. Start with 3-minute sessions twice weekly, focusing on proper technique over duration. Within 3-4 weeks, you should notice smoother movement and reduced tightness. Remember: scar remodeling is measured in months, not days. Pair your treatments with daily gentle stretching and adequate hydration for compounding results. If progress stalls after 6 weeks, seek a physical therapist specializing in scar management—they’ll identify hidden adhesions your gun can’t reach. Your body’s capacity for healing is remarkable; with the right approach, that scar can become a testament to resilience, not a limitation.


