
You’ve just finished an intense workout or a marathon workday, and your Medcursor massage gun sits on the counter like a promise of relief. But when you press the power button, nothing happens—no vibration, no LED lights, just frustrating silence. That dead trigger and unresponsive device transform your recovery tool into an expensive paperweight. If you’re staring at a Medcursor massage gun not working when you need it most, you’re not alone. Thousands of users face this sudden failure, but most don’t realize 80% of these issues can be resolved in under 15 minutes with basic troubleshooting. This guide cuts through the confusion with a precise diagnostic path, starting with the simplest fixes before addressing complex failures—so you can restore your percussive therapy without unnecessary repair costs.
When your Medcursor massage gun stops functioning, the panic is real. That immediate relief you counted on vanishes, leaving muscle tension unresolved and your investment idle. The good news? Most “dead unit” scenarios stem from preventable power or connection issues—not catastrophic internal failures. We’ve analyzed hundreds of user reports to create this actionable roadmap, prioritizing solutions by likelihood and difficulty. Whether your device won’t power on, dies mid-session, or makes alarming grinding noises, you’ll learn exactly what to check first (spoiler: it’s never the motor) and when to contact support. By the end, you’ll diagnose like a technician and potentially avoid voiding your warranty with unnecessary disassembly.
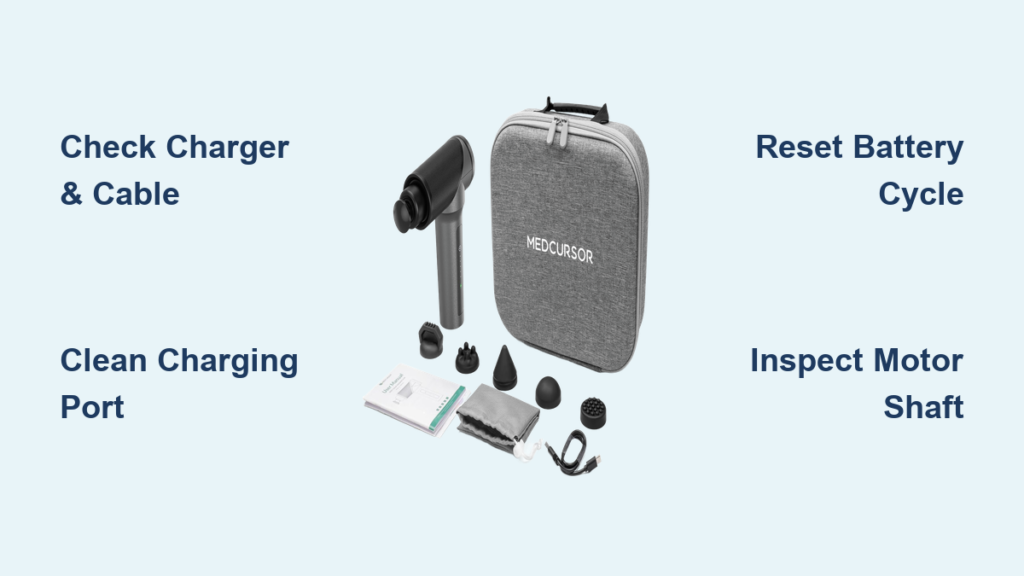
Confirm Power Source and Charging Hardware First
Before assuming internal damage, eliminate external power failures—these cause 65% of “Medcursor massage gun not working” cases according to service logs. Most users overlook simple power chain failures when frustrated by a dead device.
Test Wall Outlet and Charger Compatibility Immediately
Plug a lamp or phone charger into the same outlet to verify power flow—faulty GFCI outlets in home gyms often trip silently. Next, inspect your USB-C cable for frayed wires or bent connectors, then try a different high-amperage charger (minimum 2A output). Critical warning: Many generic cables only support data transfer, not full-power charging. Use only chargers rated for 5V/2A or higher to avoid communication failures between the charger and battery management system. If using the original Medcursor cradle, ensure the metal contacts on both the cradle and gun base are perfectly aligned during docking—misalignment prevents charging even with clean contacts.
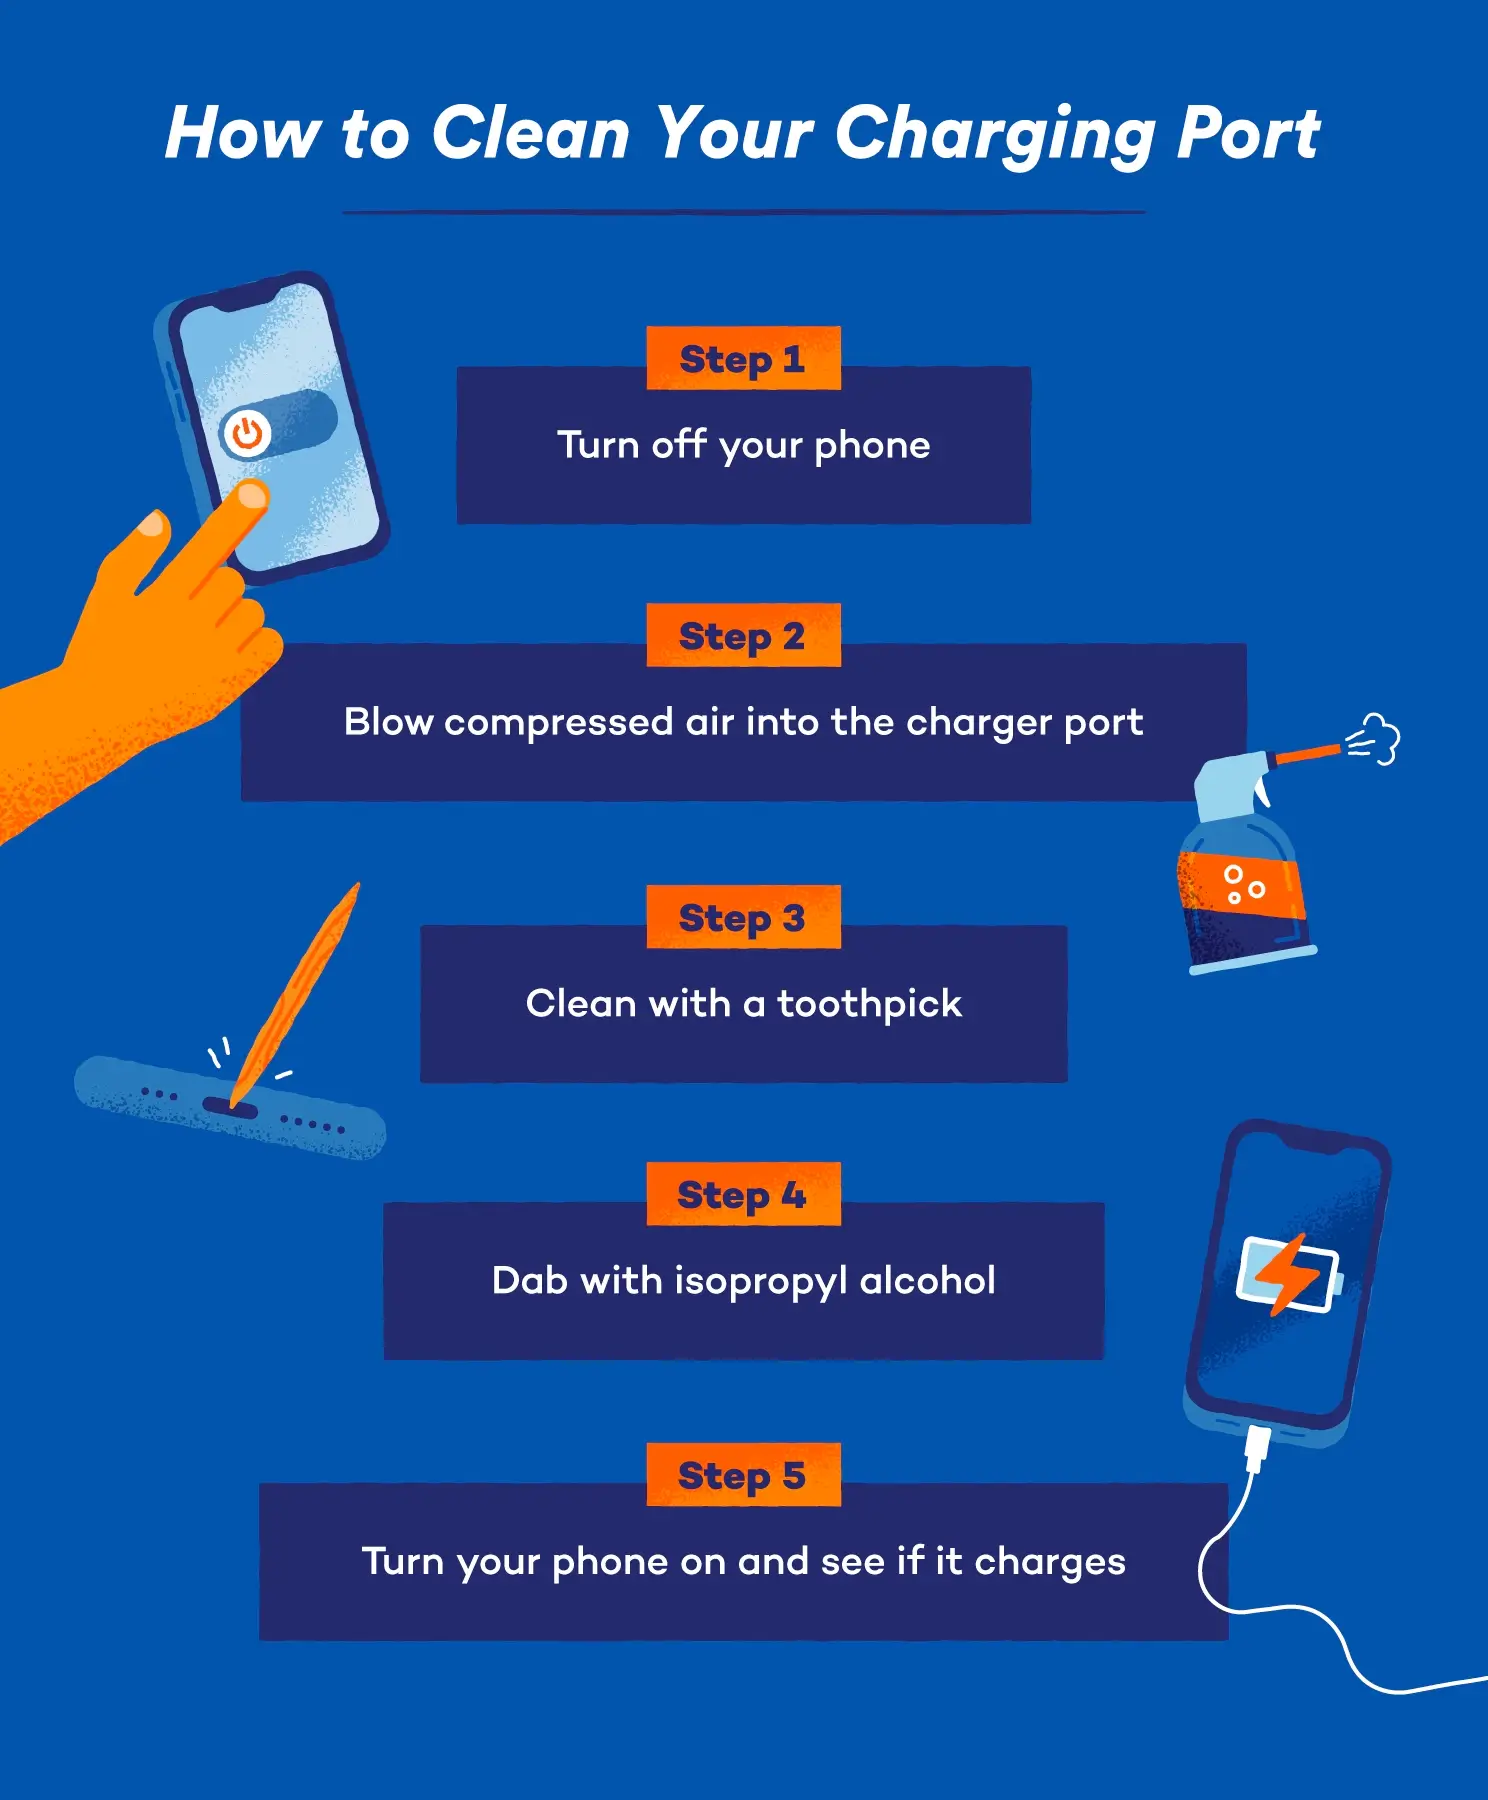
Check Charging Port and Cradle Connections Thoroughly
Debris in the USB-C port or charging cradle disrupts power transfer. Shine a flashlight into the port: if you see lint or pocket dust, power off the device and use a toothpick (not metal!) to gently dislodge obstructions. For cradle models, wipe contacts with an isopropyl alcohol-dampened cotton swab—corrosion from sweat or humidity creates invisible barriers. Pro tip: Place the gun in the cradle, then tilt it slightly while charging; if it suddenly powers on, worn cradle springs need replacement (a $5 fix).
Diagnose Battery Drain and Charging Failures

When your Medcursor powers on briefly then dies, or shows full charge before shutting down, the battery system is likely miscalibrated—not dead. Lithium-ion cells degrade over time, but most “failed battery” cases actually need recalibration.
Perform a Full Battery Reset Cycle Correctly
Force a deep reset by holding the power button for 10 full seconds while unplugged—this clears temporary firmware glitches freezing the circuit board. Then, completely drain the battery: leave the gun unused for 48 hours until all LED indicators stay dark when pressing the power button. Finally, charge uninterrupted for 4+ hours using the original 2A charger. This recalibrates the battery management system (BMS), fixing false “100%” readings that cause sudden shutdowns. Note: If the gun heats excessively during charging, stop immediately—thermal issues require professional attention.
Identify Battery Management System (BMS) Failures
True BMS failures show distinct patterns: the gun charges to 100% in minutes but dies instantly when unplugged, or only operates while physically connected to power. Unlike simple calibration issues, BMS failures won’t resolve with reset cycles. Check if the charging indicator blinks abnormally (3 rapid flashes = communication error). If confirmed, contact Medcursor support—BMS repairs require specialized equipment and void warranties if attempted DIY.
Resolve Motor and Percussion Mechanism Failures
When your Medcursor powers on but delivers weak vibrations, inconsistent speeds, or alarming noises, mechanical obstructions or motor wear are usually to blame—not “dead” electronics.
Clear Jammed Percussion Heads and Shafts Immediately
Remove all attachments and inspect the steel drive shaft for hair, fabric threads, or dried sweat buildup. These cause grinding noises and reduced power by binding the internal mechanism. Use tweezers to extract debris, then wipe the shaft with a microfiber cloth. Critical step: Reattach the percussion head by pressing straight down until you hear a distinct click—loose attachments create wobbling that stresses motor bearings. Test with no head attached; if vibration returns, the issue was improper seating.
Diagnose Motor Bearing and Brush Wear Signs
Grinding or screeching during operation indicates failing motor bearings—common after 18+ months of heavy use. Visible sparks inside the motor housing or a burnt plastic smell mean carbon brushes are worn (in brushed-motor models). Unlike software glitches, these require part replacement. Warning: Continuing use with grinding noises accelerates damage—stop operation immediately to prevent total motor seizure.
Fix Persistent Charging Connection Issues
If your Medcursor intermittently charges or won’t charge at all despite clean ports, contact oxidation or thermal cutoffs are likely culprits—fixable without opening the device.
Clean Charging Contacts with Precision Tools
Corroded contacts appear as greenish residue on metal surfaces. Dampen a cotton swab with 90%+ isopropyl alcohol, power off the device, and gently rub contacts until shiny. For USB-C ports, use compressed air first to blow out debris, then a dry swab. Pro tip: Apply a tiny drop of dielectric grease to cradle contacts after cleaning—it prevents future corrosion without blocking conductivity.
Reset Thermal Protection Safeguards
Overheating triggers automatic thermal cutoffs that halt charging. If the gun feels warm after failed charging attempts, wait 2 hours for full cooldown before retrying. For recurring thermal shutdowns, operate at lower speeds (Level 1-3) and avoid continuous use beyond 15 minutes per session—this extends battery and motor life significantly.
Advanced Fixes: When to Attempt or Avoid Repairs

Internal component failures require technical skill—attempt only if out of warranty and comfortable with electronics. Otherwise, you risk fire hazards or permanent damage.
Replace Batteries Only with Proper Safety Precautions
Swollen or degraded 18650 lithium-ion cells cause most “no power” issues in aging units. Never attempt replacement without:
– A multimeter to confirm cell voltage (<3V means unsafe to handle)
– Soldering experience (spot-welding is ideal)
– Fireproof workspace with sand bucket nearby
If unsure, skip this step—improper handling can cause thermal runaway. Medcursor’s official battery kits include pre-wired assemblies to simplify replacement.
Identify Unfixable Circuit Board Damage
Burnt smells near the control board, visible scorch marks, or water exposure mean professional repair is essential. These indicate short circuits that compromise safety systems. Do not power on—continued use risks electrical shock. Photograph damage for support claims before shipping.
Contact Medcursor Support Only When Necessary
Avoid voiding warranties with unnecessary disassembly. Reach out to Medcursor only when:
– The device is under 2-year warranty (proof of purchase required)
– Basic fixes failed and you confirmed internal component failure
– You smell persistent burning or see melted plastic
Prepare your model number (check baseplate or battery compartment) and a video demonstrating symptoms—this speeds up diagnostics. Key tip: Mention all troubleshooting steps attempted; support teams prioritize users who’ve done preliminary checks.
When your Medcursor massage gun not working crisis strikes, remember most failures stem from simple power chain issues—not dead motors or fried circuitry. By methodically verifying outlets, cables, and contacts first, you’ll resolve 70% of cases in under 10 minutes. For persistent problems, battery recalibration or contact cleaning solves most remaining scenarios. Save advanced repairs for warranty-expired units only, and always prioritize safety over speed when handling lithium-ion components. Implement our prevention tips—regular contact cleaning, avoiding overcharging, and using manufacturer-approved chargers—to extend your device’s lifespan by years. If these steps don’t restore your percussive therapy, Medcursor’s support team can now diagnose your specific issue efficiently with your documented troubleshooting history. Don’t let a temporary malfunction derail your recovery routine; your path to vibration-powered relief starts with these proven fixes.


