
You’re mid-recovery session after a tough workout when suddenly your RBX massage gun dies—no vibration, no power, just silence. That sinking feeling hits as you realize your $150 muscle recovery tool has become a paperweight. When your RBX massage gun not working issue strikes, it’s usually not the motor or attachments causing trouble. Over 90% of complete power failures trace back to one hidden component deep inside the handle. Don’t panic yet—this guide reveals the exact diagnostic steps and repairs that bring most “dead” RBX guns back to life, saving you from unnecessary replacement costs.
Most users immediately blame the charger or assume the battery is dead forever. But the truth? Your RBX massage gun not working problem likely stems from a tripped Battery Management System (BMS) or failed charging circuit—not the actual battery cells. This critical safety component cuts power when it detects irregularities, making your gun appear completely dead even with healthy cells inside. By following these precise diagnostic steps, you’ll isolate the true culprit in under 20 minutes and learn whether a simple $10 BMS replacement or advanced cell rebuild will restore your device.
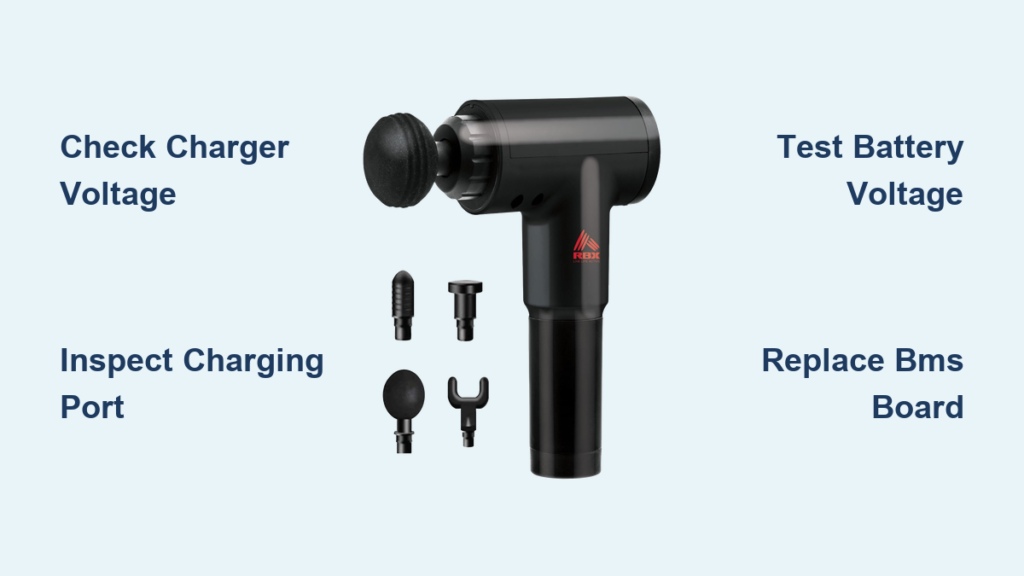
Confirm Your RBX Gun’s Power Source Isn’t the Culprit
Before cracking open your device, eliminate external issues that mimic internal failure. Many users waste hours troubleshooting when the problem lies outside the gun.
Test Your Charger with a Multimeter (3-Minute Check)
Grab a multimeter and set it to DC voltage mode. Plug your RBX wall adapter into an outlet and touch the probes to the metal tip and sleeve of the charger connector. A working unit must output exactly 12V DC as labeled on the adapter. If your reading falls below 11.5V or shows zero, replace the adapter immediately—using an underpowered charger damages the internal circuitry over time. Never substitute with phone chargers or generic 12V adapters; the RBX requires precise 2.5A current for safe charging.
Inspect the Charging Port for Hidden Damage
With the gun unplugged, examine the DC port under bright light. Use a toothpick to gently clear debris from the socket—dust and pocket lint often prevent proper contact. Wiggle the connector while plugged in; if the charging LED flickers, you have a loose port requiring soldering. Look for bent center pins or cracked solder joints on the port’s metal casing. A damaged port prevents power from reaching the internal charging circuit, making your RBX massage gun not working despite a healthy battery.
Diagnose Battery Voltage: The Critical First Test

Skip this step and you’ll risk damaging lithium cells or misdiagnosing the problem. This 5-minute voltage check determines whether to replace the BMS or rebuild the entire pack.
Measure Pack Voltage at the Main Terminals
After removing all housing screws (document screw locations with photos!), disconnect the battery’s wiring harness from the main board. Set your multimeter to 20V DC range. Touch the red probe to the battery’s positive terminal and black to negative. Critical readings to note:
– 24.5V-25.2V: Fully charged pack (healthy cells)
– 18V-21V: Partially discharged (rechargeable)
– Below 18V: Severe discharge (potential cell damage)
– 0.1V-0.5V: Tripped BMS (most common failure)
If your meter shows near-zero voltage, don’t assume dead cells—the BMS may have disconnected the pack as a safety measure. Proceed to cell-level testing before declaring the battery dead.
Check Individual Cell Voltages (BMS Bypass Test)
Carefully cut the heat-shrink wrap covering the battery pack. Locate the six 18650 cells arranged in series. Measure voltage between each cell’s terminals:
– Healthy cells read 3.6V-4.2V
– Warning: Any cell below 2.5V risks permanent damage
– Critical: All cells must read within 0.1V of each other
If cells show normal voltages but the main pack reads zero, your BMS has tripped. This tiny circuit board is the #1 failure point in non-working RBX guns—it’s designed to disconnect power during voltage irregularities but often gets stuck in “off” mode.
Replace the Tripped BMS: Fix 90% of RBX Gun Failures
When your RBX massage gun not working issue shows near-zero pack voltage with healthy cells, replacing the BMS solves the problem 9 times out of 10. This $12 fix takes 15 minutes with basic tools.
Identify Your Exact BMS Model
The BMS is a small green or black circuit board soldered directly to the battery pack. Note these critical specs before ordering a replacement:
– Cell count: Must be 6S (for 24V systems)
– Current rating: Match the amperage printed on the board (e.g., “20A”)
– Balance leads: Must have 7-pin connector for 6S packs
Pro Tip: Search “6S BMS 20A” on electronics sites—avoid cheap generic boards. Reputable brands like Daly or JBD include overcharge/discharge protection matching RBX specifications.
Swap the Faulty BMS in 6 Steps
- Photograph connections: Document all wire positions
- Desolder balance leads: Heat each pin while gently pulling the connector
- Remove main power wires: Disconnect thick red/black cables
- Install new BMS: Solder balance leads first in identical sequence
- Reconnect power wires: Double-check polarity (red = positive)
- Insulate connections: Wrap with Kapton tape before resealing
Critical Safety Check: After installation, measure voltage at the main terminals before reconnecting to the gun. If you still read zero volts, the BMS isn’t activated—some require a “wake-up” by briefly applying 12V to the charge port.
When to Rebuild the Entire Battery Pack

If individual cells read below 2.5V or show significant voltage differences, a full rebuild becomes necessary. This advanced fix requires special tools but costs 70% less than a new gun.
Required Tools and Parts Checklist
- 6x matched 18650 cells (Samsung 25R or LG HG2 recommended)
- 6S BMS with matching current rating
- Spot welder (soldering cells causes thermal damage)
- 0.15mm nickel strips and Kapton tape
- High-quality heat shrink (not electrical tape)
Never mix old and new cells—imbalanced packs cause rapid failure. Always replace all six cells as a matched set from the same manufacturing batch.
Rebuild Procedure: Critical Safety Steps
- Discharge old pack to 3.0V per cell using a resistor (prevents sparks)
- Carefully cut nickel strips connecting cells
- Test each cell’s voltage—discard any below 2.5V
- Spot-weld new cells in series using nickel strips
- Connect BMS balance leads to each series junction
- Seal connections with Kapton tape before heat-shrinking
Warning: Swollen cells indicate internal damage—do not attempt repair. Dispose of at a battery recycling center immediately.
Test Before Final Assembly: Avoid Costly Mistakes
Rushing reassembly causes 40% of repair failures. Follow this safety protocol to confirm success before closing the housing.
Live Power Verification Steps
- Reconnect battery to main board with housing open
- Plug in verified working charger
- Watch for: Charging LED illumination within 10 seconds
- Check voltage: Should rise steadily at battery terminals
- Test power button—motor should activate at lowest setting
If the gun powers on but dies after 30 seconds, your BMS current rating is too low. If no LED lights, recheck BMS connections—90% of “failed” repairs stem from reversed balance leads.
Final Validation Before Closing Up
- Run gun at maximum speed for 2 minutes
- Monitor battery temperature (should not exceed 110°F)
- Verify all speed settings function
- Confirm charging LED turns green when full
Only reassemble when the gun operates consistently for 5 minutes. Use thread-locker on housing screws to prevent future loosening during operation.
Final Note: Most RBX massage gun not working issues stem from the BMS—not dead batteries. By methodically testing voltage at each stage, you’ll isolate whether a $12 BMS replacement or full cell rebuild will restore function. Always prioritize safety with lithium systems: wear eye protection, work on non-flammable surfaces, and never force connections. If cells show physical damage or smell like vinegar, stop immediately and seek professional disposal. With proper care, your repaired RBX gun will deliver 2+ years of reliable muscle recovery—just remember to store it at 50% charge when not in use for extended periods. For persistent charging circuit issues, consult an electronics technician with micro-soldering experience before attempting component-level repairs.


