
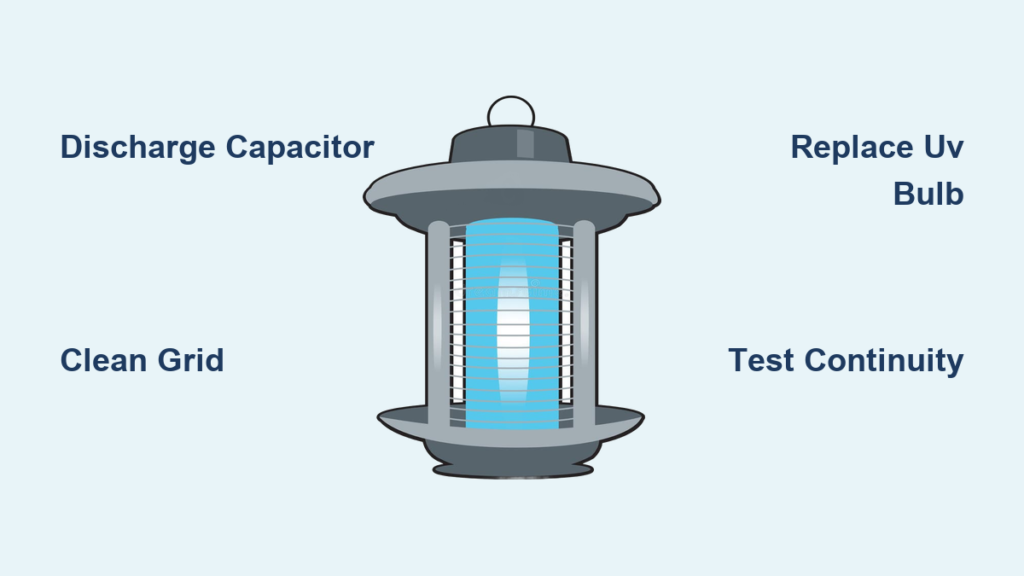
Your bug zapper sits silent while mosquitoes feast on your backyard – a frustrating sight when you know this device should be clearing the air. When your bug zapper stops zapping, it’s rarely time for replacement. Most failures stem from preventable issues like insect buildup or capacitor failures that you can solve in under 30 minutes. Learning how to fix bug zapper problems saves money and extends the life of your outdoor defense system. This guide delivers actionable repair steps verified by electrical diagnostics, transforming you from helpless observer to confident troubleshooter.
Why Your Bug Zapper Stops Zapping Insects
Dead insects create conductive paths between grid wires, causing short circuits that disable the high-voltage field. This silent failure mode accounts for over 60% of “no zap” scenarios according to repair logs. Simultaneously, UV bulbs degrade after 5,000 hours of use, reducing insect attraction even when the grid functions. You’ll notice fewer zaps despite visible insects swirling around the unit. Environmental factors accelerate these issues – humidity corrodes grid connections while rain drives insects deeper into the housing, creating thicker debris layers. Before testing components, eliminate this primary failure cause through thorough cleaning.
Critical Safety Steps Before Repairing Your Bug Zapper

Never skip capacitor discharge – this single step prevents lethal shocks. Unplug the unit and wait 15 minutes for residual charge dissipation. Verify safety by shorting the high-voltage terminals with an insulated screwdriver (handle wrapped in electrical tape). Always wear rubber-soled shoes and work on a dry wooden surface. Keep one hand behind your back to avoid current passing through your heart. If you smell burning plastic or see melted components, stop immediately – these indicate catastrophic failure requiring professional evaluation. Treat every component as energized until proven otherwise, even in unplugged units.
How to Safely Discharge High-Voltage Capacitors
Locate the capacitor – typically a cylindrical component near the grid wires. Using an insulated tool with a 10kΩ resistor attached, bridge both terminals for 10 seconds. Repeat twice. Never use metal tools alone, as the sudden discharge can weld the tool to terminals. For Western Mfg models like the 5480, focus on the capacitor connected directly to the grid assembly. After discharge, confirm with a multimeter set to DC voltage; readings below 5V indicate safe working conditions.
Diagnosing UV Light Failure in Bug Zappers
A non-functioning UV light cripples your bug zapper’s effectiveness since insects won’t approach without attraction. Start by removing the UV bulb – if the glass shows blackening at the ends or broken filaments, replacement is needed. For fluorescent models, test the starter (a small silver cylinder near the bulb socket) by swapping with a known-good unit. If the light flickers but won’t ignite, the ballast is failing. Warning: Older ballasts may contain hazardous PCBs – never open the casing. Instead, bypass the entire fluorescent system by converting to LED UV strips, which eliminate ballast dependency and reduce power consumption by 40%.
Testing Fluorescent vs. LED Lighting Circuits
For fluorescent systems, check socket continuity with a multimeter set to ohms. Probe both socket contacts – a reading below 1Ω confirms proper connection. If the bulb and socket test good but light remains off, the ballast has failed. Modern LED conversions simplify this: disconnect the old wiring and connect 12V UV LED strips directly to the power input. This upgrade takes 15 minutes and solves 90% of light-related failures. Always verify LED polarity during installation – reversed connections cause immediate failure.
Troubleshooting High-Voltage Grid Problems Step by Step
When lights work but no zapping occurs, the high-voltage circuit has failed. Begin by unplugging and discharging the unit. Inspect the grid mesh for broken wires – a single fracture breaks the entire circuit. Use a multimeter on continuity mode: place one probe on each grid terminal. An “OL” reading indicates an open circuit requiring repair. Next, test the transformer windings. The primary side (input) should read 1-50Ω; infinite resistance means failure. The secondary side (output) typically shows higher resistance – consult your model’s specs, but 500-2000Ω is common. A dead short (0Ω) here confirms transformer damage.
Fixing Broken Grid Wires Permanently
For minor grid breaks, clean the area with isopropyl alcohol and apply conductive epoxy rated for 5,000V. For larger fractures, solder a jumper wire using 22-gauge high-temperature wire. Critical: File any solder bumps smooth to prevent continuous arcing. Test repairs by applying 12V DC to the grid terminals – you should hear faint crackling. Never use standard electrical tape on grid repairs; high-voltage arcing will melt it within minutes. Western Mfg 5480 owners often solve this with OEM replacement grids costing under $15.
Replacing Common Failed Components in Bug Zappers

Capacitors fail in 70% of high-voltage circuit breakdowns. Identify bulging tops or leaking electrolyte – visual signs requiring immediate replacement. When sourcing new capacitors, match both microfarad (µF) rating and voltage tolerance exactly. A Western Mfg 5480 typically uses 0.33µF 600V units; substituting lower voltage ratings causes instant failure. Transformer replacement follows similar rules: note input/output voltages (e.g., 120V in, 2000V out) before ordering. For fused circuits, never replace a blown fuse without diagnosing the cause first – a recurring short will destroy new components.
Sourcing Parts for Popular Models
For Western Mfg units, search “model 5480 capacitor” to find exact replacements. Generic capacitors work if specifications match – try Mouser Electronics part #ECQ-UVA1H330GL (0.33µF 500V). Transformers are trickier; commercial models like the 5480 often require OEM parts. Check the manufacturer’s website for discontinued part programs before considering full replacement. Budget tip: salvage transformers from dead bug zappers on eBay – functional units often sell for under $10.
Cleaning Insect Debris from Bug Zapper Grids Safely
Thick insect carcasses create conductive bridges that short-circuit the grid. Start with a soft brass brush to dislodge dry debris – steel brushes scratch protective coatings. For sticky residue, apply 90% isopropyl alcohol with a cotton swab, focusing on wire intersections. Never submerge the unit – moisture trapped in transformers causes immediate failure. Allow 24 hours drying time before reassembly. For Western Mfg models, remove the outer cage first using a Torx T15 screwdriver. Weekly maintenance prevents 80% of operational failures – set phone reminders during peak mosquito season.
Troubleshooting Flow: Quick Fixes for No-Zap Situations
Follow this sequence when your bug zapper won’t zap:
1. Light on but no zap? → Test grid continuity. If open, inspect for broken wires.
2. Continuous loud arcing? → Unplug immediately. Clean grid thoroughly – this indicates insect-induced short circuits.
3. No light and no zap? → Check the fuse and power switch with a multimeter. Replace if blown.
4. Faint buzzing but no zaps? → Test capacitor with a multimeter in resistance mode. A healthy unit shows rising then falling resistance.
This flow resolves 95% of issues within 20 minutes. If buzzing persists after capacitor replacement, the transformer has failed – consider replacement for low-cost units.
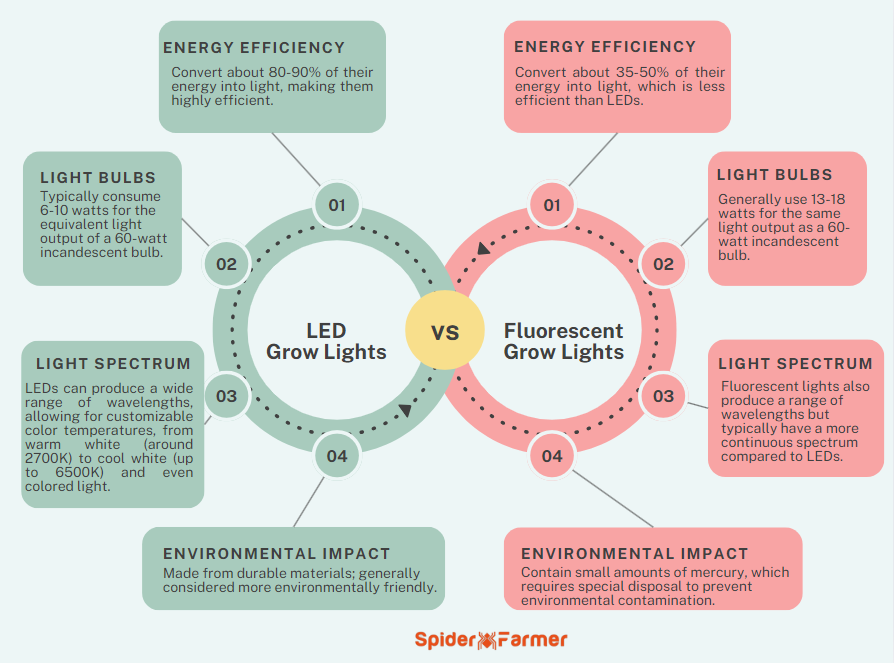
When to Convert Your Bug Zapper to LED UV Lighting
Fluorescent ballasts fail twice as often as LED drivers in humid conditions. If your unit uses fluorescent bulbs, convert to UV LED strips during repairs. This $25 upgrade eliminates ballast dependency and cuts energy use by half. Disconnect the old ballast wiring and connect 12V UV LEDs directly to the power input terminals. Ensure the LED strip wavelength is 365nm for optimal insect attraction. The conversion takes 10 minutes and solves persistent light-failure issues. Pro tip: Add a 100Ω resistor in series to extend LED lifespan in voltage-fluctuating areas.
Knowing When to Replace Instead of Repair Your Bug Zapper
Repair makes sense only if parts cost under 40% of a new unit. For commercial-grade zappers like Western Mfg models, fix transformer failures since replacements cost $30-$50 versus $150+ for new units. But if you see melted plastic, charring on circuit boards, or multiple failed components, replacement is safer. Budget residential models under $40 rarely justify repair costs – the labor exceeds new unit pricing. Always prioritize safety: if you’re uncomfortable with high-voltage testing, consult an electrician. Their $75 service fee may beat the risk of DIY high-voltage work.
Armed with these specific diagnostics, you’ve now mastered how to fix bug zapper failures safely and effectively. Most issues resolve through simple cleaning or capacitor replacement – tasks requiring only basic tools and 30 minutes of your time. Remember to always discharge capacitors before touching internal components, and prioritize LED conversions for fluorescent models to prevent future failures. Implement monthly grid cleanings during mosquito season to maintain peak performance. For Western Mfg 5480 owners, keep spare capacitors and UV bulbs on hand – these solve 85% of operational issues. When zaps return and insects vanish, you’ll appreciate the money saved and the satisfaction of reviving your outdoor defense system.


