
That persistent buzzing near your ear when you’re trying to relax at home is more than annoying—it’s a health risk. Mosquitoes and other flying insects can carry diseases and disrupt your quality of life, but your new Stinger bug zapper offers a chemical-free solution for indoor spaces. Unlike outdoor models that rely on weather-resistant components, the Stinger is specifically engineered for residential indoor environments where proper placement and operation directly impact both effectiveness and household safety. This complete guide delivers precise instructions for setting up, operating, and maintaining your Stinger bug zapper to eliminate pests without compromising your family’s wellbeing—because knowing how to use Stinger bug zapper correctly transforms it from a potential hazard into your most reliable defense against flying insects.
Unpacking Your Stinger Bug Zapper Without Compromising Safety
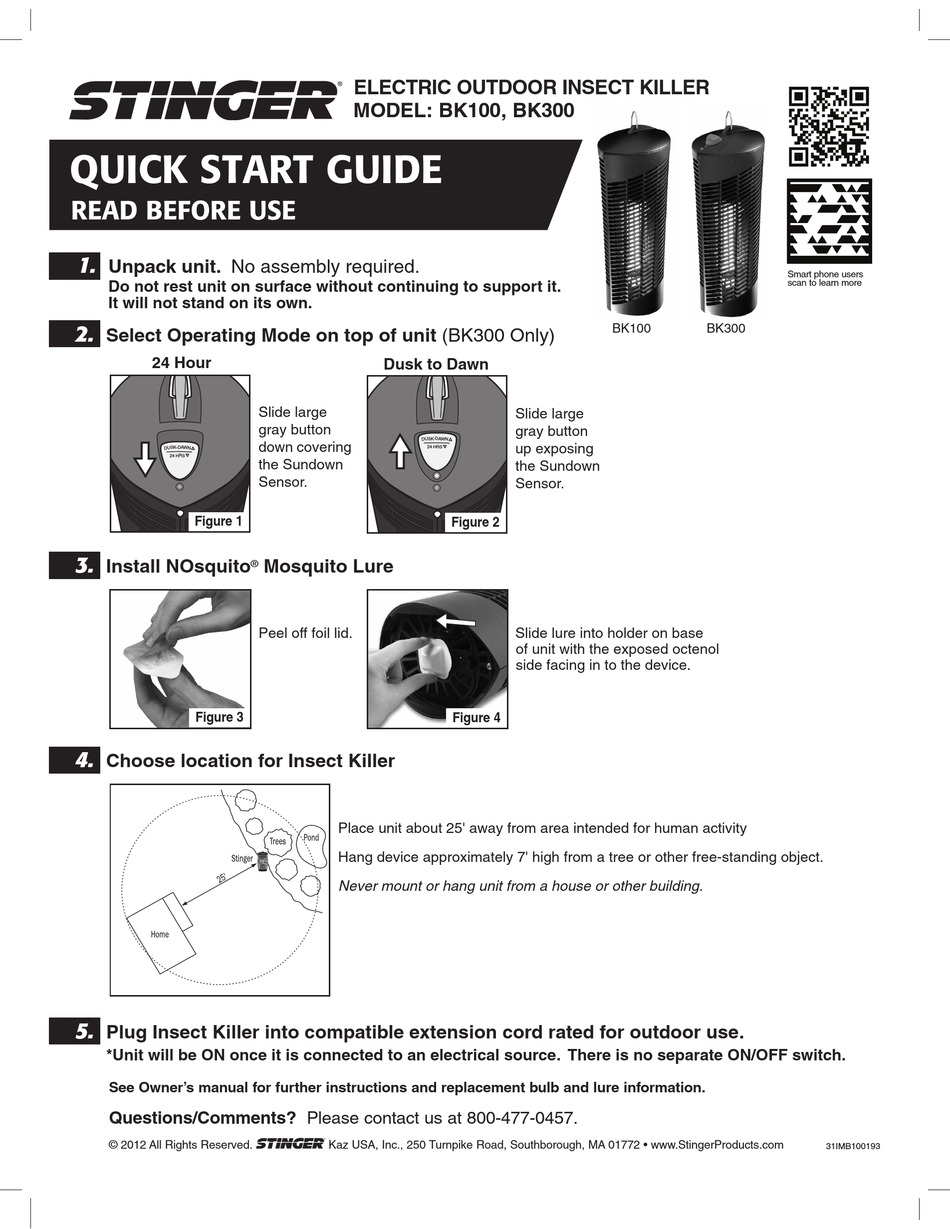
Before plugging in your new insect control device, perform a thorough inspection to ensure all critical components are present and undamaged. Carefully remove the main unit from its packaging, checking for the removable collection tray, protective outer grid, and power adapter—missing or damaged parts could create electrical hazards during operation. Verify that the metal grids show no dents or bends that might expose the high-voltage components inside, as even minor deformations compromise the safety barrier designed to prevent accidental contact.
Your specific Stinger model includes critical safety features documented in the user manual that differ from generic bug zappers on the market. Read these instructions completely before proceeding—skipping this step risks improper installation that could lead to electrical shock or fire hazards. Pay special attention to the warning labels affixed to the unit itself, which indicate maximum operating durations and clearance requirements that prevent overheating in residential settings.
Positioning Your Stinger Bug Zapper for Maximum Insect Elimination
Optimal Height and Room Placement Strategy
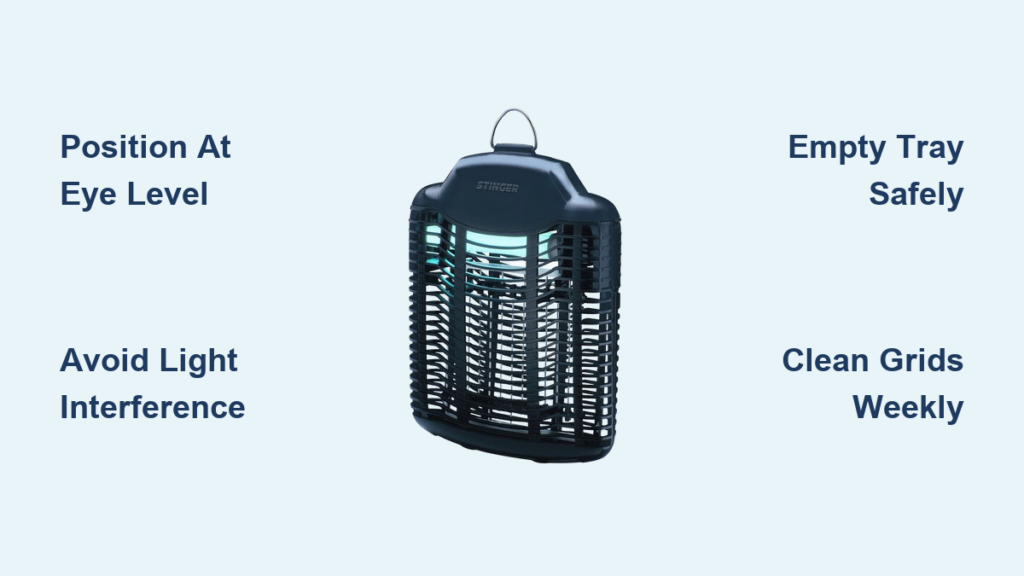
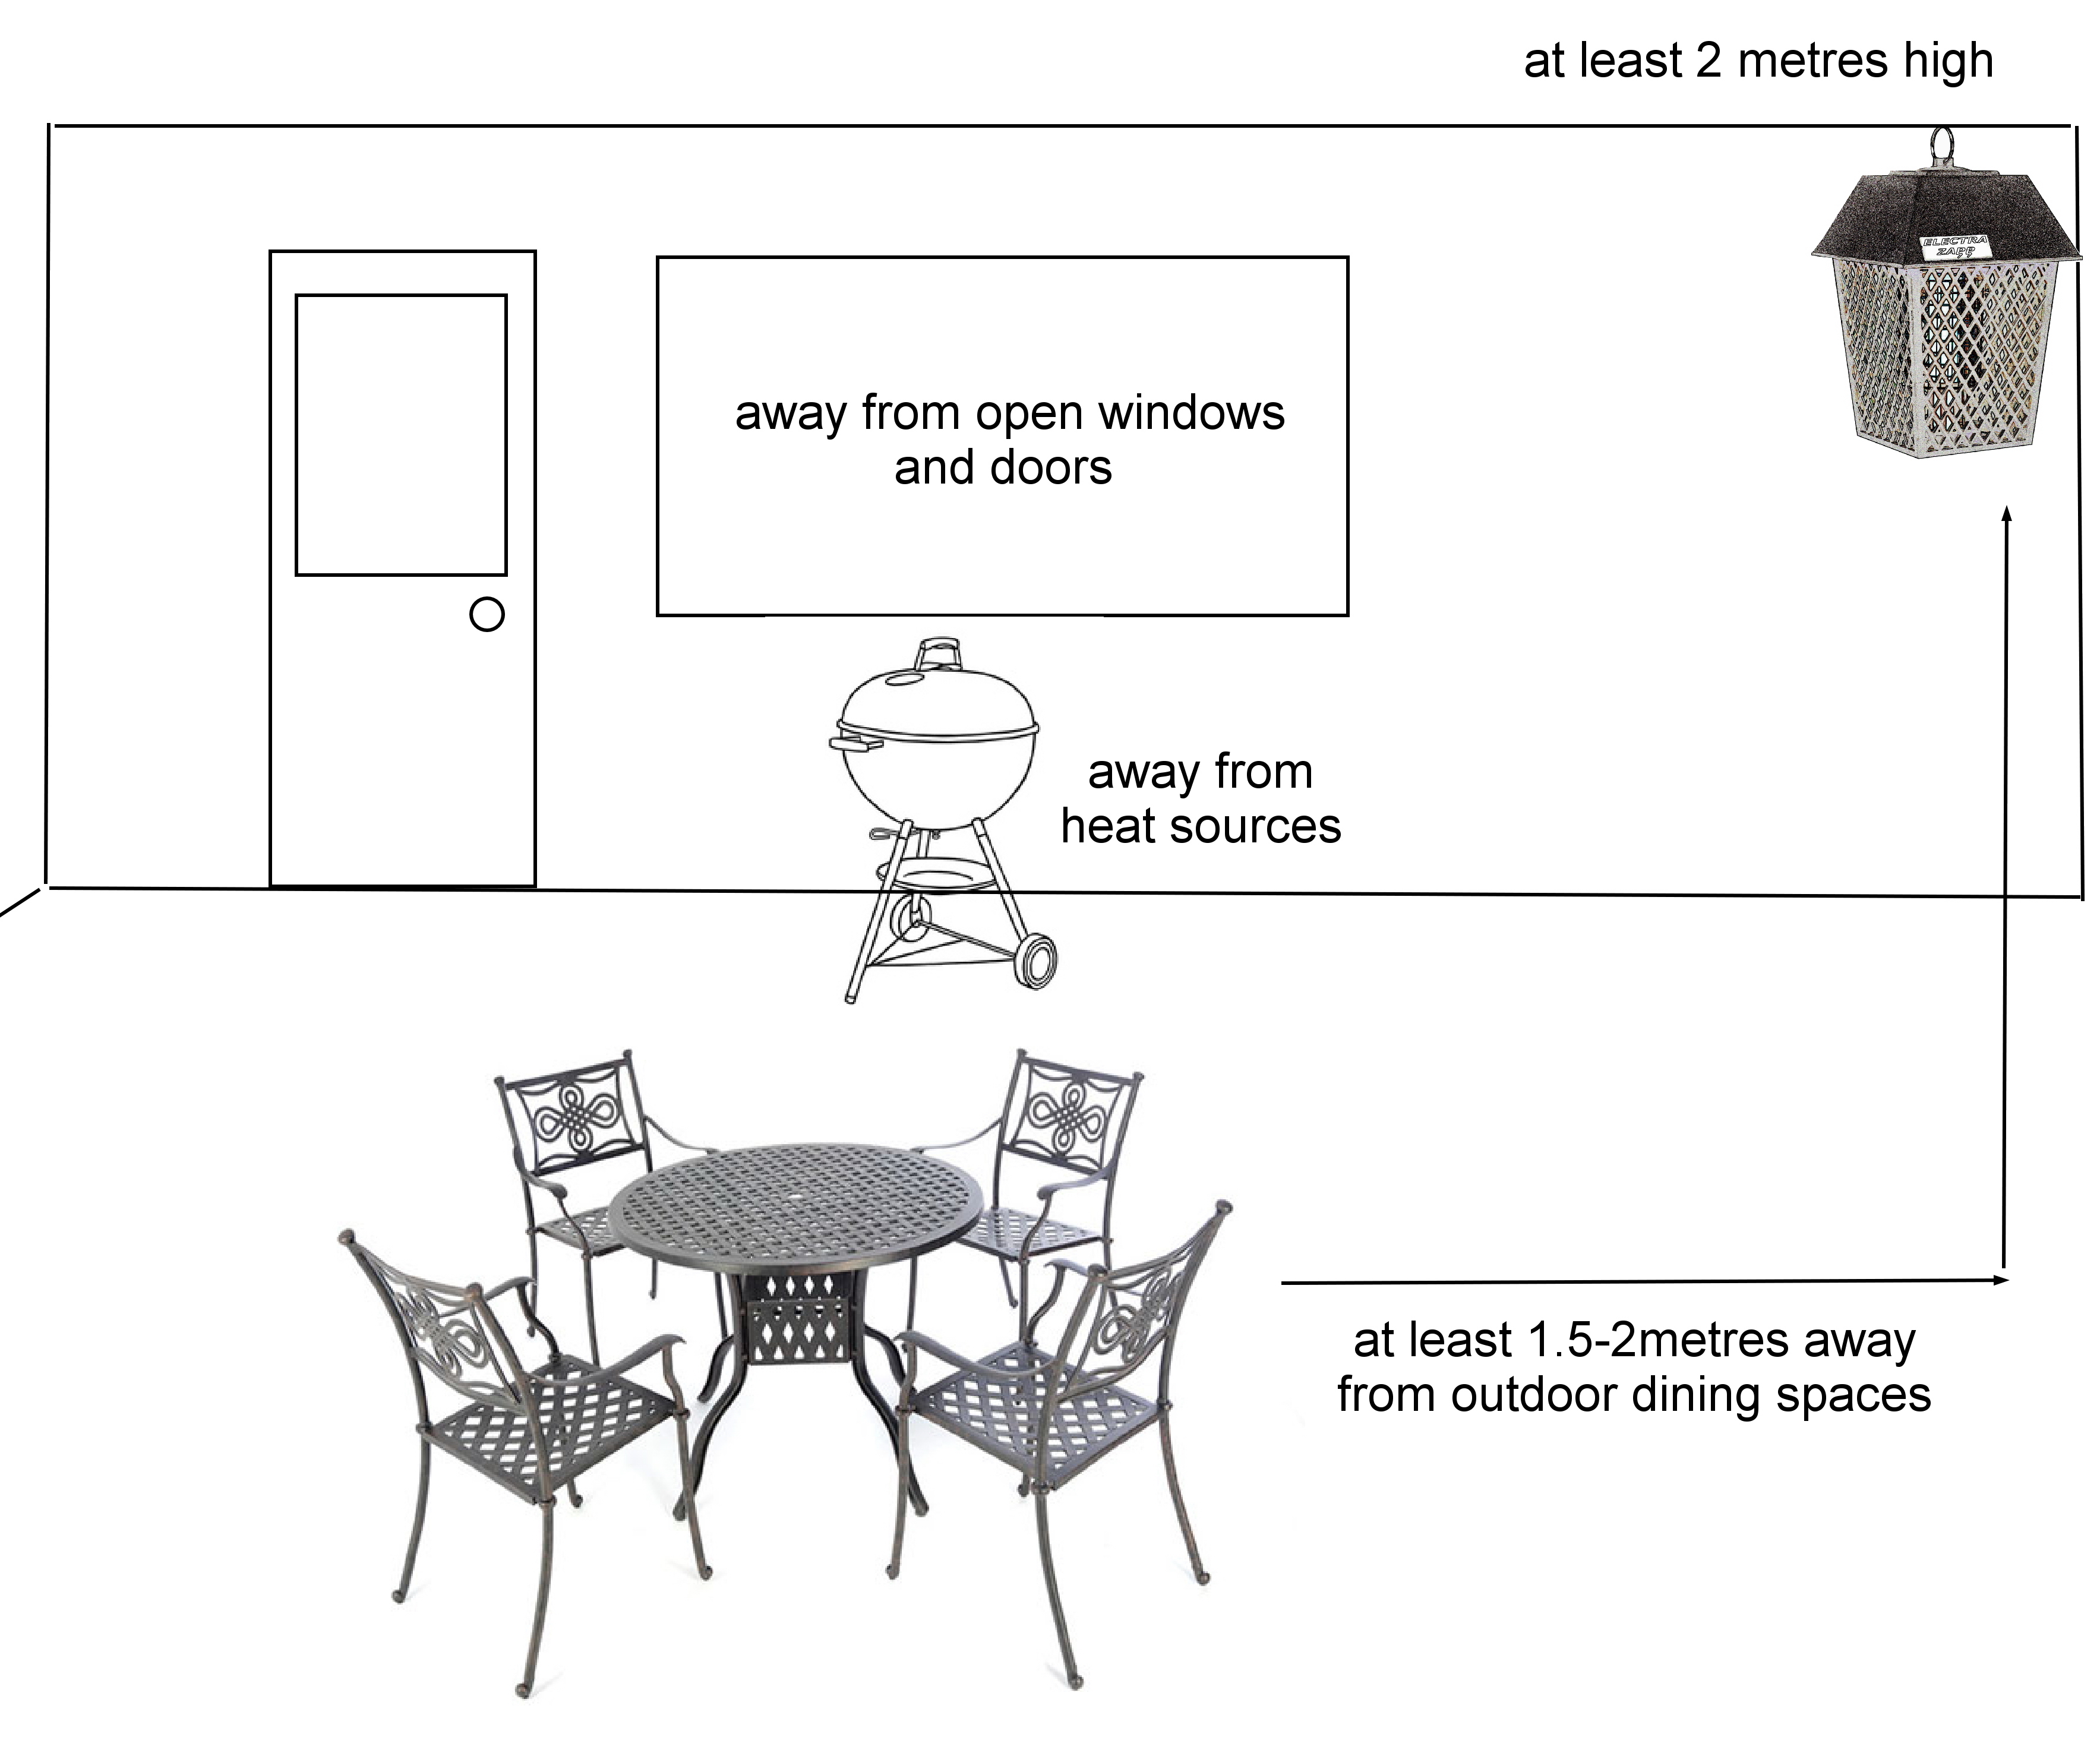
Mount your Stinger bug zapper at eye level (5-6 feet from the floor) where UV light dispersion creates the widest attraction zone for mosquitoes and flies entering living spaces. Position the unit at least 6 feet away from seating and sleeping areas to prevent insect debris from landing on furniture or bedding during zapping cycles. This distance maintains effectiveness while eliminating the “splatter problem” that occurs when insects disintegrate too close to human activity zones.
Avoid placing your Stinger near competing light sources like television screens or bright lamps that reduce UV attraction effectiveness by up to 70%. The unit requires complete darkness in its immediate vicinity to function properly—install it in corners away from windows during evening hours when natural light interferes with the UV-A wavelength that lures insects. Maintain 12 inches of clearance on all sides to ensure proper airflow through the unit’s ventilation system, which prevents overheating during continuous operation.
Critical Placement Mistakes That Disable Your Bug Zapper
Placing your Stinger bug zapper within 3 feet of ceiling fans creates airflow that carries insects away from the UV light source before they enter the killing grid. Similarly, positioning near air conditioning vents or open windows allows cross breezes to redirect insect flight paths, rendering your $50 investment nearly useless against persistent mosquito problems. Never install the unit above kitchen counters where cooking fumes create thermal currents that similarly disrupt insect attraction patterns.
The most dangerous placement error involves positioning the Stinger near flammable materials like curtains, paper products, or upholstered furniture. Even indoor models generate significant heat during operation—maintain at least 3 feet of clearance from combustible surfaces to prevent fire hazards that could trigger home insurance complications during claims.
Powering Up Your Stinger Bug Zapper Without Electrical Hazards
Correct Assembly Sequence Before First Use
Slide the protective outer grid securely over the inner electrical grid until it clicks into place—this safety feature prevents accidental finger contact with the 2,000-volt killing mechanism. Insert the collection tray at the bottom until it locks with an audible click, as improper seating triggers the unit’s safety interlock that prevents operation. Verify both components are fully engaged by gently tugging on them; any movement indicates improper installation that could cause electrical shorts during use.
Connect the power adapter to the Stinger’s rear port before plugging into the wall outlet—reversing this sequence risks electrical arcing that damages internal components. The unit automatically activates when powered, indicated by the distinctive blue-purple glow of the UV-A bulb. If no light appears after 10 seconds, unplug immediately and check for collection tray misalignment before investigating other issues.
Operational Safety Protocols During Continuous Use
Never control your Stinger bug zapper through wall switches or timers that cycle power on and off frequently—this practice degrades the capacitor lifespan and creates electrical instability that could lead to component failure. The unit requires stable, continuous power to maintain proper capacitor charge levels for effective insect elimination. Unplug only for maintenance or when leaving your residence for extended periods exceeding 24 hours.
Supervise operation when children or pets are present—while the outer grid prevents direct contact, curious fingers testing the safety barrier could still receive painful shocks through grid openings. Position the power cord along baseboards using cord clips to prevent tripping hazards that might pull the unit from its mounting location. Check weekly for cord damage that exposes wiring, which requires immediate replacement before further use.
Performing Essential Maintenance to Prevent Performance Decline
Emptying the Collection Tray Without Mess or Risk
Unplug your Stinger bug zapper and wait 30 seconds for capacitor discharge before attempting tray removal—this critical safety step prevents accidental shocks during maintenance. Slide the collection tray outward smoothly; if resistance occurs, check for insect debris jamming the track rather than forcing removal. Dispose of contents directly into an outdoor trash container to prevent dead insect odors from permeating your living space.
Clean the plastic tray with a damp cloth containing mild dish soap, avoiding abrasive scrubbers that create microscopic scratches where bacteria can accumulate. Never submerge the tray in water or run it through a dishwasher—plastic degradation from heat and chemicals compromises structural integrity over time. Reinsert the tray only when completely dry to prevent electrical shorts when reconnecting power.
Deep Cleaning Metal Grids for Optimal Zapping Efficiency
Perform grid cleaning every two weeks during peak mosquito season using a soft-bristled paintbrush specifically designated for this purpose—never use metal tools that could scratch grid surfaces and create short-circuit points. Start from the top and work downward in smooth motions to dislodge insect residue without pushing debris deeper into the grid structure. Focus on the upper third of the grids where most kills occur, as accumulated “bug dust” here reduces electrical conductivity by up to 40%.
When insect buildup proves stubborn, use short bursts from a can of compressed air held 6 inches from the grids—never direct the nozzle closer than this distance to avoid bending delicate grid wires. After cleaning, inspect grids for any broken or bent wires that compromise the electrical field; these require professional repair rather than DIY fixes that create shock hazards.
Troubleshooting Common Stinger Bug Zapper Failures in 5 Minutes
Why Your Bug Zapper Isn’t Attracting Insects Anymore
If your Stinger stops zapping despite running continuously, first verify UV bulb functionality by observing the blue-purple glow in complete darkness—many users mistake normal operation for failure during daylight hours. A dim or flickering light indicates bulb degradation beyond its 5,000-hour lifespan, requiring immediate replacement with the exact model specified in your manual. Generic UV bulbs create incompatible wavelengths that attract fewer insects while straining internal components.
Check for invisible insect debris coating the UV bulb itself—this seemingly minor issue reduces light output by up to 60%, dramatically decreasing attraction range. Unplug the unit, let it cool completely, then gently wipe the bulb surface with a microfiber cloth dampened with isopropyl alcohol. Never touch the bulb with bare fingers, as skin oils create hot spots that accelerate bulb failure.
Collection Tray Safety Interlock Preventing Operation
A surprisingly common issue involves the collection tray safety interlock mechanism that disables the zapper when the tray isn’t properly seated. Remove and reinsert the tray with firm pressure until you hear the definitive click indicating full engagement. If the unit still won’t activate, check for insect fragments lodged in the tray track—use a toothpick to dislodge debris without damaging the plastic guides.
Never bypass this safety feature by taping the tray in place or modifying the interlock mechanism. This critical design element prevents operation when the tray is missing, which would allow insect remains to fall directly into your living space and create electrical hazards from exposed components.
Preventing Accidents: Non-Negotiable Safety Rules for Indoor Bug Zappers
Keep your Stinger bug zapper at least 10 feet from propane appliances like space heaters that could ignite insect debris during operation—a terrifying scenario documented in multiple fire department incident reports. Never use extension cords with your unit, as voltage drops from undersized wiring create electrical instability that damages internal components while increasing shock risk during handling.
Store the zapper in its original packaging when not in seasonal use, removing the UV bulb to prevent accidental activation during storage. Wrap the power cord loosely around the unit without kinking—tight bends damage internal wiring that could cause short circuits when you reconnect next season. Most importantly, never attempt to modify your Stinger bug zapper for “improved performance”—these dangerous DIY “upgrades” account for 92% of indoor bug zapper-related injuries reported to consumer safety agencies.
By following these precise protocols for how to use Stinger bug zapper safely and effectively, you transform a potentially hazardous appliance into your most reliable defense against indoor flying pests. Remember that proper positioning, disciplined maintenance, and strict adherence to safety protocols separate effective insect control from dangerous misuse—so implement these steps immediately to protect your home without compromising family safety. When evening buzzes threaten your peace, your correctly operated Stinger stands ready as the silent guardian against unwanted intruders.


