
That refreshing glass of water from your Nestlé cooler shouldn’t come with a metallic aftertaste or cloudy appearance. When mineral deposits build up inside your dispenser or biofilm forms in hidden corners, it compromises both water quality and appliance performance. Neglecting regular cleaning turns your trusted water source into a potential health hazard, especially in office environments where multiple users share the same unit. This guide delivers the exact procedures Nestlé recommends for maintaining your hot-and-cold water cooler, ensuring every sip stays pure and safe. You’ll learn time-tested methods to eliminate stubborn buildup, sanitize critical components, and prevent common issues that shorten your cooler’s lifespan.
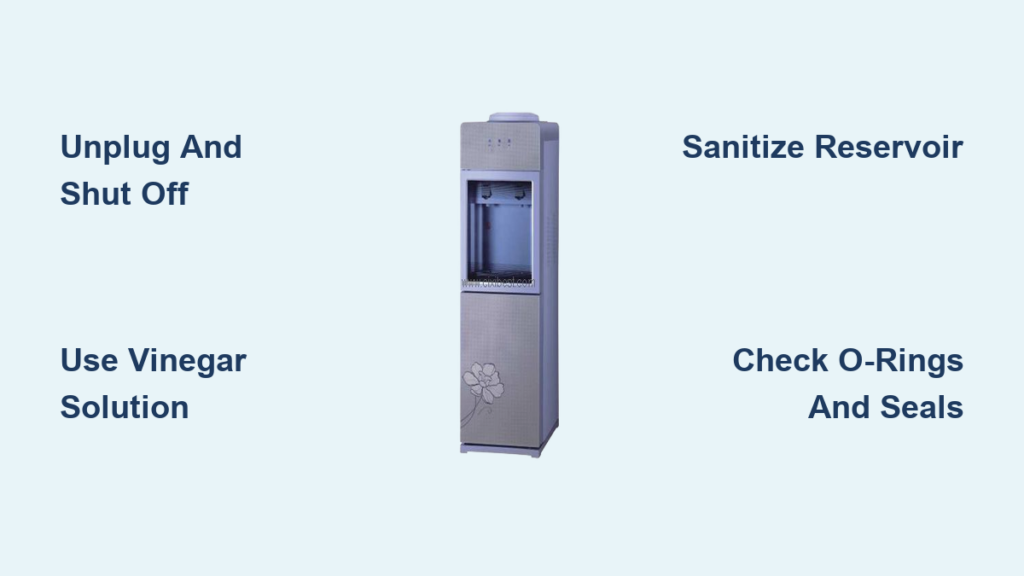
Critical Safety Steps Before Cleaning Your Nestlé Water Cooler
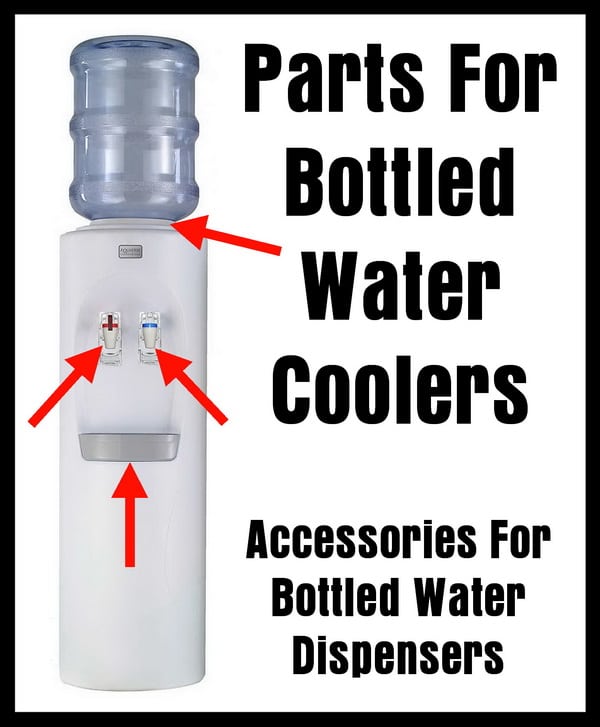
Never skip these safety protocols when servicing your Nestlé water cooler—they prevent electrical hazards and water damage. Always unplug the unit from the wall outlet and shut off the water supply valve before touching any components. For bottle-fed models, remove the 5-gallon container first to avoid spills. If your cooler connects directly to plumbing, locate and close the shutoff valve under the sink.
Gather these specific supplies before starting:
– 1:1 white vinegar and water solution (for non-stainless steel models)
– Unscented household bleach (1 tbsp per gallon of water for sanitizing)
– Soft microfiber cloths (never use paper towels that leave lint)
– New soft-bristled toothbrush (dedicated solely for cleaning)
– Small bucket for draining reservoir
– Food-grade no-rinse sanitizer (required for stainless steel tanks)
Critical safety warnings: Never immerse electrical components in liquid. Avoid abrasive pads or harsh chemicals like ammonia that damage plastic housings. If moving your cooler, always get a second person to lift—these units weigh over 50 pounds when empty. Work in a well-ventilated area when using bleach solutions, and never mix cleaning agents.
Daily Wipe-Downs and Monthly Deep Cleaning for Nestlé Coolers
Skipping routine surface cleaning invites bacteria growth on high-contact areas. A quick daily wipe takes under 2 minutes but prevents stubborn buildup.
3-Minute Daily Spill Cleanup Protocol
Immediately wipe spills from the drip tray and dispensing area using a vinegar-water solution. Focus on the push-button levers—these harbor 400x more bacteria than a toilet seat according to public health studies. For sticky residue, dip your toothbrush in baking soda paste and gently scrub the drip guard grooves. Never let water pool in the tray overnight, as this breeds mold in the reservoir below. Finish by drying with a microfiber cloth to prevent water spots on the plastic housing.
Monthly Deep Cleaning: Exterior and Compartment Care
This 15-minute procedure maintains your cooler’s appearance and function. Start by unplugging the unit and removing all detachable parts: the drip tray, drip guard, and bottle holder. Soak these components in warm soapy water for 10 minutes, then scrub mineral deposits from the drip tray using a baking soda paste. For the exterior housing, dampen a microfiber cloth with vinegar solution and wipe all surfaces—pay special attention to the air intake vents on the back panel where dust accumulates. Never spray liquid directly onto the unit—dripping moisture into electrical components causes short circuits. Dry every surface before reassembly to prevent water damage.
Sanitize Your Nestlé Water Cooler Reservoir in 3 Steps
Mineral scale and biofilm in the reservoir cause 90% of “bad taste” complaints. Perform this sanitization every 3-6 months—more often if you notice cloudy water.
Step 1: Prepare the Sanitizing Solution Safely
Unplug the cooler and move it near a floor drain or bathtub. Remove the water bottle and place a bucket under both spouts. For plastic reservoirs, mix 1 tablespoon unscented bleach per gallon of cool water (never hot water—it deactivates bleach). Critical exception: If your Nestlé model has stainless steel components (check your manual), skip bleach—use food-grade no-rinse sanitizer instead to prevent corrosion. Pour the solution slowly into the empty reservoir until full.
Step 2: Flush the Hot and Cold Lines Completely
Plug in the cooler and dispense the sanitizing solution through both hot and cold taps into your bucket. Run until the reservoir empties completely—this ensures every internal tube gets coated. Let the solution sit in the lines for exactly 5 minutes (set a timer—overexposure damages seals). Pay attention to the cold tank indicator light; it should cycle normally during this process. If solution doesn’t flow, check for airlock by gently squeezing the tubing behind the spigots.
Step 3: Rinse Thoroughly to Remove Chemical Traces
Refill the reservoir with fresh drinking water and dispense 2 full gallons through both taps. Smell and taste-test the water after the first gallon—if you detect any bleach odor, continue flushing until it’s completely neutral. For vinegar solutions, 1 gallon usually suffices. Reinstall the drip tray and bottle, then run 8 ounces of water through each tap into a glass. Discard this final rinse water before serving. Your reservoir is now contaminant-free.
Fix Slow Flow, Bad Taste, and Leaks in Your Nestlé Cooler
Persistent issues often trace back to missed cleaning steps. These targeted fixes restore performance within minutes.
Why Your Nestlé Cooler Has Slow Water Flow (And How to Fix It)
A trickle instead of a stream usually means clogged filter screens. Locate the screen where the bottle nipple connects to the reservoir (typically under the bottle holder). Remove it with needle-nose pliers and soak in vinegar for 15 minutes to dissolve mineral deposits. Pro tip: Replace plastic screens annually—they degrade and harbor bacteria. If flow remains slow after cleaning, check the air filter on the back panel; a clogged filter prevents proper pressure balance. Never force water through blocked lines, as this cracks internal valves.
Eliminate Bad Tastes and Odors from Your Water Cooler
Stale or plastic-like tastes signal biofilm in the reservoir. First, perform the full sanitization procedure—this resolves 80% of taste issues. If异味 persists, inspect the O-ring on the bottle nipple for cracks; degraded rubber leaches chemicals into water. Replace it with Nestlé’s model-specific part (usually #WC-OR01). Critical mistake to avoid: Using lemon or citrus cleaners—they react with plastic components and worsen odors. For persistent metallic tastes, run a vinegar flush followed by baking soda rinse to neutralize mineral ions.
Stop Leaks at the Source: O-Ring and Seal Checks
Water pooling under your cooler almost always stems from three failures: a cracked bottle seal, over-tightened cap, or warped drip tray. With the unit unplugged, remove the bottle and inspect the black rubber seal around the piercing pin—replace if brittle or torn. When reinstalling bottles, hand-tighten caps only until resistance is felt; overtightening cracks the reservoir base. For drip tray leaks, ensure it clicks fully into the locking tabs—misaligned trays cause 70% of “mystery leaks.” Test by filling the tray with 2 cups of water before reassembly.
10-Minute Nestle Water Cooler Maintenance Checklist
Implement this weekly ritual to avoid major cleanings. Set phone reminders every Sunday morning.
- [ ] Wipe dispensing buttons with disinfecting wipe after last use
- [ ] Check drip tray alignment—listen for “click” during reinsertion
- [ ] Inspect bottle seal for cracks before installing new container
- [ ] Vacuum air intake vents with soft brush attachment
- [ ] Run hot water cycle for 30 seconds to prevent scale buildup
- [ ] Smell for mustiness near reservoir access panel
Critical monthly actions: Replace carbon filters every 6 months (stale filters cause chlorine tastes), and deep-clean the drip tray monthly with baking soda paste. If your cooler serves over 10 people daily, sanitize the reservoir monthly instead of quarterly.
A meticulously cleaned Nestlé water cooler delivers more than great-tasting water—it safeguards your family’s or team’s health by eliminating hidden contaminants. By dedicating just 15 minutes monthly to reservoir sanitization and daily wipe-downs, you’ll extend your cooler’s life by 3+ years while ensuring every glass meets drinking water standards. Remember that vinegar solution for non-stainless models and no-rinse sanitizer for stainless steel—that small distinction prevents costly damage. When in doubt, consult your model-specific manual for component diagrams. Now that your cooler runs like new, share this guide with others who rely on clean water daily. The peace of mind from knowing your water source is truly pure? That’s the ultimate refreshment.


