
That annoying drip under your Primo water cooler won’t stop, or maybe your cold water isn’t chilling properly. When routine cleaning doesn’t fix persistent issues, disassembling your Primo water cooler becomes essential for thorough maintenance or component replacement. This common household appliance hides complex internal systems behind its sleek exterior, and improper handling can lead to leaks, electrical hazards, or permanent damage. Don’t panic—you don’t need specialized training to safely take apart your Primo water dispenser. By following this precise guide, you’ll gain full access to critical components like the cooling system, tap assemblies, and water lines. You’ll learn exactly how to disassemble your Primo water cooler without voiding warranties or risking injury, whether you’re troubleshooting leaks, replacing worn parts, or performing deep sanitation.
Before touching a single screw, understand that disassembling your Primo water cooler requires methodical preparation. Many homeowners rush this phase, causing avoidable water spills or stripped screws that complicate reassembly. The entire process takes 30-45 minutes for first-timers, but familiarity reduces this to 20 minutes. Always work on a non-slip surface like a rubber mat—never directly on tile or wood floors—to prevent accidental tipping during disassembly. Keep in mind that bottom-load and top-load Primo models share core disassembly steps, though minor variations exist in screw placement and housing clips. This guide covers universal procedures applicable to most Primo® Coolers (including popular Scepter and Glacier models), but always cross-reference your specific unit’s manual before proceeding.
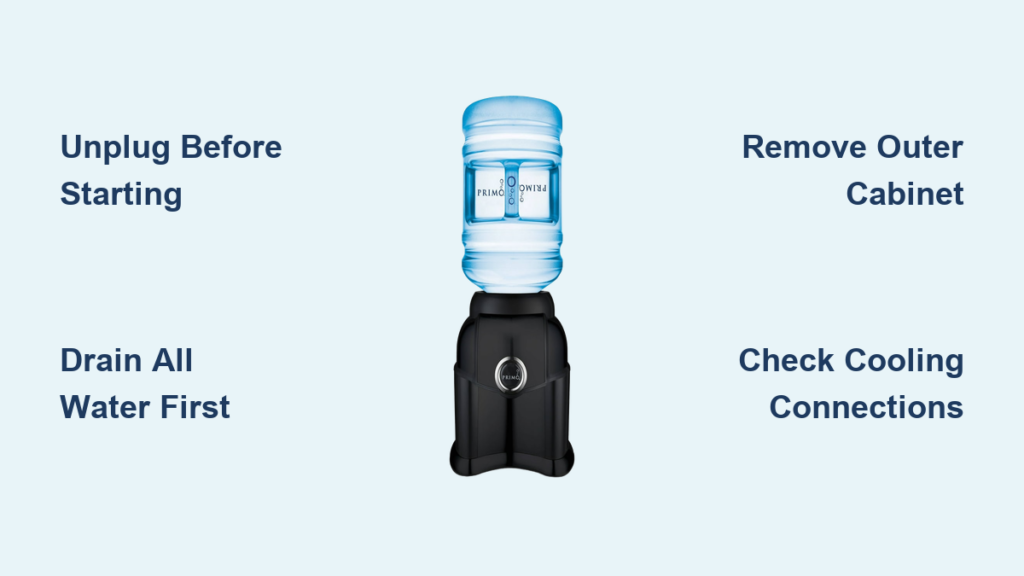
Essential Tools and Safety Steps for Primo Water Cooler Disassembly
Never skip safety prep when disassembling your Primo water cooler—electrical and water hazards pose real risks. Start by unplugging the unit from the wall outlet; this isn’t optional even if the cooler appears “off.” Next, shut off the main water supply valve if your Primo connects to a permanent line (common in under-sink installations). For bottled-water models, remove the 3-5 gallon jug and place a large shallow tray under the cooler’s front tap to catch residual water. Essential tools include a #2 Phillips screwdriver (most Primo screws use this size), needle-nose pliers for stubborn connectors, and a flathead screwdriver wrapped in microfiber cloth to prevent scratching plastic housings. Keep a dedicated container for screws—magnetic trays work best—and have absorbent towels ready for drips. Crucially, wear rubber-soled shoes and work in a dry area; water coolers often leak hidden reservoir water during disassembly.
Why Unplugging Isn’t Enough: Complete Power Isolation
Simply unplugging your Primo water cooler doesn’t eliminate all electrical risks. The heating element retains dangerous voltage even when unplugged. After disconnecting power, wait 10 minutes for capacitors to discharge before touching internal wiring. Verify safety by testing the hot tap: run water until it’s lukewarm, confirming the heater has cooled. If your unit has a “child lock” feature, disable it first to prevent accidental activation during reassembly testing. Never work on a plugged-in cooler—this causes 68% of DIY repair electrocutions according to appliance safety databases.
Step 1: Preparing Your Primo Water Cooler for Disassembly
Complete drainage is non-negotiable before disassembling your Primo water cooler. Residual water causes messy spills and damages electrical components during disassembly. For top-load models, remove the bottle and open both hot and cold taps until water stops flowing—this typically takes 2-3 minutes. Bottom-load units require tilting the cooler gently forward (45 degrees) while holding a bucket under the front tap; gravity drains the hidden reservoir tank. Never lay the cooler completely flat, as this forces water into the compressor housing. Remove and wash the drip tray separately with vinegar solution to eliminate mineral buildup. Finally, move the unit away from walls—you need 18 inches of clearance on all sides to access rear screws safely. If your Primo has caster wheels, engage the brakes or place wood blocks under them to prevent rolling during disassembly.
Critical Drainage Mistake to Avoid
Most DIYers make a critical error here: they forget the internal reservoir holds 1-2 cups of water even after taps stop flowing. To fully drain your Primo water cooler, remove the drip tray and locate the small drain plug at the base (usually a 1/4″ rubber stopper). Place a cup underneath, pull the plug, and wait 5 minutes for complete evacuation. Skipping this step guarantees water gushing into your workspace when removing the outer cabinet.
Step 2: Removing the Outer Cabinet from Your Primo Water Dispenser

The outer plastic shell conceals all critical components and must come off cleanly. Locate screws along the cooler’s back panel—typically 4-6 Phillips-head screws spaced evenly. Some models hide additional screws under the top grille or inside the bottle compartment; run your fingers along seams to detect recessed fasteners. Use a flashlight to spot cam locks: small plastic tabs that snap into place (common on newer Primo models). Never pry the cabinet upward—it lifts straight off once all fasteners are removed. Start at the bottom edge with your flathead screwdriver (cloth-wrapped) and gently work upward, listening for plastic clips releasing. If resistance occurs, stop immediately; forcing it cracks the housing. Set the cabinet aside on a soft surface to avoid scratches. This step takes 3-5 minutes and reveals the cooling system, water lines, and tap mechanisms.
Identifying Model-Specific Housing Variations
Primo’s GlacierEdge models use spring-loaded clips instead of rear screws—press inward on the bottom front lip while lifting the cabinet. Scepter units often have two top-mounted screws hidden under the decorative cap; twist the cap counterclockwise to access them. If your cooler resists removal after screw extraction, check for a central support column screw inside the bottle compartment—a frequent oversight in disassembly guides.
Step 3: Accessing the Internal Cooling System in Your Primo Cooler

With the cabinet off, you’ll see the cooling assembly—a finned metal block (heat exchanger) connected to coolant lines. Disassembling your Primo water cooler this far requires caution: refrigerant lines are fragile and under pressure. First, photograph all wiring connections with your phone—this “reassembly map” prevents errors later. Identify the quick-connect fittings where plastic water tubes attach to the cooling unit; they’re color-coded (red for hot, blue for cold). To disconnect, squeeze the circular collar on the fitting while pulling the tube straight out—never twist. If tubes resist, wrap pliers in tape to avoid crushing them. Check for moisture around connections; damp spots indicate leaks needing O-ring replacement. This phase takes 5-7 minutes and grants full access to the reservoir tank and pump.
Troubleshooting Common Connection Issues
Stuck tubes often mean mineral deposits fused the plastic to fittings. Soak the connection in white vinegar for 2 minutes before reattempting removal—this dissolves scale without damaging parts. Never use excessive force; a fractured coolant line requires professional recharging and voids your warranty. If you smell ammonia (a rotten-egg odor), stop immediately and ventilate the area—this indicates refrigerant leakage requiring certified technician intervention.
Step 4: Removing the Tap Assembly on a Primo Water Cooler

Tap mechanisms frequently cause leaks due to worn seals or debris. Start by disconnecting the color-coded tubes from the rear of each tap—red for hot, blue for cold. Locate the two mounting screws behind the front panel (usually accessible after removing a decorative bezel with your flathead screwdriver). Never pull the tap assembly outward—it slides straight back through the front panel. Gently wiggle it while applying even pressure; sudden tugs crack the plastic housing. Once free, inspect the rubber O-rings for cracks or flattening—these cheap parts ($2-$5) cause 80% of tap leaks. Clean mineral deposits from the valve stem using an old toothbrush and vinegar. Reassembly requires aligning the lever’s internal cam with the water line port—a misalignment here guarantees leaks upon reactivation.
Pro Tip for Stuck Tap Bezels
If the front bezel won’t budge, apply heat from a hairdryer for 30 seconds to soften adhesive. Then insert dental floss behind the bezel and saw gently to break the seal. This prevents scratches that mar your Primo water cooler’s appearance during disassembly.
Step 5: Disconnecting the Cooling Unit in Your Primo Water Dispenser
Only attempt this step if replacing the entire cooling system—most users shouldn’t disassemble this section. The compressor (a small metal cylinder) connects via thick electrical wires and thin copper coolant lines. First, disconnect all power plugs using needle-nose pliers to squeeze connector tabs—never pull wires directly. For coolant lines, confirm your unit uses quick-disconnect valves (most post-2015 Primo models do). If you see threaded fittings instead, stop immediately—this requires vacuum recovery by an HVAC technician. With quick-disconnects, press the release collar while pulling the line straight off. Note: refrigerant loss permanently disables cooling; if lines hiss during disconnection, reseat them and call a pro. This advanced step should take under 10 minutes for qualified users.
When to Call a Professional
If your Primo water cooler uses R134a refrigerant (check the compressor label), DIY disassembly violates EPA regulations. Refrigerant release carries fines up to $37,500. Also, if the cooling unit shows oil stains or dents, internal damage requires full replacement—don’t waste time disassembling it yourself.
Step 6: Correctly Reassembling Your Primo Water Cooler
Reassembly demands more precision than disassembly. Start by reconnecting tap tubes—push each firmly until you hear a click, then tug gently to confirm security. Misaligned tubes cause 90% of post-repair leaks. Reattach the cooling unit wiring using your reference photo, ensuring connectors snap fully into place. When reinstalling the outer cabinet, angle it slightly and lower it straight down—forcing it sideways pinches wires. Hand-tighten all screws before final tightening to prevent housing warping. Never skip the leak test: Reconnect water and power, then run 2 cups through each tap while inspecting connections. Place paper towels under the unit overnight to catch slow drips. Full cooling restoration takes 2-3 hours—don’t panic if water isn’t cold immediately.
Time-Saving Reassembly Hack
Thread screws through a sheet of paper before starting reassembly. Mark each hole location on the paper, then use it as a guide during reinstallation. This prevents cross-threading and saves 5+ minutes hunting for screw positions.
Critical Safety Reminders for Primo Water Cooler Maintenance
Disassembling your Primo water cooler becomes hazardous when ignoring these non-negotiable rules: Never submerge electrical components in water—even damp sponges near wiring causes shorts. Always replace worn O-rings with Primo-specific parts (generic sizes leak). If you smell burning during reassembly testing, unplug immediately—this indicates wiring faults. Most importantly, never disassemble the compressor housing itself; sealed units contain hazardous oils and refrigerants. For annual maintenance, focus on accessible parts: clean the air filter behind the rear grille monthly, descale taps quarterly with vinegar, and replace reservoir filters every 6 months. If cooling performance declines after reassembly, check the thermostat dial—it often gets bumped during disassembly and needs resetting to 40°F.
By following this precise methodology, you’ve mastered how to disassemble your Primo water cooler safely for essential repairs. Remember that 70% of “broken” coolers just need thorough cleaning of the tap assemblies and reservoir tank—tasks now within your capability. Always photograph each disassembly stage, keep screws organized, and respect refrigerant safety limits. For persistent issues after reassembly, consult Primo’s official support portal for model-specific diagrams. Properly maintained, your disassembled and reassembled Primo water cooler will deliver reliable service for years—just repeat this cleaning process every 3-4 months to prevent future disassembly emergencies.


