
That metallic aftertaste in your office water? Or the faint odor when you pour your morning glass? These are dead giveaways your water cooler filter system needs urgent attention. While you can’t actually clean the filter cartridge itself—a critical detail most guides miss—properly maintaining the filter housing and replacing the cartridge is your only path to consistently fresh, safe water. Ignoring this leads to bacteria buildup, slow flow, and even health risks. In this guide, you’ll learn the exact steps to sanitize your entire system, replace the filter correctly, and prevent future issues—all using safe, affordable supplies you likely already have at home.
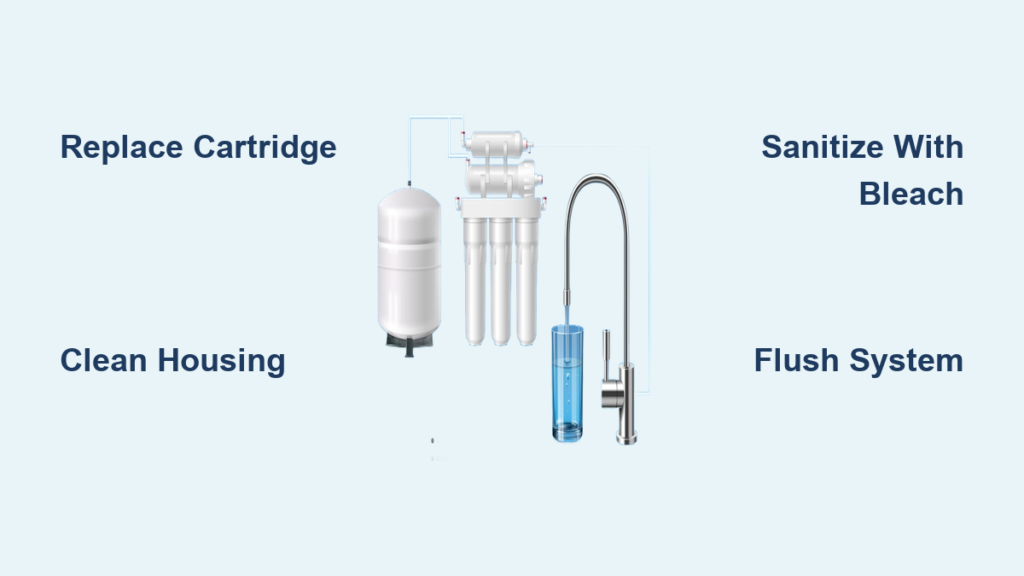
Why Replacing Beats Cleaning Your Filter Cartridge
Disposable water cooler filters are engineered as single-use components. Attempting to clean them creates serious risks:
– Bacterial traps: Scrubbing creates microscopic cracks where pathogens thrive
– Reduced efficiency: Damaged carbon media fails to remove chlorine or heavy metals
– Chemical contamination: Residual vinegar or bleach leaches into your drinking water
The CDC confirms filters lose effectiveness after 6 months regardless of usage. If you notice cloudy water, reduced flow, or odd smells, your filter is already compromised. This isn’t about convenience—it’s about preventing biofilm that standard cleaning can’t eliminate. Always replace the cartridge; focus your cleaning efforts on the housing and reservoir where dangerous buildup occurs.
Essential Tools Checklist (No Guesswork)
Gather these before unplugging your unit—missing one item risks incomplete sanitization:
– ✅ Unscented white vinegar (for descaling mineral deposits)
– ✅ Unscented household bleach (5.25-8.25% sodium hypochlorite—never scented)
– ✅ New filter cartridge (match your model number—not a generic size)
– ✅ Long-handled bottle brush (reaches reservoir corners)
– ✅ Microfiber cloths (lint-free for final wipe-down)
– ✅ Rubber gloves & safety goggles (non-negotiable for bleach handling)
Critical Warning: Keep vinegar and bleach in separate, clearly labeled containers. Mixing them releases toxic chlorine gas. Work near an open window or outdoors.
Drain Your Water Cooler Without Spills: Step-by-Step
Skipping proper drainage floods your workspace and spreads contaminants. Follow this precise sequence:
- Unplug the unit—always the first action to prevent electrocution risk
- Remove the water bottle (or shut off supply line for plumbed models)
- Dispense remaining water: Press both hot and cold levers until flow stops
- Locate the drain plug: Usually under the drip tray or at the reservoir base
- Place a bucket directly beneath, then unscrew the plug slowly
Pro Tip: Cover the plug hole with a folded paper towel before unscrewing—it absorbs initial drips and prevents splashes
Never skip the drip tray removal. Built-up slime here is the #1 cause of recurring odors even after reservoir cleaning.
Eliminate Limescale With Vinegar: Precision Descaling

Hard water minerals choke your system silently. This method dissolves deposits without toxic residues:
- Mix solution: 1 cup white vinegar + 2 cups cool water in a clean pitcher
- Pour into reservoir: Fill to the “MAX” line (or 1 gallon for large units)
- Soak critical zones:
- Let solution sit 20 minutes in the reservoir
- Dip bottle brush in solution, scrub spout openings for 60 seconds
- Wipe exterior drip tray with vinegar-soaked cloth
- Scrub stubborn deposits: Use brush on reservoir walls—never steel wool (scratches harbor bacteria)
- Drain completely: Unscrew drain plug, then rinse reservoir 3x with cold water
Visual cue: When the vinegar smell vanishes after rinsing, mineral deposits are gone. Persistent scent means repeat rinsing.
Sanitize Like a Pro: CDC-Approved Bleach Protocol
https://www.cdc.gov/healthyschools/healthyenvironments/water-coolers.htm
Vinegar removes scale but won’t kill pathogens. Bleach sanitization is non-optional for safe drinking water:
- Prepare solution: 1 tbsp bleach + 1 gallon cool water (exact ratio)
- Soak removable parts: Drip tray, spigots, and grille for 60 seconds
- Sanitize reservoir: Pour solution in, swirl to coat all surfaces, wait 1 minute
- Wipe exterior: Focus on high-touch areas like lever handles
- Triple-rinse reservoir:
- Fill with cold water → Drain completely → Repeat 3x
- Test for residue: Smell the last rinse water—it must have zero bleach odor
Critical mistake alert: Using hot water with bleach creates chlorine gas. Always use cool water. If you detect a chemical smell after reassembly, repeat rinsing immediately.
Filter Housing Cleaning: The Overlooked Lifesaver

This is where most guides fail. A dirty housing contaminates your new filter instantly:
- Remove old filter cartridge (wear gloves—slime is common)
- Scrub housing interior with vinegar solution and bottle brush
- Check for cracks: Hairline fractures in plastic housing harbor bacteria
- Rinse housing under running water until water runs clear
- Dry completely with microfiber cloth—never reinstall damp parts
Pro Tip: Dip a cotton swab in vinegar to clean sensor ports (if your model has them). Mineral buildup here causes false “low water” alerts.
Install Your New Filter Correctly: Avoid Costly Mistakes
50% of post-replacement issues stem from improper installation. Do this:
- Prime the cartridge: Soak new filter in cool water for 15 minutes (reduces carbon fines)
- Align arrows: Match flow direction indicators on filter and housing
- Hand-tighten only: Overtightening cracks housings—stop when resistance increases
- Flush system: Dispense 2 full gallons through both hot and cold levers
Warning: Skipping flushing leaves carbon dust in your first 50 cups of water
Never reinstall old filters—even if “only slightly dirty.” Pathogen counts exceed safe levels at 180 days per NSF International testing.
Prevent Recontamination: Your Maintenance Schedule
Follow this timeline to avoid monthly deep cleans:
| Frequency | Action | Critical Detail |
|---|---|---|
| Daily | Wipe spigots with damp cloth | Prevents biofilm from forming on touch points |
| Weekly | Clean drip tray with vinegar | Mineral stains become permanent in 72 hours |
| Monthly | Quick vinegar flush (no disassembly) | Pour 1 cup vinegar solution through levers |
| Every 6 months | Replace filter + full sanitization | Mark replacement date ON the filter housing |
| Annually | Professional servicing (plumbed models) | Checks compressor and internal seals |
Urgent trigger: Replace filters immediately if water tastes like plastic or develops cloudiness—these signal filter failure.
Troubleshoot Filter Failures in 60 Seconds
Solve common issues before calling a technician:
- “Water tastes stale after new filter”: You skipped flushing. Dispense 5 more cups immediately.
- “Slow flow with new filter”: Air lock in lines. Unplug unit for 10 minutes, then restart.
- “Musty smell returns after cleaning”: Drip tray wasn’t sanitized. Soak it in bleach solution for 5 minutes.
- “Leaks near filter housing”: O-ring is damaged. Replace the $2 rubber seal—do not overtighten.
Never ignore brown particles in water—they indicate rust from internal components requiring professional repair.
Final Safety Checklist Before Plugging In
Verify these before restoring power:
▢ All bleach-rinsed parts drip pure water (no odor)
▢ Filter housing is 100% dry—no moisture visible in seams
▢ Drain plug is securely tightened (hand-tight only)
▢ New filter is seated with flow arrows correctly aligned
▢ You’ve dispensed 2 full gallons to flush the system
A single missed rinse cycle can expose your team to unsafe chlorine levels. When in doubt, rinse again.
By mastering this filter housing cleaning and replacement process, you transform your water cooler from a potential health hazard into a reliable source of crisp, great-tasting water. Remember: the filter cartridge itself is sacrificial—replace it religiously every 6 months. Meanwhile, quarterly vinegar descaling and bleach sanitization of the housing and reservoir keep your system contaminant-free. Set phone reminders for filter changes and deep cleans—your team’s health depends on water that’s not just cold, but truly clean. Start today, and notice the difference in your very next glass.


