
Your CPU temperature just hit 95°C under load, your gaming frame rates are plummeting, and the dreaded “water cooler is not cooling” warning flashes on your monitoring software. When your liquid cooling system fails, you’re racing against the clock to prevent permanent damage to expensive components. This comprehensive guide cuts through the confusion with a systematic approach to diagnose and solve cooling failures in PC liquid cooling systems—whether you’re using an All-in-One (AIO) cooler or a custom loop. You’ll learn exactly where to look first, how to identify the specific failure point, and practical solutions to get your temperatures back under control.
Why Your Water Cooler Suddenly Stopped Cooling Properly
When your water cooler is not cooling as expected, the problem typically originates from one of three critical areas: pump failure, coolant flow restriction, or thermal transfer issues. The first step is determining which component has failed before wasting time on unnecessary disassembly. Start with the most critical element—your pump—since without proper circulation, even a perfectly clean radiator becomes useless.
Diagnose Pump Failure in Under 60 Seconds
A dead pump means zero coolant movement, causing immediate and severe overheating. To verify if your pump has failed:
- Listen for the characteristic hum: Power on your system and place your ear near the pump block. A functioning pump produces a consistent, low-frequency hum. Silence indicates electrical failure.
- Feel for vibration: Gently touch the tubing near the pump while the system runs. A working pump creates subtle vibrations you can feel through the tubing.
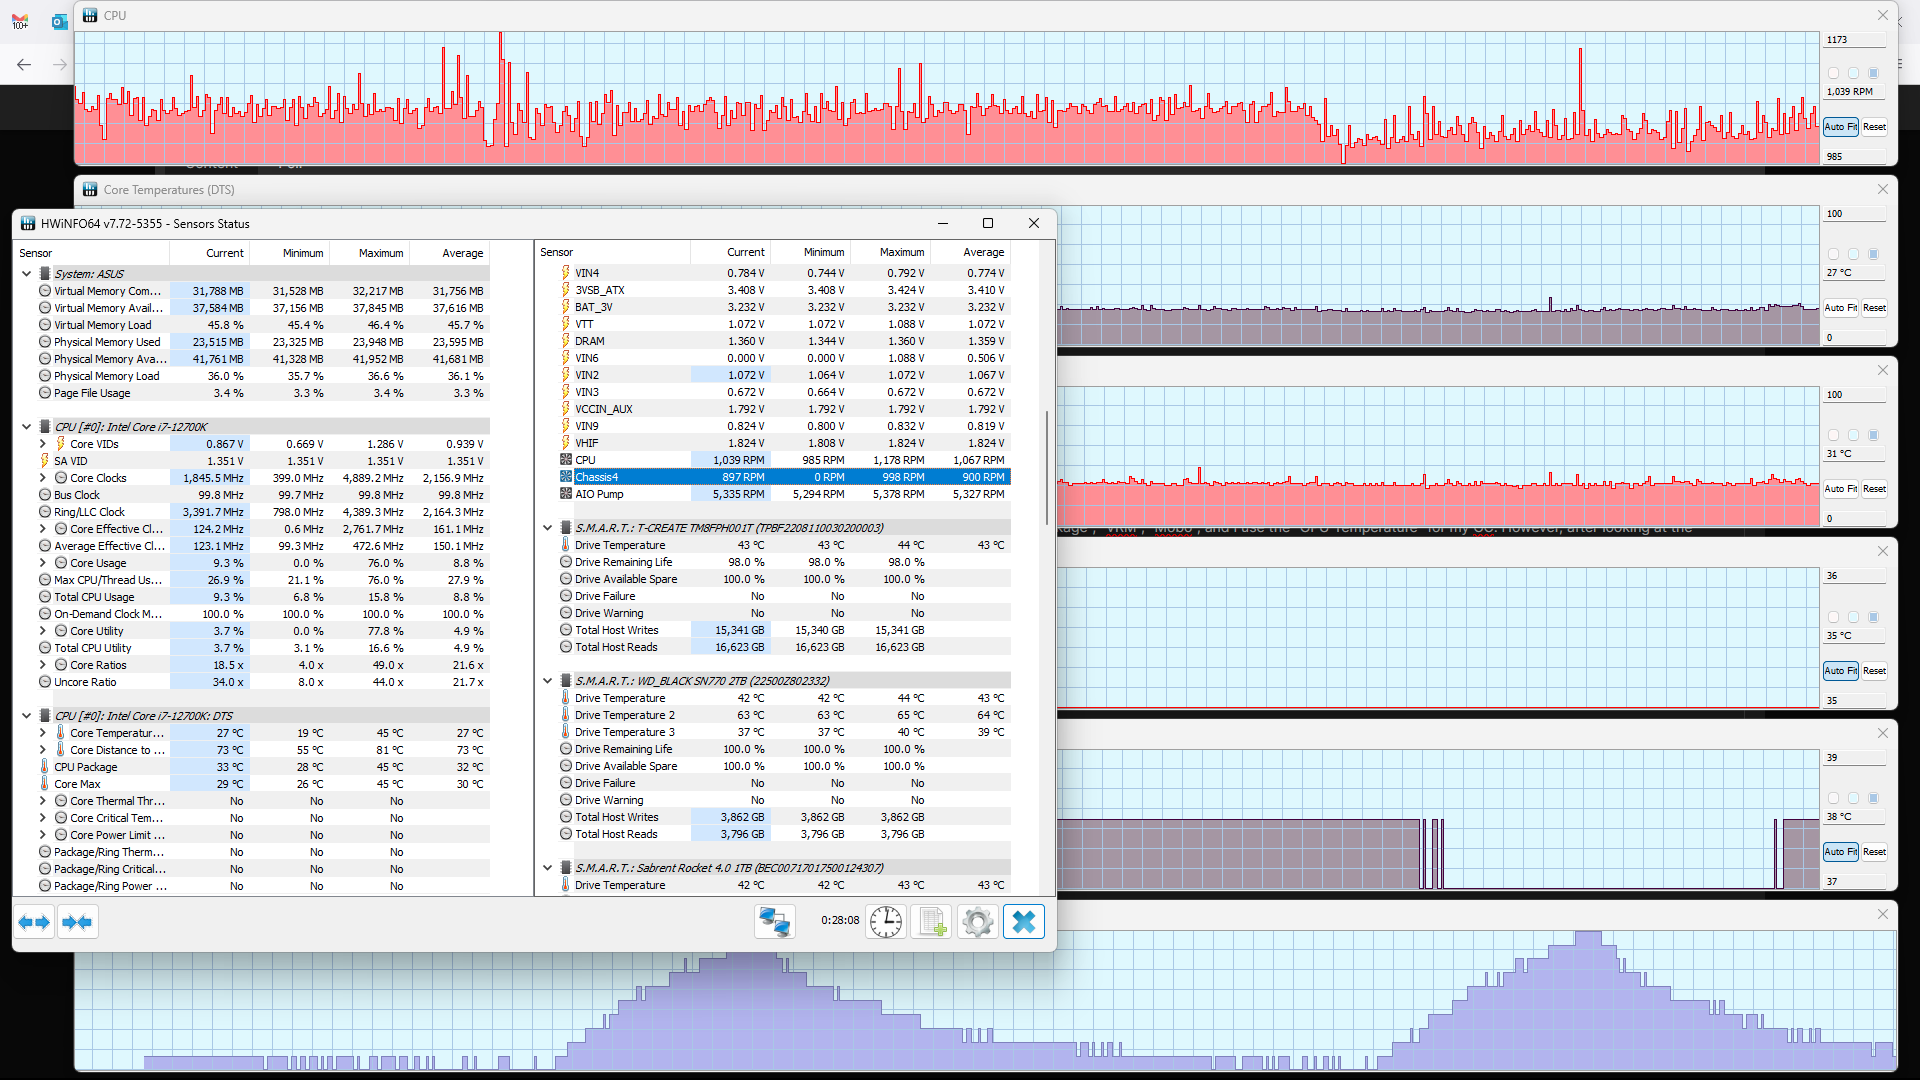
- Check RPM readings: Enter BIOS/UEFI or use monitoring software like HWiNFO to verify pump RPM. Most AIO pumps should show 1,800-3,000 RPM at idle and increase under load.
Critical mistake to avoid: Many users mistake the CPU fan noise for pump operation. Ensure you’re specifically checking the pump block, not the radiator fans. If you detect no sound, vibration, or RPM reading, immediately check power connections before assuming pump failure.
Eliminate Air Locks Trapping Your Coolant Flow
Air bubbles trapped in your cooling loop are the second most common reason your water cooler is not cooling properly. These bubbles create airlocks that prevent proper coolant circulation, particularly when stuck in the pump chamber where they cause cavitation and reduced flow.
Remove Stubborn Air Bubbles in 5 Minutes
The tilt-and-tap method remains the most effective solution for air removal in closed-loop systems:
- Power on your system and let it run for 2 minutes to circulate coolant
- Carefully tilt your PC case to a 45-degree angle in multiple directions (front-to-back, side-to-side)
- Gently tap the pump block and radiator with your finger to dislodge trapped air
- Listen for gurgling sounds that indicate air moving through the system
- Repeat until the gurgling stops (typically 3-5 cycles)
Pro tip: For hard-to-reach air pockets, run your pump at 100% speed in BIOS/UEFI during the purging process. This increased pressure forces stubborn bubbles toward the radiator’s highest point where they can be safely trapped.
Identify and Fix Flow Restrictions
Even with a working pump, physical obstructions can prevent proper cooling. Common flow restriction points include:
- Kinked tubing: Inspect all soft tubing for sharp bends, particularly near cable management points
- Clogged radiator fins: Visible dust buildup between radiator fins reduces airflow by up to 40%
- Mineral deposits: Hard water residue accumulating in microchannels over time
Time-saving shortcut: If you hear unusual clicking sounds from the pump, immediately check for tubing kinks. This symptom often indicates restricted flow causing pump cavitation.
Clean Clogged Radiators Causing Poor Heat Dissipation
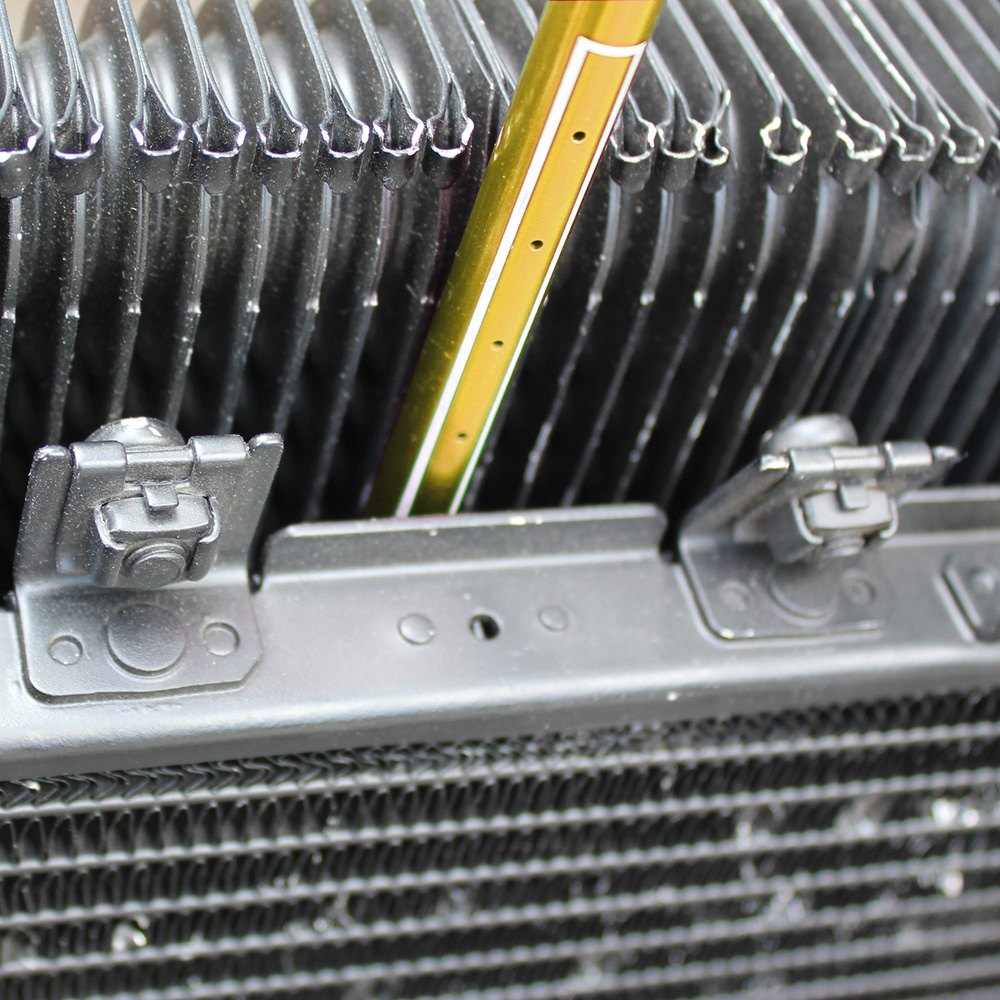
A dirty radiator is the silent killer of cooling performance—dust accumulation gradually reduces heat exchange efficiency until your water cooler is not cooling properly under load. Unlike pump failures that cause immediate overheating, radiator clogs develop slowly, often going unnoticed until temperatures suddenly spike during intensive tasks.
Deep Clean Your Radiator Without Disassembly
For most users, full radiator removal isn’t necessary for effective cleaning:
- Power down your system completely and unplug from wall outlet
- Use compressed air to blow dust from the backside of the radiator (opposite the fans)
- Hold radiator fans stationary with one finger while blowing to prevent overspinning
- Work in 2-inch sections, moving methodically across the entire radiator surface
- Repeat from multiple angles to dislodge stubborn debris trapped between fins
Warning: Never use high-pressure air directly on radiator fins—this can bend delicate fins and create new airflow obstructions. Maintain at least 6 inches distance and use short bursts.
Fix Thermal Transfer Issues Between CPU and Water Block
Poor thermal contact between your CPU and water block causes high temperatures even with perfect coolant flow. This problem often masquerades as “water cooler is not cooling” when the actual issue lies in thermal interface material (TIM) application.
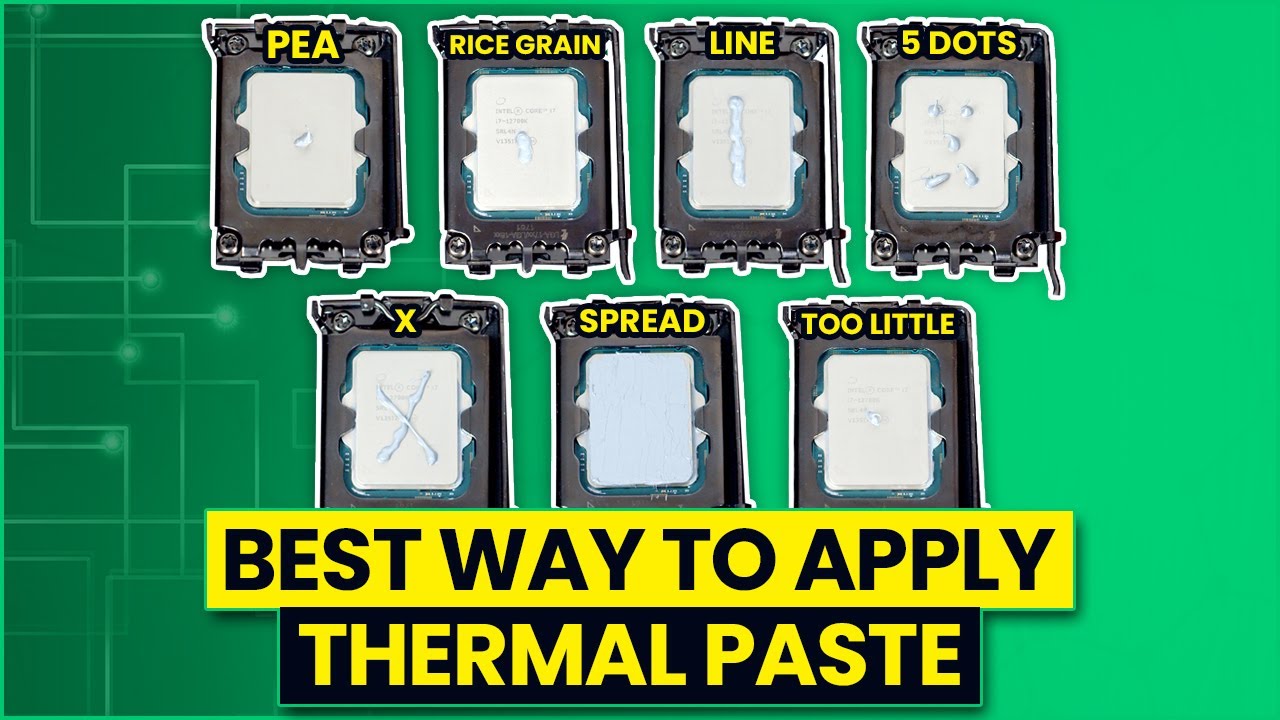
Reapply Thermal Paste Correctly in 4 Steps
- Remove old paste: Use 90%+ isopropyl alcohol and a microfiber cloth to clean both CPU IHS and water block base
- Apply proper amount: Use a grain-of-rice sized drop (about 3mm diameter) of high-quality paste like Arctic MX-6
- Mount water block carefully: Lower straight down without sliding to prevent air pockets
- Tighten screws evenly: Use cross-pattern tightening to 0.5-0.7 Nm torque (snug but not overtightened)
Expert insight: Many users apply too much paste, causing excess material to squeeze out and create insulating barriers. The “pea-sized” method is outdated—modern flat surfaces require minimal paste for optimal contact.
Verify and Optimize Fan Configuration for Maximum Cooling
Your radiator needs proper airflow to transfer heat from coolant to air. Incorrect fan setup is a surprisingly common reason why your water cooler is not cooling effectively, especially after system modifications.
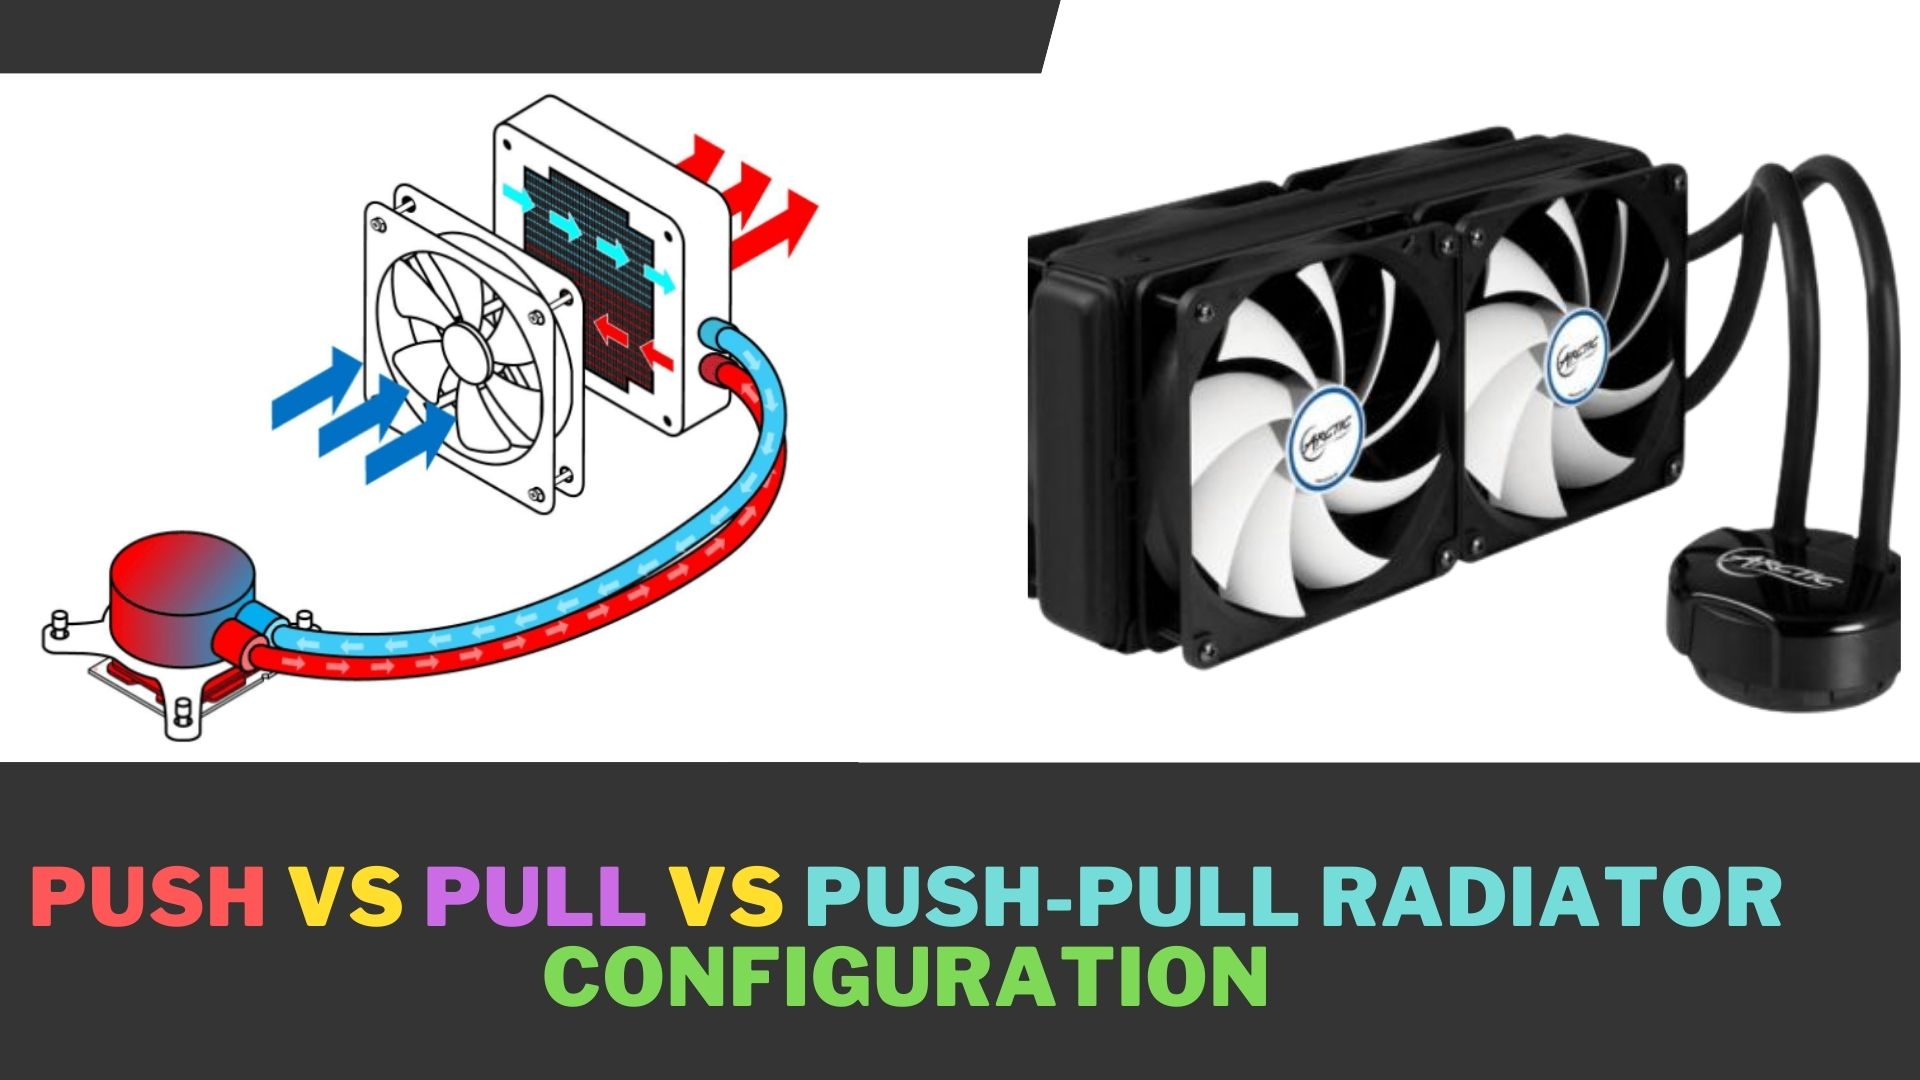
Configure Fans for Optimal Heat Exchange
- Check fan direction: Fingers should feel strong airflow through the radiator fins
- Set aggressive fan curves: In BIOS or software like Fan Control, set 70-100% speed at 50°C coolant temperature
- Implement push-pull configuration: If using two fans, set one to push air into the radiator and one to pull from the opposite side
- Verify fan headers: Ensure radiator fans connect to CPU_OPT or SYS_FAN headers with proper temperature control
Critical check: After gaming sessions, carefully feel your radiator fins. They should feel warm to hot under load—if they’re near ambient temperature, your coolant isn’t transferring heat properly.
Measure Temperature Differentials to Pinpoint Exact Failure
Professional technicians use temperature differentials to diagnose cooling issues with surgical precision. You can apply the same method with free monitoring software:
- Normal CPU-to-coolant differential: 20-30°C under full load
- Abnormal differentials:
- High CPU temp + Low coolant temp = Thermal contact issue (reapply paste)
- High CPU temp + High coolant temp = Flow restriction or radiator problem
- Small temperature difference = Insufficient radiator capacity
Diagnostic shortcut: Install HWiNFO64 and monitor coolant temperature sensors (if your AIO has them). A properly functioning system should show 5-15°C temperature rise across the radiator under load.
When to Replace Your Failing Water Cooler Completely
Some cooling failures can’t be fixed through troubleshooting. Knowing when to replace rather than repair saves time and prevents component damage:
- Replace immediately if: You detect coolant leaks, visible corrosion, or pump bearing failure (grinding noises)
- Consider replacement if: Your AIO cooler is over 3 years old and showing performance decline
- Don’t waste time repairing: Most modern AIO coolers have non-serviceable pumps—leaks or pump failures require full replacement
Cost-benefit analysis: For AIO coolers under warranty, contact the manufacturer first. For out-of-warranty units, replacement often costs less than professional repair services.
Final Verification Checklist for Persistent Cooling Issues
If your water cooler is still not cooling after following these steps, run through this final verification:
- Power verification: Confirm pump connects to both SATA power (if required) and motherboard header
- BIOS settings: Ensure pump header operates at 100% speed during testing
- Software conflicts: Temporarily disable RGB/control software that might interfere with pump operation
- Physical inspection: Check for hairline cracks in tubing or fittings causing slow leaks
Emergency procedure: If temperatures exceed 90°C, immediately shut down your system. Continued operation risks permanent CPU damage.
Prevent Future Cooling Failures With Simple Maintenance
Avoid recurring “water cooler is not cooling” issues with these maintenance practices:
- Quarterly: Clean radiator fins with compressed air
- Biannually: Verify pump operation and check for air bubbles
- Annually: Reapply thermal paste to CPU/GPU
- Monitor: Track temperature trends weekly using HWiNFO64 logging
Pro tip: Set up temperature alerts in monitoring software to catch cooling issues before they cause damage—most modern tools allow notifications when temperatures exceed safe thresholds.
By methodically working through these diagnostic steps, you’ll solve 95% of “water cooler is not cooling” scenarios. Start with the simplest checks (pump operation and air bubbles) before progressing to more complex thermal interface issues. Remember that modern liquid cooling systems are remarkably reliable when properly maintained—most cooling failures stem from preventable issues like dust accumulation or air pockets rather than component defects. Keep your system running cool and your components protected with this systematic troubleshooting approach.


