
Water pooling under your swamp cooler isn’t just messy—it’s a silent threat to your home. That steady drip can waste 10+ gallons per hour, inflate your water bill by $50 monthly, and cause costly rot in roof decking or ceilings. The good news? 90% of swamp cooler water line issues stem from three fixable points: the float valve, copper supply lines, or drain hoses. With basic tools and 30 minutes, you can diagnose and repair most leaks yourself. This guide cuts through confusing jargon to give you exact steps for pinpointing leaks, replacing faulty components, and preventing future disasters—no HVAC degree required.
Pinpoint Your Leak Source Before Grabbing Tools
Don’t waste time replacing parts blindly. Start with a 3-minute visual diagnosis to avoid common repair mistakes. First, shut off the water supply at the saddle valve (usually near your attic access) and open the cooler’s drain valve to relieve pressure. Then check these critical zones:
- Water pooling near the base? → Likely a failing float valve or cracked drain hose
- Green corrosion (verdigris) on copper lines? → Pinhole leak in supply tubing
- White mineral deposits around fittings? → Slow seepage from a loose connection
Pro Tip: Place paper towels under suspected leak points. Turn water back on briefly—the wettest spot reveals your culprit. If towels stay dry but water pools in the pan, your float valve is stuck open (we’ll fix this next).
Replace a Faulty Float Valve Causing Constant Overflow
Why this fails: Your swamp cooler’s float valve works like a toilet fill valve. Mineral buildup, a bent arm, or degraded rubber seals prevent it from shutting off, causing relentless overflow. This causes 70% of “leaking” swamp coolers—even when the water supply is technically “off.”
How to Test Your Float Valve in 2 Minutes
- Observe during fill cycle: With water supply on, watch the float arm rise. At full reservoir level, water flow must stop completely. Any drip means failure.
- Manual lift test: Turn water off. Lift the float arm fully by hand—it should snap shut the valve instantly. If water still trickles, replace the valve.
Step-by-Step Valve Replacement
- Shut off water supply and disconnect power at the breaker.
- Place a bucket under the valve inlet. Disconnect the copper supply line with an adjustable wrench (turn counterclockwise).
- Unscrew the old valve from the reservoir pan (usually 1/2″ threaded).
- Install the new valve (match exact model—take the old one to the hardware store). Hand-tighten, then give a quarter-turn with pliers—over-tightening cracks plastic pans!
- Reconnect supply line and test: Slowly turn water on while checking for drips.
Time Estimate: 15 minutes | Difficulty: ★☆☆ (Beginner)
Fix Pinhole Leaks in Copper Supply Lines Without Soldering

Why copper fails: Roof-mounted coolers expose lines to extreme temperature swings. This causes micro-cracks at joints or “weeping” pinholes where corrosion eats through thin tubing. Critical mistake: Guessing tube size. Standard “1/4-inch” labels lie—measure the actual outside diameter (O.D.) with calipers:
| Nominal Size | True O.D. | Common in Coolers? |
|---|---|---|
| 3/8″ | 0.500″ | ✅ Most common |
| 1/4″ | 0.375″ | ❌ Rare |
Do this: Cut a 2-inch sample of your old line and take it to the hardware store. Never assume size—mismatched tubing causes leaks within days.
Push-Fit Repair for Pinholes (No Torch Needed)
- Shut off water and drain lines by opening the lowest faucet in your home.
- Cut out damaged section with a tubing cutter (not scissors—crushed edges leak!). Make clean, square cuts.
- Slide push-fit couplings (e.g., SharkBite) onto both pipe ends.
- Insert new copper section (match O.D. exactly!) and push firmly until it clicks.
- Wipe joints with a dry towel—any moisture prevents seals from gripping.
Visual Cue: If you see green-blue corrosion or white chalky deposits, replace the entire corroded section—not just the pinhole.
Time Estimate: 20 minutes | Difficulty: ★★☆ (Intermediate)
Seal Leaks in Swamp Cooler Drain Hoses in 5 Minutes

Why drain lines fail: Cracked rubber hoses or clogs cause water backup, making coolers “leak” even when supply lines are fine. This is the #1 misdiagnosed issue—homeowners replace float valves when a $2 hose fix would suffice.
Quick Drain Hose Repair Protocol
- Disconnect the hose at the cooler’s drain port (usually near the base).
- Flush with garden hose to clear mineral blockages. If water won’t flow, snake the line with a plumber’s tape (1/4-inch diameter).
- Check for cracks: Pinch the hose along its length. Brittle sections feel rigid and show hairline fractures.
- Reconnect securely: Slide the hose over the drain port nipple until it clicks. Secure with a hose clamp—never rely on friction alone!
Critical Check: Ensure the drain hose slopes downward continuously away from the cooler. Any upward bend traps water and causes backups.
Repair Clogged Pump Water Lines Blocking Distribution
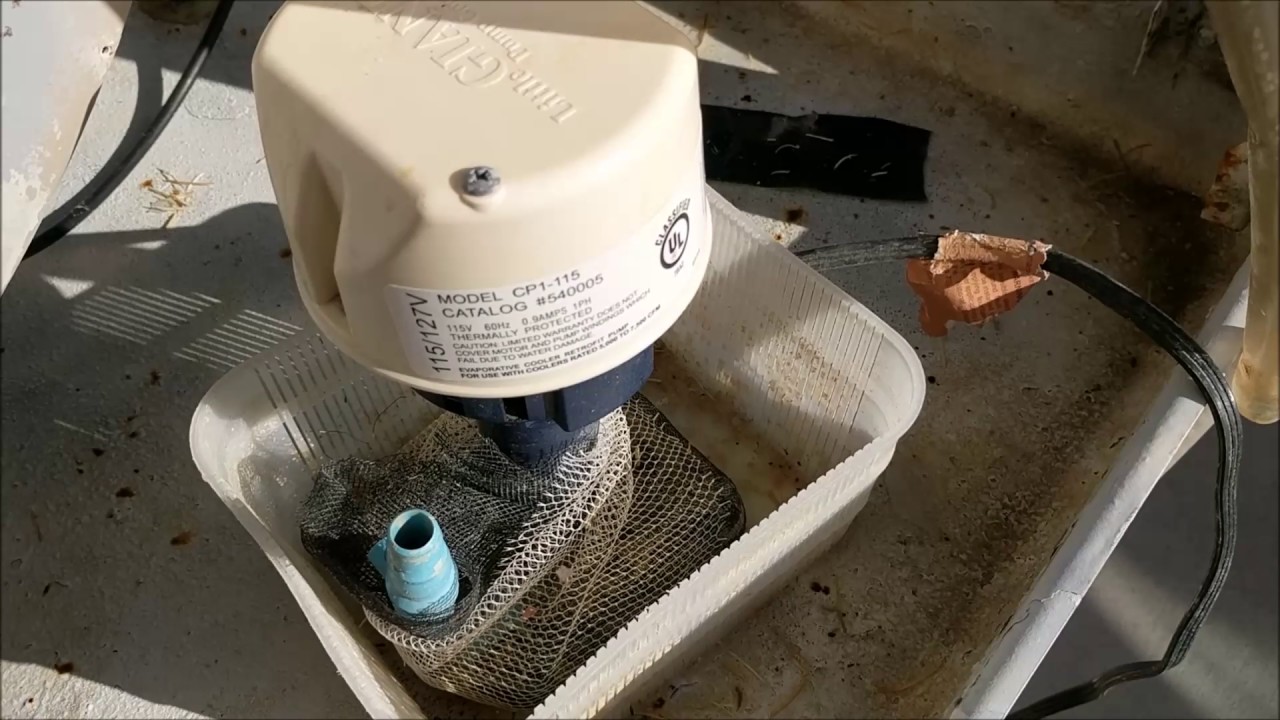
Why pumps fail: The small plastic line (1/4-inch O.D.) from the pump to the cooler’s top distribution tray gets clogged with mineral sludge. Result? Water overflows the pan while pads stay dry.
Unclog the Pump Supply Line
- Turn off power and water. Remove the pump’s inlet screen (usually twist-off).
- Clear debris with a straightened paperclip pushed through the line.
- For stubborn clogs: Disconnect the line at the pump outlet and blow air through it.
- Prevent recurrence: Flush the line monthly with white vinegar (30% solution) to dissolve minerals.
Warning: Never run the pump dry—even 30 seconds of operation without water destroys the impeller.
Test Your Repair Before Turning On the Cooler
Skipping this step causes 40% of “repaired” leaks. Follow this leak-proof verification:
- Gradual water test: Turn supply valve on slowly (1/4 turn at a time). Rushing creates pressure surges that blow seals.
- Towel scan: Wipe every connection with a dry paper towel. Dark spots = hidden leaks.
- Full cycle check: With power on, watch the float valve shut off completely at reservoir level. Confirm water flows evenly over pads for 10 minutes.
Prevent Future Leaks With 2 Annual Maintenance Steps
Do these before summer starts to avoid 95% of water line failures:
1. Clean the reservoir pan with vinegar solution to prevent mineral buildup that jams float valves.
2. Verify unit leveling: Place a carpenter’s level on the cooler base. Even 1/4-inch tilt causes uneven water pooling and overflow. Shim the base with rubber pads if needed.
Winterization Tip: In freezing climates, disconnect water lines and blow compressed air through them to prevent ice cracks. Skipping this causes 60% of spring leaks.
When to Call a Professional Immediately
Stop DIY efforts if you see:
– Rusted-through reservoir pans (requires full pan replacement)
– Leaks at soldered joints you didn’t touch (indicates systemic corrosion)
– Electrical issues like pump short circuits
A certified HVAC tech ($150–$250 service call) can replace cracked pans or re-pipe entire systems safely. Never gamble with electrical components near water—this risks electrocution.
Final Note: Most swamp cooler water line leaks are simple fixes when you target the real culprit. By focusing on float valves first (the usual offender), verifying copper tube sizes, and testing repairs methodically, you’ll stop leaks faster than calling a pro. Commit to annual pan cleanings and pre-season checks—this 20-minute habit keeps your cooler leak-free for years. If you’ve battled mysterious drips, share your toughest repair challenge in the comments; we’ll troubleshoot it together.


