
That persistent drip from your swamp cooler’s water line might seem minor now, but left unaddressed, it can become a major leak damaging your roof, walls, or foundation. When your evaporative cooler stops receiving water due to a cracked copper supply line or failed connection, you’re left sweltering in the heat with an expensive repair bill looming. The good news? Replacing a swamp cooler water line is a manageable DIY project that takes just a few hours with the right approach. This guide provides the exact steps to replace your water line correctly the first time—saving you from callbacks, water damage, and costly professional service calls.
A failed water line typically shows warning signs like mineral buildup, small drips, or visible cracks in the copper tubing. Whether you’re dealing with a pinhole leak, a kinked section restricting water flow, or a damaged connection at the float valve, replacing the line properly ensures your cooler functions efficiently all season. By following this precise method, you’ll restore reliable water delivery to your evaporative cooling system and prevent the most common mistakes that cause repeat failures.
Identify Your Exact Water Line Size Before Starting Work
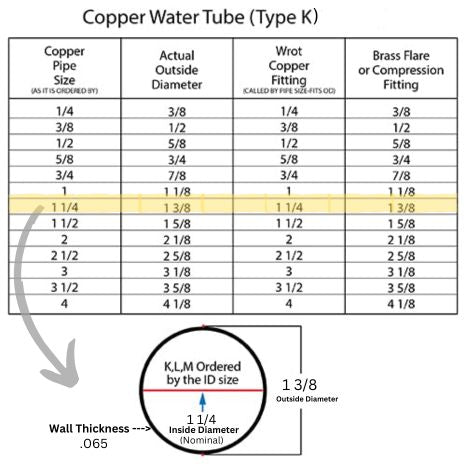
Using the wrong size tubing is the fastest way to create a leak that won’t seal properly. Most residential swamp coolers use 1/4-inch internal diameter copper tubing, but this measurement refers to the inside space for water flow, not the actual outside diameter you need to match at the hardware store. The outside diameter of what’s labeled as 1/4-inch copper tubing is actually 3/8 inch (9.5mm), creating confusion that leads many DIYers to purchase incorrect replacement parts.
How to Measure Copper Tubing Diameter Correctly
Grab your digital calipers or a precise ruler and measure the outside diameter of your existing water line at a straight section away from any fittings. A true 1/4-inch ID copper tube will measure approximately 3/8 inch (9.5mm) across the outside. If you don’t have calipers, wrap a piece of paper around the tube, mark where it overlaps, then measure that length with a ruler and divide by 3.14 to calculate the diameter. Never guess based on what the store calls “1/4-inch” tubing—bring your old line with you when shopping to ensure perfect matching. The most common mistake I see is homeowners buying tubing based on internal diameter when connections depend entirely on external measurements.
Why Using the Wrong Size Causes Leaks and Poor Performance
A mismatched tube that’s even slightly too small won’t seat properly in compression fittings, causing immediate leaks under pressure. One that’s too large simply won’t fit at all, forcing you to start over with the correct size. Even a 1/16-inch difference creates problems—compression sleeves won’t seal correctly, and flare fittings won’t mate properly. During testing, these mismatched connections either leak immediately or fail after days of use as water pressure gradually erodes the imperfect seal. Save yourself frustration by verifying your tube size before purchasing materials.
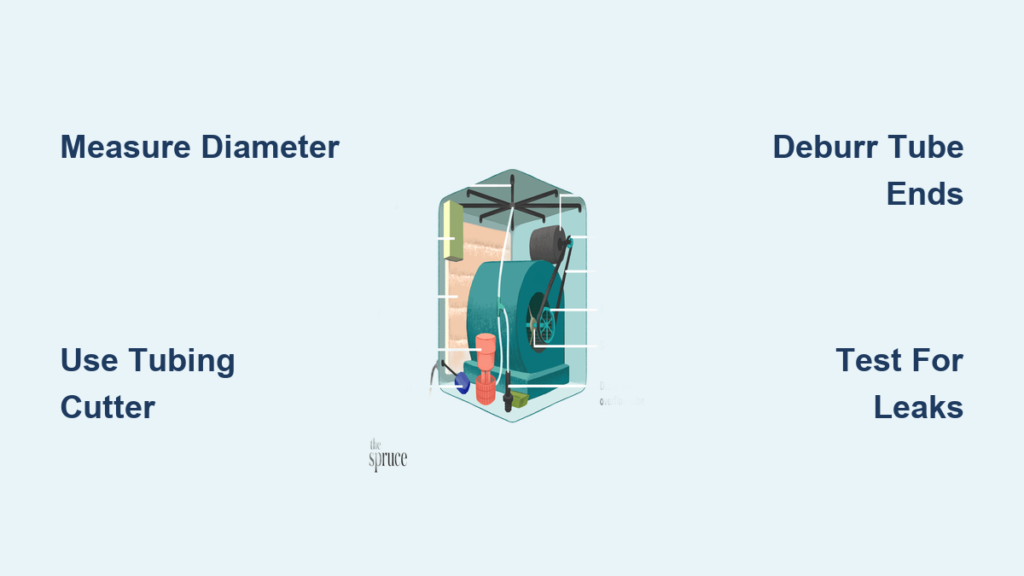
Must-Have Tools for a Leak-Free Swamp Cooler Water Line Replacement

Skipping proper tools guarantees callbacks. While you might think pliers and duct tape will suffice, swamp cooler water lines operate under constant pressure and require precise connections that only specialized tools can deliver reliably. Investing in the right equipment saves time, prevents leaks, and ensures your repair lasts multiple cooling seasons without issues.
Why a Quality Tubing Cutter Beats a Hacksaw Every Time
A dedicated tubing cutter creates perfectly square, burr-free cuts essential for watertight connections—something a hacksaw simply cannot achieve consistently. When you use a hacksaw, the uneven cut creates gaps where water escapes under pressure, even with proper tightening. Spend $15 on a basic tubing cutter; it pays for itself by eliminating the most common cause of post-installation leaks. Rotate the cutter around the tube slowly, tightening the knob incrementally until the tube separates cleanly. This simple tool ensures your copper ends are perfectly perpendicular for optimal sealing against compression rings.
The One Tool Most DIYers Forget (But Need to Avoid Leaks)
A deburring tool is essential but often overlooked. After cutting copper tubing, sharp burrs remain both inside and outside the tube end. These burrs prevent the tube from seating fully in fittings and can tear compression sleeves during installation. Run the deburring tool inside and outside the cut end to create perfectly smooth edges—this takes 10 seconds but prevents 90% of connection failures. Without this step, you’re practically guaranteeing a leak that might not appear until hours after installation when you’ve put everything back together.
Shut Off Water and Power: The Critical First Step Many Skip
Rushing into disassembly without proper shutdown causes more emergency calls than any other mistake. Before touching a single fitting, you must completely isolate the water supply and electrical power to prevent flooding and electrocution risks.
Locating Your Swamp Cooler’s Hidden Water Shutoff Valve
Most installations have a dedicated shutoff valve within 3 feet of the cooler, but older systems might connect directly to a main line with no dedicated valve. Trace the line back from your cooler until you find the closest shutoff—this might be in an attic, crawlspace, or utility room. If no dedicated valve exists, you’ll need to shut off your home’s main water supply temporarily. Never rely solely on the cooler’s internal float valve to stop water flow—these often fail in the open position, leaving you with an uncontrolled water source during your repair.
Why Electrical Safety Matters Even When Fixing Water Lines
Swamp coolers combine water and electricity in close proximity, creating serious shock hazards if you work on wet components with power still connected. Locate your cooler’s circuit breaker and switch it off before draining the system. Some models have a separate disconnect switch near the unit—verify power is off using a non-contact voltage tester. This precaution prevents accidental activation of the water pump during your repair, which could flood your workspace even with the water supply turned off.
Remove the Old Water Line Without Causing More Damage
Disconnecting the old line requires technique to avoid damaging surrounding components or creating new leaks at connection points you didn’t intend to touch.
How to Drain Residual Water Properly Before Disconnecting
Attach a short hose to the cooler’s drain valve and direct it to a bucket or drain. Open the valve fully and allow the system to drain completely—this typically takes 5-10 minutes depending on pan size. Close the drain valve once water stops flowing, but leave your bucket underneath as a precaution. Residual water in the supply line will still drip when disconnected, so have towels ready for the final disconnection step.
The Two-Wrench Technique That Prevents Stripped Fittings
Always use two adjustable wrenches when disconnecting lines—one to hold the stationary fitting body, the other to turn the compression nut. If you only use one wrench, you risk twisting the entire valve assembly or pipe, potentially causing new leaks at adjacent connections. Position the wrench holding the fitting body closest to the cooler or valve, and the wrench turning the nut on the outer side. Apply steady, even pressure while turning the nut counterclockwise—never yank or use excessive force that could crack brittle old fittings.
Cut and Prepare Your New Copper Tubing for Perfect Fit
Measuring, cutting, and preparing the new tubing correctly determines whether your installation succeeds or fails. Rushing this stage creates problems that won’t surface until after reassembly.
Why Your First Cut Will Likely Fail (And How to Fix It)
Most beginners cut their tubing too short because they don’t account for the depth fittings require. Measure your old line, then add 2-3 inches to your new tubing length—this extra material gives you room to adjust positioning and ensures you don’t come up short. When cutting, rotate the tubing cutter completely around the tube 3-4 times before tightening the knob another notch. This prevents crushing the tube and ensures a clean, square cut perpendicular to the tube axis.
Deburring Secrets for a Watertight Connection Every Time
After cutting, run a deburring tool both inside and outside the tube end. For the exterior, rotate the tool around the tube edge to remove sharp metal fragments. For the interior, insert the tool and rotate it several times to smooth the inside edge. Skipping this step is the #1 cause of slow leaks—burrs prevent the tube from seating fully in fittings and can tear the compression sleeve during installation. Test your work by sliding your finger along the cut edge; it should feel completely smooth with no snags.
Install the New Water Line: Compression vs. Flare Fitting Guide
Most swamp coolers use compression fittings for water line connections, but understanding how they work prevents the most common installation errors that cause leaks.
The Exact Tightening Force Needed for Leak-Free Connections
Slide the compression nut onto the tube first, followed by the compression sleeve (ferrule). Insert the tube fully into the fitting until it seats against the internal stop. Tighten the nut finger-tight, then use two wrenches to turn it an additional 1/4 to 1/2 turn. This is where 90% of DIYers fail—overtightening crushes the copper sleeve too much, creating a weak point that leaks under pressure. If you see the sleeve deforming significantly or the tube dimpling, you’ve gone too far. The correct tightness requires firm pressure but stops before metal distortion occurs.
Why Overtightening Causes More Leaks Than Undertightening
Counterintuitively, undertightened connections often self-seal as water pressure pushes the sleeve against the fitting, while overtightened connections create microscopic cracks in the copper that worsen over time. When you crush the sleeve too much, you create stress points that eventually fail under normal water pressure cycles. If a connection leaks after initial tightening, disassemble it completely—don’t just keep tightening. Replace the compression sleeve (they’re single-use) and reassemble with proper technique rather than compounding the problem with excessive force.
Test for Leaks Before Powering On Your Swamp Cooler
Rushing to turn everything back on without proper testing guarantees future problems. A methodical leak check prevents water damage that could cost hundreds in repairs.
Finding Hidden Leaks That Appear Only Under Pressure
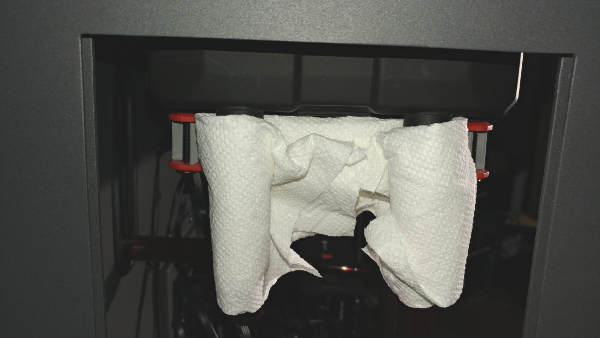
Turn the water supply on slowly while watching all connection points. Many leaks only appear after full pressure is restored, so don’t assume no immediate drip means success. Place a paper towel under each connection—this makes tiny drips visible that you might miss otherwise. Check connections after 5 minutes, then again after 30 minutes as pressure stabilizes throughout the system. Pay special attention to the float valve connection, which often develops slow leaks that go unnoticed until they cause significant damage.
The 24-Hour Leak Test Most DIYers Skip (But Shouldn’t)
After initial testing, let the system run for 24 hours before final reassembly. Place a dry towel under the cooler and check it periodically for moisture. A slow drip might not be visible during your initial test but will saturate the towel over time. This simple step catches developing leaks before they cause water damage to your roof structure or ceiling below. If you detect any moisture, disassemble the suspect connection immediately while the problem is still small and manageable.
Replacing your swamp cooler water line properly takes patience and precision, but avoids the frustration of repeat failures. By measuring correctly, using the right tools, and following these exact installation techniques, your new water line will deliver reliable performance all season. The most successful DIY repairs come from those who respect the importance of perfect tube preparation and proper fitting technique—don’t rush the critical steps that determine whether your repair lasts one season or five. When the Arizona heat hits 110°F, you’ll appreciate having a cool breeze flowing through your home thanks to a water line replacement done right the first time.


