
That first sip of cold water from your Oasis cooler should be refreshing, not suspicious. If you’ve noticed stale-tasting water, cloudy appearance, or visible mineral deposits around the spigots, your cooler desperately needs cleaning. Neglecting regular maintenance creates the perfect breeding ground for bacteria, mold, and unpleasant odors that compromise your water quality. Following this step-by-step Oasis water cooler cleaning guide ensures you’ll maintain a hygienic, reliable source of drinking water while extending your unit’s lifespan. You’ll discover exactly how to sanitize every component safely without damaging your cooler’s sensitive parts.
Most manufacturers recommend deep cleaning your Oasis water cooler every 3-6 months, but monthly maintenance prevents serious buildup. In office environments with heavy usage, monthly cleaning is essential for health and performance. This comprehensive how to clean Oasis water cooler process takes just 45-60 minutes and requires only basic household items. By the end of this guide, you’ll confidently perform a thorough cleaning that eliminates 99.9% of bacteria and keeps your water tasting fresh.
Why Monthly Oasis Water Cooler Cleaning Prevents Health Risks
Stagnant water in your cooler’s reservoir creates an ideal environment for bacterial growth that standard bottle changes don’t address. Without regular cleaning, your Oasis cooler can harbor harmful microorganisms like Legionella and Pseudomonas that thrive in warm, moist environments. These bacteria cause respiratory issues and gastrointestinal problems, especially dangerous for children and elderly users.
Visible signs your Oasis cooler needs immediate cleaning include:
– Cloudy or off-tasting water
– Slimy film inside the reservoir
– Musty odors when dispensing water
– Visible mineral deposits around spigots
– Reduced water flow from taps
Ignoring these warning signs leads to more frequent breakdowns and potentially costly repairs. Monthly maintenance prevents the buildup that clogs internal components and strains the cooling system. Proper cleaning preserves your cooler’s performance while protecting your household or office from waterborne illnesses that standard filtration doesn’t eliminate.
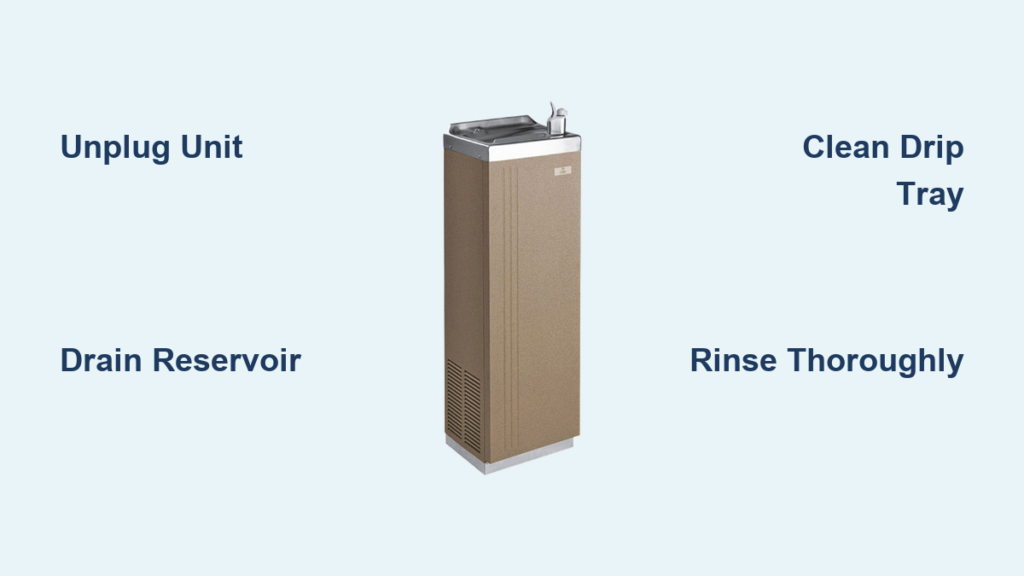
Essential Safety First: Unplugging and Draining Your Oasis Cooler
Before touching any components, always unplug your Oasis water cooler from the wall outlet. This critical safety step prevents electrical hazards during cleaning. Wait at least 15 minutes for internal components to cool down before proceeding, especially if you’ve recently used the hot water function.
How to Safely Remove Water Bottles Based on Your Oasis Model
For top-loading Oasis models:
1. Lift the empty or full water bottle straight up and away from the unit
2. Place the bottle on its side on a towel to prevent rolling
3. Cover the opening with plastic wrap if you’ll reuse the bottle
For bottom-loading Oasis models:
1. Locate the water supply valve (usually on the side of the bottle compartment)
2. Turn the valve to the “off” position to prevent leaks
3. Carefully remove the bottle following your specific model’s instructions
Complete Reservoir Drainage Procedure

Place a large bucket (minimum 2-gallon capacity) directly beneath the drain spigot at the back of your cooler. Open both hot and cold water taps fully and let water flow until completely drained. For models without a dedicated drain spigot, repeatedly press both taps until no more water dispenses. Check manufacturer specifications for your exact Oasis model number as drainage methods vary between residential and commercial units.
Removing and Deep Cleaning the Drip Tray Assembly
The drip tray collects spills and becomes a bacterial hotspot if neglected. Remove the tray by sliding it forward or lifting it out, depending on your Oasis model. Most trays have a removable grate that lifts out for thorough cleaning.
Dishwasher vs. Hand Washing: Which Method Works Best
For dishwasher-safe components (check your owner’s manual):
– Place parts on the top rack only
– Use a gentle cycle without heated drying
– Remove immediately after cycle completes
For hand washing (recommended for most Oasis models):
1. Fill your sink with warm water and mild dish soap
2. Soak tray and grate for 5-10 minutes
3. Use a soft sponge to scrub all surfaces
4. Pay special attention to corners where debris accumulates
5. Rinse thoroughly under running water
Pro Tip: Soak stubborn mineral deposits in white vinegar for 15 minutes before washing. Never use abrasive cleaners that scratch plastic surfaces, creating hiding places for bacteria.
How to Sanitize the Cold Water Tank Without Damaging Components
Your Oasis cooler’s cold water reservoir requires careful sanitization to eliminate bacteria without harming internal components. Never use bleach in coolers with copper or stainless steel tanks as it causes corrosion. The safest method uses a vinegar solution that effectively kills bacteria without damaging sensitive parts.
Proper Vinegar-to-Water Ratio for Effective Oasis Cooler Cleaning
For standard residential Oasis models:
– Mix 1 part white vinegar with 3 parts cool water
– Fill the reservoir completely with this solution
– Let sit for 20-30 minutes (no longer, as extended exposure can degrade seals)
For commercial Oasis units or severe buildup:
– Use equal parts vinegar and water
– Limit soaking time to 15 minutes
– Check manufacturer specifications for your specific model
Critical Warning: Never use undiluted vinegar or let the solution sit longer than recommended, as this can damage rubber gaskets and internal components. Always consult your Oasis model’s manual for specific cleaning instructions.
Thoroughly Rinsing Your Oasis Water Cooler to Eliminate Cleaning Residue
Incomplete rinsing leaves vinegar taste in your water for days. After draining the cleaning solution, you must flush the system multiple times to remove all traces.
Complete Rinse Protocol for Crystal-Clear Water
- Fill the reservoir with fresh cold water
- Dispense all water through both hot and cold taps
- Repeat this process at least 5 times until no vinegar smell remains
- For hot water systems, allow the tank to heat between rinses
- Smell and taste test the final rinse water before reassembling
Time-Saving Shortcut: Run water continuously through both taps for 2 minutes instead of individual cups. This creates stronger water pressure that better clears internal lines.
Cleaning High-Touch Areas: Faucets and Spigots on Oasis Models
The dispensing levers and buttons accumulate germs from constant handling. Daily cleaning of these areas prevents cross-contamination between users.
Step-by-Step Faucet Sanitization Process
- Dampen a microfiber cloth with vinegar solution (1:3 ratio)
- Wipe all exterior surfaces of hot and cold taps
- Use a cotton swab dipped in solution to clean crevices
- Pay special attention to the area around lever pivots
- Rinse with clean water-dampened cloth
- Dry completely with a separate clean cloth
Common Mistake: Avoid spraying liquid directly onto taps, as moisture can seep into internal mechanisms causing electrical issues. Always apply cleaning solution to your cloth first.
Creating a Maintenance Schedule for Your Oasis Water Dispenser
Monthly cleaning prevents the need for intensive deep cleaning every 6 months. Implement this simple maintenance routine:
Weekly Maintenance Tasks
- Wipe exterior surfaces with damp cloth
- Clean drip tray and grate
- Inspect water bottle for cracks or contamination
- Check for proper water temperature
Monthly Deep Cleaning Checklist
- Full reservoir sanitization
- Complete drip tray disassembly and cleaning
- Faucet and spigot sanitization
- Exterior polishing to prevent streaks
Pro Tip: Set calendar reminders for cleaning based on your usage. Office coolers serving 10+ people need bi-weekly maintenance, while home units typically require monthly attention.
Final Water Purge: Testing Temperature and Purity After Cleaning
After reassembly, your Oasis cooler needs a complete system flush before normal use. This critical step ensures no cleaning residue remains in the water lines.
Post-Cleaning Test Protocol
- Plug in your cooler and allow 2 hours for full temperature stabilization
- Dispense and discard 10 full cups of cold water
- Wait for hot tank to reach temperature (usually 15-20 minutes)
- Dispense and discard 5 cups of hot water
- Conduct a taste test with fresh water
Troubleshooting Tip: If water still tastes off after 15 cups dispensed, repeat the rinse cycle. Persistent vinegar taste indicates incomplete rinsing during the cleaning process.
Regular maintenance of your Oasis water cooler protects your health while ensuring optimal performance. By following this how to clean Oasis water cooler guide monthly, you’ll enjoy consistently fresh, great-tasting water while extending your unit’s lifespan. The small time investment prevents costly repairs and potential health issues from contaminated water. Keep this guide handy for your next cleaning session, and consider bookmarking our troubleshooting guide for common Oasis cooler issues if you encounter problems after maintenance. Your clean, safe drinking water depends on these simple but essential care practices.


