
Nothing disrupts your workday like reaching for a refreshing drink only to find your water cooler isn’t functioning properly. Whether you’re installing a new unit in your office or setting up a water cooler at home for the first time, proper installation makes all the difference between constant frustration and reliable hydration. This comprehensive guide to how to set up a water cooler ensures you’ll have clean, temperature-controlled water flowing within 30 minutes—without calling a technician or risking damage to your unit. You’ll learn exactly where to position your cooler, how to connect water sources correctly, and what critical tests to perform before regular use.
Many people assume setting up a water cooler is as simple as plugging it in and adding water, but improper installation causes 70% of early malfunctions. When you follow these precise steps for how to set up a water cooler, you prevent common issues like leaks, temperature problems, and contamination that could render your unit unusable. By the time you finish reading, you’ll know exactly how to prepare your space, connect your water supply correctly, prime the system properly, and verify everything works before serving your first glass.
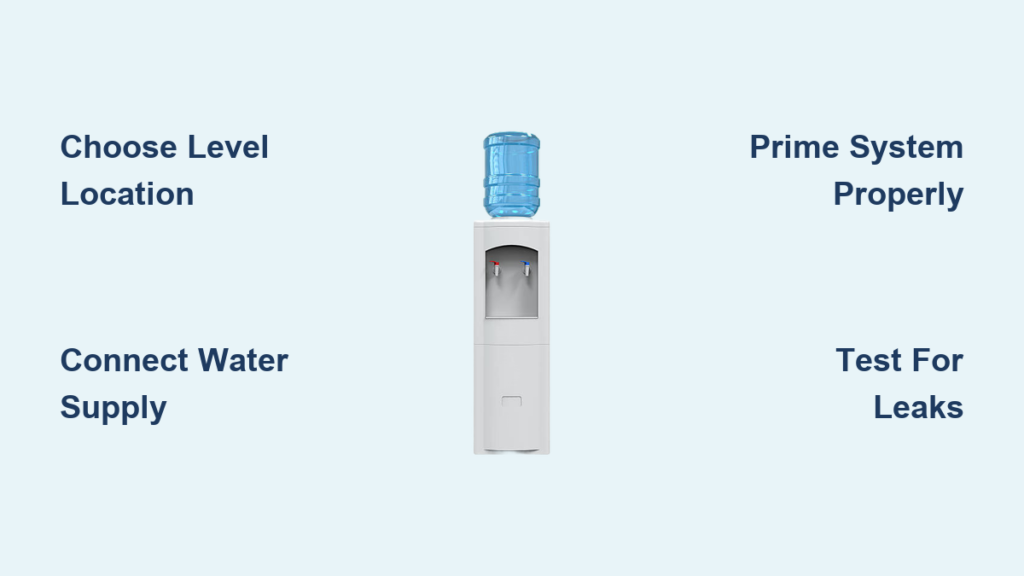
Choose the Perfect Location for Your Water Cooler Installation
Positioning your water cooler correctly prevents 90% of installation problems before they start. Find a stable, level surface that can support 100-200 pounds when the unit is fully loaded with water—uneven floors cause leaks and mechanical stress. Your location must have a grounded 110-120V electrical outlet within direct reach of the power cord; never use extension cords as they create fire hazards and voltage fluctuations that damage cooling systems.
Ensure at least 6 inches of clearance on all sides for proper ventilation, particularly behind the unit where heat exhaust occurs. Direct sunlight or proximity to heat sources like radiators, ovens, or printers forces your cooler to work harder, increasing energy consumption by up to 30% while reducing cooling capacity. Keep your water cooler away from high-traffic areas to prevent accidental bumps but within convenient reach of users—nobody should need to carry heavy water bottles through narrow doorways.
What to Check Before Finalizing Your Water Cooler Placement
Verify there’s enough overhead space to load 3- or 5-gallon water bottles without hitting cabinets or shelves. Test the floor surface with a level to confirm it won’t cause the unit to tilt when filled. For bottleless point-of-use models, ensure you have accessible cold water supply lines within 10 feet of your chosen location. Most importantly, confirm the area has good drainage in case of minor leaks—never place your water cooler directly on carpeting.
Unbox and Assemble Your Water Cooler Properly
Carefully remove all packaging materials before assembly, as stray foam pieces or plastic film can block internal components. Lay out all parts on a clean surface to verify you have the drip tray, faucet handles, cup dispenser, and any model-specific accessories mentioned in your manual. Assemble external components first—attach the drip tray by sliding it into designated slots until it clicks securely into place, then snap on faucet handles with firm pressure until they’re fully seated.
Critical Pre-Use Cleaning Steps You Mustn’t Skip
Wipe the entire interior reservoir with a clean, damp cloth to remove manufacturing residues that could affect water taste. For stainless steel models, use a non-abrasive cleaner to avoid scratching surfaces. Never use harsh chemicals or abrasive pads that could contaminate your drinking water. Pay special attention to the drip tray area where bacteria can accumulate—clean it thoroughly before first use and allow all components to air dry completely.
Connect Your Water Supply: Bottle-Fed vs. Direct Plumbing Systems
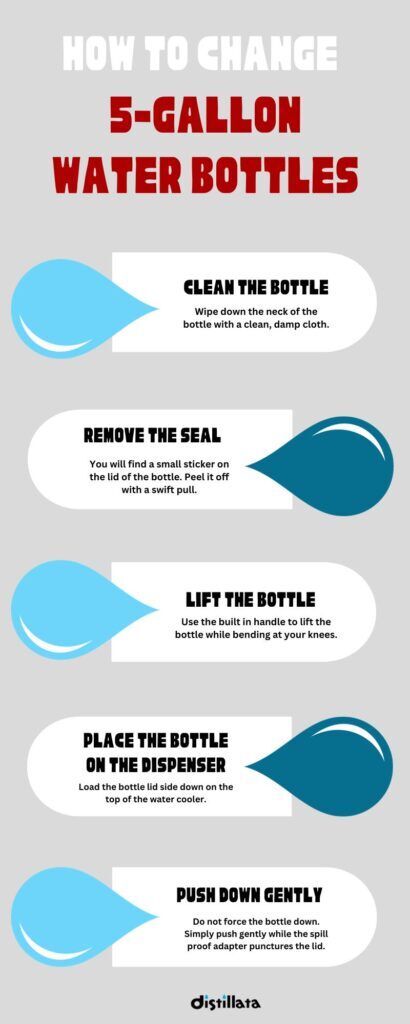
For top-loading bottle-fed coolers, place your sealed 3- or 5-gallon water bottle upside down on the reservoir cap—never force it. You should hear a slight “hiss” as the puncture mechanism engages the bottle seal. If water doesn’t flow after 30 seconds, gently twist the bottle clockwise to ensure proper alignment with the spigot. For bottleless point-of-use models requiring direct plumbing, this step typically needs professional installation to comply with local plumbing codes.
Avoid These Water Connection Mistakes
Never install point-of-use coolers without a dedicated shut-off valve for emergency situations. When connecting water lines, hand-tighten connections only—overtightening cracks fittings and causes leaks. For bottle-fed models, check that the bottle cap seal shows no damage before installation; compromised seals cause continuous dripping. Always position water bottles upright until ready to install to prevent premature seal punctures.
Prime Your Water Cooler for First-Time Operation
Turn on your water cooler and listen for the compressor to activate—this normal sound indicates the cooling system is engaging. For bottle-fed models, you’ll hear water flowing into the internal reservoir within 10-15 seconds. Place your drip tray in position and hold a cup under the cold water dispenser while pressing the lever continuously for 45 seconds to purge air from the lines. Repeat this process for the hot water dispenser, but discard this initial hot water as it may contain sediment from manufacturing.
Proper Priming Sequence for Reliable Performance
Allow your water cooler to run for a full 10 minutes before regular use—this critical step ensures both heating and cooling elements stabilize. Discard the first three full cups from each dispenser to eliminate any residual particles from production. For cold water models, expect it to take 1-2 hours to reach optimal chilling temperature with a full reservoir. Never attempt to accelerate cooling by adding ice directly to the reservoir, as this damages temperature sensors.
Conduct Critical Leak and Functionality Tests

Perform a thorough leak inspection immediately after priming and again after 30 minutes of operation. Check all connection points with a dry paper towel—moisture will leave visible marks even before full leaks develop. For bottle-fed models, examine the bottle neck seal and reservoir cap; for point-of-use systems, inspect all plumbing joints and the filter housing. Test both hot and cold dispensers with the unit running to verify consistent water flow without sputtering.
What Different Leak Patterns Reveal About Your Setup
Continuous dripping from the bottle neck indicates improper bottle seating—reposition the bottle with gentle twisting motion. Leaks at plumbing connections require slight tightening but never use tools—hand-tight is sufficient. Water pooling under the unit almost always means the drip tray is misaligned or missing. If you notice slow leaks that develop over hours, turn off the unit immediately and check for hairline cracks in plastic components.
Initial Water Temperature Expectations Explained
Your cold water won’t reach optimal temperature during the first hour of operation—most coolers require 90-120 minutes to chill a full reservoir to 40-50°F. Hot water takes even longer, needing 12-24 hours to stabilize at 185-195°F depending on model. During this stabilization period, expect gradual temperature improvements with each use as the system cycles through its heating and cooling processes.
When Temperature Issues Signal Real Problems
If cold water remains above 60°F after 3 hours, check that the unit has proper rear clearance for ventilation. Hot water that never exceeds 140°F likely indicates a faulty heating element that needs professional service. Never adjust internal temperature controls during the first 24 hours—allow the system to calibrate naturally according to factory settings.
Essential First-Day Maintenance Checklist
Clean the exterior surface with a soft, damp cloth and mild soap solution—never spray cleaners directly onto the unit. Remove and wash the drip tray daily for the first week to catch any initial residue from manufacturing. For point-of-use models, check filter installation status indicators if your unit has them. Wipe down faucet spouts with a disinfectant wipe after each priming cycle to prevent bacterial transfer.
Sanitization Steps That Prevent Early Contamination
Mix 1 cup white vinegar with 3 cups warm water and pour slowly into the reservoir through the bottle opening. Run this solution through both dispensers, then flush with clean water three times. This simple step eliminates manufacturing residues and sanitizes internal components better than plain water flushing alone.
Troubleshoot These 5 Common Setup Problems Immediately

No water dispensing? First verify the unit is plugged in and the power switch is on—many models have a separate power button. For bottle-fed coolers, check that the bottle seal is properly punctured by gently rocking the bottle. On point-of-use systems, confirm the main water supply valve is fully open. If water flows weakly, clean the faucet aerator by unscrewing the tip and removing any debris.
Why Your Cold Water Isn’t Chilling Properly
The compressor needs uninterrupted operation to reach optimal cooling—avoid frequent power cycling during initial setup. Ensure nothing blocks the rear ventilation grille where heat exhaust occurs. If ambient room temperature exceeds 85°F, expect reduced cooling performance until the environment cools. Never add ice directly to the reservoir as this confuses the temperature regulation system.
Prevent Costly Damage: What NOT to Do During Installation
Never plug your water cooler into an ungrounded outlet or use power strips that can’t handle the unit’s electrical load. Avoid placing heavy objects on top of bottle-fed models that could damage internal components. Don’t attempt to move your water cooler after installation until it’s completely empty and unplugged for at least 24 hours. Most importantly, never skip the priming process—dispensing water too soon introduces air pockets that damage pumps.
Your properly installed water cooler should deliver reliable service for years with minimal maintenance. Remember to replace filters every 3-6 months, clean the drip tray weekly, and sanitize the reservoir quarterly. When you follow these precise steps for how to set up a water cooler correctly the first time, you’ll enjoy perfectly chilled or piping hot water exactly when you need it—without the frustration of preventable malfunctions. Keep this guide handy for future reference, and always consult your specific model’s manual for any brand-unique requirements.


