

Your table saw’s crosscuts are never quite square. You’ve checked the fence alignment, reset the miter gauge, and still end up with gaps in your miter joints. This isn’t user error—it’s your equipment’s limitation. A properly built table saw sled jig eliminates this frustration by delivering laser-accurate 90-degree cuts while keeping your hands safely away from the blade. Unlike flimsy miter gauges, a twin-runner sled locks your workpiece perpendicular to the blade path with mechanical precision. In this guide, you’ll learn exactly how to make a table saw sled jig that transforms rough cuts into cabinet-grade joinery. I’ll walk you through the runner fit tolerances, the foolproof 5-cut squaring method, and critical safety modifications most tutorials skip.
Must-Have Materials for a Rock-Solid Table Saw Sled Build
Skip the trial-and-error phase by selecting materials engineered for stability. Your base must resist warping under workshop humidity swings while maintaining dead-flat contact with the saw table. For the sled base, use ½” Baltic birch plywood—not standard plywood or MDF. Baltic birch’s cross-banded veneers prevent cupping, and its void-free core won’t splinter when routing the blade slot. Cut a 18″ deep × 24″ wide rectangle; this size accommodates most workpieces while staying manageable.
For fences and runners, hardwood is non-negotiable. Maple or oak strips (¾” thick) provide the rigidity needed to prevent racking during cuts. Never use pine—it compresses under clamping pressure, ruining squareness. You’ll need:
– Two 1½” × ¾” × 24″ hardwood strips for twin runners (critical for stability)
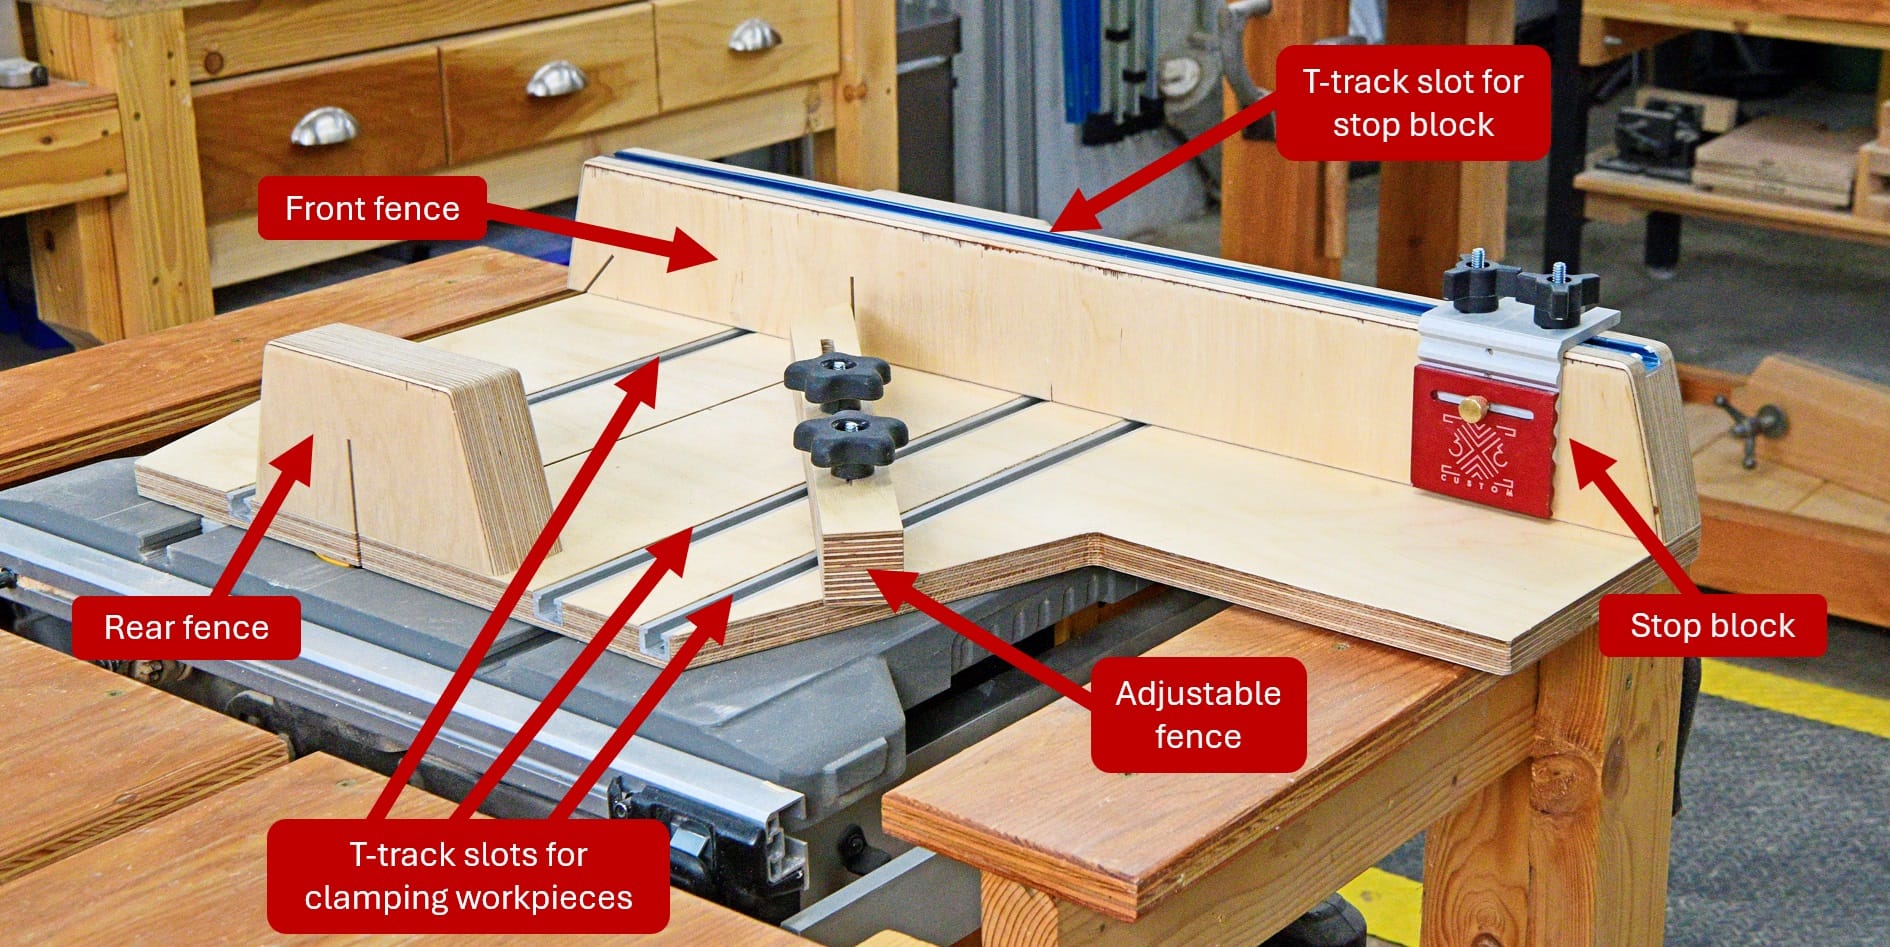
– Front fence: 4″ tall × 24″ wide × ¾” thick hardwood
– Rear fence: 2″ tall × 24″ wide × ¾” thick hardwood
– Adhesives: 5-minute epoxy (for runners) and Titebond II (for fences)
Essential Tools That Guarantee Precision Fit
You can build a functional sled with basic tools, but these five items make the difference between “good enough” and dead-on accuracy:
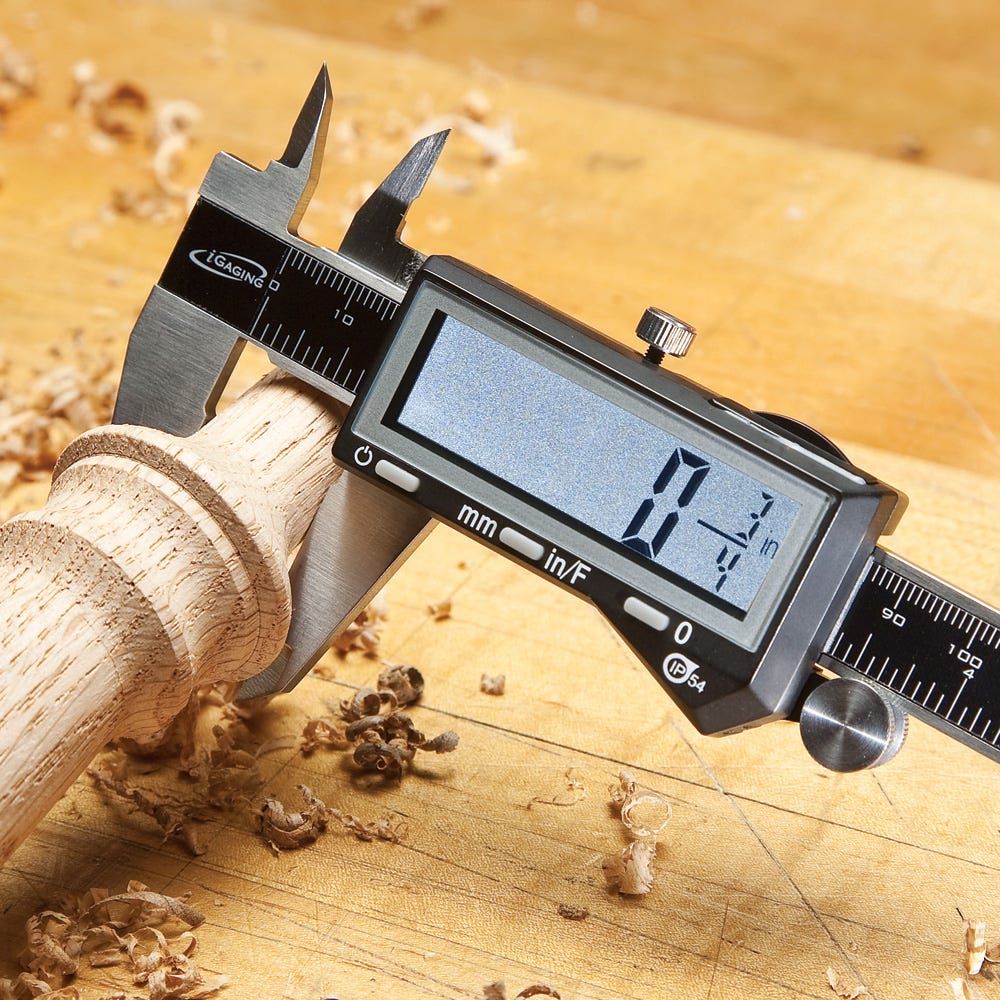
- Digital calipers ($15): Measure runner-to-miter slot clearance within 0.001″
- Precision engineer’s square (not a combo square): Verify 90-degree angles to 0.0005″ tolerance
- Flush-trim router bit: Clean up blade kerf edges without tear-out
- Pocket hole jig: Creates hidden, warp-resistant fence joints
- Digital angle gauge: Confirm fence alignment during 5-cut testing
Skip the miter saw—your table saw cuts all components. Crucially, avoid clamps that twist the base; use 3-4 parallel-jaw clamps for even pressure during assembly.
Cut the Sled Base and Create the Blade Kerf Safely
Never power on the saw for this critical step. Start with an unplugged saw and the blade lowered completely. Place your Baltic birch base on the table, aligning its front edge with the front rail. Mark the blade’s centerline 4″ from the base’s front edge—this positions the blade path where workpieces get maximum support.
Here’s the safe kerf-cutting sequence:
1. Raise the blade to full height (typically 3½”)
2. Slide the base onto the table until your centerline mark aligns with the blade
3. Lower the blade through the base using the height crank (never power on)
4. Withdraw the base and inspect the slot—it should be clean with no splintering
If tear-out occurs, glue a sacrificial hardwood strip along the cut line before routing. The kerf must be exactly ⅛” wider than your blade’s thickness to prevent binding during cuts.
Mill Twin Runners for Zero-Play Miter Slot Fit
This step makes or breaks your sled’s accuracy. Runners must slide smoothly with zero lateral play—any wiggle introduces cumulative error. Mill hardwood strips to 0.003″ narrower than your miter slot width (e.g., ¾” slot = 0.747″ runner). Test fit using this protocol:
- Place the sled base on the saw table (adds weight that affects slot geometry)
- Insert one runner into the left miter slot
- Apply upward pressure on the base’s right edge—no gap should appear
- Repeat for the right slot
If runners bind, sand only the contact surfaces using 220-grit paper wrapped around a granite surface plate. Never sand the entire runner—this ruins parallelism. For the perfect fit:
– Apply a thin epoxy bead along the runner’s top surface
– Position runners in slots while base rests on saw table
– Clamp base flat against the table surface (use shims if needed)
– Wipe excess epoxy immediately—it cures in 5 minutes
Let cure overnight before handling. A properly fitted runner should require 2-3 lbs of push force to move.
Square the Front Fence Using the 5-Cut Method
Your eyes and squares lie. Only the 5-cut method leverages your saw’s own precision to achieve true 90 degrees. Here’s the foolproof process:
Why Your Square Isn’t Accurate Enough
Standard squares have ±0.005″ error over 6″—enough to create 0.1° fence misalignment. The 5-cut method magnifies errors 4x, revealing discrepancies invisible to tools.
Execute the 5-Cut Test in 4 Moves
- Clamp a 6″×6″ hardwood scrap against the front fence (use wax paper to prevent sticking)
- Make Cut 1: Push sled through blade, creating Reference Edge A
- Rotate scrap 90° clockwise—Reference Edge A now contacts fence
- Make Cut 2 through the same scrap
Measure scrap thickness at both ends with digital calipers. If measurements differ:
– Thicker near blade: Fence leans away from you (clockwise error)
– Thicker away from blade: Fence leans toward you (counter-clockwise error)
Adjust fence position 0.001″ per 0.002″ measurement difference. Re-test until thickness variation is ≤0.001″. This achieves 0.002° accuracy—10x tighter than any square.
Install Safety Features: Zero-Clearance Slot and Blade Path Marking
A sled without safety modifications is a hazard waiting to happen. Immediately after squaring:
Create the zero-clearance slot: Glue a ¼” hardboard strip to the base’s top surface, covering the kerf. Run the sled through the blade at full height to cut a new slot. This prevents tear-out on workpiece undersides and stops small offcuts from falling into the blade.
Mark danger zones visibly: Apply red painter’s tape along both sides of the blade path, extending 3″ beyond the kerf. Add “HANDS CLEAR” stencils with permanent marker. Install a polycarbonate blade guard that lowers automatically when the sled advances—never operate without this.
Critical warning: The front fence must be tall enough to keep fingers 4″ from the blade path at all times. For 4″ tall fences, add a hardwood push handle extending 6″ above the fence top.
Add Pro Features: Stop Blocks and Dust Collection
Transform your sled from functional to indispensable with two upgrades:
T-Track Stop Block System
Embed a 12″ T-track into the front fence’s top edge using pocket screws. Pair it with a flip-stop block that locks at 0.001″ increments. Now you can:
– Cut 50 identical shelf pins in 10 minutes
– Set repeat cuts without measuring tape
– Achieve ±0.003″ length consistency across batches
Integrated Dust Collection
Route a ½” wide × ¼” deep channel behind the blade kerf, connecting to a 1½” dust port. Attach a shop vac hose directly to the port. This captures 95% of sawdust before it coats your runners, eliminating the monthly cleaning ritual.
Why Your First Sled Will Fail (And How to Avoid It)
Most DIY sleds fail within six months due to three preventable errors:
– Runner material mismatch: Maple runners in oak slots swell at different humidity levels. Solution: Use UHMW plastic runners (available at McMaster-Carr) for zero wood movement.
– Rushing the 5-cut test: Skipping iterations for “close enough” squareness. Solution: Do 3 full 5-cut cycles—each refines accuracy by 70%.
– Ignoring blade deflection: Thin kerfs deflect during heavy cuts. Solution: Cut the kerf with your sled’s final blade—not a thin-kerf test blade.
A professional-grade sled pays for itself in saved materials and time within seven projects. Start with this twin-runner design, and you’ll never wrestle with crooked crosscuts again. For your first test, cut a 12″×12″ maple square—measure diagonals with calipers. If they match within 0.005″, you’ve built a precision instrument worthy of your finest work.
Final Note: Always run your sled through the blade at full height before cutting workpieces to ensure zero clearance. Wax runners monthly with paraffin for buttery-smooth operation. Keep this jig on your saw permanently—it’s the difference between amateur and artisan results.


