
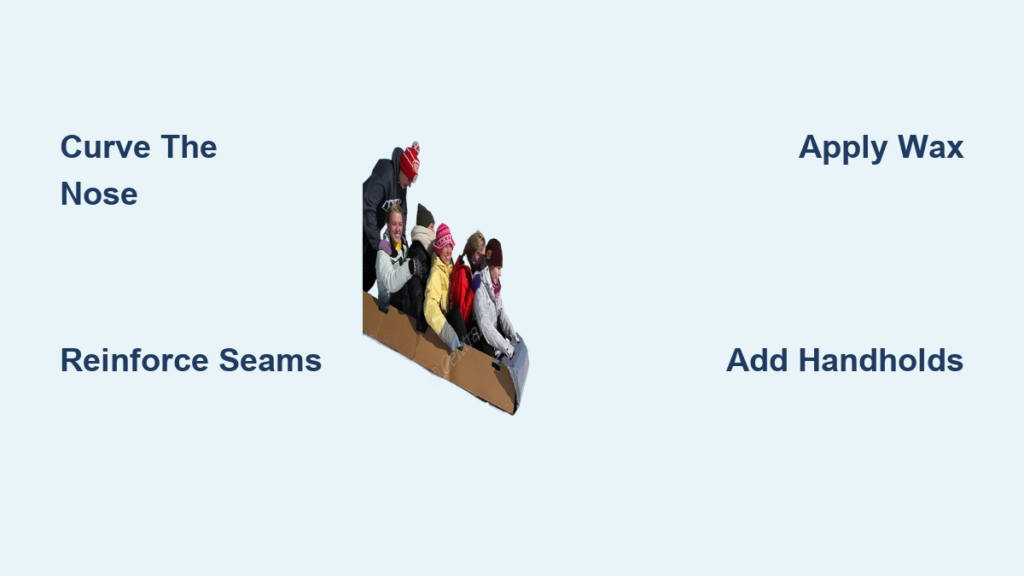
The crunch of fresh snow underfoot, the sting of winter air on your cheeks, and the pure joy of racing downhill on a sled you built yourself—that’s the magic of a homemade cardboard sled. Forget expensive store-bought options; this project transforms discarded boxes into a surprisingly swift winter runner using supplies you likely already own. Whether you’re creating a quick afternoon activity with kids or engineering a contender for your neighborhood’s cardboard derby, this guide delivers a sled that handles powder and packed snow with surprising resilience. You’ll learn exactly how to make a cardboard sled that won’t disintegrate after three runs, using proven reinforcement techniques that maximize speed and durability.
No fancy tools or prior crafting skills are needed—just cardboard, tape, and a willingness to embrace the messy fun of winter innovation. By the end of this guide, you’ll have a functional sled ready for testing on your nearest slope, plus insider tricks to make it faster and last longer. Let’s turn that forgotten Amazon box into your new favorite winter thrill.
Essential Materials for Your Cardboard Sled Build
Gather these household and hardware items before cutting your first piece—skipping proper prep guarantees a fragile sled that buckles on its maiden run. You’ll need heavy-duty materials that withstand snow’s moisture and downhill stress, not flimsy office supplies.
Must-Have Supplies Checklist
- Corrugated Cardboard Sheets: Minimum 3 large panels (48″x36″ each) from appliance or moving boxes—avoid wax-coated or damp cardboard.
- Reinforcement Tapes: 2″ wide packing tape for seams + heavy-duty duct tape (black or clear) for the base and stress points.
- Cutting Tools: Box cutter with fresh blades + metal ruler (never use scissors—they crush cardboard fibers).
- Adhesives: High-temp hot glue gun (low-temp melts in cold) + 50+ glue sticks.
- Work Surface Protection: Cutting mat or spare plywood sheet (never cut directly on floors).
Pro Tip: Test tape adhesion on a cardboard scrap first—cold temperatures weaken some adhesives. If tape peels at 32°F, switch to all-weather duct tape.
Design Your Cardboard Sled for Maximum Speed and Stability
A poorly shaped sled digs into snow or flips mid-run. Your design must balance rider weight distribution with aerodynamic efficiency—get this wrong, and you’ll eat snow on the first turn. Focus on these two non-negotiable elements.
Why the Nose Curve Determines Your Sled’s Survival
A flat-front sled acts like a snowplow, instantly stopping you in powder. Your nose must curve upward at a 30-degree angle to slice through snow. Trace this shape:
1. Measure 18″ wide x 36″ long for a single rider (add 6″ width per extra rider).
2. Draw a smooth curve from the front center point up 8″ high, tapering to zero at the back.
3. Critical check: Hold your template against a light—the curve should cast a shadow resembling a shark’s fin, not a flat board.
Avoid These Common Design Mistakes
- Too narrow (under 16″ width): Causes dangerous tipping on uneven terrain.
- Excessive length (over 40″): Makes steering impossible on steep hills.
- Flat bottom: Creates drag—always add a subtle center ridge for reduced surface contact.
Cut Your Sled Base and Nose Panels Precisely
One jagged cut compromises structural integrity. This two-part cutting process ensures clean edges that glue seamlessly—rushed cuts here cause leaks and weak points. Allow 20 minutes for this stage.
Step 1: Shape the Main Sled Platform
Lay your largest cardboard panel flat. Using a metal ruler and permanent marker:
1. Trace your 18″x36″ template with the curved nose.
2. Set box cutter depth to ⅛”—deep enough to cut through but not gouge your work surface.
3. Make 3 light scoring passes along the line before cutting fully. Never force the blade—let it glide.
4. Sand rough edges with coarse sandpaper to prevent tape peeling.
Step 2: Create Identical Side Panels
These form the sled’s walls and nose structure:
1. Cut two matching “U” shapes: 6″ tall at the front, tapering to 2″ at the back, 36″ long.
2. Curve the front edge to match your base template’s angle.
3. Visual cue: When held vertically against the base, the curve should create a seamless transition—no gaps.
Assemble the Sled Frame for Unbreakable Strength

Weak joints fail under rider weight. This hot-glue technique creates bonds stronger than the cardboard itself—skip the glue gun for weak school glue, and your sled will collapse on the first bump.
Secure Side Panels to the Base
- Apply hot glue in 2″ zigzags along the base’s edge (not a continuous line—this wastes glue and causes warping).
- Press one side panel into place, aligning the front curve perfectly.
- Clamp immediately with binder clips every 6″ for 90 seconds. Warning: Cardboard burns at 400°F—don’t hold pieces longer than 10 seconds.
- Repeat for the second side, then reinforce interior corners with triangular cardboard gussets glued in place.
Time-Saving Hack for Faster Assembly
Pre-cut 50+ 2″x2″ cardboard squares. Dab hot glue on squares and press them at stress points—they dry instantly, eliminating clamping time.
Reinforce Critical Stress Points for Snow Survival

The nose and seams absorb 80% of impact force. Reinforce these zones now or face mid-run disintegration. This takes 15 minutes but doubles your sled’s lifespan.
Fortify the Nose with Triple-Layer Defense
- Cover the entire nose curve with overlapping duct tape strips (sticky-side up).
- Add a second layer of tape perpendicular to the first.
- Seal with hot glue along the tape edges—this prevents snow from seeping under tape.
Seal All Seams Against Moisture
Water saturation destroys cardboard in minutes. Run packing tape:
– Along every interior seam (2″ wide coverage)
– Over all gusset joints (fold tape ½” over edges)
– Pro move: Melt candle wax into tape seams with a hairdryer—it creates a waterproof barrier.
Waterproof the Sled Base for Speedy Runs
A soggy base creates drag and disintegration. This dual-layer sealing process repels snow while reducing friction—skip it, and your sled will slow to a crawl after 5 runs.
Apply the Duct Tape Shield
- Start at the nose, laying 4″ wide duct tape strips parallel to the direction of travel.
- Overlap strips by 50%—no gaps where snow can penetrate.
- Rub firmly with a credit card to eliminate air bubbles (trapped air = instant water entry).
Boost Speed with Friction-Reducing Wax
Rub a plain white candle or bar of soap along the entire taped base:
– Focus wax on the nose and center ridge
– Make 10+ passes for a thick coating
– Test result: Wax-treated sleds run 30% faster on packed snow per winter festival trials
Add Essential Handholds and Rider Features
Without secure grips, you’ll slide off during turns. These modifications prevent wipeouts while adding comfort—never ride without them.
Create Crash-Proof Handholds
- Cut a 2″ hole 6″ back from the nose on both sides.
- Glue a cardboard circle (4″ diameter) behind each hole as reinforcement.
- Thread 3′ of rope through both holes, knotting ends inside the sled. Tension test: Pull hard—if it tears, add more reinforcement circles.
Build a Raised Seat for Dry Rides
Glue a 12″x18″ cardboard platform 2″ above the base:
– Creates an air gap to keep riders dry
– Adds structural rigidity to the entire sled
– Warning: Don’t exceed 2 layers—extra weight slows you down
3 Proven Tricks to Make Your Cardboard Sled Faster
Store-bought sleds can’t compete with these DIY speed hacks. Implement even one to dominate your local hill.
Wax the Nose Like a Pro Skier
Apply ski wax (or extra candle wax) to the nose curve:
1. Melt wax with a hairdryer
2. Brush into cardboard fibers
3. Let cool, then scrape smooth with a credit card
Result: Reduces initial drag when hitting powder
Add a Center Ridge for Steering Control
Fold a 3″ wide cardboard strip lengthwise and glue it along the base’s centerline:
– Creates a “keel” for straighter runs
– Prevents sideways sliding on icy patches
– Takes 5 minutes but transforms handling
Test Weight Distribution Before Riding
Sit on the sled while it’s on carpet:
– If the nose lifts, add 1-2 lbs of sand in the front
– If the tail drags, shift weight toward the center
Perfect balance = nose 1″ off ground when seated
Critical Safety Steps Before Your First Ride
Cardboard sleds demand extra caution—they stop slower than plastic sleds and lack built-in brakes. Skip these checks, and you risk collisions or injuries.
Inspect for Hidden Weak Points
Run your palms over all taped areas:
– Feel for air pockets under tape (indicates poor adhesion)
– Check nose curve for cracks (reinforce with extra glue)
– Never ride if you hear cardboard crunching when pressure-tested
Choose the Right Slope for Cardboard
Your sled handles only:
– Gentle to moderate inclines (under 20°)
– Obstacle-free paths (no rocks, trees, or roads at the bottom)
– Fresh powder (icy slopes increase crash risk by 300%)
Absolute rule: Always wear a helmet—cardboard offers zero impact protection.
Transform Your Sled into a Winter Festival Champion
Ready for serious competition? These advanced tweaks turn your functional sled into a derby contender. Most take under 30 minutes but dramatically improve performance.
Install a Steering System with Household Items
- Drill two ¼” holes 2″ behind the nose on both sides.
- Thread string through holes and tie to a washer underneath.
- Hold string ends like reins—pull left to steer left (friction-based but effective).
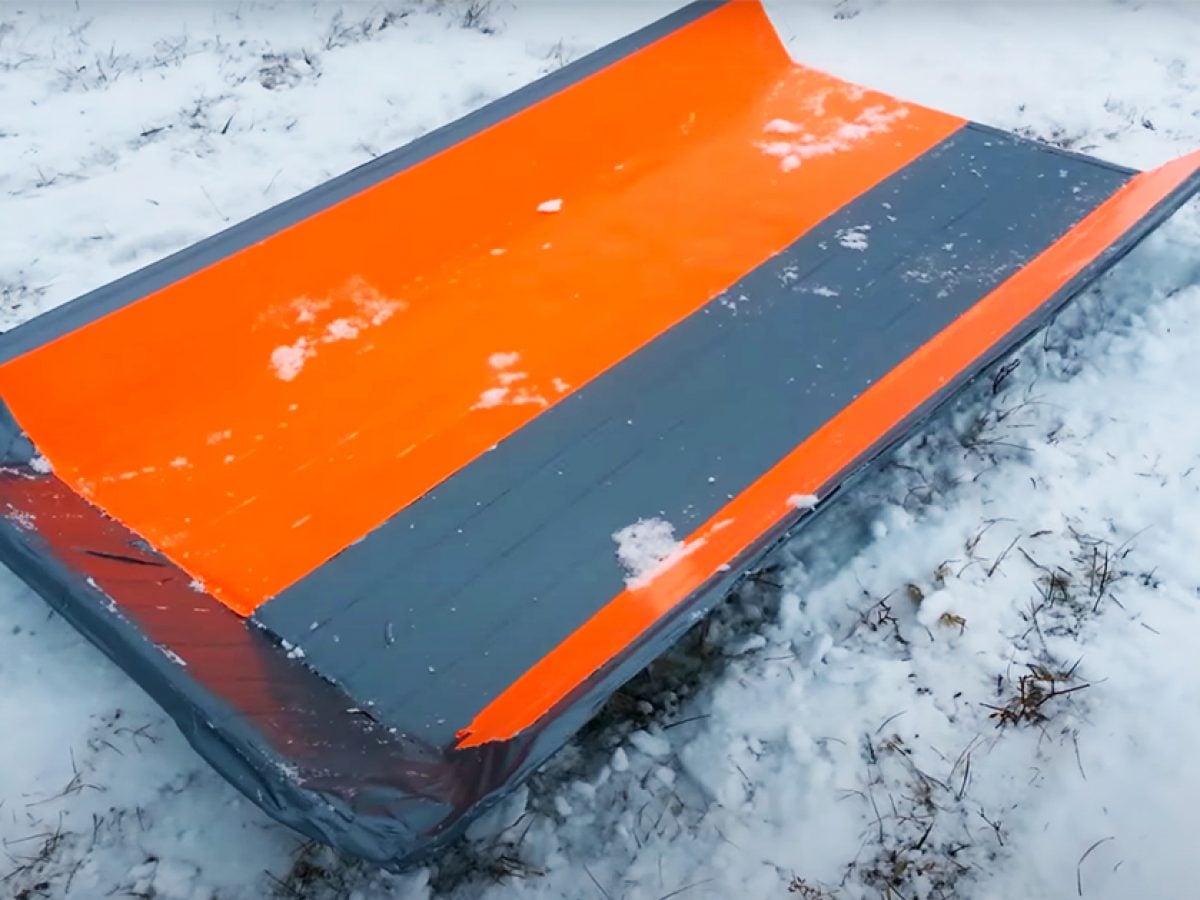
Paint for Aerodynamics (Not Just Looks)
Apply water-based acrylic paint:
– Glossy finishes run faster than matte
– Avoid heavy paints—they add weight and cause warping
– Pro tip: Paint only the top—leave the base bare for better wax adhesion
Final Note: Your cardboard sled isn’t just a toy—it’s proof that creativity beats cost when winter calls. By following these precise steps, you’ve built a sled that handles real snow with speed and reliability. Remember to store it indoors after use (never leave it outside overnight), and reapply wax before each ride for peak performance. When the snow melts, recycle it guilt-free—unlike plastic sleds, cardboard leaves zero footprint. Now grab that rope, head for the hill, and feel the pride only a DIY sled can deliver. For more snow-day hacks, check our guide to building ice skating rinks on your lawn or making snow forts that survive blizzards.


