
Your sled push stalls at 20 yards, your shoulders burn before your legs, and that heavy load feels impossible to budge after the first five steps. You’re not alone—most athletes hit these frustrating plateaus because they treat sled pushes as brute strength tests rather than technical movements. The truth? How to improve sled push performance hinges on three overlooked factors: your starting mechanics, force transfer efficiency, and sport-specific programming. This guide cuts through the guesswork with actionable fixes proven to add explosive power to your drives. You’ll discover why 90% of technique errors happen in the first three steps, how to build foundational strength that actually transfers to the sled, and the exact workout structures that build game-day explosiveness—not just gym fatigue.
Fix Your Starting Position to Overcome Initial Sled Inertia
That first explosive drive determines whether you conquer the sled or fight it. Most athletes waste critical power by starting too upright or misplacing their hands, turning what should be a piston-like drive into a grinding slog. The solution starts before you even touch the sled.
Set Up for Maximum Leverage in 3 Seconds
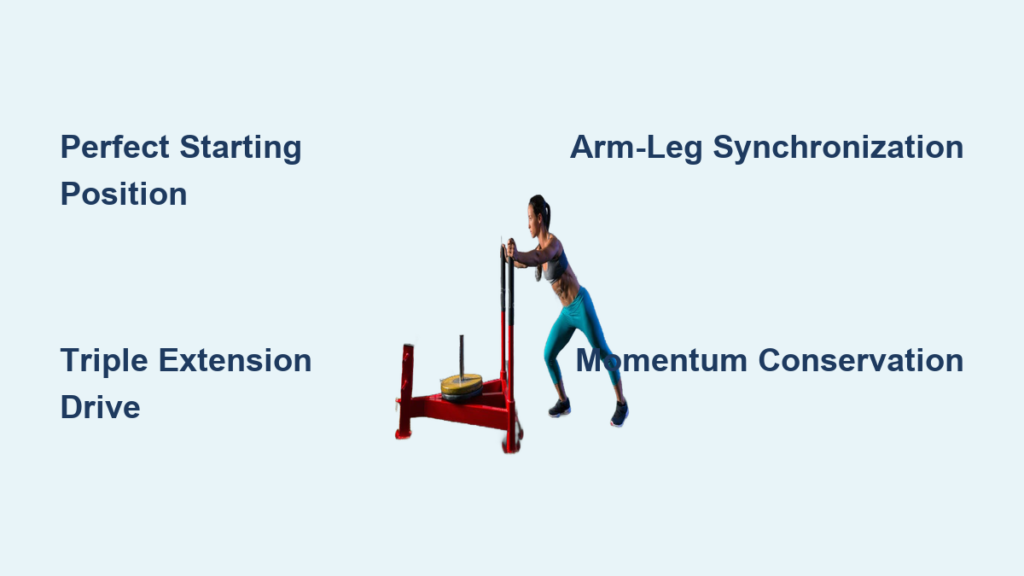
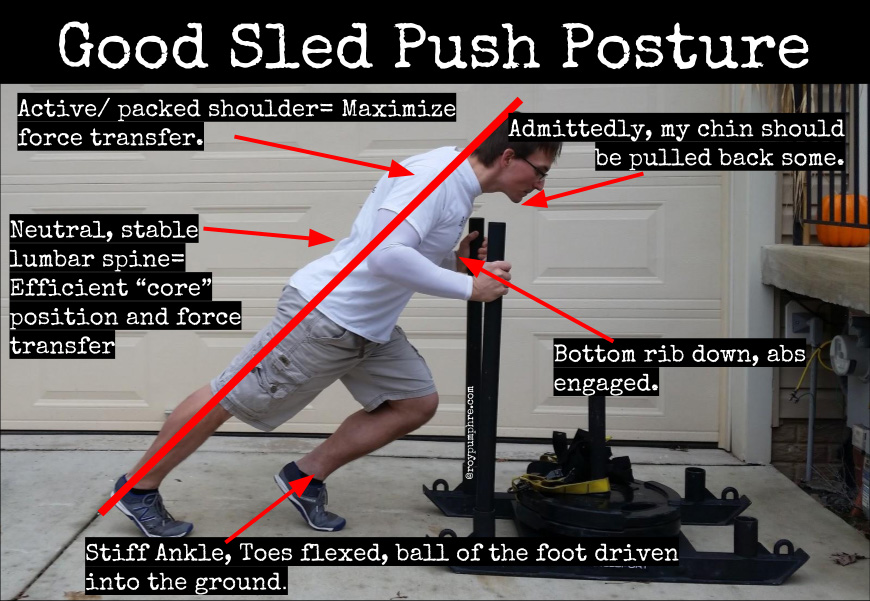
Stand with feet shoulder-width apart directly behind the sled’s vertical posts. Place hands just outside shoulder width on the lower posts—not the top bar—creating a 45-degree body angle from head to heel. Critical visual cue: Your nose should align vertically over your toes when braced. This position engages your posterior chain while preventing the “upward push” error that wastes energy. Test your setup: if you can easily lift your heels, you’re too upright; if your hips rise faster than your chest when pushing, reset immediately.
Execute the First 3 Power Steps Without Momentum Loss
Drive the ball of your lead foot into the ground while aggressively extending your hip and knee simultaneously—think “punching the floor backward.” Your arms must mirror this action: push the posts forward with straight elbows as if thrusting a heavy door open. Pro tip: Time your first step to land precisely when the sled begins moving—any delay forces you to overcome static friction twice. If the sled jerks or stalls, reduce weight by 20% until you master this sequence. Elite athletes maintain this explosive start for 10+ yards; beginners should focus on flawless execution for just 5 yards before adding load.
Generate Explosive Drive Phase Power Through Triple Extension
Once moving, your ability to sustain acceleration separates effective pushes from exhausting walks. The drive phase (yards 5-15) demands perfect synchronization between leg drive and core tension—where most athletes leak power through collapsed posture or weak arm engagement.
Triple Extension Technique for Ground Force Transfer
At each step, fully extend your ankle (plantarflexion), knee, and hip in one fluid motion—like a spring uncoiling. What to watch for: Your trailing foot should leave the ground with toes pointed, not flat-footed. This maximizes force application against the ground. If your steps shorten prematurely, you’re likely leaning too far forward; adjust to a 50-degree torso angle. Record yourself pushing: if your hips dip or rise unevenly between steps, reduce weight by 30% to retrain the pattern.
Coordinate Arm Drive with Leg Power for Full-Body Engagement
Your arms aren’t just for balance—they’re force multipliers. Drive both arms forward in sync with your lead leg while keeping elbows locked. Imagine trying to push the sled through a wall rather than just moving it. Common mistake: Bending elbows during the drive phase turns your arms into shock absorbers that dissipate power. If your shoulders fatigue before your legs, retrain with 50% of your working weight while shouting “DRIVE!” with each arm extension to reinforce neural engagement.
Maintain Speed Through Momentum Conservation Tactics
When the sled hits top speed (yards 15+), inefficient athletes slow down within seconds, forcing constant re-acceleration. Elite performers sustain velocity by adjusting stride mechanics while preserving core rigidity—key for conditioning-focused pushes.
Adjust Stride Length and Rate Without Breaking Form
As speed increases, naturally shorten your steps while increasing cadence—like shifting gears in a car. Aim for quick, piston-like drives (1.5-2 steps per second) with knees driving forward, not upward. Warning: Never let your torso angle change; maintain the 45-50 degree lean even at top speed. If the sled decelerates noticeably between steps, you’ve exceeded your sustainable load—drop weight by 15% until you can cover 40+ yards without speed fluctuations.
Prevent Mid-Push Momentum Collapse With Core Bracing
Your core must resist rotational forces as arms and legs move asymmetrically. Before each push, take a diaphragmatic breath and brace as if preparing for a punch to the stomach. Expert test: Have a partner gently push your shoulder during a moderate-speed push; if you wobble, your core disengaged. Fix this with 3 weekly planks (45-second holds) focusing on ribcage-to-pelvis tension.
Build Foundational Strength With 4 Sled-Specific Lifts

No amount of sled work compensates for weak starting strength. These lifts target the exact muscles and movement patterns that translate to explosive drives—prioritize them twice weekly.
Squat Variations That Mimic Sled Drive Mechanics
Front squats (4 sets x 6 reps) build quad strength for the critical first steps, while box squats (3 sets x 5 reps) teach explosive hip extension from a dead stop. Key adjustment: Descend until thighs are parallel to the floor—shallower depths miss the stretch reflex needed for sled starts. If your box squat depth matches your sled push starting position, you’ll transfer power instantly.
Deadlifts and Unilateral Moves for Hip Drive Power
Trap bar deadlifts (5 sets x 3 reps) build the posterior chain strength to maintain drive phase posture. Pair with deficit reverse lunges (3 sets x 8/leg) where you step back onto a 2-inch plate—this replicates the single-leg force application during pushes. Critical cue: Squeeze glutes at the top of each lunge like you’re holding a credit card; this fires the exact muscles that prevent hip sag during sled work.
Program Workouts for Power, Strength, or Conditioning Goals

Throwing random sled pushes into leg day wastes potential. Match load and structure to your specific athletic objective using these proven templates.
Power-Focused Sprints for Explosive Starts
Use 30-50% of max load for 20-yard bursts at 90% effort. Rest 3 minutes between sets to maintain quality. Sample session: 5 sets with a timer—record time for yards 1-5 (explosiveness metric). Stop when time increases by 10% to avoid fatigue-induced technique breakdown.
Heavy Load Sets for Raw Starting Strength
Load sled to 80-100% of max for 15-yard pushes at 70% speed. Rest 4 minutes between sets. Pro tip: Push until you can no longer maintain your starting torso angle—this prevents grinding with broken form. Elite athletes build to 5 sets; beginners start with 2 sets twice weekly.
Eliminate These 4 Costly Technique Errors Immediately
Correcting the “Upward Push” Body Angle
Leaning below 40 degrees turns your drive into vertical force that lifts the sled instead of moving it. Fix: Place a 6-foot pole vertically behind the sled; your head should stay within 18 inches of it throughout the push. Film yourself to catch this subtle but power-killing error.
Fixing Weak Arm Drive and Hand Position
Gripping the top crossbar or bending elbows wastes 25%+ of potential force. Solution: Tape hand targets on vertical posts at sternum height—push through these points with straight arms. Do 3 weekly sets of 10-second maximal-effort presses against a wall to build arm drive endurance.
Supplemental Exercises That Boost Sled Push Transfer
Sled Drags for Hip Extension Mastery
Attach a harness and drag the sled backward for 30 yards. This isolates glute/hamstring drive—the exact muscles that maintain momentum during pushes. Key: Keep chest up and drive through heels; if you shuffle, reduce weight by 40%.
Box Jumps for Explosive Power Transfer
Perform depth jumps (step off 12-inch box, immediately explode upward) 3 sets x 5 reps. This trains the rapid force production needed to overcome sled inertia. Measure progress: When your jump height increases by 15%, your first-step sled power will follow.
Final Takeaways for Immediate Sled Push Gains
Stop treating sled pushes as generic conditioning. Your breakthrough starts today: Reduce your working weight by 25% for one week while focusing solely on perfect starting mechanics—record your first 5 steps to spot leaks. Within 14 days, you’ll move heavier loads farther with less fatigue by applying these non-negotiables: maintain 45-degree torso angle through full extension, synchronize arm/leg drives like pistons, and program workouts for specific power goals. For ongoing progress, test max sled push distance every 21 days using 70% of your 1-rep max load—this metric predicts athletic acceleration better than any gym lift. Remember: the sled never lies. When your technique aligns with physics, that once-immovable weight will surge forward with explosive ease. Now go own the drive phase.


